At a certain period of time in the life of almost every person, more often than not a woman, of course, there comes a time when she does not want to purchase things in a store, and turning to professional seamstresses can be expensive.
Therefore, there is a very reliable option: making a base pattern yourself, which will allow you to easily sew clothes that fit your figure in the future without difficulty.
What is needed to create a base pattern?
First of all, you need to take basic measurements, on the basis of which the pattern will be built.
To most accurately take basic measurements, you need to follow some simple rules:
- It is necessary to take measurements with an even posture.
- Taking measurements and trying on must be done in the same bra.
- When taking measurements, you must be natural: do not slouch, do not suck in your stomach, otherwise the indicators will not be the most optimistic and the sewn item will most likely disappoint.
Now you can directly begin creating the base pattern.
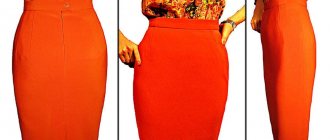
Beginning craftswomen who find it difficult to come up with their own clothing model can choose the dress or skirt model they like, take their measurements and transfer them to paper to make a pattern.
It is better to transfer the sketch of the chosen outfit onto graph paper. This choice will only make it easier to create the pattern, since such paper has clear divisions.
To make a simple model, the most difficult thing is transferring the pattern onto the fabric; even novice craftsmen should not have any problems with other stages.
How to learn cutting and sewing?
Option 1. (for the motivated): Learn to cut and sew clothes professionally
In order to work in a studio or for yourself, you need to take into account that your main task is to learn how to correctly construct patterns. Then you will become a real cutter-fashion designer-designer.
You can become such a specialist by taking professional cutting and sewing courses. A full course must necessarily teach how to design clothes, work with professional equipment, and model clothes for different body types. During the classes you will develop practical skills (cutting, basting, sewing) and learn how to change the bobbin without outside help, learn many practical subtleties and secrets of sewing.
After careful preparation in the courses, you will be able to master any product.
Even such complex things as classic coats or formal business suits. You can get a job in a studio, sew clothes to order, or professionally create clothes for yourself.
Prices for professional cutting and sewing courses in Moscow and St. Petersburg start from 1,500 rubles and reach 25,000 rubles.
The duration of classes is from 40 to 150 hours.
Option 2 (for the budget conscious): Learn to cut and sew things for yourself and loved ones
For such skills, it is enough to take basic courses or courses on individual complex products, for example, coats, trousers or shirts. During your training, you will learn how to take measurements, cut and master straight stitching. This knowledge is enough to make your own patterns, adjust them to the desired size, choose fabrics, and cut out parts correctly. You can sew almost any item from your basic wardrobe.
Prices for basic cutting and sewing courses in St. Petersburg start from 2,500 rubles.
The duration of classes is from 20 to 50 hours.
Option 3 (for beginners): Try to make a pattern with your own hands and sew a simple but good thing
Try one-day sewing workshops on specific items. On them you will test yourself both as a seamstress and as a cutter. After completing the course, you will be able to sew with your own hands what you will wear every day or wear on holidays. For example, a fashionable sweatshirt, a new skirt or lace underwear. It's very tempting for the first time, isn't it? At the same time, you will understand whether it will be worth your suffering or not.
Prices for cutting and sewing master classes in St. Petersburg start from 1,500 rubles.
Duration of classes is from 4 to 10 hours.
Inspired and decided that you will take a cutting and sewing course? Great, the main thing is not to rush to buy the most beautiful lace or fabrics for dresses in the store. You should be more careful when choosing courses. If you decide to spend money on learning the profession of a cutter or seamstress, even from the very basics, it is worth taking as much as possible from the training.
- Try to find a master or studio with good reviews and a clear course program - this way you will know what you are paying money for and what skills you will acquire.
- There should be a maximum of 7 people in the course group - in this case, the master will definitely pay attention to you and help you if something doesn’t work out.
- Find out from the organizers what is included in the price and whether they will provide working tools during the training.
Construction of the base pattern
The basis of the pattern consists of two parts, which are called shelves. There are shelves in the back and shelves in the front. Each shelf consists of three more elements - two grooves and an armhole.
It is important to remember that the grooves on the front shelf are always larger than on the back shelf.
As for the armhole, it should be smaller on the back shelf.
The construction of the base pattern is carried out on a rectangular piece of paper. You need to put your own measurements on it.
It is important to know:
- The length of the product is the length from the cervical vertebra to the level where the bottom of the dress will be.
- The width of the base pattern is the half-bust circumference (+5 cm).
To make the pattern you will need:
- Centimeter
- Tracing paper
- Scissors
- Soap
- Textile
- Pins
- Ruler
- Pencil
If the pattern is not made according to the sketch from the magazine, then the beginning craftswoman needs to do the following:
- Take measurements. Measurements are taken in such a way that the measuring tape does not stretch or sag, otherwise the final product will be greatly distorted.
It is necessary to take the following measurements:
- Bust volume
- Hip volume
- Waist
- Back length to waist
- Shoulder length
- Sleeve length (if available)
- Finished product length
- You need to determine your own size. There are many tables that are presented in magazines or on the Internet to determine the size. Your size is determined by two main data: chest volume and hip volume.
- The drawing lines are transferred to tracing paper.
- Now the tracing paper is pinned with fabric, and using a pencil or soap, the pattern drawing is transferred to the fabric.
- The finished sketch is carefully cut out of the fabric. In this case, it is necessary to leave a few centimeters free for allowances.
- All details and recesses need to be swept away, and then tried on.
- During fitting, you may find that the armhole depth needs to be adjusted.
- The grooves need to be smoothed out. Smoothing of grooves is carried out only in the direction of the side seams.
- After this, the product can be swept away.
- For the height of the future product, it is necessary to change the distance from the cervical vertebra to the bottom of the product.
- Half bust is measured as the chest circumference divided in half.
- The chest center measurement is the distance between the tops of the chest.
- The width of the back is measured at the level of the center of the shoulder blades. The distance is measured from the left to the right hand.
- The back length is the distance between the sewing vertebra and the waist.
- Shoulder length is measured from the lateral point of the base of the back to the shoulder joint.
- Half-circumference of the neck is measured as the circumference of the neck divided in half.
- Half waist is measured as the waist circumference divided in half.
- Half hip circumference is measured as hip circumference divided in half.
Why do you need to learn to sew and cut from scratch?
Store shelves are filled with an abundance of dresses, but you still have to walk through them looking for the right sizes? Tired of buying your kids new clothes because they are growing too fast? Why then do you still not have tailor’s pins and a pattern in your hands?
Imagine how much you will gain when you learn to sew. You don't have to go to a tailor just to get your skirt or trousers adjusted. When sewing clothes for yourself, you and only you select the details of your future clothes: color, style, length, accessories. And what’s best is that each product will fit you perfectly. Don't forget about significant money savings and a pleasant pastime.
The ability to sew neatly and beautifully is an opportunity to make money from your hobby.
Do you think this is not true? Read our article and we will convince you otherwise.
Let's start from the beginning
There are several main professions in the sewing business: seamstress, tailor, fashion designer. Don’t think that once you learn to sew, you can only be a seamstress. Tailors and fashion designers know how to not only sew clothes with high quality, but also participate in the entire process of creating clothes - from idea to sewing.
Let's understand the terminology
Don't be alarmed when you see the word fashion designer . This is the name given to a specialist who creates patterns, knows how to select fabrics and sew professionally. He selects materials and decorative elements in such a way that even the most daring designer’s ideas can be realized.
So, choose what you want to learn and we will help you navigate.
How to take measurements correctly so that the base pattern is the most accurate?
All measurements should be taken in such a way that the measuring tape does not compress anything, but does not sag. You need to measure in a natural state, then the result will be the best.
To more accurately construct a base pattern, it is necessary, in addition to the main indicators, to remove additional ones. They include:
- Back width. Measured using the formula 1/8 chest volume + 5 cm.
- Chest width. Measured using the formula: 1/8 chest volume - 2 cm
- Armhole width. Measured using the formula ¼ chest volume – 4 cm
- Armhole depth. Measured using the formula 1/10 chest volume + 10cm.
With such indicators, you can create a literally perfect pattern, on the basis of which the sewn product will definitely please its creator.
Is it possible to learn to sew and cut from scratch on your own?
Yes - you can find many sites on the Internet with detailed instructions, patterns and tips. They will help you learn how to cut and sew on your own, even if you are starting from scratch.
Look for informational articles with photos or video tutorials that detail each step when cutting things. Nowadays, authors on any thematic resources conduct entire courses of video lessons, where they talk about types of fabrics, tools, types of figures, classic mistakes of beginners, and much more.
The following can help you learn how to sew and cut from scratch:
- thematic websites/forums about sewing;
- sewing magazines (Burda, ShiK);
- video tutorials on YouTube.
Of course, you may not be able to become a professional tailor by studying only at home, but you will definitely learn how to master basic cutting skills and get good at stitching.
How to choose a sewing machine?
A good sewing machine is the most expensive and most profitable investment for a tailor or seamstress.
If you want to develop as a professional craftsman in the future, seriously think about purchasing a good sewing machine. A high-quality machine with all the functions and types of stitches necessary at the learning stage costs 6-10 thousand rubles. If you choose well, she will become your reliable friend for several years.
Look for your machine among the leaders in the production of sewing machines. European manufacturers include Bernina, Pfaff, Husqvarna , and Asian manufacturing companies include Janome, Brother, Juki, Jaguar . Singer are also appreciated .
We studied the reviews on Yandex.Market and found out that the following are good for beginners :
- Brother LS-300
- Plaff Element 1050S
- Janome 419S/5519
During training, you can buy a machine second-hand for training, and then purchase a more professional unit. If you still have your grandmother's old car, then try to start on it.
Darts: construction features
Modeling darts is considered a difficult stage of work, and when sewing for beginners it is recommended to do without it. Choose simple samples: a loose trapeze dress, a sun-shaped skirt, a wide sundress with a drawstring. But, sooner or later, you will have to master transferring darts from the diagram to your drawing. They provide the desired fit of adjacent, fitted items and products according to the figure.
Before modeling a dart, consider:
- along the back, the waist dart should end along the chest line, and along the front - a couple of centimeters lower;
- shoulder cuts end along the chest line;
- the depth and length of waist darts are determined by the degree of narrowing of the product;
- Darts from the chest are often transferred to the side seams.
When determining the parameters of a chest/shoulder dart (to draw its triangle pattern on paper), tailors use fabric cut in the shape of a circle. It needs to be attached to the body so that the breasts. A fold is made on the circle - the fabric should fit tightly around the roundness. The allowance that is formed in this case must be pinned with a pin. 2/3 of its length is the depth for the dart, and their width parameters are the same.
austin.com
Sewing skirts according to the basic drawing
Having mastered sewing without diagrams, they move on to drawing drawings. The peculiarity of simplified basic patterns is the presence of only the basic lines of the product, without complex detailing. They are based on a schematic rectangle, in which one side is equal to the length of the item, and the second is equal to the half-circumference of the chest (if we are talking about a dress) or hips. The basics need to be supplemented with elements that are cut out separately, depending on the appearance of the finished item.
It is recommended to start getting acquainted with patterns with a straight skirt.
- On paper with a millimeter grid, mark the length of the skirt and the horizontal half-circumferences of the waist and hip, taking into account the increase in freedom (from 3 cm) and the axis of the hem.
- Connect the segments with a vertical line and cut the finished rectangle diagram in two.
- On one half (front) place a dart from the waist to the hip - a triangle with the short side along the waist line to a depth of 6-8 cm.
- Transfer the design to the fabric and model the back - make a seam in the middle and add a vent/cut.
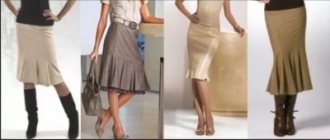
You can use the ready-made base of a straight model and adjust it to your waist, hips and desired length. By changing the shape of the bottom, you can sew a tapered “pencil”, an A-shaped skirt, or a product with a frill.
chudomama.com
Is it possible to learn on your own?
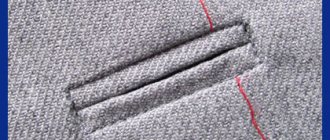
If you prefer to learn the basics of sewing on your own, at a relaxed pace, then available free online lessons or a paper textbook will be a good guide to the world of sewing. They'll guide you through every step, from sewing straight lines to creating buttonholes. Is it possible to learn to sew on your own? Of course yes, but don't expect perfection from the start, remember that learning to sew takes a lot of time and practice and it's okay to make mistakes. The beginning should be accompanied by the creation of simple sewing projects, such as household items. Sewing clothes can be challenging for complete beginners, so it's easier to start with bedspreads or decorative pillowcases.
Where to look for useful tips and inspiration if you are a seamstress:
- Groups on social networks with patterns, tips, selections of color palettes and much more (for example: DIY, a group with visual examples of patterns that can be downloaded, various home accessories and ideas).
- Video on YouTube - all the manuals with clear examples: rules for patterning complex things, with comments and instructions, decorating ideas, various master classes (for example: Easy to sew, a channel with which you can sew any children's things and toys).
- Thematic forums - here it’s easy to find like-minded people, ask for advice or ask for help with a pattern;
- Sewing magazines - trends for the new season, and many patterns that are not so difficult for an experienced craftsman to customize.
- In your free time, try to design your own clothing line. This simple practice of working out details and style will help you determine your preferences and better understand what kind of item you want to sew.
The main thing is not to be afraid - the head is afraid, the hands do. We need to take orders, even at a trifling price, and sew. Spit in all directions, in particularly difficult situations, drink a teaspoon of cognac with coffee, and continue.
It is also important to learn how to make patterns. If you can’t do it yourself, find someone who can teach you. Sometimes the product is completed in 2 hours, and sometimes something doesn’t work out at all. At this moment, there is a risk of making a bunch of mistakes that are difficult to correct. At such moments, I turn on Scarlett O'Hara with her "I'll think about it tomorrow."
Svetlana Ukhmakova, head of Atelier “Turn on the Lights”
Let's sum it up. How to learn to sew and cut from scratch? To do this you will need:
1) Decide for yourself what you want to be able to do: sew basic things or create patterns or make full-fledged sketches 2) Choose a mentor or inspirer who will help you get comfortable and point out mistakes 3) Practice and regularly sew on your own 4) Watch thematic video channels and groups 5) Look for new ideas for inspiration!
If you seriously decide to take up sewing, then don’t give up even after the first small failure. With proper practice, you will acquire a good practical skill that will allow you to create unique, beautiful things not only for yourself. If you wish, you can earn money by tailoring clothes, or, as a last resort, you can earn extra money in an atelier. Good luck to you!
This training may be right for you:
- Best Online Cutting and Sewing Courses from 1,100 Rubles
- 10 Best Cutting and Sewing Courses in Moscow
- Best Cutting and Sewing Courses in St. Petersburg
- 10 Best Lingerie Sewing Courses in St. Petersburg from 1,500 rubles
Could it be even simpler?
Modern materials make it possible to make fairly accurate patterns for complex products in just a few minutes. Figure 5 shows the first stage of obtaining a pattern using masking tape.
Low-tack tape is attached to the structural seams of the corresponding piece of clothing (preferably from the inside out), then the entire area is gradually sealed with it, after which it is carefully transferred to paper (Fig. 6)
The tape will also help you immediately trace the seam allowances on the pattern. To do this, you just need to connect two pencils with it. If you need a larger allowance, place a third pencil in the center with the lead facing up.
Setting the correct pattern size
Accurately determine the size of the future product.
Correctly take measurements from the person for whom you want to sew clothes, but if you decide to sew for yourself, then be sure to involve someone to help take measurements, but keep in mind that the patterns will not always be the same size as the purchased clothes that you bought. you wear. As a rule, patterns are accompanied by a table of sizes; based on it, you can easily determine your size. For the most part, ready-made patterns use international size coding.
Look carefully, the pattern can be universal or so-called multi-sized.
How to figure out a pattern
Examine the finished pattern very carefully. As a rule, I make the company’s ready-made patterns universal for any size, or they are also called multi-size. This means that this pattern can be used for various sizes and your task is to find exactly the size you need on the pattern. This is done using special marks on the pattern that correspond to your size.
3.You must understand what allowance is.
In some patterns you can find a fit allowance, this is done to ensure that the garment is comfortable to wear. But we must take into account that not every fabric needs to take allowance into account. For example, if you are going to sew from knitwear, then you should not take into account the allowance for it, since this type of fabric stretches perfectly. Therefore, in order to correctly determine the allowance, you need to know exactly what fabric you will be making the product from and correctly read the instructions included with the finished pattern in order to ultimately determine the final size of the product. If you want to make your own adjustments to a ready-made allowance, pay very close attention to this because this will determine whether the product fits you tightly or fits loosely. For beginners, it is not recommended to change ready-made seam allowances, so at the initial stage, leave everything as it is, but note that some companies use standard names for designating seam allowances, something like fitted or loose.
HOW TO GLUE A PRINTED PATTERN.
Once you have printed the pattern, you can begin to “assemble” it.
All sheets have a letter with a number in the upper left corner. This way you can recognize the top and bottom of the sheet.
1. There is a frame along the edges of the sheets, cut it off from the bottom and right.
2. Now you need to glue the sheets together in accordance with the notes in the margins (A1, A2,...B2,B3...). Lay out Row A into a column. It is located vertically. Glue the sheets of row A together. Each subsequent sheet is located under the previous one. The docking line is the frame line.
3. Glue the next row with the letter B into a column and assemble each letter into a column.
4. Glue the columns together, joining them alphabetically and carefully tape all the sheets with tape.
As a result of gluing, the letters A, B, C, D, E... should appear sequentially horizontally along the resulting pattern sheet, and numbers 1, 2, 3, 4, 5.. vertically.
The principle of sheet assembly is shown in this diagram. The number of letters and numbers may be different (since there are large and small patterns), but the principle should be this - the letters A, B, C, D, E... go sequentially horizontally, numbers 1, 2, 3, 4 vertically , 5..
5. Cut out the pieces. The pattern is ready.
We hope everything worked out for you!) Good luck with your sewing!
