Where are hand stitches used?
There are more than 20 types of hand stitches. Their names and areas of application depend on the direction of the stitch on the fabric. Stitches can run in a straight line, diagonally, crosswise and in the form of loops.
The following table shows the classification of the main hand stitches:
| Stitch type | The seam |
| Straight |
|
| Oblique |
|
| Cross-shaped |
|
| Loop-shaped |
|
| Looped |
|
| Special |
|
The use of all the variety of stitches comes down to several areas of application:
- temporary hemming and stitching of parts, copying of stitching lines;
- decorative finishing;
- processing the edges of products using overcasting or hemming;
- connecting parts with permanent stitching using invisible and decorative seams.
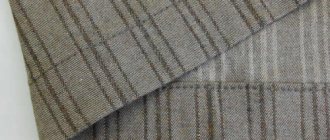
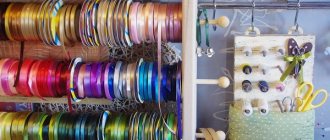
Types of braid for needlework and decoration
Decorative braid is a ready-made material that can be easily transformed by handicraftsmen into something original and beautiful.
A pigtail is a popular braid with a width of 4 to 15 mm, obtained by interweaving several strands consisting of a core and braid. The raw materials are cotton, polyester or viscose; metallized and viscose cords are combined. The braid is used in the finishing of clothing, leather goods decor and interior items.
Also, more complex patterns are woven from cords, combining materials and adding accessories.
Braid with a pattern is obtained in two ways - by applying a pattern to the finished tape or by the weaving method, when the pattern is created during the production process. The second method is more labor-intensive and expensive, so the price is much higher, however, the quality of the weaving pattern cannot be compared with the printed one.
Rep braid is similar to a ribbon with a small transverse rib. Keeps its shape well, but does not stretch. It is used for finishing clothes, making hats, bags and shoes, creating home decor and scrapbooking. It can be plain or with a pattern. Inexpensive and easy to use for beginners.
The jacquard braid for finishing is made using the same weaving method, which results in a beautiful, decorative, slightly convex pattern on both sides, similar to satin stitch embroidery. Suitable for handicrafts and creativity, it is used in sewing, making souvenirs, and decorating gifts. The tapes are very durable, resistant to stretching and abrasion. Metallized threads can be used in the design.
Silver and gold braid comes in the form of solid thin ribbons, ornaments and openwork weaving. Metallized or lurex threads are used for production. It is in demand for finishing clothes and creating costume jewelry, accessories, and haberdashery items with your own hands. Suitable for decorating bedspreads, curtains, tablecloths.
Lace and knitted openwork braid is often found in the decor of blouses, jackets, jeans, hats, summer bags, underwear and bed linen. This is a good option for making your own jewelry and hair accessories (hairpins, bows). Ribbon lace is often used in decoupage and scrapbooking to decorate albums and make DIY postcards.
Decorative braid with embroidery is a ready-made decor for finishing clothes and haberdashery. The base is made from dense woven or non-woven materials of natural origin or high-quality polyester. Embroidery is applied with strong threads.
Decorative finishing tape is intended for decorating clothes, handmade toys, pillows, curtains, and other home decor. This is an almost ready-made material for making original jewelry - necklaces, bracelets, belts. Strips of fabric, organza, leather, velvet, rep are decorated with beads, beads, stones, and chains.
Plastic braid is made of polymer materials and can be openwork in appearance, in the form of stones or beads. It is not elastic, therefore it is most often used in handicrafts, for example, when creating panels or decorating boxes, mirrors, and furniture.
Ostrich feather braid is a decorative frill ready for decoration, which can be used to decorate evening dresses, outerwear, hair accessories, handbags, and home interiors. The length of the feathers can vary, as can the density of the stripe.
Selection of threads, needles
Beautiful needle stitches are made by hand using correctly selected threads. The wide range of sewing materials can sometimes be confusing. Therefore, before going to the store, you should familiarize yourself with the existing types of needles and threads.
Types of sewing needles:
- For manual work. A universal look for any type of sewing. They come in different sizes and are used for both thin and thick fabrics.
- For stitching. Short with rounded eyelet.
- For knitwear. They have a rounded end and do not damage the hinges.
- For decorative work with loose fabrics. Short, blunt with a large ear.
- For darning and masking holes. Long with a wide eye for threading several layers of thread.
- For embroidery. Sharp with a wide oval eye.
- For leather and leather substitute. A distinctive feature is the triangular tip.
- For beads and seed beads. Very thin, long and flexible.
- For furniture and decorative fabrics. They can be straight or curved with a wide eye for threading thick threads.
When choosing needles, you should pay attention to the following nuances:
- The better the needle, the better it will glide through the fabric. Cheap analogues may have unevenness and jagged edges, which can lead to fabric damage and tightening.
- The thinner the fabric, the thinner and sharper the needle should be.
- The thickness of the needle and thread must match each other.
- Do not use rusty or bent needles.
- For each type of work, choose a suitable needle. Do not use blunt-tipped cross stitch needles for hand sewing.
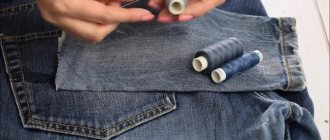
The choice of threads depends on the type of work planned. For temporary estimating work, thin threads that are easy to break are suitable. For durable stitching of clothing parts, strong synthetic threads are chosen. And for embroidery - special decorative materials.
What is braid and how does it differ from ribbons
Braid is a name given to narrow strips that can be made using either braided or woven methods. Initially, ribbons were used to tie and tighten clothing items, for example, in a corset. Hence, it has higher strength than craft tapes. Although these fittings have more in common than differences.
Durable linen, cotton, and silk threads are used for manufacturing. In modern production - artificial raw materials, leather, wool. Most often, plain and twill weaving is used, for silk braid - satin, for knitted braid - knitting. To ensure that the strip stretches well, the threads are woven at an angle.
The possibilities of braid in modern needlework have been significantly expanded. There are special types with adhesive base, convenient blanks for curtains, paintings, and decoration. Beautiful braid can easily transform ordinary items from the store and refresh boring clothes.
Basic rules for hand stitches
Hand seams have a structure that consists of the following elements:
- stitch – 1 completed cycle of thread weaving;
- line - a sequence of stitches:
- Stitch pitch is the distance between 2 needle punctures.
To ensure that hand stitches are smooth and neat, you need to follow some rules:
- Carry out work on a flat, well-lit surface. This will reduce eye strain and allow you to control the tension of fabrics and threads.
- It is recommended to use a thimble when sewing. This will protect your fingers from punctures, preserve your nails and speed up your work.
- To obtain an even stitch, tighten the thread, controlling its tension.
Finishing with cord covered with fabric
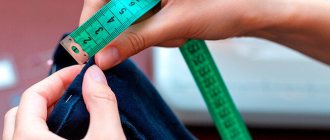
Cord Measurement
Choose a cord, moisten it in advance so that it shrinks. Measure its circumference with a measuring tape, add 3 cm for the seams: this will be the width of the bias tape. Cut the binding to the desired length and width.
Sheathing the cord
Place the cord in the center of the bias tape, on the wrong side of it. Fold the binding in half, encircling the cord; pin and sweep. Place the stitches as close to the cord as possible. You can use a machine foot to sew in zippers.
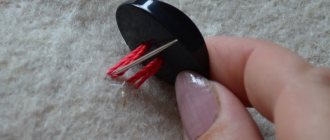
How to make a knot?
Some needlewomen secure the thread to the fabric using 2 small crosswise stitches.
Another way is to secure the beginning of the thread with a knot.
To create a knot you need to perform simple manipulations:
- Pinch the end of the thread between the pads of your thumb and index finger;
- Wrap the thread once around your index finger, making a loop on it.
- Use your thumb to twist the crossed threads, moving it to the end of your index finger.
- Hold the twisted loop between your fingers, pull the working thread, and tighten the knot.
Technical types with decorative capabilities
Velvet ribbon works well for finishing and lacing. In the second case, it is better to use an elastic velvet braid; it stretches a little, allowing you to get the desired contour. As a rule, only the front side is velvet; it can also be decorated with lurex or sparkles.
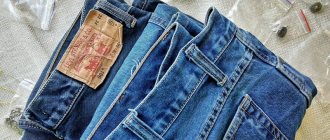
Kipper braid is made by twill and diagonal weaving of threads. It is used to strengthen seams, including on knitwear, edging, and in tailoring. They are also used for finishing garments made from coarse fabrics (often used to decorate jeans), making belt loops and belts.
Edging braid with a width of 16 to 32 mm is intended for edging the edges of neck products - hems, necklines, sleeves. It is used for processing cuts of blankets, blankets, bedspreads. Suitable for strengthening seams.
How to secure the thread at the end?
A beautiful seam made by hand with a needle can unravel if the end of the thread is not secured correctly.
There are 2 mounting methods:
- node;
- securing stitches.
To perform fastening in the form of a knot, you need to do the following:
- At the end of the last stitch, make 1 small stitch back with a needle and pull the thread until a small loop is formed.
- Insert the needle into the resulting loop and start tightening the thread again until you get a second loop, into which you can thread the needle again.
- Tighten the thread until a knot is formed.
When finishing a seam with a bartack, you need to make several small stitches of the same length in one place.
Connecting edge ends in a straight line
Reducing cord thickness
Sew the piping to one of the pieces on the right side. Make an overlap of 2.5 cm; Leave 5 cm unstitched on each side. Remove a few stitches on both sides and open the cord. Untangle the ends of the cord, cut the threads in half at each end.
Connecting the ends of the cord
Twist the ends together and tie with thread. Bend one end 6 mm, place the other end on it, cut the overlap to 1.5 cm.
Connection processing
Place the edges of the tape around the joined ends of the cord, one on top of the other. Sew along the seam line, over the join, attaching the piping securely to the fabric. Sew the binding using hidden stitches. To hide a joint, place it near a seam or in the center of the piece.
Beautiful seams and manual needle technique
The techniques for making hand stitches are simple and accessible to beginners. Below are step-by-step instructions and recommendations for performing different types of stitches.
Back the needle
The back stitch is a very popular stitch stitch. On the front side it resembles machine stitching. From the reverse side, the stitching does not look so neat; the stitches are longer.
This type of stitch is used for hand-stitching garment pieces and securing them firmly in hard-to-reach places.
Stitch order:
- Pierce the fabric from the inside out and bring the thread to the top.
- Make a stitch 2-3 mm long to the right side.
- Bring the needle back to the front side on the left, 2-3 mm from where the needle enters.
- Stitch to the right again, inserting the needle into the fabric where the last puncture was.
- Continue the sequence until the seam is completed.
- Fasten the thread.
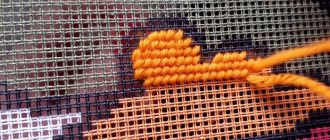
Looped option
This seam can be decorative and functional. With it you can beautifully process the edges of felt, fleece, embroider loops and belt loops. You can also overcast the cut of the fabric to prevent it from fraying and give it a neat, finished look.
Sequence of stitching:
- Start the seam on the left side. Place the fabric cut side down.
- Insert the needle from the bottom and secure the thread at the edge of the cut with a loop.
- Insert the needle at a distance of 5 mm from the edge of the cut and approximately 4 mm from the first puncture of the needle. Bring the thread to the front side, passing the working thread from below. Lightly tighten the loop
- Repeat the sequence until the edge is finished.
Beautiful seams with a needle by hand: loop stitch - The width of the stitch pitch depends on the desired density of the edge finishing. So, when sewing buttonholes, each next stitch is located close to the previous one.
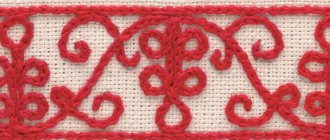
Goat or Christmas tree
Beautiful seams with a needle by hand are also used for the semi-movable connection of 2 pieces of fabric. These seams include the goat seam. It is used for stitching the lining to the main product or for hemming knitted fabric.
For hidden and hem stitches, it is recommended to use thin and strong threads.
The order of the seam:
- Place the fabric in front of you with the sections folded to the wrong side. Start working on the left side.
- Insert the needle from the wrong side into the bottom piece and insert it into the top fabric, making an oblique stitch to the right at an angle of 45 degrees.
- Pick up 2 threads to the left side directly at the junction of the 2 fabrics and remove the needle.
- Insert the needle into the lower tissue to the right at an angle of 45 degrees from the line of tissue connection and withdraw it to the left after 1-2 mm.
- Continue stitching until the seam is completed. Fasten the thread.
French setting
In this way, the hem of the lining is attached to the hem of the main product.
This creates a small thread bridge that prevents the lining from moving away from the bottom of the product.
Execution sequence:
- Sew 2-3 long stitches (approximately 3 cm) between the lining and the hem of the product.
- Combine the threads of the stitches with a buttonhole stitch laid over the top. Lay the seam loops close to each other.
Hemming stitch
A hem stitch is also called a blind or invisible stitch. It is used to discreetly stitch together two parts or hem the bottom of a product. Method of execution: needle forward. The difference from a simple seam is the passage of stitches inside the fabric of the parts being connected.
To make a hemming seam, use thin, strong threads very close in color to the color of the fabric. The needle should be short, thin and sharp.
How to do it:
- Work on the right side.
- Insert the needle into the edge of the hem and bring it out to the working side.
- Pull back 3-4 mm diagonally, pick up 1-2 threads of the front fabric, and pull the thread through.
- Again take a step to the left by 3-4 mm and pass the needle through the edge of the hem. Pull the thread slightly.
- Continue the sequence of stitches. Fasten the thread.
Whipping
Easy to sew seam. Can be used by sewing beginners. This stitch is used to finish the edge of the fabric to prevent it from fraying. The thread for work is matched to the tone of the fabric. The needle should be a comfortable size (not too thick or long) with a sharp end.
It is more convenient to lay the seam on the left side, holding the fabric with the cut side up.
Execution order:
- Insert the needle 5 mm from the edge of the fabric and bring it to the front side.
- Throw the thread over the edge of the fabric and reinsert the needle from the wrong side.
- Stitches are done at the same distance.
- Finish the row and secure the thread.
Dotted line
A variation of the “back needle” seam. Used for sewing zippers and other elements on velvet and velor fabric. The thread should be the color of the fabric, and the needle should be sharp and thin.
How to do it:
- Start work on the right side. Insert the needle from the wrong side and make a stitch, picking up 1-2 threads to the right side.
- Pass the thread from the wrong side and bring it to the front side at a distance of 5 mm from the first needle puncture. Make a small stitch to the right again.
- Repeat the sequence of stitches until the fabric is finished. Fasten the thread.
Hide it
Beautiful seams with a needle can be made by hand, not only decorative, but also invisible. The beauty is that such a seam is invisible, and the product looks neat.
This seam is often used to sew parts together on the front side. For example, in this way you can disguise a hole in clothing or sew up a seam on a soft toy.
Sequence of making a blind seam:
- Fold the edges of the stitched parts inside out.
- In order for the seam to be smooth and invisible, the edges must have clear fold edges. To do this, you can iron them with an iron.
- Insert the needle from the inside under the fold and bring it to the front side. Along a line perpendicular to the edge of the fold, insert the needle into the edge of the second fabric and pass the needle inside the fold. Pull the thread out after 2-4 mm.
- Lay the thread perpendicularly again and insert it into the opposite fabric to be sewn.
- The more firmly the parts need to be sewn, the smaller the stitch steps should be.
- At the end of the work, secure the thread with a knot.
Macrame
Macrame seams are used when working with leather, leather substitute and other dense materials whose edges do not unravel. This type of stitch is used to firmly connect the edges of two parts. This type of seam is often used for upholstery of furniture or car interiors.
Initially, a machine stitch or a “back with a needle” seam is laid along the edges. The stitches of these seams serve as the basis for further work. When working with thick materials, choose a strong needle with a blunt end and a synthetic thread.
Sequence of seam:
- Secure the thread at the beginning of the work with several stitches across both edges. Use the first holes made when machine stitching.
- Next, work only on the front side, using machine stitches.
- Pass the thread alternately through the stitches, lacing through 1 stitch.
- After lacing is completed, begin to tighten the working thread, forming a beautiful, strong seam.
Sports seams
Sports stitching is used in the manufacture of sports equipment from leather materials. These seams help secure the edges and provide tension to the leather.
The seam is made similarly to the macrame seam. The difference is that the lacing goes through every machine stitch.
Pigtail
One of the types of sports seams that is used for working with leather. It is performed using ready-made holes, which are made along the edges of the cuts with an awl or a thick needle.
The parts to be sewn must be stretched, then the seam will be raised and neat.
How to do it:
- Secure the thread with several stitches in the starting holes.
- Following the drawing, start stitching. Do not tighten the thread.
- After stitching is completed, begin to tighten the working thread, forming a relief seam.
- Secure the thread with several stitches and bring it to the wrong side.
Sooner or later, every person has to pick up a needle and thread. Beautiful hand stitches do not require experience or skill; just study the diagrams and follow the advice on choosing materials and tools.
Author: Maria Andryukova
Continuous bias tape
Preparation of material
We recommend the following practical method for making bias tape. Take a rectangular piece of fabric, lay the short side of the fabric diagonally over the long side, align the edges. Iron and cut along the fold along the bias thread.
Sewing fabric pieces
Place a triangular piece over another piece with right sides facing in, straight cuts together; align the edges. After stitching, the fabric will have a diamond shape. Sew the pieces of fabric with a 6 mm seam allowance and press the seam.
Lane markings
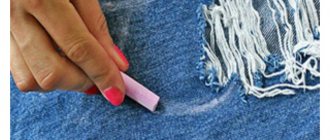
Place the fabric right side up. Mark lines parallel to the bias cut of the fabric. Mark the entire section, choosing the desired width of the stripes. To mark, use a right triangle and sympathetic ink or chalk.
Shaping fabric into a tubular shape
Fold the fabric right side inward, align the marked edges so that the ends of the marked lines join into one, forming a spiral. Pin the edges until the fabric takes the shape of a tube. The seam will be spiral. Unscrew the pipe.
Cutting fabric
Check to see if the marked lines meet on the bias at the pinned edges. Turn the pipe inside out again, sweep the edges and sew with a stitch seam with an allowance of 6 mm. Press the seam open. Starting at one end, use scissors to cut along the marked spiral line. You will get a long bias tape.