How to thread a sewing machine with elastic thread?
You need to wind the elastic thread onto the bobbin, and it should be wound under slight tension. To do this, we thread the tip of the thread into the hole on the bobbin, install the bobbin into the mechanism, pulling the thread crosswise, and wind it, holding the tip of the thread. You can wind the thread by hand, but you also need to wind it under tension - the degree of tension will determine how tight the product will be. Now you need to insert the bobbin into the shuttle, pass the thread under the plate and install it in the machine. We use a simple thread as the upper thread. We thread the machine as usual, by turning the flywheel we pull out the lower thread and check its tension. It is important that the thread is not pulled out too tightly. The degree of tension can be adjusted using the bolt on the shuttle - it can be loosened a little so that the plate does not fit too tightly and the thread comes out of the shuttle freely, otherwise the thread will break. It is advisable to increase the tension of the upper thread to 6-7. We will sew with a simple straight seam with a stitch length of 3.5-4 mm on the front side - there will be a simple thread on top, and an elastic thread on the back. First we lay a test stitch on an unnecessary piece of fabric, adjusting if necessary.
Why and where can you use a thread with an elastic band?
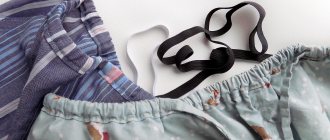
Rubber threads are very often used when sewing clothes in order to increase the fit of certain parts of things to the body. These could be cuffs, a waist, a corset, a turtleneck neckline, and so on. This type of thread is also used to create elastic gathers of canvas or fabric. Its qualitative difference from elastic braid is that the elastic does not require drawstrings and is hung directly on the fabric.
Use for knitting
The elastic thread is thin enough that you can easily thread it into a sewing machine, just like regular natural or synthetic threads. As already mentioned, the wide range of colors of the products allows you to completely hide the threads on any material of different textures. This means there is no need to sew on the front side.
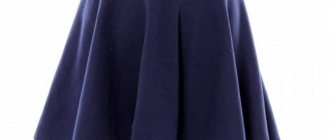
Gathering on the dress
If an elastic band is used for knitting, then it is added to any type of yarn. This is done to make the fabric more elastic. A good assistant is spandex, which is used for the upper part of the socks. Thanks to this, the elastic of the sock fits quite tightly to the foot and prevents the skin from coming into contact with the rubber.
You might be interested in this: Instructions for sewing sofa covers yourself
Important! Despite all the positive aspects and areas of use, rubber is short-lived. The more it is used (worn, washed, dried), the faster it becomes unusable.
Color-matched elastic for knitwear
How to make a flounce or ruffle using an elastic thread?
We attach the flounce to the base and pin it together. An elastic
thread allows you to quickly and easily assemble flounces and ruffles, and the assembly is uniform along the entire length of the part without much effort.
Before sewing on a flounce or ruffle, it is necessary to process the bottom of the part in one way or another - in our case, this is a simple double hem. We sew a stitch with an elastic thread along the opposite edge of the shuttlecock at a distance of 1 cm, focusing on the markings on the plate of the sewing machine. We tie the ends of the threads together so that they do not unravel. We apply the shuttlecock to the base face to face and pin it together. You can baste a millimeter from the elastic thread. We change the bottom thread to a regular one and sew a line on a sewing machine, adjusting the thread tension. Stitch length 2.5-3 mm. We will sew directly under the elastic, making fastenings at the beginning and at the end. We process the edge using an overlocker or using an overlock-like stitch on a sewing machine. Iron the seam up - the shuttlecock is ready.
Check the quality of the rubber thread and the selection
When purchasing or ordering any similar product for use in sewing, you must carefully research the pros and cons of each type, choose one that will ideally match the cutting and sewing material. It is always recommended to ask for quality certificates when purchasing thread in bulk and to check the quality of any elastic before making a purchase.
Braided rubber thread
How to make cuffs using elastic thread?
We bend the lower cut of the sleeve using a roller seam on an overlocker.
We take a detail of the sleeve - it should be expanded downward at least twice, since there will be an assembly here.
There will be a ruffle at the bottom of the sleeve, so measure the desired length at the bottom of the sleeve and add 0.5 cm to the hem (in our case it is 3.5 cm). Now you need to measure the desired length of the cuff (in our case it is 6 cm). We will lay a line with an elastic thread every 1 cm along this length - we draw a line for each line. Now we sew the lines on the sewing machine, leaving the ends of the threads quite long. We bend the lower edge of the sleeve using a roller stitch on an overlocker or in any other way (this can be done before laying the stitches with an elastic thread). Fold the sleeve in half, face inward, and secure with pins, starting from the finished edge of the sleeve, while aligning the seams with each other, connecting the elastic thread into a ring. To be sure, you can baste at a distance of 1.5 cm. We sew a line on a sewing machine from edge to edge, making bartacks. We trim the threads and finish the edge with an overlocker or an overlock-like stitch on a sewing machine, and hide the remaining threads in the seam using a gypsy needle. Iron and place a bartack at the bottom of the sleeve so that the seam does not protrude.
steps to creating an elastic waistband
In this tutorial I will show you how to insert an elastic band inside a waistband. This method of making an elastic belt is very popular for sewing most children's and women's products from knitted fabrics that have an elastic strip around the waist. Here you will learn how to properly sew a waistband without twisting or turning the elastic into a shell. Note: To make a better quality belt with a casing, you will need an overlocker.
In this video you will learn how to attach an elastic waistband to trousers or a skirt made from jersey.
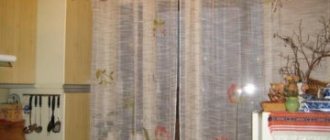
Striped ribbed knit fabric
This sewing technique is most often used when sewing belts from ribbed knitted fabrics.
Sew both sides of the waistband strip and pinch the seam as shown.
Now fold the strip in half and press.
How to measure the length of an elastic band
Wrap the elastic band around your waist and mark the edges where you want to cut it. Be sure to add seam allowances to both edges of the elastic.
Sew both ends of the elastic band together using a regular straight stitch as shown. I usually open up the seam allowances and stitch each one as shown. This helps to securely connect the elastic strip.
Preparing the belt strap
Now you need to divide the folded tip of the casing into four equal sections with chalk.
Now you need to fold the ribbed strip in half and insert an elastic band into this shell. Note: The marks on the elastic band and on the waistband must match.
Before stitching, you need to fasten the edges of the belt. Pin the folded strip of fabric with an elastic band inside at four points.
At this point, the preparation of the belt is completed, it’s time to use the sewing machine and overlocker.
Sewing a belt
Now you need to stitch both edges of the body along the entire waistband as shown. Note: Do not sew in the elastic band that is in the body. Sew only the edges of the knit fabric.
If you want to trim the edge, you will need to trim it earlier as shown.
Before attaching elastic to the inside of your skirt or pants, take a piece of chalk and mark the waistband into four equal sections.
How to add a belt to clothes
Attach the waistband with an elastic band inside to the waistline of the skirt or trousers.
All four pairs of marks on the belt and waist of the skirt (pants) must match.
Now it's time to connect these layered waistband edges to the top of the skirt or pants all the way around the waistband. Note: Be careful to keep the fabric away from the blades.
Elastic belt covering in finished form
In this photo you can see the finished elastic waistband of your skirt or shorts, made from knitwear.
English is not my native language, so please forgive any mistakes and help correct them. The email to send is on the contact page.
How to make women's jersey shorts
Here you will find 30 photos with comments on how to sew women's shorts from knitwear. With this tutorial you will be able to sew children's shorts.
How to make a women's jersey t-shirt
Learn how to make jersey t-shirts. Here you will find a tutorial on how to make a women's jersey t-shirt with 20 photos and comments from professionals.
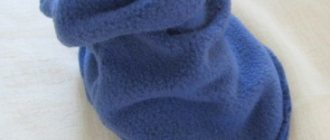
How to make children's pants with an elastic waist
Looking for lightweight knitted pants for your baby? Try sewing these knitted pants with step-by-step instructions that include over 20 photos and comments.
Skirt Sewing Tutorial
Here is a tutorial for sewing a skirt. In this post you will learn how to make a skirt vent correctly and easily.
How to make pockets on a dress or skirt
Learn how to add inside pockets to a dress. In this sewing tutorial you will learn how to properly and easily make a pocket for a dress or skirt.
Lesson on knitting a baby beanie hat
In this post, I offer a simple tutorial on how to sew baby hats with knitting needles. The sewing guide includes 20 photographs and professional commentary.
How to make a decorative pocket flap
Here are instructions for creating a pocket with a flap. If you need to sew a flat pocket, these tips will help you do it right.
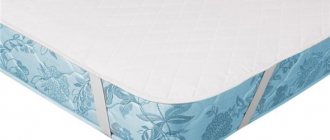
How to make a pillowcase with a cuff
Want to save money? Then try to learn how to sew bed linen with your own hands.
.
How to create the perfect fit for a loose bodice?
A simple way to create a perfect fit for a loose bodice.
Let's cut out the part of the front and back - in this case it is a 62x45 cm rectangle. We process the upper sections with a roller stitch on an overlocker. Measure 1.5 cm from the cut and draw the bodice with lines at a distance of 1 cm from each other. Sew the stitches using an elastic thread. Let's put the parts face to face, connect with pins, starting from the overlocked seam and combining the elastic bands, and lay the side seams at a distance of 1.5 cm from the cut with a simple thread, process the cut with an overlocker, and iron. Let's try it on. The bodice fits perfectly!
More useful tips on online sewing courses!
Types of elastic threads
All similar threads for knitting, sewing and inserting can be divided into two types:
- rubber;
- elastomeric.
The most common type is rubber. The main core is obtained by cutting the rubber web into microfibers or using extrusion. This part is braided with cotton or synthetic material using a special machine. The final product has good wear-resistant and elastic properties.
Elastomeric Beading Thread
Modern and more environmentally friendly threads are made from elastomer. The material makes them more durable and resistant to stretching, which reaches ×6 times. All this is possible thanks to the unique properties of the material. It also helps to achieve exceptional fineness of the thread. This has led to its widespread use in the knitting industry.
Elastic thread “Astra” without braid
Many of the properties are provided by the braiding material. He can be:
- natural (cotton, linen);
- synthetic (viscose);
- absent.
If there is no braid, then the diameter of the product is immediately reduced to 0.4–0.8 millimeters, which is used in weaving beaded bracelets and other products in the form of socks and stockings.
Despite this, the lack of braiding is the cause of the following negative aspects:
- reducing the number of colors to choose from;
- impossibility of using in combination with glass beads or cutting;
- cannot be used in sewing machines.
Janome 5519 is ideal for working with thin threads
Additionally
Additional methods concern securing a certain number of rows of elastic threads in the waist area of the product.
kupivip.ru
Simple stitch
- The sewing machine is threaded from below with elastic thread. We place a regular thread on top with a loosening of tension, which will allow, if necessary, to tighten the bottom thread after laying the stitch.
- The “face” of the product is stitched with a slightly weakened top thread.
- A tension stitch is placed on the wrong side.
- Having laid a line from one edge of the base to the other, tighten the rubber thread to the desired limit. The rubberized thread should “walk” freely inside the loops formed by a simple thread.
Zigzag stitch
- Elastic threads are applied to the corresponding lines drawn on the fabric.
- A zigzag seam is laid on top.
- The threads are stretched until the desired degree of fitting is achieved.
Sewing rules
Regardless of the type of rubber belt, it is necessary to attach it to the base by following the basic rules.
- Do not pierce the rubber veins of the tape with a needle. Punctures can lead to deformation of the elastic - once damaged, it stops stretching. When stitching by hand or by machine, it is recommended to stick the needle between the rubberized veins of the tape. In this case, the zigzag stitch is considered safer.
- During operation, the tape should be evenly tensioned. If the degree of tension of the rubber band changes, the folds at the model’s waist in different areas will be different in thickness.
blogspot.com
Recommendations for performing work
- Before starting work, you can draw a waist circumference on paper, mark on it the centers of the back and front of the product, and then divide the resulting fragments in half, marking the side points. Divide the resulting parts in half several times. A circle with a smaller radius is drawn inside the first circle - this is an elastic band. The outer circle marks are transferred to it.
- Divide the fabric base (to which the rubber belt will be attached) into equal parts by successively folding the fabric at the waist line. Marks are made as the folding fragments decrease.
LiveInternetLiveInternet
Quote from Dushka_li's message
Read in full In your quotation book or community!
Methods for sewing elastic in step-by-step master classes.
How to sew an elastic band - four ways (in step-by-step master classes). Author: Olga Klishevskaya Today I decided to write a separate special article on how to competently and correctly sew elastic into clothes. The article was written specifically for beginners in sewing, and therefore I will show everything in detailed step-by-step pictures. And I will give a more detailed explanation of how to sew in an elastic band in each of the FOUR WAYS.
Yes, yes, in this article I posted all FOUR methods of sewing in elastic . And for those who have a modern machine. And for those who have an old hand-made Singer from their grandmother, and even for those who do not have a sewing machine, I will tell you how to sew in an elastic band by hand.
- A NOTABLE METHOD for uniformly sewing in elastic (for those with a machine without a zigzag stitch).
- Manual method of sewing in elastic (for those who do not have a machine)
- ZIGZAG METHOD of sewing in elastic (without pulling it during the sewing process, but only after sewing)
- STANDARD METHOD of sewing in elastic (for any machine)
- BOBBIN METHOD (will help you sew in an elastic thread on a regular sewing machine)
I already talked about some of this in an article about beach dresses with elastic. But I wanted to consider all possible cases of using elastic bands in clothes. And give a more detailed and understandable method of sewing them to clothes.
But before that, we will proceed directly to our lesson. I want to inspire you with beautiful pictures of clothing models using elastic bands. You can sew stitching into all these clothing models yourself following the lessons from this article.
So let's admire, and therefore let's learn.
Elastic on the shoulders.
This is the most common use of elastic on tunics and off-the-shoulder dresses. The pattern of such a product is always a modification of a truncated pattern - when the shoulder line and the top of the sleeve cap are cut off.
Elastic on the hips.
Serves to provide a slight allowance for free-flowing fabric above the hip line and wavy fabric below the elastic line.
Elasticated waist.
It is used when you need to fit a product without a belt while maintaining the splendor of the folds both above and below the elastic line.
Elastic band under the bust.
More often found on loose, fluffy tunics, and serves to emphasize the chest, while maintaining freely flowing pomp in all other places.
Elastic on shoulders, waist, sleeves.
Creates a gentle image of an airy peasant blouse.
The elastic is sewn vertically.
Ideal for creating horizontally directed draperies.
Elastic band on the chest.
Most often, it is used to rubberize the entire upper part of the tunic - both on the front and on the back.
Elastic on the back.
Or sometimes only the back area and (if available) sleeves are treated with elastic thread.
Elastic on the sleeves.
The sleeves are also partially rubberized for decorative purposes - in the cuff or shoulder area.
And, of course, sometimes in all of the above cases, fashion designers can replace the elastic with ordinary non-elastic twine pulled into a simple drawstring.
The fabric will also gather and fit, but such gathering on twine, of course, will not give elasticity.
Well, now let’s proceed directly to our master classes on sewing in elastic.
You and I will often model a tunic, dress, hat or swimsuit that will have an elastic band. And we will need to sew it in. There are two types of rubber bands...
2 types of rubber bands
Ordinary elastic bands (that is, simple underwear elastic bands) They come in different tight and soft, with lace or frilly, figured, etc.
Elastic bands can be sewn on by hand or by machine.
Elastic threads (elastic threads) - they are sold in the form of spools (the same as threads). The thread itself is a rubber fiber wrapped in a spiral with a hebesh thread. Such elastic threads can only be sewn on a machine. Although…. if the fabric has a small hole, then they can be sewn into the dress even with a regular crochet hook. Or manually thread it through the holes.
No matter what elastic bands we sew in, in any case we will need to follow 2 rules.
2 rules for sewing elastic bands:
Rule 1: when sewing on an elastic band, you must try not to tear the rubber veins inside the elastic band with a needle . Otherwise, the elastic band may become deformed and lose its elasticity over time. This happened in one of my daughter’s purchased dresses and I had to change the elastic.
In order for the needle to pierce the rubber veins of the elastic band to a minimum, you must try to ensure that it passes between the rubber veins of the elastic band as much as possible.
Or a zigzag stitch - it is more gentle, because... The stitches jump over the central elastic fibers of the elastic.
Rule 2: The elastic must be sewn with uniform tension along its entire sewing length. Otherwise, we may end up with a dress that is tightly gathered in one place, and only a couple of folds in another.
How to ensure uniform tension of the elastic along the entire length of the sewing? There are several ways. We will now look at all these ways to evenly sew elastic bands into clothes.
STITCH METHOD - for those who only have a simple stitch on their machine.
or for those who will sew the elastic on by hand.
I called this method “basting” because we will divide the elastic and the dress into equal sections, and each section of the elastic will be basted along the edges to its own section on the sewing line - this is necessary for uniform sewing of the elastic.
I will display this method in the picture so that everything is clear. The whole stage of work is based on the example of this dress with an elastic waist.
You can see that the dress is loose-fitting and has an elastic band sewn into it at the waist level. Not in a very tight stretch - but to give the dress soft folds. It looks beautiful on flowing fabric. The detail of the dress (the pink part) into which the elastic is sewn is shown in Fig. 1.
Now we will see all the stages of work on UNIFORMLY sewing elastic under tension.
Step one - draw a sewing line for the elastic band.
Find the elastic sewing line - draw it directly on the fabric with chalk or a pencil (Figure 1).
Step two - find the desired length of the elastic band.
We take an elastic band and wrap it tightly around our waist. Not a tight stretch, but a comfortable one, so that it presses but does not squeeze. Cut off this piece of elastic.
And immediately divide it in half - half will be sewn to the front part. The second half goes to the back detail.
We see (in Fig. 3) that when relaxed, the elastic is much shorter than its sewing line. That's how it should be. Because we will sew it under tension (Fig. 4) and after sewing, it will shrink and pull the fabric into uniform gathers.
Step three - divide the sewing line into sections that are convenient to hold with two fingers.
Now let’s remember the ancient Russian measure of length - span. This is the distance from the protruding large dress to the index. It is in this two-fingered way that we will stretch the elastic under the machine foot when we sew it on.
Therefore, we divide the sewing line for the future elastic on the dress into spans. Directly with your hand - we walk along the line with spans and mark the boundaries of the spans with chalk.
Step four - transfer the marks to the stretched elastic band.
Now we stretch the elastic next to our sewing line and transfer the same marks with a pencil to it. It is convenient to do this on the carpet - press one edge of the elastic with the heel of your foot, pull the second edge of the elastic with your left hand, and use your right hand to draw strokes with a pencil.
Step five - sew the marks on the elastic to the marks on the dress.
Now we release the rubber bands with marks. We sit down on the sofa and calmly sew the elastic to the sewing line IN THE PLACES OF THE MARKS - that is, manually using a needle and thread we fix the mark on the elastic with a similar mark on the line of the dress with 3-4 stitches.
Step six - attach the elastic to the sewing line.
We have fixed all the marks and now you can put the product under the presser foot. We stretch the first piece of elastic between the marks with two fingers of our right hand - the fabric is aligned, the elastic is in tension - and we sew with a regular line or a zigzag stitch.
We sewed one section - we stopped the machine, the needle was down in the belly of the machine and the foot was lowered (so as not to move from the line) - we pulled on the next piece of elastic and sewed again.
An easy way to sew an elastic band BY MANUAL (without a machine) is to stretch it on the edge of the table.
Yes, yes, elastic bands can even be sewn in by hand - if the fabric is variegated or bouclé, that is, it is not afraid of crooked stitches, for the reason that they are simply not noticeable on it. Moreover, after sewing the elastic, the fabric at the sewing site will wrinkle greatly and all the stitches (no matter how crooked they may be) will be hidden in wrinkles and folds.
I sewed my first peasant blouse with elastic at a time when I was still afraid of a sewing machine. I used the same method of drawing marks on the elastic and on the fabric that I described above. The only difference is that when sewing, I did not put the fabric under the machine foot. I simply stretched the fabric with a span on the edge of the table (to make it easier to pry with a needle and thread) and sewed it tight with ties. The fabric tightened and hid the crooked stitches.
In one evening I had an exclusive item, absolutely handmade.
ZIGZAG METHOD is the simplest. Suitable for both regular elastic and elastic thread.
This method is generally the easiest for those who have a zigzag stitch on their machine. And it can even be done manually - after all, a zigzag stitch can be done manually
This method can be used to sew both elastic thread and elastic tape .
It is remarkable in that even an ordinary underwear elastic will be sewn evenly - and there is no need to make any fixation marks.
I’ll show you how this happens in pictures.
Step one - create a sample of the ideal piece of elastic.
We also start by wrapping the elastic band around the waist, choosing the optimal tension for us. Cut off this rubber girth. And we cut it in half - but we will not sew on this particular half.
She will serve as a model for us later. Now you will see and understand everything.
Step two - sew a wide zigzag behind the edges of the long elastic band.
Take a new piece of elastic the same length as the width of the product or longer.
We place it under the machine foot and select a zigzag stitch such that the zigzag step is wide enough and the needle never touches the elastic itself, but makes a zigzag, piercing the fabric a few millimeters from the elastic - Fig. 13.
That is, as you already guessed, we need the elastic band to move freely inside the zigzag.
Step three - try on the sample elastic band to the elastic band under the zigzag.
And when the entire elastic band is under the zigzag, we put our sample next to each other and make 2 marks on the elastic band under the zigzag - at the same distance as the edges of the sample segment - fig. 14.
Step four - tighten the zigzag elastic band to the desired length.
Now we pull the ears of this “zigzag” elastic band until the marks are near the edges of the product. There they need to be fixed - that is, manually sewn to the edges of the product with several strong stitches.
All is ready. By the way, you can do this zigzag manually - it’s very convenient and fast.
Under such a zigzag - but with a smaller stitch pitch, of course - you can also place elastic threads. You also put an elastic thread on the elastic sewing line. And in the same way, you cover it on top with a zigzag stitch - without piercing the elastic thread itself anywhere. And then we tighten the elastic thread inside this zigzag to the degree of tightness we need.
You can also place the elastic not under the zigzag stitch, but under a specially sewn strip of fabric - that is, a drawstring. Here's the method:
THE ROCKET METHOD is very simple and suitable for any machine.
We measure the length of the elastic sewing line with a centimeter (Fig. 17). We measure a strip of fabric (Fig. 18) of the same length. The width of the strip should be sufficient for our elastic to be hidden in the future drawstring - that is, the width of the elastic + seam allowances is equal.
We sew the drawstring to the line where the future elastic will pass - Fig. 19. And we pull our elastic into the resulting “tunnel” - that is, the drawstring.
We pull it in using a safety pin - we pin it on one end of the elastic and pull it through, feeling the pin inside the drawstring with our fingers, pushing it forward, wrinkling the fabric along the pin. The pin is slippery and fits well under the fabric, and pulls the elastic along with it.
To prevent the back end of the elastic from slipping inside the drawstring, it is better to first sew it to the entrance edge of the drawstring. And then, when the forward tip of the elastic appears on the other side of the drawstring, it will also need to be sewn firmly to the outlet hole of the drawstring.
Then the elastic will be firmly fixed at both ends of the drawstring and will never pop out.
WE SEW IN RUBBER THREADS - on a regular machine with a simple line.
We will talk about the BOBBIN METHOD OF SEWING in elastic threads. This method is suitable for any machine. You need a spool of regular non-stretch threads and a spool of elastic threads.
We wind the elastic band onto the bobbin with a slight stretch (then we will tighten it at the line, if necessary).
And we thread a regular thread on top - and make sufficient relaxation in its tension. Practice on a piece of fabric - we need to select the tension of the upper thread so that it forms small loops on the wrong side.
That is, the elastic thread from the shuttle will not be pressed into the fabric by the top thread, but will lie freely inside the loops.
When the stitching is completed from edge to edge, you can safely tighten the elastic thread to the desired tightness. It will move calmly inside the loose loops of regular thread.
As you can see, there are a lot of ways to quickly and easily, and most importantly correctly, sew elastic bands into your product.
Happy sewing.
Olga Klishevskaya, especially for the site “Women’s Conversations”.