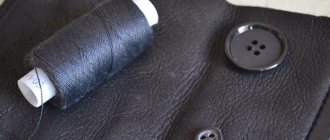
Creating a dress is a complex process and requires painstaking work. Each piece must be carefully cut. And the process of sewing on the lining of the dress is especially difficult. The question arises: is it needed? Do all dresses need a lining? And how to sew a lining to a dress? These issues should be considered in more detail. Sometimes it can be seen on dresses, and on some it is absent. This part really helps. Some people specially complement their clothes with it, in particular dresses. How to sew a lining to a dress with your own hands will be described in this article.
How to sew a lining to a dress
How to sew a lining to a dress
A lining is necessary for many dresses. It serves as a soft “layer” between the body and thick, warm fabric; outfits made from light translucent materials do not “see through” with it. The ability to sew it correctly distinguishes a confident craftsman from an inexperienced beginner, and this skill can be considered mandatory for a tailor. A lined dress is a professionally sewn, finished product that can be created even at home, provided you have a regular sewing machine.
Other linings for love
Here you will learn about other, safer and less serious types of linings to bewitch the object of desire, and receive instructions for carrying them out.
How to make a lining for a knitted hat
This ritual is carried out in cold weather, because a person must wear this thing. Find a way to take your lover's headdress and read three times:
“Dear man, put a hat on your head,
Turn it on one side, forget about old thoughts,
Just be with me in thoughts and reach out,
Tremble for me with your heart, look only at me with your eyes.”
How to make a lining with salt
Salt is used to bring a man back to his family or to warm his heart. Any kind will do, but in this case it’s better to take a kitchen one. Mix white spice with pepper in equal parts and say three times:
“I cooked it, boiled it, put pepper and salt. If you (name) are with me, you won’t be able to think about anyone else.”
Add the charmed salt to the dish and serve.
How to make a lining for a dress
Make an appointment with the man under any pretext. Before a date, hang the dress you'll be wearing on a hanger and stand naked in front of him. Look closely at the clothes while saying:
“The betrothed cannot resist charm, he will appear and stay, he will not go anywhere
He will look at me and feel attraction, yes desire.
There is no way without him, only with him there will be happiness. Amen"
Rules for creating and working with lining
- For lining, choose fabrics that are pleasant to the touch, which, as a rule, do not stretch (cambric, rayon). If the edges are very frayed, they will need to be over-sheared or processed.
- To cut out parts, use the same patterns as for elements made from the main fabric - fronts, backs, sleeves.
- In a dress with facings along the neckline, the lining fabric is cut minus their width.
- When cutting, you need to leave allowances - the same as for the main parts, except for specially stated cases.
- Darts, seams in the shoulders along the front and back are sewn separately on the main elements and the lining.
- When cutting a skirt, the length of the part made from the main material should be on average 10 cm longer than the lining (the exception is a decorative two-layer hem with a “peeking out” underskirt).
What is lining
A lining is a thing or object that has been charged with a certain energy using magical rituals. Rituals can be dark and light, carry both good intentions and contribute to the destruction of life. But most often, in simple terms, the lining is damage.
You can understand that someone has used an unusual way to take revenge by a sharp series of illnesses and troubles, increased quarrels and misunderstandings in the family for no apparent reason, and other problems. Attributes of damage can be needles, pins, food, soil, and even someone’s gift “from the heart.” In fact, you can say anything if it can be quietly planted.
Do you often perform rituals?
Not really
Features of sewing a lining
There are two main ways to sew a lining to a dress.
- Manually, securing it to the facing of the cuts on the neck.
- Grinding the cuts using the lining itself.
To cut out parts from lining fabric for a product with facing, you need to place its elements on the front and back along the corresponding lines, and transfer the internal outlines to the drawing. If the product has a zipper, it is necessary to process only the neck, sewing the item in advance before this stage.
Progress
- Stitch the darts and seam lines of the lining, press along the seams.
- Overcast the armholes and fold the hem.
- Pin the allowances for the fastener, turning them on the bottom cover to the wrong side, and on the top - to the face.
- Sew the necklines along the edges, sweep and then iron the edge.
- Sew in a zipper and attach the lining to the zipper.
- Secure the edge of the armhole along the seam allowances of the sides and shoulders.
The pattern is cut along the sleeves - set-in varieties are made without a bottom layer. If the element is one-piece, the length along the shoulder is set aside on the front and back and the armhole is drawn to the end of this segment.
Raglan modeling
- Measure the length of the shoulder along the seam on the shoulder (or dart), marking the end of the segment with a dot.
- Cut the one-piece sleeve drawing at the level of the middle of the dart and finish the cut at the lower end of the part.
- Glue the front, back and sleeves along the axis of stitching - from the edge of the neckline to the starting point of the rounding.
- Draw the armhole as for a standard sleeve.
- Cut out the lining, leaving up to 1.5 centimeters for seam allowances and hem allowances.
.site-header .container{ padding-top:0} .site-title{ background:none;padding-top:0}
Sewing. Processing the bodice of the dress with lining. MK from Arvovna
There are several different ways of finishing a bodice with a lining, I tried them all and came to the conclusion that the best treatment is with open side seams.
Today I want to show some aspects of this processing. It is convenient when there is a zipper in the middle back seam, i.e. At the time of joining the lining to the bodice, this seam has not yet been stitched. After fitting, all darts and seams on the back and front parts and on the lining parts are processed. The front and back parts are connected at the shoulder seams (the same with the lining), the seams are pressed. The lining is connected to the top first along the neckline, the seam allowance is notched as usual and secured with a machine stitch on the lining side at a distance of 1mm from the seam.
After this, it is convenient to trim the excess lining that has formed along the armholes, and then connect the top with the lining along the armholes (photo 1, 2).
We iron the armholes and neckline of the inverted bodice (photo 6).
After ironing, it is convenient to lay the bodice flat on the table and trim the excess lining again, aligning it with the top (photo 7).
Now you can sew the side seams of the lining and top, doing them in one line. We sew the skirt to the bodice, and then sew in the zipper. If the dress does not have a seam bodice, it is convenient to first sew the zipper into the middle back seam, and then connect the side seams. I use the same method to line the vest.
I “spied” this method a long time ago on a finished expensive dress that was brought to me to be sewn in the side seams, and I discovered that the side seams of the top and lining are connected with a single line, which, by the way, is convenient at such moments: sew in or, conversely, , release from the seam, there is no need to flog and redo the lower part of the armhole. Since then, when there is a middle back seam, this is the only way I do it. And the connection at the shoulder seams is really “troublesome”, because... all flaws, if they happen, will be visible, and the shoulder seam itself is very short and uncomfortable in this regard. Many people still suffer and connect through the shoulder seams, although this method also has a place, because the product does not always have a middle seam on the back or shelf, and the method I proposed is acceptable only in this case.
You can sew the zipper up to the side seams, so it’s more convenient to then adjust the volume to the side seams, but then we sew the back skirt to the back, and the front skirt to the front to the side seams, and not the whole skirt to the finished bodice, this is an option for a cut-off waist.
I always adjust the seam allowances for some facing seams, the neckline, and the armhole at a distance of 1 mm from the seam on the front side (along the armhole, usually as far as the machine allows to “climb” into the shoulder seam, I adjust it to that point), then when turning it inside out, the seam immediately falls, forming the desired edge, and sometimes you can even do without basting the edge and iron it straight away
I have already shown the dress for Nika, but since I received a request from the girl’s mother to write down the sequence (there are a lot of young women around me who are starting to learn to sew - it’s time to open courses), and then a request came from a magazine on the topic of a children’s dress, I am posting: suddenly someone else needs it...)))))
So, a dress for a girl turns out to be super budget-friendly. It could be dad’s shirt and a little lace, mom’s skirt and some kind of appliqué, or a funny-sized piece of fabric - a remnant from her sewn dress.
Children's dress r 86-92
.
Dress Materials:
· Fabric that holds its shape (cotton, linen, gabardine, crepe, shirt fabric, etc.): with a width of 1 m - 0.8 m, with a width of 1.5 m - 0.5 m
· Zipper or button closure
· Cotton, lawn for lining - 0.6 m at any width
· Trim: lace - 2.5 m, 3 buttons
Girls, sorry for the corrections in the pattern: at first I wanted to give a more universal one (front-back clasp), and then I realized that I would only confuse those who are not yet very smart at “swimming” in this matter... But, alas, I no longer have the strength to redraw it! ))))) only the crossed out words were corrected - they are not needed, the rest is completely correct.
1. Open it up.
Using the patterns, we cut out the details: front - 1 piece with a fold, back - 2 pieces, skirt - one piece with a fold.
2.
Assembling and processing the top of the dress:
a. We assemble the dress along the shoulder sections, trim the allowances to a comfortable size - 1-1.5 cm, and iron them. Leave the side seams open.
b. Place the resulting piece face to face on a piece of cotton fabric that will be used as a lining.
c. We carefully smooth out the details, making sure that the front of the dress and the lining match perfectly. We chop off the parts and cut out the lining
d. In this case, it is not necessary to baste; you can prick the tailor’s pins like this and safely stitch along them: the machine easily passes over the pins if they are inserted clearly perpendicular to the stitch line, and the chance that the machine’s needle will hit the pin is minimal.
e. We line up the neckline and both armholes, iron them, cut off the allowances to 0.5-0.7, and if necessary, cut the allowances at the rounded areas. Please note that we sew the beginning and end of each armhole along the side seam allowance slightly obliquely - this is important.
f. Having placed the resulting part with the lining up and the front towards you, we place our hand between the dress and the lining, with the other hand we help ourselves and pull the back lining towards us through the shoulder tunnels.
Repeat with the second half of the back. Straighten the inverted part.
g. Carefully sweep out the edge of the armholes and neckline, making sure that the 1 mm roll goes to the wrong side of the dress - then the lining will not be visible. We iron it to make sure it’s done well and stitch it along the front side of the dress.
h. We sew the side seams, not forgetting to make a reliable fastening at the armhole itself. To do this, I do this: I start stitching from the armhole to the waist line, but not from the very edge of the armhole, but stepping back 3-5 mm from the processed edge of the armhole. I sew two or three stitches, turn on the reverse and return the stitch to the very edge of the armhole, then, releasing the reverse, I sew a regular stitch. Why is this so? - the beginning of the stitching will be inside the seam, the beginning of the side seam will be secure and without any knots. We process the cuts (zigzag, overlock) and manually secure the side seam allowances at the armhole. The corners of the allowances should be below the edge of the armhole so that they do not peek out. It was for this purpose that we made slightly beveled lines along the allowances at the beginning and end of the armhole (see point 4).
3. Connecting the top of the dress and the skirt
. We fold the skirt and top of the dress face to face, carefully aligning the marked pattern lines so that after sewing the middle back seam, all the lines clearly coincide. We sew down the waist seam, overcast the edges and iron the seam allowances upward. Place the lace on the waist seam line, sew along both edges if the lace is wide, and along the bottom edge at the waist if it is narrow.
4. Clasp.
We sew the back seam of the dress, paying close attention to the perfect match of all the lines in the “middle seam-waist line” section. We iron the middle seam as follows: the left back part - we fold the allowance to the wrong side, the right back part - we do not fold the allowance, we leave it even. We process the slices separately. We manually sew the allowance on the left back part to the neckline and sew out an air loop for the button. On the right part we sew a button under the fastener.
Advice:
You can decorate the dress with a zipper, but then you definitely need a non-hidden zipper, because... Hidden zipper may be a bit harsh for delicate baby skin
5. Dress hem
. We draw the hem line. To do this, we process the cut with an overlock or zigzag, apply lace to the face of the skirt and stitch it either with a small zigzag or with a double needle, depending on the thickness of the fabric and lace.
6. Iron the dress. Ready.
Important!
If there is no single piece of fabric for lining or the size of the future dress is such that it does not fit into the existing width of the fabric, then the same thing can be made from a stitched lining. To do this, we cut out the front and back pieces from the lining fabric, connect them along the shoulder seams, iron them - and then work as if they were a single piece. A small condition - you need to ensure that the shoulder seams match and carefully trim the allowances so that there is no noticeable thickening at the junction of the dress seam and the lining.
I hope this is useful not only for Nika’s mom...)))))
The lining is cut using the same patterns as the dress. If the dress has facings for the neckline, then the lining is cut out minus the width of the facings. To do this, place the facing patterns on the front and back pieces along the corresponding neck lines and transfer the inner facing lines to the patterns (1). Cut the patterns along these lines. The sleeves of the dress are made without lining. In the case of one-piece sleeves, on the front and back pattern pieces, set aside the shoulder length according to the measurement table and put a mark. From this mark to the side seam, draw an armhole line (2). For raglan sleeves, mark the length of the shoulder along the shoulder seam or shoulder dart accordingly and place a mark. Cut the pattern of a one-piece raglan sleeve along the line of the middle of the dart and continue the cut to the bottom edge of the sleeve. Glue the front and back pattern pieces to the sleeve pieces along the stitching lines from the edge of the neckline to the beginning of the rounding, respectively, and then draw the armhole line of a regular sleeve (3). Cut out the lining with seam and hem allowances of 1-1.5 cm.
THIS IS HOW TO SEW THE LINING TO THE SETTINGS BY HAND
At this point, the dress has already been sewn and ironed. Sew darts and seams on the lining. Overcast seam allowances and press.
At the bottom edge, iron the lining to the wrong side at a distance of 2 cm above the marked hem line. Fold the lining over and topstitch. On dresses with sleeves, overcast the armhole sections of the lining. Pin the lining to the dress, wrong sides together, aligning the darts and seams. Fold the lining over and pin it to the facings, notching the lining seam allowance in several places. Fold the lining and pin it to the zipper straps at a distance of 7.5 mm from the teeth. Sew the lining manually using a blind seam (4). On dresses with sleeves, secure the armholes of the lining with a few stitches at the side and shoulder seam allowances or shoulder pads, respectively (5).
THIS IS HOW TO SHARPEN THE NECK SECTIONS WITH A LINING..
On dresses with sleeves everything is very simple, since only the neckline is processed. At this point, the dress is sewn up to the zipper and neck finishing stage. Sew darts and seams on the lining. Overcast seam allowances and press. Overcast the armholes and hem the hem. Pull the lining over the dress, right side to right side, and pin the neck edges together, matching the shoulder seams.
On the back of the lining, turn the seam allowances along the edges of the opening for the zipper onto the wrong side of the lining at a distance of 5 mm from the marked seam line and pin (6).
On the dress, turn the seam allowances along the edges of the zipper opening right side out and pin them over the lining to the neckline. Sew the edges of the dress neckline and lining (7). Cut the seam allowances close to the stitching, and in the rounded areas, cut close to the stitching. Turn the lining and seam allowances along the edges of the zipper opening to the wrong side. Brush and iron the edges.
Baste the zipper from the edge of the neckline under the edges of the opening for the fastener on the back. Tuck the upper ends of the zipper straps. Sew the zipper (8).
Fold the lining and sew it to the zipper straps (9). Secure the edges of the armholes of the lining with several stitches at the side and shoulder seam allowances, respectively (see Fig. 5).
On sleeveless dresses, the neckline and armholes are lined in one step. To stitch the neckline, the shoulder and side seams on the dress and lining must be open so that the dress can be turned inside out.
This is done like this: fold the lining parts with the corresponding parts of the dress right sides and pin the sections of the armholes and necklines, aligning the seam lines. On the back of the lining, turn the allowances along the edges of the opening for the zipper onto the wrong side of the lining at a distance of 5 mm from the marked seam line and pin (see Fig. 6).
On the dress, turn the seam allowances along the edges of the zipper opening right side out and pin them over the lining to the neckline. On the front and back, sew the necklines and armholes, starting/ending each line, not reaching approx. 3 cm to the marked shoulder seam line. Cut the allowances of each seam close to the stitching, and notch in the rounded areas (10).
Turn the front inside out.
Place the shoulder sections of the front between the dress and the lining into the shoulder sections of the back, aligning the front sides of the dress and the lining respectively. Pin the front and back of the dress along the lines of the shoulder seams and stitch the shoulder sections. Then pin the lining pieces along the shoulder seam lines and stitch (11). Pull the front at the shoulder sections outward a little and press the seam allowances. Pin and stitch the remaining open neck edges (12).
Pull the front out from the shoulder sections of the back, while the lining on the back turns to the wrong side. Iron the edges of the necks from the lining side. On each side, sew the side seams on the dress and lining in a single stitch. Stitch the zipper, sew the lining to the zipper tapes (see Fig. 8 and 9). And lining
, then stitch the shoulder seams and the hidden zipper at the back.
In order for the lining
not to be visible at the neckline and in the armholes, it is necessary to trim it by 2-4 mm.
You need to sew the lining
along the zipper (but not very close) with its release approximately 3 - 5 mm.
The next step is to stitch the neck. The dress must be placed down in front of you. Fold the seam for sewing the zipper to the lining and pull it tightly over the zipper. At the same time, retreat 2 - 3 mm from the stopper and sew along the neckline. When sewing along the neckline, leave the material on one side and the lining
and the seam of the strike - on the other. When sewing, you need to get as close to the zipper as possible. You need to iron the neckline, align the shoulder seams and armholes.
Turn the dress inside out through the back seam, where the zipper is located. It should be taken into account that there are two ways to turn a dress inside out: the first way is through unsewn seams, and the second is with unstitched side seams. But in this case, the zipper must be sewn in after the armholes and neckline are finished, or the dress will not turn inside out. This uses the space between the lining and. Then use one seam to sew the side seams, first at the lining, then at the dress itself.
Video on the topic
Helpful advice
When sewing a dress without a zipper, all steps must be performed in the same order, of course, excluding only hemming the lining to the zipper.
Sources:
- dress with lining
If you notice that the zipper on some product (bag, jacket or somewhere else) has begun to come apart, if it has stopped fastening or unfastening, it will have to be replaced.
Instructions
Now go to the sewing shop and pick up a new zipper
. It must match the old one not only, but also in shape. Perhaps there is a different type of zipper - from a different material, more durable, since the old one has begun to disintegrate. Also in the store, check how easy it is to unfasten and fasten, and whether there is any defect on it, such as a bent “dog”.
Now take the product you want to replace the zipper
, and carefully peel off the old one.
At the same time, pay attention to how it was sewn - in the future this will help you sew in a new zipper
.
Now, on the front side of the product, apply a stitching line with chalk or a pencil. Attach the purchased zipper
to the seam so that the zipper teeth are slightly visible.
To make it work, take a bright contrasting thread and baste it. If you already have sufficient sewing experience, then simply take pins and attach the zipper
to the product with their help.
Now start sewing on the zipper
.
It would be more reliable to do this manually. But not everyone is able to sew a zipper
by hand.
If you are not confident in your abilities, then take a sewing machine. In this case, the machine must have a special foot. Sew the garment and zipper
from the front side, starting from the bottom end of the zipper.
Once you finish stitching, make sure that the seam is straight and that the fabric does not bunch up. If there are any defects, then it is best to undo the zipper
and sew it on again.
Once you're done, carefully remove the contrasting color thread or safety pins you used to hold your sewing together.
Remember that sewing in a zipper
, especially small items where delicate work is needed, not everyone can do it, this is quite painstaking work, so if you are not confident in your abilities, then just take the product to any sewing shop, they will do this work in an instant.
Every item should look perfect, and for this it is necessary that it does not deform or become distorted. It is the lining that not only gives
As well as cutting and sewing the neckline and lining.
Before sewing on the lining, the dress must be sewn. Let's look at the main points of working with jacquard fabric. All seams are finished with silk edging, cut on the bias, because jacquard fabric sections are subject to severe fraying, and overlocking looks unsightly.
We cut the lining and facing
The lining pattern is the dress pattern. In this case, a straight skirt pattern is attached to the bodice pattern. We cut out the lining without a seam along the waist line and minus the neck facing. Draw the facing on the pattern (red lines in the drawing). Cut the pattern along the lines. We transfer the dart on the back from the shoulder seam to the neckline. There is a seam in the center of the lining shelf. We close the dart on the central part of the shelf. We received the lining pattern and neck facing patterns.
Attach the facing to the neckline and stitch along the facing. We turn it inside out, roll the seam, and sew the edge. And we baste the facing to the dress. We sew the darts and seams on the skirt or assemble the top of the finished skirt for gathering - it depends on what style of skirt you chose (straight or “tatyanka”).
In this dress, the “Tatyanka” skirt looked ugly, it was then that it was decided to replace it with a straight one.
We do not process the side section into which the zipper will be sewn and do not sew it completely, leaving an unsewn section from the waist line down to the length of the zipper section remaining from the bodice. Attach the skirt to the bodice. We process the cuts with edging.
We sew in a zipper and trim the side sections with piping. The bottom of the zipper can be sewn with braid so that its end does not cling to the lining of the dress
We line the sleeves and sew them into the armholes of the dress. The lining is sewn to the bottom of the sleeve using a machine seam, and to the armhole - by hand.
Sew the lining to the dress
On the lining, we sew all the darts and seams, except the side ones. We process the armholes of the lining with a Moscow seam. How to do this is described in the article Hemming seams on thin fabrics. Sew the lining to the neck facing, matching the shoulder and middle front seams.
Finished cutout. The hem is hemmed with a wide strip of silk called a lining. With this design of the bottom of the dress, its appearance becomes more chic and the lining does not cling to the jacquard weave of the threads of the main fabric.
How to sew a lining by hand and by machine
A lined dress can be made by hand pinning the top and bottom pieces together. Before work, the product made from the main fabric is completely stitched and ironed. The darts are sewn down on the lining cover, the seams are fastened, their allowances are overcast and ironed. Before sewing the dress and the bottom part, you will need to iron the lining to the wrong side, leaving 2 cm up from the hem.
Progress
- Fold the cover over and stitch to the edge, overcast the cuts at the armhole if the model has sleeves.
- Pin the lining to the top, back to back, align along the seams and darts.
- Pin the lining to the facing and make several notches in the seam allowances.
- Fold in the lining and sew using a blind stitch.
If the lined dress has sleeves, the armholes are secured by stitching along the seam allowances at the sides and shoulders. When working on a sewing machine, the lower part is cut off along the neckline and armpit line by 2-4 mm so that it is not noticeable on the finished product. Sew the lining along the line of the zipper, making a release of up to 5 mm.
Progress
- The upper and lower parts of the product are folded “face to face” and the seams in the shoulders are sewn down.
- Insert a secret lock if provided by the model.
- Sew down the neckline - place the product with the lining down, fold the seam for the fastener and pull it tightly (the main fabric will “go” on one side, and the lining with the seam will go on the other).
- Iron the neckline, align the seams in the shoulders, sew armholes.
- Turn the product inside out through the seam with the fastener - either over the shoulders or along the open seams on the sides (before sewing in the zipper).
- First, secure the sides of the lining with a single seam, and then the product itself.
Many people have something in their wardrobe that cannot be worn without a lining, but (for unknown reasons) it was not provided for during the creation process. You can, of course, take the item to a workshop for modification or try to fix it yourself. But something is always missing - time, money, enthusiasm, finally. What if there are several such things? So will they hang in the locker until better times? I offer a solution - a universal lining dress that can be worn under everything! It is easy to sew, the fabric consumption is minimal, and it looks wonderful.
For work we
will need:
the front part of the finished basic dress pattern and, of course, fabric and sewing supplies.
The basic pattern can be constructed using our advice “Constructing a basic pattern”
On the pattern, we transfer the chest darts to the chest line, and the waist darts are partially transferred to the side lines. Do not be afraid that the dress will not fit your size - due to the bias cut, it will fit perfectly on your figure. We copy the resulting part (photo 1).
Using the “original” we model the neckline. On the “copy” we draw the line of the chest and the line of the middle of the back, and cut the pattern along them.
The part below the chest line is the back we need. To make it more convenient to cut later, we glue all the parts of the pattern into a whole “dress”.
At an angle of 45 degrees relative to the middle of the back, draw a line for the back cutout.
We position the pattern so that the cutouts on the back halves are parallel to the edges of the fabric, but do not reach them.
If your fabric cut length is too short, then part of the back on one side will protrude. Feel free to cut off the corner that does not fit and secure the pattern with pins. We wrap the back parts onto the front part and make a notch at the point of their connection along the lower edge on the left half.
We unfold it again and from the notch, parallel to the edge of the fabric, draw a line along which we will cut out the dress part.
On all sides of the pattern, add a centimeter to the seam allowances and cut it out.
Mark the location of the darts on the fabric. From the waist, measure the required length, add 1 cm for processing the bottom.
From the remaining fabric we make bias tapes for finishing the armholes, neckline and back décolleté.
We cut strips 4 cm wide along the bias, fold each in half and iron the fold.
We sew darts on the dress and iron them down.
We sew the back and side seams together or secure them with pins.
And we perform a “French seam”.
To do this, fold the parts with the wrong sides inward and sew them with a straight stitch. We cut off the allowances at a distance of 2-3 mm. from the line.
We turn the parts inside out and sew at a distance of 4-5 mm. from the edge. The cut remains inside the seam.
This is what the seam should look like from the front side.
Next we process the armholes with bias tapes.
Then we measure the binding equal to the length of the neckline + armhole neckline + the length of two straps. We start stitching from the “corner” of the back: the right half of the back neckline (leaving the trim along the length of the strap unstitched), the neckline (leaving the strap), the left half of the back.
We wrap the straps evenly on both sides with the raw edges inward and sew close to the edge.
We turn the bottom of the product by 7-8 mm. and run a zigzag stitch along the edge of the fold. We cut off the excess fabric as close to the stitching as possible, and fold it in another 2 mm. and we zigzag around the second circle. The result will be a slightly wavy bottom.
The lining dress is ready. If desired, we decorate with “bows-beads” and wear them with pleasure.
How to sew a lining dress at a minimum cost
Dress lining. Back view
Dress lining. Back view
Author of the material: La Linea
How to work with lining in a sleeveless dress
A lined dress is often modeled sleeveless. To accurately connect the elements, you need to prepare them separately. Make allowances and carry out wet-heat treatment. Before sewing the lining to a sleeveless dress, sew the darts or make a relief, attach a zipper, sew the armhole, leaving about 3 centimeters short of the shoulder seams. You can also finish the stitching directly on the line. True, this is not convenient for everyone, so it is permissible not to cover small fragments.
Progress
- It is necessary to trim the seam allowances on the dress and turn the elements to the face.
- Sew the seams on the sides on the top and lining using a common stitch.
- The seams are processed with an overlocker and ironed - it is worth using a special backing for ironing.
- Pull the seams at the shoulders towards you, placing your hand between the top and the lining on the wrong side (you can pin the pieces in advance with pins, right sides facing each other).
- Stitch and iron the shoulders at the top and bottom of the product.
- Close the unstitched areas on the neckline and armholes, slightly pulling the parts towards you for convenience.
LiveInternetLiveInternet
—Categories
- Knitting (146)
- Knitting (25)
- Border, binding (22)
- Crochet (19)
- Magazines and books on knitting (7)
- Car (3)
- Sewing (72)
- clothing for women (25)
- processing of individual clothing units (6)
- underwear (4)
- men's clothing (3)
- children's clothing (2)
- hats (1)
- Cooking (10)
- Jewelry (6)
-Music
—unknown
—Search by diary
—Subscription by e-mail
—Interests
— Regular readers
—Communities
-Statistics
PROCESSING THE DRESS BODY WITH LINING
Sewing. Processing the bodice of the dress with lining. MK from Arvovna
There are several different ways of finishing a bodice with a lining, I tried them all and came to the conclusion that the best treatment is with open side seams.
Today I want to show some aspects of this processing. It is convenient when there is a zipper in the middle back seam, i.e. At the time of joining the lining to the bodice, this seam has not yet been stitched. After fitting, all darts and seams on the back and front parts and on the lining parts are processed. The front and back parts are connected at the shoulder seams (the same with the lining), the seams are pressed. The lining is connected to the top first along the neckline, the seam allowance is notched as usual and secured with a machine stitch on the lining side at a distance of 1mm from the seam.
After this, it is convenient to trim the excess lining that has formed along the armholes, and then connect the top with the lining along the armholes (photo 1, 2).
Next, we drag the back parts into the formed “tunnels” on the shoulders (photo 3-5).
We iron the armholes and neckline of the inverted bodice (photo 6).
After ironing, it is convenient to lay the bodice flat on the table and trim the excess lining again, aligning it with the top (photo 7).
Now you can sew the side seams of the lining and top, doing them in one line. We sew the skirt to the bodice, and then sew in the zipper. If the dress does not have a seam bodice, it is convenient to first sew the zipper into the middle back seam, and then connect the side seams. I use the same method to line the vest.
I “spied” this method a long time ago on a finished expensive dress that was brought to me to be sewn in the side seams, and I discovered that the side seams of the top and lining are connected with a single line, which, by the way, is convenient at such moments: sew in or, conversely, , release from the seam, there is no need to flog and redo the lower part of the armhole. Since then, when there is a middle back seam, this is the only way I do it. And the connection at the shoulder seams is really “troublesome”, because... all flaws, if they happen, will be visible, and the shoulder seam itself is very short and uncomfortable in this regard. Many people still suffer and connect through the shoulder seams, although this method also has a place, because the product does not always have a middle seam on the back or shelf, and the method I proposed is acceptable only in this case.
You can sew the zipper up to the side seams, so it’s more convenient to then adjust the volume to the side seams, but then we sew the back skirt to the back, and the front skirt to the front to the side seams, and not the whole skirt to the finished bodice, this is an option for a cut-off waist.
I always adjust the seam allowances for some facing seams, the neckline, and the armhole at a distance of 1 mm from the seam on the front side (along the armhole, usually as far as the machine allows to “climb” into the shoulder seam, I adjust it to that point), then when turning it inside out, the seam immediately falls, forming the desired edge, and sometimes you can even do without basting the edge and iron it straight away
Types of linings
Before turning to dark forces, carefully study what kind of linings there are, what they are aimed at and what is the peculiarity of each ritual. After all, any mistake is fraught with serious consequences for you too.
Can be roughly divided into 4 groups:
- Vampiric: the attribute sucks strength and energy from a person who has been damaged.
- Protective: Protects home, relationships, or finances from intrusion by others.
- Love: helps to bewitch a man or return him to the family.
- A lining for death.
Kinds:
- Explicit linings - objects remain in plain sight or in a place where a person can definitely find them. Usually this is the threshold of an apartment, a room inside it, or personal belongings.
- Secret linings are hidden in a place inconspicuous to the victim: in the wallpaper, under the baseboard or in other small holes. This also includes enchanted inscriptions and drawings. Usually the effect stops as soon as the enchanted object is disposed of.
Don't forget that you can say almost anything. From the usual attributes such as a needle, to food, drinks or cigarettes.
Processing the bodice of the dress with lining
In evening, elegant and wedding clothes, the boat neckline is very common. It is a graceful neckline with very narrow shoulder seams. How to line the bodice of such a dress?
Let's look at the example of a fitted dress with a boat neckline, model 108 B from Burda 5/2011. Very narrow shoulder seams - from 1 to 3 cm.
If the dress is made of silk, pay attention to one feature - if you cut out the parts along the lobar, then in narrow models and under load the seams may diverge, and a vacuum of fabric appears in them.
How to avoid this?
- for tight-fitting models it is better to take silk with elastane;
- It is better to cut silk without elastane along the longitudinal, but along the transverse. Only in this case, all cutting details need to be done along the transverse!
- If the silk is cut along the grain, then it is better to glue all the seams with thin strips of glue before stitching. It will protect the seams from thinning.
Cut out the details of the dress bodice and lining with the same allowances.
On the details of the dress, strengthen the necklines and armholes with strips of thin glue so that they overlap the seam markings by a couple of millimeters. This will prevent them from stretching. There are special thin adhesives for silk and chiffon. The thinner the fabric, the thinner the adhesive should be. If strips of adhesive in a thin fabric appear from the face, then it is better to lay a straight line along the seam allowances. It will also keep the edges of the neckline and armholes from stretching. The stitch is placed along the seam allowance next to the seam marking, so that it then goes into the seam for attaching the lining.
Sew the bodice pieces and the lining pieces separately. Iron the bodice allowances. Iron the lining seam allowances together. Do not overcast seam allowances. In a dress made of thin silk, it is better to sew the bodice details with a French seam; it is more durable and has closed edges. How to do this is shown in detail in the master class “How to process seams and darts in thin and transparent fabrics.”
Do not sew down the shoulders at either the lining or the bodice!
Trim the armholes and neckline of the lining by 2-3 mm. But this operation makes sense only if the details of the lining and top are absolutely identical. If this is not the case, then before trimming you need to align (align) the lining parts with the details of the dress bodice. This operation reduces the lining along the contour, and in the sock it will not peek out in the armholes and along the neckline.
How to make a lining at home
All rituals of both black and white magic require preparation and strict adherence to instructions. But you can charge an item for one action or another without leaving home, the main thing is to prepare the necessary paraphernalia.
Three conditions that must be strictly observed:
- All rituals are carried out in a calm environment, where no one and nothing can distract you.
- No one should know about what has been done except you.
- If you use a photograph during a spell, it should only contain the object, and the photograph itself should be of good quality.
For the love of a man
A spell for a man’s love will awaken his attention and passion or help him return to the family. Make sure that you have a red candle, a photo of the object of desire and a chargeable item on hand: it can be something small or, on the contrary, a thing that you will give him.
The ritual should be performed on the waxing moon, preferably in the first quarter. This period is aimed at increasing and increasing something, in our case – feelings. Place a candle on an empty table and place a photo of your loved one in the center. The attribute to be enchanted should be located at the top of the image. Light a candle and begin to visualize your man and your future together in as much detail as possible, then read the plot:
“Just as I fell in love with you (name), shared my feelings with you, so you will fall in love with me and be united by fate with my life. Let it be so".
The thing on which you performed an energy ritual must be given to the chosen one as quickly as possible: presented as a present or quietly thrown somewhere where he will not see the lining for as long as possible.
For quarrels and discord in the family
It happens that someone else’s spouse becomes a real lust, without which it is impossible to live and breathe. When you want to destroy someone else's relationship and get the man who is in it, you need to know how to properly deal with discord in the family.
For the black magic ritual you need:
- Photo of one of the spouses
- Black threads, preferably silk
- Pincushion
- 7 identical needles
- 3 red church candles
Place the photograph on the pad and stick needles around it symmetrically. Stretch the threads so that you get five-pointed stars. Already at this moment you need to concentrate and imagine yourself together with your loved one.
Use the first candle to lightly water the photograph, and burn the threads with the second. The third you need to hide or bury in the soil along with the photograph. The remaining pillow from the ritual must be burned the next morning.
To the death of the enemy
If you want to wipe someone off the face of the earth without literally getting your hands dirty, you will need the help of dark forces. It is worth remembering that such rituals are some of the strongest, they will harm you too, and you are unlikely to be able to correct what you have done.
Shots of this type can be instantaneous or delayed.
The most affordable and easy-to-make lining is on a needle. Making it is not difficult and will take a minimum of time. For the ritual you need a gypsy needle (it differs from the usual one in length and thickness of the eye). Say the spell:
“In the Name and Power of Asmodeus the Warrior-Destroyer! I shoot this arrow into the heart of the damned (name), may it fly faster than lightning, may it strike stronger than heavenly thunder, may it strike him/her, may it crush and condemn him to a fierce death. My spell is stronger than damask steel, stronger than the storm. No one can get off! Cursed!
Wrap the item charged to death in a small piece of paper and throw it under the enemy’s door.
For human illness
If you want to take revenge on a person who is unpleasant to you, not so radically, but at the same time in a tangible way, you can talk about the subject so that the person gets sick.
The easiest way to protect against the disease is through soil, garbage or salt. Charge the selected material with a spell:
“Dirty laundry in public, dirty laundry in health. I sweep, I sweep, I slander (type of illness). The heart beats, but not always, and is about to stop. The right time will come, the disease will call. Dirty dirty laundry (a type of illness) in the heart.”
The need for a lining for a dress
In what cases will we sew a dress with lining:
- If the fabric is loose, transparent, mesh.
- If you are planning a white dress.
- Guipure and lace necessarily require at least a partial cover.
- A cover is necessary if the main product has a complex cut with a large number of seams so that they do not rub the body.
- Natural breathable, hygroscopic, hypoallergenic lining fabrics will make life easier for people with sensitive skin and allergy sufferers.
- For girls with excessive sweating, a dress with a lining will cause less trouble.
- After all, a luxury finish requires the products to have a lining.
Rules for working with lining
There are two ways to make the lining:
- All sections are covered with it; there are no separate edgings or facings from the fabric of the main dress.
- One-piece edgings and facings are cut out from the main fabric. The lining fabric is then sewn onto them, often by hand.
It is better to use soft, slippery fabric for the lining, then the dress will be more comfortable to wear.
It is important to pre-decorate the fabric so that it does not wrinkle or shrink during wear. Only after this they begin cutting.
Raglan modeling
If you have a raglan sleeve, but for the lining we need a regular sleeve, then we perform the following operations:
- Along the shoulder seam we set aside the length of the shoulder and mark it on the pattern.
- On the sleeve pattern, place a notch in the middle of the dart, then extend the cut to the very bottom of the sleeve.
- We glue or pin the patterns of the back, as well as the shelves, to the sleeve pattern along the armhole from the very neck to the beginning of the rounding.
- We draw the contours of the new armhole.
- Cut out the pattern.
- Cut out the lining.
Advice! Before making the cover, make sure that the main dress is almost ready and iron it.
Sew the lining by hand:
- When cutting the cover, we minimized darts, as well as features of a complex cut, but if darts remain, sew them.
- We sew the lining parts together with machine stitching.
- We process all the allowances with an overlock stitch, or with a frequent zigzag stitch on a sewing machine.
- Iron the lining.
- Iron the seams and fold the lining.
- We process all cuts.
- We cut together the lining parts with the main dress.
- Make sure that all the main seams match, paying special attention to the armholes and neckline.
- We hide the allowances on the wrong side.
- We sew it with a blind seam by hand, paying attention to the fastener, if there is one.
Advice! If the dress has sleeves, then connect the lining sleeves in several places around the armhole, side and shoulder seams, and at the bottom of the sleeve.
Stages of work on how to sew a lining to a dress
Processing of the neckline, armholes and fasteners of a sleeveless dress.
We begin working with the cover at the stage when all that remains to be done on the main dress is the neckline and clasp.
Working with the lining:
- We do all the seams and darts.
- We process all the cuts and iron them.
- We bend the hem and stitch it.
- We sew the armholes.
- We connect the main dress with the cover face to face, matching the seams along the shoulders with the side ones.
- We process the zipper by sewing it between the lining fabric and the main fabric. To do this, turn the fabric of the cover inside out, pin the zipper to the fastener line, as well as to the neck.
- Baste, then sew the zipper into the seam, see picture.
- Fold the upper ends of the zipper so that they are between the layers of fabric.
To fix the neckline and armholes of a sleeveless dress, we simply use the lining as a large facing, processing them simultaneously on the main fabric and on the cover.
In this case, it is better to leave the shoulders and sides unsewn so that we can easily turn the resulting product inside out. Processing the neckline and armholes simultaneously with the cover:
- We fold the blanks for the shelves and backs with those made from lining fabric and pin them together.
- Turn back the seam allowances.
- We sew the parts together in pairs along the armhole and neckline, leaving shoulder and side seams.
- Turn it inside out.
- We chop and then sew the front to the back along the shoulder seam.
- We sew the main parts along the shoulder seams, then the lining.
- We perform the side seams in the same way.
- We sew in a zipper, similar to the previous description. See the picture.
A dress cover performs many functions, one of which is to give confidence to its owner, since such an outfit will not rise when walking and will not puff up.
We cut out the details and sew the dress
After the patterns are ready, we cut out the parts from the main fabric with allowances of 1 cm on each edge. An allowance of 0.5 cm along the neckline will be sufficient. We cut the lining fabrics in the same way. Now you can start sewing the dress:
We have prepared for you a detailed video course “Sewing Basics”
Get it now for free!
get a course
- Place the back piece face up on the table.
- We attach the shelf to it so that the parts are positioned with their front sides facing each other.
- We connect the shoulder sections with pins and sew them together with a margin of 1 cm from the edge.
- If you are sewing a product with a lining, then the sections can be left without stitching. Otherwise, they should be basted.
- Now take the lining and repeat steps 1–3.
- Place the stitched piece face up on the table. We place the lining blank on top, face down. We connect the neck sections of both parts, as well as the shoulder seams (it is advisable to iron the sections first).
- We stitch around the neckline in a circular manner with an indentation of 0.5 cm.
- In the places of cuts with the greatest roundness, it is necessary to make cuts, not reaching 1–2 mm from the seam.
- We turn the workpiece inside out and straighten the corners, seams, etc. Direct all cuts along the neck towards the lining. After this, you need to stitch along the front side of the lining, 1–2 mm away from the seam.
- We sew the side sections, matching the side seams of the front and lining fabrics separately. To do this, we fasten them with pins, and then grind them down by 1 cm.
- Take the sleeve blank. Fold it in half, face inward, aligning the cuts. We secure the sections with pins, after which we lay a line with an indent of 1 cm from the edge. The sleeve will not be lined, so the sections need to be sewn with a zigzag or overlock. We also overcast the cut of the bottom of the sleeve, after which we bend it 1 cm inside out and add a stitch.
- We turn the main part (bodice) inside out and the sleeve right side out. Next, we put the sleeve into the armhole, connecting the side and elbow seams, the cut of the armhole and the sleeve cap.
We sew a circular stitch, departing 1 cm from the edge without overcasting the edges. Please note that we sew the sleeve only to the main fabric. - We connect the sleeve with the lining. This must be done in such a way that the stitching sections are on the inside. To do this, turn the product inside out and direct the sleeve sections upward. Fold the lining inside out 1 cm and place it on the cuts.
Next, from the reverse side, you should grab all the sections together. We bring the side seams together and then secure them with pins.
Similarly, we correct the armhole sections of the main fabric and the lining, connecting them in a circle, securing them with pins. As a result, the sleeve should be located between two armholes. We stitch in a circle strictly along the previously laid seam. - We sew in the second sleeve in the same way.
- Let's move on to the skirt part. Let's look at sewing a half-sun skirt. The pattern can also be used from a magazine. At this stage, you need to determine the desired length of the skirt, which will consist of two parts: the front and back halves. We cut them out from the main and lining fabric. The lining can be made 1–2 cm shorter than the main skirt. This is necessary so that the lining is invisible and does not peek out.
- Place the main fabric pieces face to face. We fasten them with pins and stitch them at a distance of 1 cm from the edge. After this, you need to sweep the cuts. The same should be done with the lining details. We overcast the bottom section of the main skirt, bend it inward by 0.5 cm and stitch it. The bottom of the lining can simply be overcast (without hemming).
- Turn the skirt inside out. Now you need to put the top of the dress into the skirt. Before this, we pin the waist sections of the bodice with pins so that the wrong side does not move relative to the front fabric. You can also give an auxiliary stitch in the round. We put the upper part of the dress into the skirt and connect the sections with pins.
- Attach the lining. To do this, turn the dress and skirt lining inside out. After this we put the bodice into the skirt. Next, we connect the side seams and sew a circular stitch.
The dress is ready. It has an aesthetic appearance on both the front and back sides. All seams are hidden inside, so these clothes will be as comfortable to wear as possible.
What do you need for work?
To sew such a dress, we will need:
- Product pattern. You can use a ready-made pattern from a magazine as a basis.
- Tracing paper for translating patterns.
- A simple pencil for drawing lines.
- Stationery scissors for cutting paper.
- Tailor's scissors for cutting fabric.
- Main fabric. It is advisable to take elastic and light fabric that drapes well and does not wrinkle.
- Lining fabric. It is best to use natural cotton fabric (chintz, cambric, calico, viscose).
- Polyester thread for sewing cuts. If this work is performed on an overlocker, then three spools will be needed. To stitch the sections you will need a reinforced thread.
- Tailor's chalk, pins, measuring tape.
Preparing for work
Our product will consist of four parts:
- Shelf.
- Back.
- Sleeve.
- Skirt.
Before sewing the product, you should transfer the magazine pattern onto tracing paper. To do this, place a sheet of tracing paper on a drawing from a magazine and outline the part. Please note that in some magazines models are given without allowances, and therefore you will have to add a centimeter on each side of the pattern.