All knitters of amigurumi toys know that designing the faces of knitted dolls is a very important stage. The whole appearance of the finished doll will depend on how you design the face.
Many people resort to ready-made purchased eyes or faces. There are also those who prefer to design completely independently. It can be a completely embroidered face or made from scrap materials, here everyone decides for themselves. The main thing is to convey exactly the facial expression that you want.
In this article I have collected the most useful ideas and examples for designing doll faces. I hope the information will be useful to you. You can also add your lessons and MKs in the comments.
Painted face
In order to design our face like this, we will need:
- White cotton fabric.
- PVA glue.
- Acrylic paints, brushes.
- Fabric markers.
- Pastel.
- Glue moment "Crystal".
We are preparing white cotton fabric. We will draw eyes and lips on it. First of all, apply a layer of PVA glue, let it dry, I speed up this process with a hairdryer))
And using the template, we draw eyes and lips. The idea to draw on fabric was taken from the Internet
In order for us to understand what size template we need, we need to attach the head to the monitor and enlarge it to the desired size, print it or trace it with a pencil from the same monitor))
Next, cut out the inside of the eyes, mouth, nose and eyebrows. Why everything? Then I’ll explain why.
In the meantime, we apply our template to the fabric and redraw the eyes and mouth with a simple pencil.
We decorate with acrylic paints and felt-tip pens to your taste.
Cut it out. Thus, our paint is firmly glued to the base and the fabric does not crumble.
All that remains is to glue them in place. ))
How to do it? This is where we need a template with cut out eyes, eyebrows, etc.
Thanks to the template, we put everything in place))
We fix and glue the “Crystal” moment with glue. We also draw the eyebrows and nose using a felt-tip pen according to the template, thereby marking their correct location.
Everything was glued symmetrically thanks to the template……. and this is what we got.
Next, all that remains is to tint the face. I used dry pastels and fabric markers.
Embroider the nose.
And glue the eyelashes.
That's all, our face is ready)))
Eye Drawing Ideas and Patterns
Useful tips
Embroidery seems like a very simple type of handmade work, but even here there are some nuances. If you know a few useful techniques, then even a simple satin stitch will become a real work of art.
Embroidered eyes for a doll may not turn out to be very attractive if you don’t know a few secrets:
- It is imperative to adhere to the step-by-step algorithm of actions during the manufacturing process of the part.
- To give details more naturalness, neretin is often used in work.
- To create volume without using fillers, you can embroider on felt, and then cut out the part and sew it in the right place.
Operating procedure
Important! To make the details look harmonious, it is recommended to accurately calculate the proportions.
Even the most ordinary bunny will look beautiful and original if the accessories are made carefully and attractively.
Making eyes for a doll
The site has a very detailed article on ideas for creating eyes for toys with your own hands . In it I collected all the popular ideas from the Internet for creating peepholes.
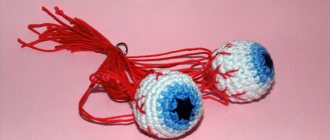
Knitted eyes
We knit floss threads in two folds, hook No. 0.75, starting with black. If you are knitting a doll with yarn of a different yardage, you need to be guided by the size of the head. My head circumference is around 20-25 rows (excluding hair) - 18 cm, eye width - 1.5 cm. To calculate your eye size, multiply your resulting head circumference in cm by 1.5 cm and divide by 18 cm (eye width = (OGwash x 1.5)/18). Select the number of floss threads and hook to obtain the eye size you need.
1st row: 6 sc in amigurumi ring (6) 2nd row: inc x 6 (12) 3rd row: (inc, sc) x 6 (18)
We change the thread to green and knit a ss behind the back half-loop of the first column of the next row, then we knit for both half-loops in the same column:
Row 4: (2 sc, inc) x 6 (24) Row 5: (sc, inc, 2 sc) x 6 (30)
We change the thread to white and knit a ss behind the back half-loop of the first column of the next row, then we knit for both half-loops in the same column:
for left eye:
6th row: 4 sbn, inc, 4 sbn, 10 sbn behind the back wall, 4 sbn, inc, 6 sbn behind the back wall (32) 7th row: ss, ch, 4 sbn, ss for the right eye: 6th row: 3 sbn , inc, 6 ss behind the back wall, inc, 4 sbn, 10 ss behind the back wall, 5 sbn (32) Row 7: ss, 4 sbn, ch, ss
We cut the thread, leaving a small end for sewing. Using the same thread we embroider highlights on the pupils.
You will need: 2.5 hook and cotton thread
Row 1: black 5 sc in ring (5)
Row 2: brown: 2 sc in each loop in a circle (10 loops)
Row 3: Sc around (10)
White color 4th row: [2 sc in the first loop, sc in the next loop] in a circle (15)
Round 5: Sc in circle (15)
Flesh color Row 6: sc in circle (15)
Row 7: Work in outside sts only Half double crochet in next stitch (corner 1) Sc in next 14 sts, half double crochet in next st Fasten off.
Embroider the eye pupil lines and highlights to make them more real.
Embroidered eyes
Such eyes are embroidered with thread on fabric using a hoop or other embroidery device. The author of the idea shows the embroidery technique using the example of eyes for a chicken. Using this method you can embroider any eye shape, the main thing is to draw the sketch you need.
- Make two sketches on paper, cut out the first and try on the toy.
- If the size suits you, then copy from the template onto white fabric:
- We embroider with satin stitch in 3 threads in green, as shown in the figure:
- In 3 black threads we embroider the pupils with small stitches, leaving 2 small round highlights unembroidered:
- Using 2 black threads, we sew the outline of the black pupil with small stitches. The pupil will appear smoother:
- Using 3 black threads, we embroider eyelashes with small stitches, and then using 2 black threads, sew them along the contour:
- Using 2 white threads we embroider highlights on the pupils, the eyes began to seem more alive:
- Using 3 gray threads, we embroider small stitches along the sides and bottom:
- Now you need to cut out the eyes, but before doing this, coat the edges with transparent glue on the wrong side of the embroidery, otherwise, when cutting, the edges of the embroidery will begin to unravel:
- Where the embroidery is black, if the white fabric peeks out a little, carefully go along the edges with a black marker
- Glue the finished eyes to the toy with transparent glue:
Embroider eyes on the doll's head
Eyelashes for your future doll can be created in any way you like, for example, embroidered, glued artificial eyelashes that girls use, or made from scrap materials. Below are some examples of creating eyelashes for a doll.
Ready eyelashes
You can purchase such eyelashes in a specialized store. They are made specifically for artificial fiber toys.
Eyelashes made of threads
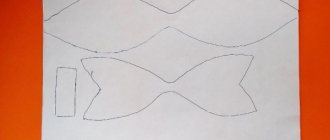
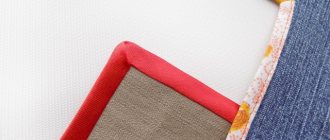
Eyelashes from a box of chocolates
Look at the photo and you will see what you will need for the job. Consider packaging molds for candies and choose symmetrical, matching designs for eyelashes. Feel free to cut out what you need.
We need to cut out those areas from the packaging molds that best suit our idea.
I used two types of packaging: gold and brown. The most important thing in this work is to very carefully make cuts along the grooves so that the eyelashes turn out beautiful. Arm yourself with sharp, straight nail scissors and get to work.
In the photo you can see the eyes I prepared for the toy as a sample. I made them from white fleece. You need to cut a circle out of fleece, tie it with a strong thread in several folds and fill it with padding polyester. Sew on a button (in my version) or install a ready-made eye. Cut out an eyelid from fleece. The eyelid is glued or sutured to the eye blank.
In this way you can create any eyelash shape you need.
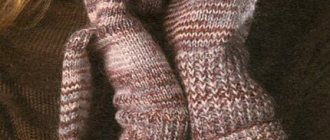
Eyelashes made from tress or long wool
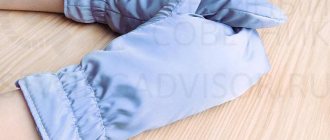
In several photos I will show you how to make eyelashes for a doll. You will need tress or curls on the skin. I usually make hair from wool on the skin: I carefully cut it in strands, coat the edge with “Moment Crystal” glue. I do the same with tress. After drying, I cut it off, trimming the edge of the curl.
We cut the cut to the desired length of the eyelashes and along the length of the upper eyelid (we estimate the length by eye). Glue the finished eyelashes to the doll's eyelid.
Eyelashes that are stuck together and have a light adhesive coating - we will fix them. Using watercolor paint of the color you want, tint the eyelashes on both sides.
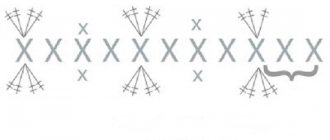
Eyelashes made of nylon tape
1. Take black nylon tape. Here I have it 2 cm wide. For large dolls it is better to take a wider one. We cut it along approximately slightly longer than the length of the eyelid (eye).
2. We begin to remove the longitudinal threads with a needle along the cut edge, and the transverse ones will form the future hairs of our eyelashes.
3. Remove all longitudinal threads to the edge.
We do the same with the edge of the tape opposite. We cut the required length of the eyelashes and glue the edges onto transparent glue using a toothpick (more convenient). And then you can create any length and shape of eyelashes by trimming them. You can twist it using hairspray or PVA, but you need to make sure that the PVA does not stick together.
Step-by-step instruction
Before you start working, you need to decide which embroidery technique will be used. There are several options that are used most often, but the most popular is considered to be satin stitch.
Eye embroidery can be done using the following set of tools and materials:
- Embroidery threads. Usually silk or floss are used.
- A needle of a suitable diameter and sharp scissors.
- Marker or pencil for creating a sketch and marking the location.
- Safety pins and pieces of felt may come in handy.
Embroidery algorithm
Please note ! If you combine satin stitch embroidery and felt with filler, you will get voluminous eyes.
First you need to decide on the shape and size of the eye. For a doll, you should choose more complex options. It is advisable to develop a design with a large eye shape, iris and pupil. This will be the most suitable type of embroidery. In accordance with the same model, a version for cats is being developed.
If you choose the appropriate type of eyes for animals, namely a bunny, a bear or a pig, then you can apply embroidery using a French knot. To do this, you need to remove the needle at the place where the eye is formed, entangling the thread at the base, and insert the tool near the exit point. You will get a noticeable “dot”. The same option is suitable for different tilde toys.
How to embroider eyes on a knitted toy:
- On the muzzle/face, you must first mark the points where the toy’s eyes will be located.
- Using a marker, draw the outlines of the future product. To ensure that the sketches turn out identical, it is better to use a template.
- Using white thread, embroider the base using the satin stitch technique. It is worth stitching the element along the contour with black thread.
- The iris is then formed on the prepared base. You can choose any color.
- A black pupil is already embroidered on the iris itself.
Drawing eyes
If you repeat the master class exactly, you will get a wonderful version of the eye with the most natural contours and shape.
Drawing instead of embroidery
In addition to embroidery, you can use the painting technique, that is, the eyes are painted with special textile paints. If the toy is made using the knitting technique, then the procedure is as follows:
- Prepare a white cloth that will become the base. It is advisable to wash and iron the base.
- Draw a sketch for the base first with a pencil. A basic base is being formed, which can be adjusted at this stage.
- Using a brush, paint the eye, forming the iris and pupil. First, white paint is applied, then the color of the iris and the black pupil.
Useful tips
The threads for embroidering the eyes of a knitted doll must be strong. You can buy a set of floss or lint-free woolen threads with the addition of synthetic fibers. It will be easier to embroider if the thread can be easily pulled through the knitted layer.
All knitters of amigurumi toys know that designing the faces of knitted dolls is a very important stage. The whole appearance of the finished doll will depend on how you design the face.
Many people resort to ready-made purchased eyes or faces. There are also those who prefer to design completely independently. It can be a completely embroidered face or made from scrap materials, here everyone decides for themselves. The main thing is to convey exactly the facial expression that you want.
In this article I have collected the most useful ideas and examples for designing doll faces. I hope the information will be useful to you. You can also add your lessons and MKs in the comments.