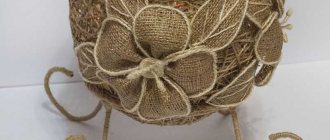
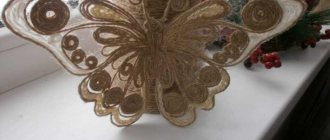
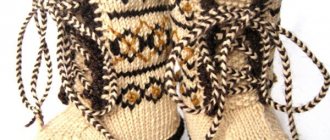
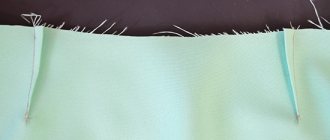
A cute, flirty decoration familiar from childhood is a bow. Templates for bows, photos of which you will see in this collection, will help you create a universal decor. Bows can be made from different materials: fabric and ribbons, foil and paper, leather and felt, plain or shiny foamiran. And you can decorate with them a dress, a room, elastic bands or headbands, a postcard or gift wrapping, a photo frame or a toy, but a bow tie needs no introduction. You will find a template for a bow made of foamiran, felt, leather or fabric in this collection.
How to make a bow template from foamiran with your own hands
A template for a foamiran bow is a kind of blank that can be used many times. To make the template last a long time, it is best to use cardboard.
To make templates, you can use either cardboard or plain paper.
Making a template is quite simple:
- Draw a bow of the desired size and design on cardboard and cut it out. You need to cut exactly along the lines, since the finished foamiran bow will exactly repeat the edging of the template.
- Place the cut out cardboard bow on a sheet of foamiran and trace it with a pencil or pen.
- Cut the bow along the contour of the foamiran sheet.
This is how a single bow is made. To make the bow voluminous, the cardboard template must be longer so that the cut foamiran blank can be folded in the desired direction.
How to work with a template
Most often, making bows requires a template. This is a kind of pattern for the shape of the bow, according to which it is cut out. You can draw a template yourself, but it is difficult to achieve symmetry and a beautiful shape. Therefore, it is better to use ready-made patterns.
The easiest way to get such a template is to print it on a printer. But this is not always possible. Then you should use tracing paper. It is applied to the monitor screen and carefully traced with a marker or soft pencil. The resulting stencil must be transferred to cardboard; such a template is reusable.
You can transfer the stencil onto foamiran with a pencil or a pen that no longer writes. It is not recommended to use crayons, felt-tip pens or markers for this, since the material absorbs coloring pigments well, this can ruin the finished product. You can even use a toothpick to transfer the stencil onto soft foamiran.
Peony
Rose
Simple foamiran bows: master class, simple and quick
The steps are very simple: fold a large strip in the shape of a bow with both ends towards the center of the strip and secure with glue. When the glue sets, make a double fold in the center of the workpiece and glue them together. Place a small strip of foamiran over the folds and glue its ends overlapping.
In order to make a simple bow, you need to prepare foamiran in the form of a strip in advance
To make a simple bow from foamiran you need to prepare:
- A strip of foamiran of any color measuring 15 cm in length and 4 cm in width;
- A strip of foamiran of the same or contrasting color measuring 4 cm in length and 2 cm in width;
- Quick-drying universal adhesive;
- A pearl, rhinestone or bead for decorating the finished bow.
The bow is almost ready, all that remains is to glue on a bead or any decorative item to give the bow some zest and a touch of elegance.
Master class on making a bow with ears
Making an elegant elastic band or hairpin for girls from foamiran is not difficult. This material is perfect for creating original bows with a fashionable detail - cute ears. You can make a combined product with grosgrain ribbon up to 5 cm wide or use shiny foamiran in several colors.
To assemble the bow you will need 2 base parts: wide (10x4 cm), narrow (8x2 cm), as well as 4 elements for the ears. Shades are selected individually. Ears are usually made with pink inner styling and a brighter background. Ordinary silk foamiran will make stylish children's bows for every day.
The operating procedure will be as follows.
- Cut blanks for ears from foamiran, similar to those of a hare or cat . You will need 2 large parts (50x15 mm) and 2 small ones (33x8 mm).
- Make a pattern for the base . A flat back, with forked ends and a voluminous one for the bow itself. The difference in the width of the blanks should be about 1 cm.
- Glue the parts of the ears together - the smaller one to the larger one, with the decor facing forward.
- Assemble the bow by bringing its ends together in the center of the workpiece. Glue by placing ears between these elements. It is important not to use too much compound so that the material remains soft and elastic.
- In the center, glue a jumper or a fluffy pompom , similar to a hare's tail.
- Attach the product to the base. If desired, attach additional decor.
If the base is made from rep tape, it is assembled with thread or glue from 2 volumetric parts. In this case, a rounded piece of foamiran is cut down, hiding the connecting seam. A jumper is attached to this place for the convenience of fixing the bow on a hairpin or other base.
Shiny bows
The following products can be used not only as hairpins, but also as additional decoration, for example, to a hoop. The work will require the following materials and tools:
- glitter foamiran;
- templates; Cutting template
- a pen without ink or a toothpick;
- scissors;
- hot glue.
And now we offer the instruction itself, which will tell you how to make a hair clip with your own hands:
- Choose any color of foamiran. We turn it over and apply the suggested templates. We trace with a pen, but it is better to use a toothpick. We cut out the blanks.
- Take a piece with rounded sides. Turn the back side towards you. Apply hot glue along the edges. Apply the edges to src=”https://i1.wp.com/megamaster.info/wp-content/uploads/2019/08/blestjashhie-bantiki-shag-2.jpg” class=”aligncenter” width=”1024″ height=”680″[/img]
- Add a drop of glue to the joint. We glue this blank to the center of the part that looks like a bow. With the remaining piece in the form of a strip, we wrap the bow in the center. Glue everything with glue. We cut off the excess ends.
The work can be considered completed; we glue the fastener to the bottom of the bow.
We have prepared many interesting ideas for other crafts for you.
Lovely flowers from foamiran
Let's look at the simplest, but very beautiful examples. Let's start with flowers, which will be a wonderful addition to any hairstyle. To make these hairpins, you will need the following materials:
- foamiran with a thickness of 1 mm;
- ruler;
- toothpick;
- scissors;
- hot glue;
- a simple pencil;
- paper;
- glitter;
- base for hairpin.
If everything is prepared, you can start making hairpins with your own hands from foamiran:
- From the main material we cut out squares measuring 4.5 by 4.5 centimeters. Take a ruler and a toothpick and divide the pieces in half to make triangles. We will need 5 of these figures.
- On the wide side of the triangle, mark one centimeter on each edge. Cut off the corners. We repeat the action with each workpiece.
- At the bottom of the figure, in the center, apply a drop of glue. Glue the part together. After this, we begin to fold the edges like an accordion. We glue each layer with hot glue. We've got the first petal. We repeat the work with other parts. Forming a flower. Glue the petals together.
- Take paper measuring 2 by 3 centimeters and a pencil. We draw templates for additional details. On the first piece we will draw a petal, on the second piece we will make a circle. Apply to fabric with glitter, trace and cut out. You will need two petals.
- To prevent the material from starting to crumble, we burn it on all sides. Glue the circle into the center of the flower. We turn the product over and glue the shiny petals on the bottom, but so that they look out from under the flower.
Ready. All that remains is to glue the base itself at the bottom and then the work can be considered done.
You can also make beautiful hair bands
Making an elegant bow
To decorate a hair clip or headband, you can make a laconic festive or neutral bow, suitable for a specific outfit or everyday look. In this case, the material can be thin, pastel - silk or regular. For a festive bow on a hairpin, a glitter version of 2 or 3 shades that combine well with each other is suitable.
An elegant decoration for a hairpin is made from 3 parts: a base (10x3 cm), a bow (2x8 cm) and a bridge no more than 1 cm wide. They are made in the form of a template, cut out, and transferred to the material. You can put together a bow from scattered elements according to the following scheme.
- From the inside of the bow, apply a drop of glue to the center. The edges of the workpiece are brought together here and fixed. You should get a voluminous bow.
- Place the flat base piece (it should be larger) on a flat surface . Glue a bow on top.
- Using a jumper secured in the center of both parts, hide the attachment point. You can glue a bead or artificial pearl on top of it.
- Cover the top of the prepared metal hairpin or clip with fabric. Attach a bow to its surface in the area of the jumper.
Holiday decorations can be decorated differently. In this case, the basis will be the bow detail itself - it is made voluminous, from a 10x3 cm blank. Additionally, 6 strips no more than 0.5 cm wide are cut from contrasting glitter foamiran - silver, gold. They are laid on the surface of the voluminous bow so as to form loops with ends converging in the center of the decoration - 2 or 3 on each side. The finished product is decorated with a jumper and secured with a hairpin.
Making a bow from foamiran to decorate the headband
A bow for decorating from foamiran will add individuality to hairpins, headbands and elastic bands. Decorating a headband using this pliable material is quite simple.
A foamiran bow on a hairband will look beautiful and unusual
Must have:
- Simple thin bezel;
- A strip of foamiran 5 cm wide and 20 cm long;
- A strip of foamiran 2.5 cm wide and 12 cm long;
- A strip of foamiran 1.5 cm wide and 8 cm long;
- Universal fast-drying transparent adhesive;
- Large decorative rhinestone
Fold the foamiran strip with its ends toward the center of the strip and secure with glue. Do the same with a medium-sized strip. Then place the smaller strip on the larger one so that their centers coincide and glue them together. After the glue has dried, make a double fold in the center of the bow and fix it with glue again. Place the bow on the headband, glue it, wrap the bow with a smaller strip, simulating a knot, grabbing the headband.
Beaver hunting in winter: where it is found, season and hunting methods, what to hunt
The final stage is to attach a decorative rhinestone in the center of the bow and let the glue dry completely. The headband is ready. This elegant decoration suits both an evening look and a casual outfit.
From foamiran
Templates for foamiran bows with dimensions will help you make these decorations for every taste with your own hands. When making crafts from glitter material, do not forget that the glitter is applied on one side, so you need to place a stencil or bow template made from glitter foamiran on the back.
How to make a New Year's bow with your own hands?
A beautiful and shiny bow for the holiday is an excellent addition to hairpins, elastic bands, and headbands as a decorative element. It can be made from foamiran with a glitter effect, using blue and white or red and green colors of the material as a basis. Glitter decor looks especially impressive in festive lighting. You don't need a complicated pattern for the bow. It is enough to prepare the material:
- a wide strip of foamiran for the base 15x4 cm;
- contrasting narrow stripe 4x2 cm;
- universal instant adhesive;
- decor - rhinestones, beads, artificial pearls.
The bow is very simple to make. The wide strip is folded so that its ends meet in the center, closing into a ring. Sticks together. The dried workpiece is shaped into a bow. The small strip is glued in the same way and secured on top of the large one. All that remains is to decorate the gluing area in the center, intercepting it with a narrow foamiran ribbon or decorating it with a rhinestone or bead.
Features and types of material
Foamiran is a special type of polymer, which is foam rubber. Sometimes it is also called plastic suede. Sold in the form of sheets of different colors with a thickness of 0.5 to 10 mm. Beautiful crafts, jewelry, hairpins, and toys are made from it.
Reasons for the popularity of foamiran:
- soft to the touch;
- plastic (stretches well);
- easy to cut with scissors, a knife, or a hole punch;
- Thanks to its porous structure, it absorbs any paint well;
- when heated, it easily takes the desired shape, maintaining it after cooling;
- water resistant;
- sticks well;
- does not emit harmful substances.
Foamiran is produced in Turkey, Iran, Korea, and China. It comes in sheets or in rolls; you can find material of any color and thickness.
In addition to a wide variety of shades, foamiran differs in texture:
- Silk is available in thin sheets and has a matte and pleasant-to-touch surface. It is durable and elastic, holds its shape well.
- Marshmallow foamiran is a soft and pliable material of pastel colors. It changes shape even from the warmth of your hands.
- Glitter has a multi-layer structure, the outer layer with sparkles.
- Textured – there is a relief pattern on the surface.
Foamiran is often used to make bows. They are used to decorate hair clips and elastic bands and attach them to clothes, hats, and scarves. Bows are also used to decorate shoes, handbags, bracelets, photo frames, cards or gift boxes.
Glitter Marshmallow Silk
What you will need
DIY bows made from foamiran are quite popular. This material can be purchased at any craft store. In addition, for work you need to prepare auxiliary tools:
- You will need patterns from which to cut out the details of the craft. Despite the fact that this material is easy to cut and the bows have a simple shape, it is better to make them according to a template.
- Cut out the parts with scissors; regular tailor's or manicure scissors will do. Small decorative elements can be obtained using a figured hole punch.
- For gluing parts, it is best to use transparent glue or a hot-melt gun; PVA is not suitable for this.
- To color and tint the finished product, you can use pastel crayons, acrylic or oil paints. Even regular lipstick or eye shadow is suitable for this.
- To make the material plastic, you can heat it using an iron, hair dryer or hair curling iron.
- The basis for bows can be a regular hairpin or elastic band, headband, clip, brooch.
- Satin or grosgrain ribbons and lace are used as decoration. You can decorate products using felt, beads, rhinestones, and beautiful beads.
Foamiran melts easily, so it is not recommended to use a too hot iron or open fire to heat it.
From felt
A template for foamiran bows will help you make a felt bow. It’s convenient if it’s a pattern with dimensions, then you can change the parameters. The felt holds its shape perfectly and does not require finishing of the edges. Watch the master class on working with felt and get started!
Glitter foamiran bows
These are the bows we will get from shiny foamiran as a result of our work.
To make a bow clip from glatter foamiran, the following materials are needed:
- glitter foamiran in two colors, it is better to choose a thickness of 2 mm;
- glue gun (or instant glue);
- blue outline;
- scissors.
Templates for a shiny bow made of foamiran
Take a strip of blue glitter foamiran 8*6 cm and a silver strip 7*4 cm and a third strip 1*3 cm.
Cut out the shape of a bow.
Making a bow with your own hands: step-by-step photos
We glue the blue foamiran blank and tint the end with a blue marker.
We connect the silver foamiran blank with a droplet to the blue foamiran blank, and also connect it with a thin strip of silver foamiran.
We glue a small “crocodile” onto the mount.
We made this bow hairpin from glitter foamiran at the master class. You can also decorate the hairpin using flowers from glitter foamiran.
Beautiful bows for decorating a children's handbag
From childhood, girls, looking at their mothers and older sisters, strive to decorate themselves. Preparing a beautiful accessory for a little fashionista using foamiran is an exciting activity in which you can also involve a child. Working with small parts develops motor skills, memory and attentiveness. The girl will be pleased to play with the handbag that she decorated with her mother.
Bright bows will help you make your children's handbags more festive and cheerful.
What you will need:
- Several strips of foamiran of different lengths and widths. The number of strips must be even, as they will form double bows. You can choose different colors, including contrasting ones. It all depends on your imagination.
- Quick-drying glue;
- A handbag that needs to be decorated
We prepare a sketch for bows from foamiran, glue double bows together, combining different colors of foamiran material.
To get a brighter decorative effect, you can use bows made of shiny foamiran.
We choose places to fix the made bows and glue them to the handbag. The glue dries quickly, the handbag will be ready in a few minutes.
Double bow made of foamiran: ready-made paper pattern
Draw on a sheet of paper 2 stencils necessary for making a double bow. There will be two parts. One smaller than the other for subsequent superimposition of one on top of the other. Place the templates on a sheet of foamiran and trace along the outline with a toothpick. There will be a mark left on the foamiran sheets, along which you will need to cut out the details of the future bow.
A wonderful decorative element that can easily decorate jewelry and other items is a double bow made of foamiran.
It is not difficult to prepare a pattern for making a foamiran bow.
The following items will be required:
- Paper;
- Foamiran sheet;
- Toothpick;
- Scissors
Foamiran is a very soft material, it will be easy to cut it clearly along the contour, making workpieces of the desired size.
Step-by-step instructions for other models
Schemes for making more complex bows from foamiran involve a combination of materials with grosgrain or satin ribbon, and an increase in the number of blanks. For example, you can fold an original product of complex shape for a school-age girl with a fastening for elastic bands. Small bows made from foamiran are no more difficult to assemble than large ones; gift ones are usually distinguished from simple ones only by the choice of the type of base.
Festive and special occasions require cutting out elements from a glitter sheet, strewn with sparkles on the front side, smooth on the back.
The most interesting models are worth studying in more detail.
American
A stylish and unusual bow in the American style may well become a bright detail of the image. This decoration for elastic bands, hairpins, and headbands is made using a more complex technique and involves the use of several materials of different textures. By combining beads and rhinestones, braid, lace, grosgrain or satin ribbons, you can get an unusual product that can decorate the school days of any girl.
The scheme of work will be as follows.
- Using foamiran, use a template to make a base for a bow. Gather its ends in the center and secure with glue.
- Cut 3 blanks measuring 170x25 mm from ribbon (reps, satin). Cut out 2 similar pieces from lace.
- Connect the ends of the ribbons and lace, alternating them in a circle. Gather on a thread, forming a lush, voluminous bow. Pin.
- Glue a felt circle in the center back. Sew a hair elastic to it as a fastener or a jumper to secure the hairpin.
- Place the foamiran part in the center of the bow on the front side. Secure with glue.
The place in the center on top of the assembled structure must be decorated. A large cabochon, lace or rhinestone insert would be suitable. You can also use several artificial pearls attached with glue.
American bows allow for the use of several contrasting colors when choosing the material. But for everyday wear, it is better to give preference to practical neutral tones, appropriate for school or garden.
Multilayer
Fashionable voluminous bows look very impressive - lush, created from 3 or more layers. Having become a little more comfortable with working with foamiran, you can create them with your own hands in a matter of minutes. For assembly in this case, not 1, but 3 parts of the same size are used. Two of them can be made the same color, the third - contrasting.
The procedure for making a stylish multi-layer bow for decorating a brooch, headband, or hairpin will be as follows.
- Create a pattern. The template is made 150 mm long and 35 mm wide, a 7 mm jumper of arbitrary length is cut out separately - it can be shortened during assembly. You will need 3 base parts.
- Transfer the template to sheets of material. Cut the blanks with scissors or a stationery knife.
- Assembling the base. For each of the blanks, the edges of the front side are brought together in the center of the back side. Secured with glue. It is important to use only a couple of drops so as not to increase the hardness of the material.
- All elements are sequentially secured to each other with a slight offset - fan-shaped .
- Place a jumper in the center of the resulting bow . It is made from the same material as the top bow.
The finished product can be equipped with a jumper on the reverse side for fastening to a hairpin, headband, or simply glued to the base of the elastic band. It is better to collect lush bows from the thinnest silk foamiran, which drapes well, is soft, and elastic. If you make one detail with glitter, this will diversify the design of the product.
Unicorn hair clip
Based on the skills we learned above, let's try to make a hairpin for little princesses in the shape of a unicorn. It can be prepared as a gift. We will continue to use glitter foamiran. This time we will need three sheets of different colors, ours are red, green and white. Let's add the following list to the main material:
- templates;
- toothpick;
- scissors;
- hot glue.
Let's begin to figure out how to make a hair clip with your own hands:
- First, let's print out the templates that megamaster.info prepared for you.
After that, on green foamiran we draw a small bow, ears and horn. Trace the templates with a toothpick or skewer. Cut it out. - Take red foamiran. We transfer the template of a large bow onto it. Add a strip with a length of 4 centimeters and a length of 1 centimeter. We also cut out these blanks.
- We transfer the template of ears and horns onto white foamiran. After these blanks are cut, we divide the white rock into parts. We immediately glue these parts onto the green base.
- We collect all the details. Glue the white ears onto the green ones. Take a red bow on the back side, apply glue in the middle and glue the edges. Hold with your finger until the glue cools completely. After this we attach the part to the ears.
- We do the same with the green bow. After this, we wrap the workpiece in the center with a strip. Add a horn. We place it at the back.
Growing and caring for the Elena variety apple tree
The decoration is ready. All that remains is to glue the hairpin itself, in our case it is a metal base. We've looked at how to make beautiful hairpins with your own hands from foamiran, and now we'll take satin ribbons and look at working with them.
You can make a jewelry box for jewelry
Made from fabric and leather
A hair clip or elastic bands, decorated with bows with sparkles or flirty ears, will become a real hand-made decoration. For work, choose non-flowing fabrics and thin, pliable leather. Trace the templates with a pencil on the wrong side. Foamiran bow patterns are suitable for both leather and fabric.
Step-by-step manufacturing technique
To get started, print or draw a bow template from glitter foamiran, shown in the photo below. You need two sizes - the length of one is 10 cm, and the other is 8 cm.
Turn the foamiran over to the wrong side (without glitter) and use a toothpick to transfer the template. The large blank is green, and the red one is small. Cut out the details with nail scissors.
Move on to the decor. Glue 5 white half beads to each edge
Glue three half beads onto the red bow on one side and the other. And from other edges there are two. Add a snowflake. Glue white puffy half-beads into the center of the snowflakes.
Hot glue the two pieces together.
The butterfly for the bow is made of green shiny foamiran. Cut out a rectangle 12.5 cm long and 5 cm high so that it is convenient to cut. Fold the form in half; you can also run a toothpick along the fold line.
Cut strips from both sides of the rectangle towards the center. The thickness of each strip is 1.5-2 mm. You need four of them on each side. Cut off the excess piece. For the butterfly you will need two of these parts.
Now you need to glue these four strips together. Each subsequent one is shifted by 3-4 mm . Apply glue to the side of the piece. Do this on both sides, two parts.
Connect the ends of one piece together, forming an oval. Trim the edge a little.
Cut an oval blank from a green leaf. Turn it over to the wrong side and glue both butterfly wings with hot glue.
Flip the glitter butterfly over to the other side. Apply glue to the tip of the shape, bend the butterfly wing and glue it onto the oval.
Also repeat on the other side.
Glue the double-sided stamen to the center of the butterfly.
Glue the oval transparent center. White would look good. Both decoration parts are ready.
Apply a small amount of hot glue to the glitter bow and glue on the butterfly . Attach an elastic band, clip or hoop to the reverse side. Or make a brooch for a hat, bag, cardigan.
Such a shiny and bright hairpin will delight every fashionista. It can complement a festive outfit or brighten up boring everyday life.
If you like original hair accessories created with your own hands, go to the section with step-by-step lessons. There you will find decorations in different handicraft techniques for children and adults.
A master class on making a bow with a butterfly from glitter foamiran was prepared by our regular needlewoman Svetlana Sorokina. Photos by the author. Have fun creating!
Step-by-step master class on creating bows
No pattern is required to make a simple bow. You need to take a strip of material 10-16 cm long and 2-4 cm wide. Fold it with its ends towards the middle and glue it together. Since foamiran is a very plastic material, the resulting part can be shaped into a bow by hand. After heating the workpiece, you need to compress it in the middle, forming folds. They need to be fixed with glue. A small strip is glued in the middle. You can connect several of these parts of different sizes to make the bow more pompous.
There are many examples of such products; you need to choose the appropriate model and choose a color combination. When making complex bows from foamiran, the master class will help you do everything right.
New Year's made from glitter foamiran
Festive decorations are often made from shiny foamiran. These can be bows attached to an elastic band or hairpin, clothing, and even to a Christmas tree. To make such a New Year's bow, you will need red and green material, small snowflakes and white beads.
By making a bow from glitter foamiran with your own hands, you can decorate a child’s outfit for a matinee.
To work, you need templates of two sizes: 10 and 8 cm. You need to outline them on foamiran from the wrong side. Jewelry making process:
- cut out two parts, the large one green, the small one red;
- the green element is the base, its edge should be decorated with white beads, gluing them with transparent glue;
- stick small snowflakes on the red part along the edge;
- for the central butterfly you need a green rectangle 5 x 12 cm;
- from it you need to make two blanks, cut into strips 2 mm wide, leaving a solid space for folding in the center, these will be the wings;
- Glue the edges of the strips, retreating 3 mm, to create a three-dimensional part;
- cut out a small oval from green foamiran;
- connect the base of the wing to the oval on the front side, and glue the ends to the wrong side;
- decorate with beads and white stamens;
- connect the butterfly to the bow, glue an elastic band or clip to the reverse side.
It is better to attach a clip or hairpin to the bow using a strip of foamiran.
Elegant on a hairpin
Foamiran hairpins can be worn not only by children, but also by adults. To make an elegant bow, it is better to use shiny material in one or two matching shades. The template consists of three parts: the base, the bow itself and the jumper. They need to be transferred to foamiran and cut out. Next, the manufacturing process is as follows:
- Apply a drop of glue to the middle of the bow detail from the wrong side;
- connect the ends so that they touch in the center;
- glue the resulting bow onto the second part;
- connect them with a jumper, carefully placing it in the middle;
- secure the bow to the base.
A hairpin, clip or elastic band must be glued with a bridge. The metal base should first be pasted over in this place with a piece of fabric so that the bow holds better.
American
American bows are popular right now. Their peculiarity is that they are lush, multi-layered, they combine different materials. When using foamiran, you can combine it with grosgrain or satin ribbons, lace, and braid. To make the simplest American bow, you need:
- redraw the template on foamiran, cut it out;
- connect the ends of the part by gluing them in the middle;
- take 3 strips of grosgrain or satin ribbon 17 x 2.5 cm and 2 of the same pieces of lace;
- fold the ends of the ribbons towards the middle, gather them on a thread in the form of a lush bow;
- sew a hair elastic on the back surface;
- glue the foamiran part;
- decorate with lace, cabochon or beads.
With ears
Many people are interested in how to make a bow out of foamiran so that it is unusual. You can quickly and easily make an original hairpin with ears. To do this you will need two bow parts and 4 ear parts. You can use regular or shiny foamiran. Any color will do, but it is better to make the inside of the ears pink. Work algorithm:
- cut out parts for the ears: 2 main parts, length 5 cm, width – 1.5 cm, 2 internal parts, length – 3.3 cm, width – 0.8 cm;
- prepare the details for a classic bow: the base and the back forked bow, the second template should be larger in size so that it protrudes slightly beyond the base;
- glue the parts of the ears in pairs;
- connect a large piece in the form of a bow;
- glue all the parts, placing the ears symmetrically, they are glued between the two parts of the bow;
- you can glue a jumper or a piece of fluffy fur in the middle;
- attach the base, decorate with beads.
Layered butterfly
A multi-layer butterfly bow can be made from regular or glitter foamiran. The manufacturing process is very simple, since the parts are the same. Step-by-step instructions will help you do everything correctly:
- Cut three parts according to one template: length - 15 cm, width of the convex part - 3.5 cm, width of the jumper (middle) - 0.7 cm.
- Fold the edges to the middle and glue. Do the same with the remaining parts.
- Connect all the elements, placing them not directly under each other, but in a fan.
- Glue it together, cover the middle with a bridge made of material of the same color as the top part.
Tips for beginners
Bows made from plain or glitter foamiran hold their shape well, do not fade and serve as an excellent addition to any outfit. Step-by-step instructions and templates will help you create a real work of art in just an hour. It’s better to start with one or two-layer bows. Later, you can begin more complex designs from shaped parts.
It is important to choose the right color combination. It is advisable not to mix more than 3 colors in one product. You can decorate the craft with a detail made of gold or silver glitter foamiran. Finished bows are sometimes painted with oil paints, pastels or acrylics.
There are several subtleties of working with foamiran. Beginning craftswomen also need to take them into account:
- It is better to choose sheets no thicker than 1 mm, then the products will not look rough;
- although it is a plastic material, you should not stretch it too much, it may tear;
- It is better to glue parts together using a hot glue gun;
- To impart plasticity, it is easiest to heat the material by applying it to a warm, but not hot, iron.
Foamiran bows are a beautiful decoration for hair, clothes, shoes and interior items. Making them is very simple; a large number of master classes with templates will help you cope with even a complex model.
Useful tips
Foamiran bows are easy to make, beautiful products that you can easily create with your own hands. They do not lose their brightness for a long time, hold their shape well, and are easy to glue. To begin with, it is better to master the simplest foamiran bows without a lot of details. When combining several colors, no more than 3, inserts in metallic shades - silver, gold - are considered a universal solution. Plain patterns can be hand-painted with bright acrylic paints and pastels.
When working with material, it is also worth remembering some of the subtleties of this process. To avoid mistakes, it is enough to consider the following points.
- When using quick-drying glue, you need to dose it carefully. The less amount of this composition gets onto the workpiece, the better. This way you can avoid the appearance of unwanted stains, as well as increasing the rigidity of the material. If possible, you should use a hot-melt gun for gluing.
- The best sheet thickness for making bows is up to 1 mm. They are flexible and elastic enough to provide the necessary grace to the product.
- Do not stretch the workpieces too much. For all its plasticity, foamiran has limits of strength. With intense tension, it can tear.
- If you need to change the shape of the workpiece, it is applied to the warm sole of the iron . There is no need to heat it too much. Marshmallow foamiran can even be kneaded with your hands; it even reacts to the heat of the human body. The use of a lighter, soldering iron, or other sources of open flame is strictly prohibited.
Useful recommendations for working with foamiran will help every needlewoman easily create beautiful bows from it the first time, without wasting time correcting mistakes.
Timeless classic
A foamiran bow, the template of which you transferred to a sheet, may become your first homemade decoration. To make beautiful fabric, leather, felt or foamiran bows, it is better to print templates with dimensions or transfer them to thick cardboard for convenience. Make one bow template and use it to make various decorations from a variety of materials. A classic bow is a simple accessory. But it has so many execution options that you definitely can’t call it boring.
Loading…
What is necessary?
To make decorative bows from foamiran, a novice needlewoman will need a simple set of materials and equipment. The main list can subsequently be expanded and supplemented with various decorative elements. To create most crafts, this set of materials and tools will be enough.
- Sheet foamiran . Thin ones will make elegant decorations for a headband or hairpin. Made from terry - funny bows for children's hair ties. Sheets of glitter foamiran make the best holiday decorations.
- Glue gun with rods or ready-made instant glue . They are needed to connect parts together.
- A stationery knife or scissors with sharp ends for cutting out elements and forming decorative slits.
- Stencils . They are made independently, based on the design of the product. You can draw on thick cardboard or Whatman paper.
- Figured hole punch. Necessary for creating small parts.
- Iron . With its help, foamiran is heated, giving it the desired shape and bends.
- Molds, toothpicks . Necessary for giving natural relief to blanks for flowers and leaves.
- Decor . This may include beads, buckles, rhinestones, artificial and natural stones.
Additionally, depending on the purpose of the product, various options for fastening bows can be used: pins, if the decoration is intended to be worn in the form of a brooch, an elastic band, or a hairpin. For quick assembly or short-term heating, staplers and lighters are used.
With glitter
Shining bows made from glitter foamiran, templates for which you create yourself or find on the Internet, will be noticed by everyone. Bows with sparkles and flowers are wonderful for decorating hairstyles, dresses, etc. Any foamiran bow template will help you create a creative, stylish decoration.