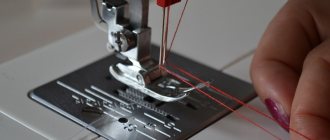
Anyone who has tried to sew something from knitted fabric knows how difficult it is sometimes to overlock sections with an overlocker without stitch defects, and sometimes it is simply impossible to sew knitwear on a regular machine. Gaps appear in the stitch, loops form at the bottom of the stitch, and sometimes even the thread breaks.
Why does this happen, why do machines like Chaika or Podolsk generally “refuse” to sew knitwear? Is it possible to set up a regular straight-stitch machine so that it sews knitwear without stitch defects?
You will learn the answer to all these questions, as well as what a knitted overlocker and differential are, and what is different about a sewing machine designed for sewing knitted fabrics (coverer, coverlocker) in this article.
Sewing machines for sewing knitted fabrics
Sewing machines for sewing knitted fabrics are a special type of sewing equipment and they have one thing in common - the method of stitch formation. The stitch for sewing knitted fabrics is called a chain stitch and it is formed using a looper. In the photo on the left is a flat-stitch machine, on the right is a knitted overlocker.
In a conventional machine (lockstitch), the bottom thread is wound on a bobbin, the bobbin is inserted into the bobbin case, the cap is inserted into the shuttle, which is why it is called a lockstitch. So, for a chain stitch, such a multi-layer “matryoshka” is not required, and the thread is simply threaded into the looper directly from the bobbin.
Externally, the chain stitch from the inside resembles a “pigtail” and if you pull the edge of a loose thread, the entire seam will unravel. This is one of the disadvantages of the chain stitch, however, this property does not apply to the overlock stitch, but only to the flat seam.
In addition to the cover stitch, a flat seam can only be performed by a carpet locker. Moreover, the seams of the carpet can be either overlock or cover-stitched. It’s true that the price of such a universal household machine is equal to the cost of two: an overlocker and a stitcher.
In this article we will look at the features of the formation of a three-needle flat seam on household cover stitching machines. If you are interested in other capabilities of cover stitching machines, see the article Industrial Cover Stitching Machine.
Main secrets
Three key factors have a primary influence on the entire sewing process. If you ignore these three aspects, the result will be unimpressive.
This:
- Device selection. And for our fabric there is a special type of equipment. This is a knitted overlocker. It is enough to adjust the thread tension, and the overlocker will cope with any task. Working on a regular machine, on the contrary, has its own specifics and is not intended for such purposes. But everything is doable, you just have to spend more time adapting.
- Threads. The choice is obvious in favor of thin threads. Fortunately, the modern assortment of stores will fully satisfy your request. But “grandmother’s reserves” will not be able to.
- Needles. For such a fabric, it is important to use a specialized needle. It is desirable to achieve an effect in which the needle does not tear the threads, but only gently pushes them apart without the slightest damage.
Sewing machine needles for sewing knitwear
This article is structured in such a way as to give you an idea not only about knitwear machines, but also to advise how to sew knitwear on a regular Chaika-type straight-stitch machine. Therefore, carefully follow all the wizard’s advice; they are also suitable for ordinary machines.
For example, you should know that to sew knitwear you need to use special sewing needles. Often there is even a corresponding inscription on the box or packaging: JERSEY. This is the designation for knitted weave, on the basis of which modern stretchable fabrics are woven.
Double seam
On the front side, a double seam is no different from a simple stitch seam. From the wrong side, this line is laid along the narrowed joint. The specificity of double stitch sewing technology is such that it can only go in a straight line. It is laid in two steps: the first is a traditional stitch along the edge, the second is a seam parallel to the first along a specially folded edge. Despite the multi-stage nature and complexity of the seam, it turns out to be very strong and is often used for:
- sewing bed linen, especially pillowcases and duvet covers;
- sewing internal pockets into trousers and shorts;
- attaching cuffs to long-sleeve items;
- processing the edge (free edge) in products made of thin material that “creeps” easily (for example, for processing tulle).
Double seam allows for a strong connection of parts
Essentially, the double seam is intended for joints that require physical force. It is suitable for sewing shopping bags or inserting an additional pocket into a handbag.
What is a cover (flat) seam?
Many who are interested in sewing sooner or later ask themselves the question: What is a flat-stitch machine and what is the peculiarity of the so-called flat stitch (flatlock, flatstitch), or in everyday life - a cover stitch? This photo clearly shows what a 3-needle flat seam looks like on the product.
And this photo shows how a cover-stitch machine works: three needles and one lower looper. True, in industrial machines the looper can be on top and it is called a spreader. Then the cover seam will be “braided” (as in the photo above), but on both sides: on the wrong side and on the front side.
Now look at how a flat-stitch machine differs from an overlock machine. You can see that the overlocker has two loopers, and one of them extends beyond the needle plate, making it impossible to form a flat seam. That’s why overlockers can’t do anything else other than overcasting. And the function of simulating a flat seam with an overlock indicated in the instructions is just a type of overlock seam, rather an advertising gimmick that attracts your attention.
What else fundamentally distinguishes an overlocker from a cover stitcher, do you think? Of course, trimming the edges of the fabric using the built-in knives. Therefore, an overlocker is intended only for processing only the edges of the fabric, while a coverstitcher and a carpetlocker can lay a seam anywhere in the product. Accordingly, their sleeve reach (working surface) is larger.
How to sew knitwear on a machine
Before you start sewing and cutting, you need to make sure that you are absolutely sure of the stretch coefficient of the fabric. In elastic fabric, the reliability of your stitching depends on this parameter.
A little about elasticity
If you get information about a cut from a specific source, you can usually also find the stretch factor for which the pattern is intended. Following the data received, select a product in a store with the specified criteria.
But such information is not always available. Either there may be a gap in the instructions, or the canvas was purchased a long time ago and the density was completely forgotten.
You'll have to make do on your own. Calculating density is actually not difficult. It is enough to select an arbitrary part of the fabric, the main thing is that it is not an edge, an indent of at least 8 centimeters. We select a segment of 10 centimeters, and then stretch it to its maximum length. We measure the resulting number.
The results may be as follows:
- 15 cm or more is a highly elastic fabric. Its coefficient is the largest - 50%;
- less than 15, but no more than 12 – this is the average, 30%;
- 12 cm or less is a low parameter, according to the standard only 12%.
How many needles are installed on knitting machines?
The number of needles used is determined by the number of threads. Depending on the operation, a knitted seam may contain 3, 4, 5 or even 8, 12 threads per stitch or more. True, more than 5 threads are already industrial models of cover-stitching machines, adapted strictly for one or two operations. For example, adding a wide elastic band to the waistband of sportswear.
This diagram shows how a stitch will be formed depending on the number of needles used on a cover stitch machine (from one to three).
Manual hemming method
The fastest and cheapest option is to hem the T-shirt yourself at home.
If your product is made of dense fabric that does not fray, then you can safely trim it. And if there is a risk that the fabric may “move” or fall apart, then it is better to pre-process the edge with an overlocker.
After cutting, the bottom of the T-shirt must be finished with a hidden cross-shaped seam, which is usually called a “goat”.
Goat seam
This type of seam is quite simple to make; even a novice seamstress can handle it. One or two threads (at your discretion) are grabbed with a needle from below and above the cut allowance. In this case, you need to carefully ensure that the seam is not visible from the outside.
The item you are going to trim and hem must be clean and ironed.
What seams can a household cover sewing machine make?
You need to know all these technical details only in order to understand that it will not be possible to sew a knitted fabric well on a regular sewing machine. Even if the stitch is without gaps, it will be very fragile, because the threads (top and bottom) in the lockstitch line are very tight and when the seam stretches, they will definitely crack.
The same applies to overlockers without a differential feed, for example overlocker class 51. It may be possible to overcast the fabric, but you need to wear such clothes carefully, avoiding stretching the seams. This is precisely the property that knitted fabric is distinguished by - increased stretchability, which allows you to actively move in such clothing (sports), and often without ironing.
Creating a pattern for knitwear
We discussed how to stitch knitwear on a regular machine.
Transferring the pattern to fabric
Now let's move on to an equally important stage - creating a pattern. When cutting, you should adhere to the basic rules:
- To do this, you first need to prepare the fabric. It is worth noting that cotton fabric shrinks strongly, so before cutting it should be washed and dried, and the procedure repeated at least twice. If the edges of the fabric curl strongly, the fabric can be ironed before cutting.
- The pattern should be pinned to a highly elastic fabric, only then traced with chalk and cut out. But if the fabric is delicate, then piercing with sharp objects will not work, as the fabric can be damaged. In this case, masking tape will serve as an alternative. The pattern is placed on the fabric, secured with tape and cut out.
- It is not recommended to cut elastic fabric in two layers, as the parts may shift.
Threads for the formation of high-quality knitted stitches
The most important condition for high-quality stitching when sewing knitwear, not only with special equipment (overlock, coverlock, cover stitch), but also with a regular machine, is thread. The quality of the stitch will depend on their thickness, strength, uniformity and elasticity.
Please note that for any sewing machine, when sewing knitted fabrics, it is recommended to use thin and elastic (synthetic) threads. It is strictly not recommended to thread thick but strong threads into knitted sewing machines. The effort to pull threads out of the loopers is so high that if the thread gets tangled, something can break.
It is also important to thread the threads correctly, approximately as shown in this photo. Such a “cunning” threading will dampen the looping of the thread, which will generally balance their tension in the stitching of an overlocker or cover stitch. In a conventional sewing machine, the twist of the thread (loop) can be suppressed if you use a linen elastic band; you just need to tie it around the sleeve of the machine and insert the thread (from the spool) under it while threading it.
Selecting threads and needles
The first thing you need to ensure that the thread does not break during work is the correct choice of the material itself. Tension also has an effect. This point is also worth focusing on.
Immediately forget about thick threads. You shouldn’t turn to “morally obsolete” either. Our main criteria are elasticity and density. And only a modern, high-quality product can combine the density parameter with a small thickness. Therefore, you need to focus on at least the average price range. An excellent option would be polyester threads. Such an assortment now prevails on the shelves; you won’t have to search for long.
The situation with needles depends on the specific task. A simple needle is suitable when working with hard fabric. These are cotton, wool, fine knitting with a low stretch coefficient. Damage even from a sharp end is excluded.
But! For medium or low density, only stretch needles should be used. They are intended for elastic tightness. Therefore, their end is rounded; it gently stretches the fibers of the thread, does not tear or damage them. Nowadays the product is represented on the market by a lot of companies, with Singer considered the leader.
What is the differential of an overlocker, coverlocker, or stitcher?
Well, the last thing you need to know about sewing machines for knitwear is to understand what a differential or differential type rack is. You can even find various articles on our website describing the operation of such a rail. But if you do not delve into the design features of this unit, you can explain its action using a simple example.
What do you do when you need to remove the fit from the top layer of fabric while sewing a garment? You push it under the paw with a fingernail or an awl. What do you do when, on the contrary, there is not enough top fabric? Well, of course, pull the top layer with your hand, trying to correct your own cutting mistake or poor operation of the sewing machine. Neither of these things improves the quality of your work, but that’s not about that now...
This is roughly how the differential rack works. In one case, it stretches the fabric during stitch formation (under the foot), in the other, it compresses. Both properties of the slats are used for various types of processing of knitted fabrics, as well as for making decorative stitches and seams (waves along the edge of the bottom of the skirt).
When buying an overlocker, it is important to pay attention to this, because the cheapest models of Chinese overlockers (3-4 thousand) or overlockers of older models do not have this function, which will make the processing of knitwear poor quality.
The lower handle in this photo controls the differential operation of the Janome ArtStyle 4057 overlocker.
What do you need to work with knitwear?
Knitted products are very beautiful and practical. Thanks to their elasticity, you can do without darts and fasteners when sewing.
Many novice seamstresses are afraid to take on the task of sewing a dress or skirt using butter or stretch with their own hands. These fears are completely unfounded; you just need to follow the rules for working with these seemingly difficult matters.
You can avoid possible difficulties if you sew the parts on a special machine, use threads and needles intended for this, and stitch the elements with a special seam suitable for knitwear. Only in this case will the stitches be even and continuous, and the quality of the sewn product will be satisfactory.
Type of household sewing machine
Typically, such fabric is sewn using special equipment - a cover stitch, which is a chain stitch device. This means that the seam she makes on the reverse side has a weave that resembles a pigtail. Another machine for sewing knitwear is a carpetlock. This device combines the functions of a stitcher and an overlocker.
To stitch the edges of knitted parts, it is recommended to use a knitted overlocker. It is equipped with a special strip that stretches the fabric, called differential, on which a chain stitch is placed during sewing.
Despite this, it is not at all necessary to specifically purchase the listed sewing devices. You can sew knitted parts on a regular household machine. The main thing is to use special threads and needles that ensure a high-quality seam.
Threads for knitwear
In order for a dress or blouse made from this material to please with its quality and serve for a long time, you need to choose the right threads for sewing. Too thick ones can damage the fabric at the point where the needle punctures, and too thin ones can easily tear. It is best to use polyester elastic, thin, but very strong threads for this purpose. Their markings must contain the letters “LL” or “HL”
The threads must be new. It is highly not recommended to use threads that have already been used or that have been lying around for a long time, waiting in the wings. It is important that the thread matches the number of the needle used in the work. If you do not follow this rule, it is unlikely that you will be able to avoid skipped stitches and the formation of wavy seams. To facilitate the selection of threads, you can use the information presented in the table regarding their optimal combination with needles.
| Fabric type | Needle number | Thread number |
| Thin | 60, 70 | 50, 60 |
| Fat | 90 | 30, 40 |
It is important not only the quality and characteristics of the threads used, but also the degree of their tension. No matter how strong the thread is, it will easily break if it is pulled too tightly. You should also not tighten it loosely, as this will negatively affect the quality of the seams.
Needles for working with knitted fabric
As noted earlier, the needle must match the thickness of the material. It is best to sew knitted fabric with a needle rounded at the end. It allows you to move apart the threads of matter, rather than pierce it. If the tool is selected correctly, it will not tear the material or form puffs, and the finished product will not have arrows with loose loops.
If you plan to work with wool or cotton fabric, it is recommended to buy needles marked “jersey” on the packaging. Knitwear, which contains synthetic raw materials or a large amount of lycra, is sewn with needles marked “stretch”.
What kind of foot do you need?
Sewing a dress or blouse from knitwear using a regular foot can cause the material to bunch, the threads to break, and gaps to appear in the stitching. You can avoid these problems using the following tricks:
- place paper on both sides of the material to prevent the formation of folds;
- select sewing modes by adjusting the tension of threads and presser feet;
- use special water-soluble paper.
Despite the fact that with the help of the listed tricks you can achieve high quality tailoring, it is recommended to acquire a special foot. This device will come in handy even if you have no plans to constantly sew knitwear items. This device turns a regular stitch into an elastic one. It turns out to be a little less durable than a regular stretchable one, but it looks much neater.
This device is equipped with a special lever, which, when installed, rests on the needle holder. There is a rubber pad at the bottom of the base and a spring at the back. This design prevents the layers of fabric from shifting and also prevents them from stretching and bunching.
Recommendations for sewing from knitwear!!!!
Knitted items, especially dresses, do not lose their relevance in any fashion season. There are many styles - from the shortest to the very long, from loose to those that fit the figure, and which are made in dark and also pastel colors.
It’s nice to wear things made of knitwear, they fit beautifully on the figure, but sewing from it sometimes becomes a whole problem. And if you have any problems when handling this delicate material, then come here)))
First, let's look at the types of knitwear:
Knitwear is made from threads by forming loops and interweaving them. There are mainly two types of loops: knit and purl. The facial loops form longitudinal rows, reminiscent of pigtails. Purl loops are transverse rows reminiscent of brickwork.
According to the knitting method, single and double knitwear are distinguished. To produce single knitwear, one row of knitting needles is used. This fabric has flat vertical “braids” on one side and dense “brickwork” on the other. It stretches in width and almost does not stretch in length.
When producing double knitwear, two rows of knitting needles are used. The fabric turns out twice as thick and has vertical “braids” on both the front and back sides. Double knitwear has little stretch; jackets, suits, and trousers are made from it.
Jersey is a type of single jersey. Jersey has little stretch and is mainly used for shirts, dresses and underwear.
Interlock is a light, loose fabric with “braids” of facial loops on both sides. It has a moderate stretch and is suitable for blouses, T-shirts, sportswear, as well as nightgowns and pajamas.
Sweatshirt is a brushed cotton jersey with flat vertical “braids” on the front side and a soft fleecy surface on the back. Used for sports blouses, trousers, tracksuits and other sportswear of simple style.
Ribbed knitwear has convex vertical stripes of several “braids” on both sides. It stretches quite strongly and is widely used for facing necklines, armholes, bottom edges and in the form of cuffs. Also used for sewing tight-fitting blouses and dresses.
Terry knitwear has small pull-out loops on the front side and vertical “braids” on the back. Warning: When sewing two pieces with the right sides together, the top layer may move slightly due to the lint.
Mesh knitwear has an even cellular structure. It does not bloom when cut, but can form snags from sharp and rough objects. This knit is commonly used for decorative panels, appliques and ventilation in sportswear and other clothing.
Stretch knitwear is made from spandex, a highly elastic synthetic fiber. It stretches strongly in all directions and restores its original shape. Spandex is often combined with polyester, cotton and nylon. it is difficult to find anything more suitable for a swimsuit, tights, leggings and other clothing of this type.
Decatation:
wash the knitted fabric in accordance with the care instructions and dry it laid out on towels; cotton knitwear should be washed two or three times on a medium cycle (shrinks several times); if you use knitwear with elastic for facings, you should not wash it; if the finish is contrasting, you should dip it into water and vinegar to remove excess dye.
We learn to determine the degree of elasticity of knitwear.
A distinctive feature of knitwear is its elasticity. It must be taken into account when cutting. The best option is to use a ready-made pattern designed for this type of knitwear (the required percentage of elongation is indicated). We learn to determine the degree of elasticity of knitwear.
To do this, step back 7 cm from the cut and fold the fabric crosswise. Measure and mark a 10 cm long piece on the fabric along the fold line. Pull it wide. The appearance of the loops should suit you.
Low-elasticity is considered to be fabrics whose percentage of elongation is less than 12% (10 cm stretched by 1.2 cm), moderately elastic - approximately 30% (10 cm stretched by 3 cm), and very elastic - 50% or more (10 cm stretched by 5 cm) .
Cutting knitwear
Preparing for cutting.
When cutting, do not stretch the canvas in the transverse direction. Pay attention to the direction of the loops: the loop columns must have a longitudinal direction, which corresponds to the direction of the grain thread, indicated by arrows on the details of the paper pattern. The directional arrows of the grain thread on the laid out pattern pieces should run parallel to the edges of the fabric. Lay out your pattern pieces so that their bottom edges point in one direction, as the weave structure makes the color of the material appear duller in one direction than in the other. Before cutting, stretch the cross sections of the fabric and see along which edge more loops have unraveled. You need to lay out the pattern so that the bottom of the product falls on this edge. During wear, the bottom hem stretches slightly, so the likelihood that the loops will begin to unravel is very small. When laying out, the canvas should not hang from the work table, as the longitudinal direction may be skewed. The cutting allowance is equal to the width of the seam plus the trim allowance. The knitted fabric can be cut in two layers or in one. Open in two layers.
For large parts, the canvas is usually folded in half on one side (picture on the left).
Sometimes it is more rational to fold it on the right and left along the longitudinal direction, to a width corresponding to the width of the parts (picture on the right). Open in one layer. Some types of knitwear may slip when cut in two layers. It is easier to cut out parts from them in one layer.
This cutting method is convenient and, if necessary, takes into account the design. Lay the fabric face up on your work surface. Place the piece on top and secure. Cut the first half without cutting the fold line.
Mark the top and bottom points along the fold line on the canvas, matching the strips (it is important to maintain the symmetry of the pattern). Remove the pattern and cut out the second half along the lines of the first.
If you need to cut two identical parts, first cut one part, then remove the pattern, move the canvas, place the cut part on top, maintaining the symmetry of the pattern, fix and cut the second along the lines of the first.
Cutting knitwear (tips from amateurs and pros)
From a foreign book, where they give the principle for calculating the stretch coefficient of knitwear, but then write: “if you are going to sew a model from lycra-containing fabric that is intended for less elastic fabrics, then you need to cut the pattern a couple of sizes smaller than usual. Then sweep and try on.” They especially emphasize that this is a situation when you need to sew “at random” (i.e., trying on), emphasizing that even well-known fashion designers arrive at the optimal fit (including knitwear items) experimentally.
Posted by: o'christi (common sense approach) I make quick patterns for each fabric, I didn't want to share my homebrew method, but maybe it will help someone! First of all, we must remember that there are different types of knitwear: durable, stable (not much different from fabric), single-face, elastic, stretchable in 2 directions, etc... The approaches are different. I measure the elongation with a ruler and take this ratio into account in sizes, for example, if the coefficient is 15%, then I reduce the OG, OB, OT by this amount. When creating patterns, no allowances for a loose fit and no darts, of course. The pattern is very “curvy”. As you can see, there is also an element of “poke” here, but with a slight calculation. What I do with the neckline and armholes: I draw all the “holes” after the “base mesh” is ready. Those. The shoulder is ready and the chest line is defined. The stretch is taken into account both in the armhole and at the neckline, but I no longer calculate it. At first I tried using ready-made patterns from Burda or ready-made items from my closet, and looked at the difference. Now I draw directly by hand: the front armhole is deeper, of course. You can also edit the armhole after trying it on. From experience: I can’t say that I ruined something, because I was always careful, before cutting, I’ll figure it out and try it on to see if it’s too tight. The last “failure”: I bought expensive knitwear for a sweater, not very thick, I was afraid to make it small, it’s a little loose, although you can’t call it a “puncture”. Sewing with knitwear is easy once you feel it. Until now, I have sewn everything with great success on a machine (there was no overlocker).
Author: Yanata I really like O'Christi's advice. I do everything the same way. I stitch the facing with a single stitch on all three layers, but before that I prepare the facing: first, I iron it folded. Secondly, I try to do it in such a way that, when ironing, I can form a circle from the facing (if we are talking about a round neckline). To do this, I have a template made of thick cardboard, where the front and back parts are conditionally connected along the shoulder line (more precisely at the top point of the shoulder). And after ironing, I lay the knitted trim/facing along the neckline. Purely through experience, I found out that the knitted tape should be slightly longer than required for the cardboard template. It may sound difficult in words. But in practice it doesn’t take much time and allows you to be confident in the quality (which is important).
Author: Anna I want to share my experience in sewing knitwear. Sew from Diana magazine. I have size 44-46. I take the size 44 model I like and cut it out without seam allowances in width and with allowances in length. If the knitwear is thin or I want a very tight-fitting model, then I cut out size 42 in width and 46 in length. I sew with a special knitting needle and a regular (not knitted) stitch, with the exception of the neckline in turtlenecks (zigzag there). In tightly fitting models, reinforced stitching. I don’t have an overlocker, so I use a regular overlock stitch with a special foot. Everything turns out very well. Honestly, I don’t understand why any calculations or elasticity formulas are needed. The thinner the knitwear or the more lycra it contains, the more you need to reduce the base in width and increase in length.
We sew knitwear
Preparatory stage:
Spacers for knitwear are chosen that are thin and do not damage the fiber structure. In the case of knitwear, they are necessary where stretching of the fabric is undesirable: when processing fasteners, sides and pockets. In models where the stretchability of the neckline and armholes is not provided, sizing is used along the seam allowances. If you are going to use adhesive pads, test them. Before sewing knitwear on scraps, try out different stitches, select a needle and thread. Smooth out the seams by selecting the temperature setting (the fabric and stitching threads should not melt or deform!): straighten the seam with your hands and hold the steamer over the fabric, steam quickly. You can press the seam until it cools, for example, with a ruler. When ironing from the front side, touch the fabric lightly using a gauze iron. Be sure to check the stretchability and strength of the seams. The knitted seam must stretch along with the fabric, otherwise the stitching will tear. If the seam deforms (stretches) the fabric, try laying a separate thread under the zigzag (do not attach it!). Upon completion of sewing, pull the thread to fit the fabric until it matches the pattern. Perhaps this option will suit you... Three types of needles for sewing machines: with a rounded end, universal and pointed (sharps). Choosing the right type of needle is just as important as the right number.
A needle with a rounded end does not pierce the fabric fibers, but only pushes them apart without forming puffs (this needle is preferable). The universal needle has a tapered end. This type of needle is suitable for knitwear and various stretch fabrics (careful! Check). Sharps are used mainly for loose or open-knit knitwear and thin fabrics. A pointed needle is not recommended for thick knits or knits with a high polyester or nylon content. It enters such a fabric with difficulty and often breaks the fibers, leaving holes. For thin knitwear, needle No. 70/9 is good. For semi-thick knitwear, needle No. 80/11 is more suitable. For thick and voluminous knitwear, needle No. 80/11 or 90/14. Suitable threads for sewing knitwear include long-fiber polyester threads, textured nylon threads, and fibrous nylon threads, because... they are smooth and elastic.
Varieties of seams for working with knitwear on a regular machine and overlocker. Making knitted seams on a regular sewing machine is possible if you use the existing seams correctly. If none of the proposed seams withstands the test, it is better to use a seam using a gasket (an option for stabilizing seams).
Moderately stretchy fabrics can be processed with a straight stitch at a distance of 1.5 cm from the edge (9-12 stitches per 2.5 cm).
When sewing, the fabric should be slightly stretched. If skipping stitches occurs when sewing, you can use a strip of paper, placing it under the intended stitch. The stitching will be stronger if the seam allowances are turned out and pressed.
A double stitch consisting of two straight or zigzag stitches made at a distance of 6 mm from each other is also suitable for processing moderately stretchy fabrics (photo above). When sewing, stretch the fabric slightly: a seam made of two straight lines will be more elastic. First, make a straight stitch along the stitching line. Then along the allowance - 3 mm from the first one. Trim the excess fabric along the second stitch. Suitable for knitwear that does not require cut processing. The lengths and widths of the two zigzag stitches should be different: one narrow (stitch length 2.5 mm, width 0.5 mm), the other wide (stitch length 3 mm, width 4 mm. Photo above)
For any type of knitwear. A narrow zigzag will also work (stitch length 2.5 mm, width 0.5 mm). It doesn't tighten the fabric. You can try sewing any type of knitwear with this seam; it is done 1.5 cm from the edge. Do not stretch the fabric while sewing. If the fabric does not move well, loosen the presser foot: move the pressure regulator to the lower position. Unfold the edges and press.
The flat stitch is used for sewing many types of knitwear on an overlocker. During stitching, excess fabric will be cut off. After making the seam, pull the fabric wide to give it a flat shape. If you want to use the stitching as a decorative trim, stitch along the front side (a). If the stitch is used to seam sweater knits, sew along the wrong side (b).
Thin or smooth elastic fabrics can be sewn by machine, but it is better to use an overlocker. Special needles with a round tip are most suitable.
Check on the flaps which stitch to use and what threads to use. Make sure that the seam allowance will not print on the other side. If the seam is imprinted, try finishing it with two threads. The most commonly used is a three-thread overlock stitch with a width of 5 mm and a length of 2.5 mm. Long-fiber polyester threads or overlock threads are used, which give the finest finishing. Highly stretchable knitted fabrics. A three-thread overlock stitch is suitable (stitch length 2.5 mm, width 5-7 mm), it stretches well and restores its original length. When making such a seam, long-fiber polyester threads, overlock threads, and fibrous nylon threads are used.
A two- or three-row double buttonhole stitch is also good. This seam can be made on a three- or four-thread overlocker. Fibrous nylon threads are well suited for this seam (stitch length 2.5 mm, cutting width 2 mm, differential No. 2.
It is better to sew medium and heavy knitwear with a four-thread seam: the fourth thread strengthens the seam. For a four-thread seam, you need to give 6 mm seam allowance and 1 cm for cutting.
Shape and seam stabilization
When to strengthen the neckline and armholes? How to limit the stretching of the fabric to maintain the shape of the product: collar, fastener, crotch seam in trousers? Requires padding and stabilizing seams.
Using gaskets
The gasket should be used to strengthen parts that must retain their shape: collar, edges of the fastener. The G785 bi-directional stretch woven interlining is best suited for this purpose.
It gives the necessary rigidity to the fabric, which at the same time remains soft and does not lose elasticity. The gasket is ironed dry using a moderately heated iron (thermostat in the “silk” position). Soft types of knitwear with large loops are sewn better if Vliseline Nahtband is ironed along the seam lines on the piece lying below.
If elasticity is not required from the neck of the product (for example, when putting it on). If, on the contrary, it is desirable that the neckline and armholes retain their shape, they are reinforced with bias tape made of thin adhesive non-woven fabric (Vliseline Formband). Don't have ready-made binding on hand? Cut out a 2 cm wide strip from non-woven fabric H 180 at an angle of 45 degrees and stitch it along one side at a distance of 4 mm (the stitch will replace the chain stitch).
If sections reinforced with tape are subject to subsequent edging (the seam allowance will be cut after strengthening the part), the chain stitch should run close to the marked seam line (from the side of the part). Cut the gasket-tape on the curves several times.
To prevent shoulder seams from stretching, the cut details along the shoulder sections are reinforced with bias tape, or when making a seam, stretched bias tape from the lining fabric is tacked into it.
Stabilizing seams Sometimes it is necessary to limit the stretch of the fabric to maintain the shape of the product, especially at the shoulder, waist and crotch lines of trousers. Some styles do not require stretch at the neckline or armholes, but rather reinforcement is preferred.
A seam with interfacing is used when sewing sleeves and sewing a bodice to a skirt, as well as in trousers. Suitable for loose and semi-thick fabrics. Cut a strip of gasket equal to the length of the seam (it should not stretch along the seam). If the armhole or neckline is being reinforced, cut the lining, repeating the cut line so that the knit stitches (share line) are directed along the least stretch of the lining. Place it on top of the canvas and iron it. Sew using a sewing machine or overlocker. The excess gasket can be cut off.
An elasticated seam is used when sewing in sleeves and sewing a bodice to a skirt. Recommended for thick and semi-thick fabrics. Cut a strip of elastic equal to the length of the seam. Place it on top of the canvas. Sew using a sewing machine or overlocker. Excess elastic can be trimmed along the seam.
Topstitching is used on all types of fabrics to strengthen shoulder and other seams and give them a flat appearance. If the original seam allowances are pressed in both directions, stitching is done to the right and left of the seam line. If the edges are pressed to one side, the stitching is done according to the allowance along the seam line. Stitch the canvas. Iron the seam allowances in both directions or in one direction. Turn it onto its face and sew one or two lines along the seam line along the seam allowance.
Hem finishing
The simple hem method is most often used when processing hems on tops and T-shirts.
Place a securing stitch 1.3 cm from the edge of the neckline and armholes. First, mark the center of the neckline on the front and back of the top. Then center the armholes on each piece.
Lay each securing stitch first from one edge and then from the other edge to the center. For example, on the armhole from the shoulder to the center, and then from the side cut to the center. Sew using short stitches (1.5 - 2 mm), trying not to stretch the fabric. Sew the shoulder seams. If desired, you can finish the edges of the neckline and armholes with a 3 mm wide overlocker. Press the seam allowances of the neckline and armholes to the wrong side so that the stitches are not visible on the right side. Sew the side seams. Make two decorative stitches with one (or double) needle along the edge of the neckline and armholes at a distance of 3 and 6 mm.
Finishing with knitted elastic. Knitted elastic is especially often used for finishing knitwear: the design of the necks, sleeves and bottoms of sports blouses and trousers. If you were unable to find it, use another material. This can be any fabric that stretches at least 50% in width. There are two ways to attach ribbing: flat and circular.
The flat method is much faster, but the neckline is less neat.
Cut out the parts, add 6 mm to the seam allowance along the neckline. Sew the shoulder sections on one side of the garment only. Divide the neck circumference into 4 equal parts and mark with pins. Do the same with the trim. Pin it to the neckline from the front side, aligning the marks. Place the product under the foot with the trim facing up and sew at a distance of 6 mm from the edge with a narrow zigzag stitch or on an overlocker. While stitching, stretch the elastic, distributing it around the circumference. Press the seam allowance lightly down from the neckline. Sew the shoulder edges on the other side of the product, aligning the edges of the trim and the product exactly. Topstitch to the edge if desired.
The circular method is preferable. A neck made this way looks much neater.
Stitch the prepared elastic along a short cut at a distance of 6 mm from the edge. Divide the neck circumference and elastic band into 4 equal parts and mark with pins.
Pin it to the neckline from the front side, aligning the marks. Place the product under the foot with the facing facing up and sew, 6 mm from the edge, with a narrow zigzag seam or on an overlocker. While stitching, pull the facing evenly over the entire circumference. Lightly press the seam allowance down.
Topstitch along the stitching line with one or two needles. If you are using a single needle, keep the fabric slightly taut.
Elements of knitted decor
Classic necks. All of them are made in a circular manner.
For hook-type necks (a), the finished width of the finish is from 2.5 to 3.2 cm. The stitching line is 2 cm below the natural neck line. Cut a strip of elastic equal to 2/3 of the neck line plus 1.3 cm for seam allowance. For turtle necks (b), the finished width is 10 -15 cm. The stitching line coincides with the natural neckline. Cut a strip of elastic equal to the circumference of the neck plus 1.3 cm for seam allowance. For false turtle necks (c), the finished finish is 5-6 cm. The stitching line is 1.3 cm below the neck line. Cut a strip of elastic 3/4 of the way around the neckline plus 1.3cm for seam allowance. The cowl collar is perfect for soft and lightweight knitwear. There are two types of collar: traditional and asymmetrical. A traditional collar has even folds distributed throughout the neckline, while an asymmetrical collar has large soft folds in the front.
To make such a collar, you need to choose models with a wide enough neck so that your head can pass through it freely.
There is no need for a pattern for a cowl collar: a rectangle of the required size is cut from the fabric using a bias thread. The length of the collar is equal to the length of the neck plus 1.3 cm for the seam. Collar width is about 38 cm. Along the edge of the neckline there is an allowance of 6 mm. Stitch and press the short edges. Fold the collar in half with the wrong side facing in. At the same time, align the ends of the short sections (traditional clamp) or move them relative to each other by 10 cm (asymmetrical clamp). Sew to the neckline in a circular manner. Neck options with trim. They are also performed in a circular manner.
Double trim (a) is used on the neckline and hems of the sleeves, creating an effect known as “two shirts in one”. This requires two strips of elastic of different widths. Each one is folded in half with the wrong side inward, but they are sewn to the neckline at the same time. Criss-cross trim (b) with ends at front. In women's products, the right end is placed on top of the left, in men's products - vice versa. A contrasting insert (c) from the main fabric will beautifully highlight the central front of the neckline or bottom of the product. Insert (d) of two or three strips of elastic of different colors, sewn one to the other. Particularly suitable for finishing sleeves. Let us describe in more detail a more complex method of attaching trim: criss-cross finishing (b). Cut a strip of elastic of any width and length equal to 3/4 of the neck circumference plus 5 cm for the trim in a crisscross pattern. Fold the strip in half with the wrong side inward. Measure 2.5cm from each edge and mark with a pin. Place the ends one on top of the other and pin in the center. Divide the circumference of the neckline and elastic band into 4 equal parts and mark with pins. Pin the elastic to the neckline from the right side, aligning the marks and edges. Fold the ends of the trim over the seam line in a crisscross pattern. Break off the center pin, straighten the neck line and pin again in the same place. Trim off any excess fabric at the ends of the elastic. Place the product under the foot with the trim facing up and sew, 6 mm from the edge, with a narrow zigzag seam or on an overlocker. Stretch the elastic, distributing it evenly around the circumference of the neck. Lightly press the seam allowances down. If desired, you can stitch along the stitching line on the front side with a single or double needle. Edging trim can “refresh” and decorate even plain knitwear. For thick and voluminous fabrics, it is recommended to use edging instead of hem. In this case, the edge is much thinner. The edging strip should be 4 times wider than the finished edging. From thin knitted fabrics and jersey, it is cut in the transverse direction in relation to the loop column.
The piping is sewn flat: only one shoulder section is sewn down, the second - after sewing the piping to the neckline. In this case, the edges of the edging are ground together with the shoulder section.
The edging is sewn in a circular manner.
The only difference is in the processing of the inner corner.
On the front part, secure with a small stitch (at the level of the finished edge width) the angle of the neck: 2.5 cm from the center on both sides. Make a small cut in the seam allowance in the center of the corner. Perform all steps to process the neck in a circular manner. Turn the corner out. Sew the trim along the fold line.
Knit trousers
Knitted trousers softly and beautifully fit the figure and are comfortable to wear. The simplest trouser model is made with a one-piece belt. If you want to make pants with a pleated waist or a more traditional waistband, cut the waistband.
Pants without fasteners should be fairly loose in the waistband: take into account the size of the widest part of the hips and the maximum tension of the fabric.
If your hip volume is 100 cm, then the elastic drawstring can have a length of 100 x stretch coefficient. If the trousers have pockets in the side seams, it is necessary to allow an allowance along the hips of at least 5 cm so that the pockets do not bulge. Knitted trousers do not require a large allowance for the depth and width of the step, like trousers made from regular fabric. To prevent pants from stretching out at the knees, line this area with light lining fabric or cambric. When sewing crotch seams, for fastening, lay the tape cut along the bias thread. The belt with an elastic drawstring is not complicated in design and fits well with knitted fabric. At the same time, it can serve as decoration. Belts can be one-piece - cut together with the product, and stitched - cut as a separate part along an oblique thread.
In a one-piece belt, the elastic band can be left unstitched to the belt or stitched to its upper edge. Suitable for light to medium knitted fabrics. A stitched belt provides a great opportunity for modeling the style and can advantageously emphasize the waist. The stitched belt can be smooth or gathered. A smooth belt is a traditional belt that suits any figure. It is made from light or medium-sized fabrics with a rigid elastic band 2.5 - 3.2 cm wide. If the product is made from a voluminous fabric, the belt must be sewn from a lighter fabric that is similar in color (or, conversely, contrasting) fabric. A gathered, stitched belt looks more flattering on wide skirts made of thin fabric. It is especially impressive when a wide elastic band is used. General rule: the length of a regular elastic band should be 5 -7.5 cm less than the waist circumference; the length of a soft elastic band should be 7.5 -12.5 cm shorter than the waist circumference; the length of a hard elastic band should be equal to the waist circumference or 2.5 cm shorter. If the belt is decorated with several rows of stitches, the tension of the elastic may weaken; taking this into account, it is worthwhile to further shorten the elastic by 2.5 cm.
Hemming the bottom and loops Let's complete the sewing by hemming the bottom and making loops.
Bottom hem.
The bottom edges, hand-stitched, retain elasticity (picture on the right).
Sew seam allowances and hem seams with a large zigzag or overlock stitch. If the edges curl, then stitch not along the very edge, but at a distance of 0.5 cm. In this case, an elastic seam - a zigzag - is very good. If the edges stretch, simply grab the thread with a zigzag. By pulling it, you will pull the edge to the original width, and then press it. The bottom edges retain their elasticity when sewn along the front side with a double needle (with two top threads and one bottom thread). Two parallel stitches appear on the upper side of the material, and a zigzag seam appears on the lower side.
To prevent the fabric from stretching when adjusting the hem, stick a piece of adhesive tape on both sides of the future seam and then lay a stitch between them.
Making loops. Reinforce the places where the loops will be with non-woven fabric on both sides. Topstitch them very carefully, stretching the fabric slightly. Remove the interlining from both sides of the product.
Tips from Elena Kucherova
It should be taken into account that knitwear may also contain natural fibers, and it may shrink after washing. It often happens that a loose blouse becomes tight-fitting after washing. And the former dress was, at best, a tunic. Ask the fabric composition in the store or check it yourself at home. Gradually, by touch and by sight you will be able to determine the presence of natural components in the fabric: cotton or wool. To sew thin stretch fabric, we will need “stretch” or “super stretch” knitting needles No. 75 and thin polyester threads. I think you won’t have any problems with threads; now almost everywhere these are the only ones sold. On the reel it may be written “40/2 400 yards”. But the needles often try to slip “jersey” instead of “stretch”. Jersey needles are designed for sewing coarser, denser, knitted fabrics. “Stretch” needles have a specially rounded point (not noticeable to the naked eye) that passes between the fibers of thin stretch fabric without tearing them. There are also special needles for sewing knitwear on an overlocker. Ask in stores. Don't believe that just a fine needle is enough. Always before sewing fabric, try sewing on unnecessary pieces to check if there are any holes left by the needle or if stitches are skipped. Skipped stitches and holes in the fabric can be caused by a needle that is no longer new and dull. Try changing it. Sewing knitwear has its own characteristics. Try all the tips you've heard about sewing knitwear to find the techniques that are right for your sewing machine. When I first started, my mentor advised me to sew knitwear using a narrow zigzag stitch. This is when the stitch length is 3 mm and the width is 1 mm. This seam is very similar to a straight stitch, but can stretch a little if necessary. In my opinion - not enough. Ideally, just completely sew all the seams using an overlocker. It is only necessary to adjust the tension of the threads so that when the fabric is stretched, the seams are practically invisible. It's like in the picture. seam on the front side If you think that just an overlock seam is not enough, sew another machine, stepping back from the overlock seam by 2-3 mm. Now I sew knitted parts with simple straight stitches 3 mm long, while sewing I slightly stretch the fabric, trying not to stretch the seam allowances. Look at the picture. we stretch the fabric, not the seam allowance. Hemming the bottom of the product and sleeves is ideal on a special machine - a “stitcher”, it creates a seam with two needles at once. You can use a double needle for your sewing machine or imitate this seam by sewing two regular straight lines in succession. I do not recommend sizing highly stretchable knitwear with non-woven fabric. If necessary, try a piece. Often the appearance of the fabric in this area deteriorates, and it will no longer stretch. Look for another type of treatment. Write details in the comments, we’ll figure it out together. Neck cuts in items made of thin knitted fabrics can be processed with a roll made of the same fabric. This is what we do on our dress from the last post. Please note that there is no need to cut the roll at an angle of 45 degrees, but rather cut a strip of the required width along the most stretchy side. To ensure the finished edge looks perfect, apply slight tension to the roller when sewing. When sewing from knitwear, there is no need to trim the necklines and armholes with facings. You can simply, slightly stretching, sew a folded strip of the same or finishing fabric around the circumference. Topstitch so it doesn't curl. I use a stitch stitch, and you use a simple straight stitch on a machine. view from the front side view from the back side When ironing, lightly press the seams. To do this, I lightly gather the seam on the board and then simply put the iron on top of it for a while. I hold it for a couple of seconds and lift it up. Ironing is very important when sewing knitwear. You can’t “wiggle” an iron here and there. And in general, get out of the habit of moving the iron over the fabric. This technique is used only if you need to stretch a certain area of the fabric or seam.
Source
I think you will be interested:
>
- We sew evening dresses! Useful video from international sewing courses in Israel.
- We sew flounces - the most clear and detailed lessons from Olga Klishevskaya!!!
- We sew a drawstring correctly using the example of a bread bag. Master Class
Leave a comment
Click here to cancel reply.
How to hem a T-shirt at the shoulders
Sewing a T-shirt at the shoulders is easy, since you don’t even have to rip the fabric.
Hemming steps:
- Mark the length you need from shoulder to collar;
- Draw a line with chalk or soap to the end of the armpit line.
- Fold the T-shirt in half.
- Trim off excess fabric.
- Pin the sleeve, front and back that you cut off.
- Sew these parts and press thoroughly.
How to hem a neckline
Sometimes, due to prolonged wear and frequent washing, the neck of a T-shirt can stretch and look different than when purchased. On the Internet you can find a lot of tips on how to hem a neckline. We will talk about several below.
What you will need:
- pins;
- hand needle for knitwear with a blunt tip;
- or a sewing machine.
Collar hemming method No. 1
Progress:
- Turn the T-shirt inside out.
- Fold the edge of the collar and pin it with pins.
- Sew by hand or on a sewing machine.
It is important that in the end your seam is elastic!
Collar hemming method No. 2
There is another option for hemming a T-shirt collar, which involves cutting it off and then re-sewing it back on.
- Pull the collar away from the T-shirt.
- Spread the shoulder collar about two centimeters.
- Carefully smooth out the entire fabric.
- Cut the seam from the trim strip.
- Stretch the bar by ironing it.
- Finish any of the long edges with an overlocker.
- Place the T-shirt and placket with right sides facing each other.
- Baste so that the neckline and raw edge match.
- Cut off the rest of the strip.
- Sew the placket to the fabric.
- Unscrew the bar and baste.
- Sew the strip and topstitch it at a distance of half a centimeter.
- Sew and finish the shoulder seam area.
