Woven products, not only bracelets, but also belts for clothes, collars and cuffs, necklaces and headbands, scarves and stoles, bags and clutches, covers for phones and chair seats and much more, consist of knots, the tying technique of which can be easily found in such needlework as macrame. Macrame has its roots in Ancient Egypt, Greece, Iran, Peru and China. People of those times tied stone axes with similar knots and knitted mats. To this day, macrame is popular among both the female and male half of humanity. You will find patterns for weaving bracelets from laces below in the material.
Men, of course, do not wear jewelry, but they can wear a minimalist stylish bracelet made of knitted or leather cords. Women's jewelry is more varied and a woman has to have a large number of them in her wardrobe, matching them with each of her outfits, but in order not to spend your entire budget on beautiful things, you can weave an original bracelet yourself. For a woven bracelet, various materials are used: threads of different composition, incl. and floss, beads, satin and leather ribbons, fabric, knitted and leather laces, and to make the bracelet more attractive, it is recommended to add beads of different sizes and colors.
What types of cords are there?
There are different types:
- leather;
- metal;
- polyester;
- textile;
- rubber;
- twine;
- paracord
But most often they use:
- waxed;
- nylon;
- suede.
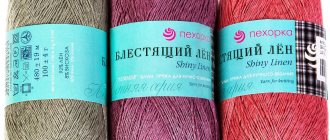
Waxed
They are strong braided or twisted cords made of cotton or synthetic threads impregnated with wax. The product range is represented by a large color palette (about 20 shades), allowing you to choose the ideal color for your future decoration. Due to wax-impregnated cotton, a waxed cord bracelet is dense and practical.
Nylon
A thin twisted product, the same rope, only of a smaller diameter, has great flexibility and can withstand high loads. Typically used to create unusual patterns. Nylon ends are easily scorched, therefore, the master can weave the cord into absolutely any pattern.
Suede
As a rule, they are made of durable and, at the same time, soft leather, giving them a beautiful velvety surface. Despite the elegant texture, such jewelry is durable. The color range is also large - 9 primary colors, each with from 3 to 12 halftones. But they require careful treatment and constant care, otherwise the suede will wear out and the jewelry will lose its attractive appearance.
Tip: you can use different cords in one product, but it is important to remember the right color combinations so as not to overload the composition.
MK double bracelet
*photo MK: Vera Mazepina
In the weaving of this bracelet, the beads are not fixed with a flat knot: in order to secure them to the base, you need to twist them alternately with working threads.
For this bracelet you need 18 turquoise beads with a diameter of 12 mm, 4 metal beads, waxed cord, scissors, glue and a lighter.
Necessary materials
How to quickly and correctly make a bracelet from a cord, what materials and tools are needed - these are the first questions that arise for people who decide to make their own jewelry.
First, you need to prepare your workplace. It should be bright and spacious, nothing should interfere with work. Depending on the type of weaving, you will need to use either a solid cushion to pin the edges to, or a rod to which they are tied.
Next comes the choice of material, shape and size. If you plan to make jewelry from laces and beads, then they need to be selected in such a way that they fit the size of the hole with the cord and harmoniously match in color.
Advice: it is advisable to think in advance about what clothes the accessory you have made will be worn with, so that it matches the overall concept of the outfit.
The next step is choosing a lock. There are many devices designed to fix the finished product on the hand. These are special latches, toggles, hooks, carabiners, clip locks, magnetic locks and others. It all depends on the preferences of the master.
And the last, but very important step is choosing a scheme.
Models of baubles
Today there is a wide range of wicker products on sale for every taste. These can be thin and massive bracelets, made from one thread or from several. They can be decorated with beads, stones or ribbons, and can also be as laconic and discreet as possible. What we have today:
- Beads. Woven bracelets with bead inserts are bright and beautiful. Moreover, it does not matter at all whether the product is made in one color or not. A bracelet with beads is suitable for everyday wear as an element of a fashionable look.
- Pendants. A bracelet with a pendant is another bright detail that is very popular among modern fashionistas. Here the pendant, or rather its shape and theme, can highlight almost any image. Most often, metal products in the shape of leaves, flowers, hearts, as well as geometric shapes and symbols of faith are chosen as pendants.
- Nuts. No matter how unusual it may sound, nuts can also be used to make products from laces. With their help, you can make an impressive and strong bracelet of medium and large sizes, which will look good not only on a woman’s, but also on a man’s wrist. Nuts will well emphasize the daring image of a rebellious nature.
Simple pattern
To learn weaving, take thick cotton cords. Start weaving macrame by securing the base. Since it is represented by a straight line, it is most convenient to tie it at the two ends to the back of the chair. This is the main thread; three ropes are already attached to it, placing them as shown in the diagram under numbers 1, 2, 3, 4, 5, 6. To do this, they are folded in half, and both ends are inserted into the loop in the middle. All that remains is to tighten it tightly and you can start weaving.
The work is done only with the middle two threads, designated numbers 3 and 4. When the required length of the craft is reached, the edges of the main thread from below and above are tied to one another and secured with knots. The ends should hang down. This kind of macrame is quite suitable for beginners to master the basics of this art; you can make a belt or handles on a bag this way. If you take thin ropes, you can make a bracelet on your hand with these double loops.
Weaving pattern for a wall panel
The beginning of weaving from cords is similar to the previous example, only the main thread is strengthened not on a rope, but on a wooden stick. The knots in the product are woven from 4 threads, first at one level, and then in a checkerboard pattern a few centimeters lower. Be sure to make sure that all the knots in the row are at the same level, then the work will look neat.
Step-by-step instructions are given in the photo above. When several levels are connected, the work is completed, and the remaining cords are trimmed with scissors so that all ends are the same size. You can do it differently: starting from the middle to the edges, gradually reduce the size to form a triangle.
Selection of schemes
Below is a selection of patterns for weaving bracelets from laces.
1) The most common knot in woven bracelets is the double flat knot.
2) The next weaving option is “Tatting” knots with “picot” air loops along the weaving. Tatting knots are also called left and right loop knots.
Here the tatting knots are woven not on one knotted cord, but on two.
3) The Josephine knot (another name for the bow knot) is another way to weave a lovely bracelet.
Related article: DIY candle holder from a glass jar: ideas for Halloween
4) The Turkish knot or also called the “Turkish head” knot is very popular among lovers of bracelets with interesting patterns.
5) Weaving a variety of braids from 3, 4, 5 and 6 laces does not cause difficulties for beginning craftswomen.
6) A Celtic knot (“Heart” knot) can be woven for the entire bracelet and simply tied at the ends of the laces.
Diamond knot
The knot called “Diamond” looks very impressive. To create it, you need to fold the rope in half and lay out the threads in three different directions, as shown in figure No. 1. Then wrap each end with a loop. Tighten the edges of all three segments inside the previous loop, and only from the outside.
Do not tighten the knots immediately, otherwise the structure may fall apart. Slowly tighten each knot, gradually reducing the distance to the middle. With the last series of movements, fix it tightly. This triple knot looks beautiful on both sides of the belt.
We recommend reading: Beaded figurines: weaving patterns for beginners and more, how to make flat and three-dimensional figurines
Patterned cord weaving
To make a bracelet, take cords of two contrasting colors. In our sample it is yellow and red. The first is folded in half and fixed at the central point with a mace with a bead at the end on the pillow. The red one is wrapped around the bead and tied in a knot around two yellow cords.
Then the weaving proceeds one by one: first, they tighten with a yellow thread on both sides, and then again fix the middle with a red cord. The result is a pattern in a circle. Continue working in a similar way until the bracelet reaches the desired size. Finally, all the cords are tied together and this tight knot is inserted into the starting red loop. It turns out to be a kind of fastener.
Types of nodes
So, as mentioned above, the simplest pattern for a bauble is weaving a double flat knot. Moreover, each new product using the same design can look completely different due to different materials.
Another common and popular pattern is weaving with knots with the unusual name “tatting”. This pattern looks like air loops, they are also called loop knots on the left and right sides.
The list of the most beautiful knots for bracelets can easily include the “Josephine” pattern, thanks to which you get very beautiful intricate products that will look elegant both in one color and in several.
Another pattern that may resemble “Josephine” is the so-called “Turkish head” or simply the Turkish knot. This type of weaving will definitely appeal to lovers of unusual jewelry.
The so-called “Celtic Knot” is very popular among connoisseurs of authentic accessories, which is woven only once throughout the entire bracelet and is a kind of insert. One of the simplest and most common patterns is the well-known braid of either three laces or five or six; here everything depends on the skill and imagination of the needlewoman.
But if the product consists not only of laces, but also of beads, then it is worth observing some nuances:
- Before starting work, you need to measure in advance the girth of the wrist on which the future bauble will flaunt, and then take a cord, the length of which will be 4 times greater than the figure obtained when measuring;
- In addition, you need to prepare at least 9 beads for the bauble itself and plus two smaller beads for the ties;
- It is recommended to weave a bracelet according to the simplest pattern - this is the so-called “double flat knot”.
Next you should take the following steps:
- A long cord is cut into three unequal parts: one along the length of the wrist, the second taking into account the size of the beads, and the third for ties;
- all three laces must be secured to a suitable object: two long laces should be placed at the edges, a short one should be placed in the middle;
- weaving must begin by retreating about 7-8 cm (for ties);
- first you need to weave two flat knots according to the diagram;
- then a bead is strung on the middle cord, which is wrapped around the two outer cords;
- then two flat knots are made again.
This is how all the work on weaving a bracelet with beads is carried out. In fact, experienced needlewomen can experiment with the number of decorative experiments and knots, everything will depend on imagination and skill.
Braided bracelets are not just a hobby, but a modern fashion accessory not only for everyday wear, but also for special events. If you have several of these products, you can complement absolutely any look in an original way; they will look especially attractive in the summer in combination with sundresses, shorts or bright things with an ethnic theme.
Knots we use for weaving
Now let's look at existing weaving patterns that can be used in the creative process.
Double flat
The most widespread type of weaving. It also has other names - square, encircling and double half-knot.
Important! You must first measure your wrist circumference for a loose or tight fit. Do not forget that the measurement is taken taking into account the width of the fastener.
- On some ledge or hook, fasten two threads one meter long with a knot. In this case, one end should be 80 cm and the other 20. The short ends will serve as the base, which is braided with side threads.
- Weaving begins on the left side, when the thread is laid on top, and then the right one braids it. In this case, it is passed under the short ends, and comes out between the left short and long.
- Tighten the knot.
- On the right side, the same is done in a mirror image.
- The knots are placed tightly to each other, then the chain is smooth and strong.
Josephine
It is also called a “bow knot”. It looks more gentle and elegant. It is made of thick and rigid rounded cords, so the finished product looks very neat. Usually used in individual fragments of a pattern. The number of threads is taken equal to multiples of . The more there are, the wider the craft will be.
It is more difficult to weave than the previous one due to the instability of the pattern; therefore, when tightening the loops, it is advisable to ensure that they do not move. To begin with, you should learn on some tight rope.
- One of the ends is folded into a loop and placed on the other.
- Now place the second one on top of the first one, and then go under it.
- Lower the second end into the right loop, passing under it, and placing it again under this loop. We get a left loop.
- We pull both out to align the pattern.
- We continue knitting knots until the end of the chain.
Tatting
An example of this is shuttle lace.
- Air loops braid the main threads along the entire length. Depending on the direction in which the fastening occurs, it can be left or right.
- Fasten the thread to a clasp with two ends - short and long.
- While pulling the short thread with your hand, make a knot with the other, wrapping it around it from bottom to top and passing it forward.
- The next knot is made behind the main thread, wrapping it from the bottom up and coming out from under the working thread.
Attention! In this method, the auxiliary thread should be 8–10 times shorter than the working thread.
Turkish
One of the types of sea knots that are used in decorative needlework. The peculiarity of this weaving is that it is performed using the Josephine knot.
- We make the first loop and fasten it to something.
- We tie a Josephine knot under it and we get three loops.
- Using the end of the thread, add another one and use it to braid all four loops in the second circle.
Attention! You can weave a women's or men's bracelet in the round from plastic laces without a fastener, using any cylindrical piece equal to the volume of the wrist.
Celtic
Quite famous for its use in Christian manuscripts and monuments. For example, it was used in the ornaments of the manuscripts of the Holy Gospel and the Book of Kells.
You can make only one openwork element and tie the ends of the cord on your hand. It is woven in the form of figures of various shapes - round, square, triangular. It is made both from one color and multi-colored in several folds.
- We create a loop at one end and pass the other through it. The result is a shape like a heart.
- Using the same elongated edge, we go one by one inside all the rounded parts.
- We make the same turns on the reverse side until the entire internal space is filled.
How to weave a bracelet?
We have described the basic weaving techniques used in making jewelry. They are used in various accessories that have both a classic, strict look and a formal, elegant look.
Cobra
We will need paracord - a lightweight nylon cord in two neon colors. And the brighter it is, the more interesting the thing looks . For example, these will be green and purple.
- Fold the green one in half.
- We have a loop formed on top. This is a fragment of the future fastener. You can make it in the form of ties or attach a metal one.
- We wrap it with purple cord so that both ends are on the left.
- We wrap the top half around the bottom, bringing the end of the rope to the right. It turns out that the knot wrapped around the green cord, while being located on the left side.
- And then the actions are repeated exactly so that the purple nodes are on one side and then on the other alternately.
- At the end we make a thick knot, which is inserted into the loop made at the beginning of the work.
With beads
For this you will need:
- carabiner for fastening;
- three meter lengths of satin cord;
- round beads;
- 2 limit switches;
- 2 connecting rings;
- Super glue;
- pliers and round nose pliers.
We do this:
- Apply glue to the inside of one of the end caps.
- We insert all three threads into it at the same time and clamp it with pliers. On the other hand, we thread the beads into the left cord, securing them with a knot at the end.
- From the fastener side we braid a regular braid 5–6 cm long.
- We insert a bead from the left extreme segment, bending it around with the right lace. We continue until they run out.
- Next we braid the braid again. We cut off the edge and glue it to the second end.
- We open the connecting rings and thread them through the carabiner loop.
- We string them onto the end switches and close them. You can wear the bracelet in several layers, using beads and cords of different colors.
For a man
This look is made voluminous and multi-layered . Let's prepare two types of laces: blue and black, the size of four wrist sizes . We make a loop on the green one, bending it in half. Typically, bracelets are made of natural, artificial leather, waxed cord of one color or two colors. For work we will need:
- two cords;
- large metal bead for clasp;
- scissors.
Work process:
- We put the cords together, bending them in half.
- At the bend we create a loop, on top of which we fold another. There is space between them.
- We bring both edges of the left cords under the right ones, insert them inside the loop, bring them out to the middle and insert them into the left loop from above.
- Tighten, carefully straightening the cords with your fingers.
- Again we fold the left cord, placing the right one on top.
- We repeat the previous steps until we reach the end.
- Tighten the knot, gather all 4 ends together and thread them into the bead.
- After dropping a drop of glue, insert the knot into the hole of the bead. The protruding ends can be trimmed or left for decoration .
Bracelet - braid
You will need three beautiful laces from any material, approximately 2.5 wrist widths:
- Place the ends together and secure with a paper clip or tie in a knot.
- We fix them with some kind of hook or protrusion. And we braid a regular braid.
- If you want a more voluminous bracelet, do not weave it very tightly. Leave tassels at the ends.
From three laces
This bracelet can be made in the form of a braid or created with a more complex pattern. Decorate it with 9 large beads and two smaller ones. The cord is taken 4 times larger than the volume of the wrist. The accessory is made with a double flat knot.
- The cord is divided into three parts. One of them is the size of the product with an allowance for a loose fit and fastening, the other two are the same.
- We make two flat knots around a short segment.
- Then we put a bead on it, crimp it with two outer cords and again tie two knots.
- We finish the work with two small beads located on both sides.
From many laces
This type of weaving can be done in any way by adding two other colors to a piece of cord of the same color and laid in several layers. Which looks quite interesting and exclusive.
Snake
It is usually woven from paracord or leather. Having measured the circumference of your wrist, multiply this length by the number 12. This amount will be used for the entire product .
- Fold the cord in half. We take it in our hands so that the loop faces in your direction.
- We slightly separate the ends to the sides, throw the right one over the left one, bring it out under it and carry out the same actions with the left one.
- Insert the right tip into the left loop and thread it through, tightening at the same time. We still have a loop at the end for the fastener.
- Then we throw the right lace on top of the left one.
- Place the left end under the right and insert it into the right loop.
- Alternating these movements, we finish our bracelet.
Multi-colored for children
Bracelets for children can be woven from brightly colored material using any of the above methods. If desired, complement it with fun fittings made in the form of animal figures or hanging metal elements. also look good .
By making this craft together with your child, you will accelerate the development of his fine motor skills and aesthetic taste. To emphasize your individuality, choose a material of any texture and palette. And the schemes proposed above will help you create unique masterpieces that will highlight the originality and artistic style of the owner of this jewelry.
Superstitions of unmarried people: why you can’t wear a skirt wrong
The benefits and harms of a wooden hair comb
Bracelet made of satin cords with beads
You will need: 3 satin laces (each one meter long), beads, carabiner, end caps, round nose pliers, pliers, jump rings, super glue.
Master Class
- Apply super glue inside the end cap.
- Glue 3 laces and clamp with pliers.
- String beads onto the other edge of the pieces. There should be the same number of beads on all three segments.
- Tie knots.
- Make a braid 5 cm long.
- Pull the bead onto the left outer cord and weave it into the braid.
- Wrap the empty cord around the bead while continuing to braid.
- Add a bead to the left edge and braid it. Weave all the beads in this way.
- Make a braid 5 cm long.
- Apply super glue to the other end, then glue the sections together using pliers.
- Add a lock in this way: open the small connecting ring, thread a carabiner loop onto it, attach it to the end and close the ring.
- Connect the second connector to the small ring and secure it to the carabiner clasp.
We recommend reading: Knit sweater with deer diagram: models with description and video MK
I recommend watching the video master class!
How to make a braided cord bracelet with your own hands. Master class Watch this video on YouTube
Lace bracelet for men
You will need: a green cord 60 cm, a black cord (measure your wrist and multiply by 4 - you will get the length of the black cord), a lighter.
Master Class
- Fold the green lace in half.
- Tie a knot using the macrame technique as shown in the picture.
- Lift the green cord on one side, insert the black cord, and make a regular knot.
- Make the same knot on the other side.
- Braid knots on both sides, continuing to weave.
- Tighten the knot tightly at the end, cut and singe the edges of the black lace.
I recommend watching the video master class!
Cord bauble for men. Very simple! Watch this video on YouTube
Basic weaving technique (flat knot)
Before you start working, you need to get acquainted with the main knot that will be used in weaving. It is called flat, or square. The weaving technique and pattern for beginners are shown below.
Pay attention to the light green cords: this is the basis on which we will weave. In the example, it consists of two threads, but you can easily take one, the diagram will look like this:
The base is always located in the center of the weave, and it must be properly tensioned for comfortable work. For example, you can use a shoebox lid and simple office clips for this.
Detailed description of the process:
- We throw the cord from the working thread, located to the left of the warp (blue), over it and take it under the far right (red).
- We take the red cord to the left, under the base, and pull it into the loop formed by the blue cord. Half the work is done, and now you need to repeat the same thing on the other side.
- We draw the right cord (blue) over the base, under the left (red).
- We pass the left cord (red) under the base and pull it into the loop on the right. We tighten it.
The unusual straight knot is ready. In fact, its weaving consists of two stages:
- left: above the base - under, under the base - above, tighten;
- on the right: above the base - under, under the base - above, tighten.
When using beads in the weaving process, the actions are no different: the beads are strung on the base, and the knots are tied between them. The main thing is not to hold back your imagination: we are sure that you will create a real masterpiece!
By the way, a bracelet with one spectacular bead looks very cool. To weave this element, it does not need to be tied with knots on both sides: the side threads can simply be threaded through the hole in the same way as the warp thread. Look at the example of both options:
How to weave a clasp for a shamballa bracelet
The “sliding lock” is made using the same square knots.
Of course, there are several nuances:
- the knots of the “lock” should not be tightened too much so that it can be used safely;
- instead of one main cord, we use two ends of the bracelet, folded together;
- for tying, take a separate piece of cord 40-60 cm long;
- we form a clasp by tying 5-10 knots; you can tie beads at the end.
Our master class below will show in detail how to weave a clasp.
Leather cord bracelet
You will need: thin leather cord, embroidery thread, thick waxed rope, ruler, scissors.
Master Class
- Take waxed rope and cut 25 cm.
- Make a loop at the end of the rope.
- Make a knot in the loop.
- Cut a piece of rope, leaving half a centimeter under the knot.
- Wrap the leather cord around the waxed rope until a half-centimeter long section is hidden.
- Make one more turn with the leather cord, then pull the end through the loop and tighten to make a tight knot.
- Place the end of the embroidery thread onto the lace and rope.
- Wrap the thread around the rope in a circle.
- Secure the thread by pulling the end into the loop and tightening a tight knot.
- Continue weaving by wrapping the leather cord alternating with the thread. Don't forget to secure the knots after each section!
- Make a knot at the end of the cord so that it fits into the loop.
- Trim off any excess ends.
I recommend watching this video!
braided leather bracelet Watch this video on YouTube
The modern fashion industry supports unpretentious simplicity, both in clothing and jewelry. Bracelets made of laces look elegant and original, and are also comfortable to wear.
Popular nodes
Various techniques are used in weaving baubles from cords. Craftswomen use different types of knots to create unique decorations, and some of them are invented by the craftswomen themselves. The classic type of braiding is a braid, which is braided from four cords.
Circular braiding and girlish braids are also often used. Modern craftswomen really like the technique of double and single puzzles. Any type of weaving is, in one way or another, based on the classical technique.
Several types of nodes can be distinguished:
- Surgical. At the very beginning, you need to tie a half-knot. To do this, you need to take one end of the lace and hold it lightly. The second end is braided around the first tip. Then the manipulations are repeated and the weaving is secured. To do this, you need to circle the first half-knot five times and the second half-knot once more. When finished, you need to carefully trim off all excess, leaving the ends no more than 1.5 cm long.
- Simple. To tie such a knot, you need to take the tip of the material and pull it through the loop, and do it from the reverse side. Now you need to move the knot slightly away from the loop and tie both ends together. But this type of knot is used extremely rarely; it is considered very impractical.
- Sliding. Perhaps one of the most difficult options. It takes a lot of time and patience to create jewelry using a slip knot. To tie a slip knot, you need to measure 15 cm on both sides of the lace; this length will remain in reserve.
Then you need to make a loop from the right lace, and in such a way that its tip is on the outer edge. Now take the left cord and use it to circle the loop, and make two turns at once. At the very end, both ends need to be pulled through the loop and the structure tightened.
How to weave bracelets from laces
Laces are an excellent material for weaving bracelets. These can be thick or thin laces, fabric and leather, laces of a wide variety of colors and textures. You can use as many laces as you like in one bracelet. A little tip: don't forget about the right color combinations and try not to overload the composition with ten different laces. Below in the photo you can see techniques that are perfect for beginners: Sometimes bracelets made of laces alone look rough, then they should be diluted with delicate and romantic beads: A bracelet made of leather will look stylish and fashionable. Just take some leather laces or ropes and make a simple but elegant braid:
Video
Lace baubles: straight weave patterns
If you want to make a bracelet using straight weaving, take several laces of different colors as a basis.
Next, we fasten the ends of the laces and begin to make a series of knots to the right and left (we do this in one color). Then we weave another lace and repeat the knotted pattern the same number of times. As a result, you will get a beautiful product made from different colors.
In a word, stock up on plenty of laces, be patient, and don’t be afraid to experiment using a variety of lace bracelet weaves.
How to weave a friendship bracelet with your own hands
A friendship bracelet, or in common parlance a bauble, is woven from thin threads. This is where you can absolutely not limit yourself in the number of colors; the more there are, the more colorful and pretty the bracelet will turn out to be. Weaving them is not so difficult, you can see some patterns in the photo below: We also recommend watching the video to see the process clearly:
These bracelets can be worn three or more at a time, they do not overload the image, especially if you choose the right color scheme.
Bracelet made of rubber bands
Bracelets made from many colored rubber bands have come into fashion quite recently and immediately captivated young people. Such bracelets are very inexpensive, and even an absolute beginner can make them on their own. They look bright and fresh, making them a suitable accessory for teenagers.
A rubber band bracelet can be made in several ways:
- On a special machine. To make a fishtail bracelet, take one rubber band and twist it in a figure eight. Next, place your figure eight on a special machine and add two untwisted rubber bands to it. As you add each new rubber band, lift the tip of the first rubber band using the protruding parts of the machine. Do this until the length of the bracelet is satisfactory:
Editor's choice: How to wear tassel earrings?
- On the fork. This option is also suitable for beginners. To do this, take an elastic band, twist it in a figure eight and fold it in half to get one small ring. Then place it on the middle tines of a fork. Do the same with the outer tines of the fork on both sides. Next, put another small ring on the middle teeth and “throw” the ends of the first elastic band over it. Repeat these steps until you complete the bracelet.
We recommend reading: DIY aquarium at home: assembly steps, video
Tips for choosing weaving material
Threads, cords and beads
First you need to choose the materials you will work with. Almost any thread is used to weave shambhala: floss skeins, threads for weaving fishing nets, ropes, knitting yarn and waxed cords are used.
In this case, you need to focus not only on the appearance of the selected material, but also on how it behaves in operation: for example, leather cords look very rich, but the knots on them are difficult to tighten. Thin cotton threads are easy to tie, but during use they quickly become unusable.
Most often, bracelets are woven from waxed cord . It is not as slippery as others, so the knots do not unravel during operation. The ends can be easily secured by burning them over the flame of a lighter. In contrast, cotton lace quickly loses its aesthetic appearance, and you also have to fasten its ends with glue.
When choosing beads, you need to focus on the width of the hole: it is important that it is large enough, so ordinary beads will not work - you will not be able to string them on a cord. Typically, one bracelet requires 5-7 beads, but there are examples of amazing designs that use just one bead.
You can order them in any online store, and if you have some time to spare, you can order the beads on Aliexpress.
Machine
Behind this term lies a very simple device that will help you quickly and easily weave a bracelet with your own hands. The weaving machine is a simple board into which two nails are driven at a distance of 25-30 cm.
To use the machine, you need to tie one end of the lace to a nail, and string the selected number of beads onto the free area. We also tie the second end to a free nail. In the end it should look like in our example.
Now you need to cut another thread, which you will use to make knots. We fix it on the one that is already on the machine, and you can work.
Even if you do not have the opportunity to make such a loom, you can learn how to weave shamballa at home without it. It is enough to secure the working thread in any convenient way, be it a pin or a stationery clip.
Advice from the experts
We also recommend taking note of tips from experts that will help you in your work:
- For a bracelet in one row, the length of which is 18.5 cm, you will need 12-15 beads. If you plan to decorate in two rows, then this amount is doubled.
- One bracelet will require a cord length of 1.5-2 meters. The exact length depends on both the circumference of the wrist and the number of beads used.
- To prevent the ends of the threads from becoming fluffy and interfering with your work, you can lightly singe them over a fire, or coat them with colorless varnish.
To get started, these tips are enough, and you will become familiar with the rest of the nuances as you work.
Paracord Survival Bracelet
If you are a seasoned hiker and can’t imagine your life without hiking, then this bracelet will become your indispensable assistant. The survival bracelet is made from paracord, making it lightweight, durable, and flexible. In addition, this is probably the most multifunctional bracelet in the world. With it you can:
- build yourself a shelter;
- organize a clothes dryer;
- repair instruments;
- stop bleeding using the bracelet as a tourniquet;
- assemble a homemade bow;
- collect a fishing rod and catch fish;
- build a snare;
- make a lifeline;
- and much more.
The length of the cable in such a bracelet ranges from three to five meters, while it is comfortable and almost invisible, such decoration is extremely unburdensome. We can add various useful things to the bracelet, for example, a small blade, a carabiner, a metal token or a capsule.
Editor's choice: Fashionable women's umbrellas 2021 - new items for the season with photos
Another advantage of such a bracelet is that it can be unbraided in 10-15 seconds in case of an emergency. For convenience, you can weave a dial or a small compass into the bracelet:
Let's look at some instructions for making a survival bracelet:
Lace weaving
Below are ways to weave various laces, varying in complexity and functionality.
How to make a simple chain of loops
The result here is very interesting - the cord itself is very dense and strong, looks like a chain and
braid
Of course, thick wool threads are also suitable for this method. However, the advantage of this method is that it allows you to weave a chain even from the thinnest sewing threads .
An additional advantage here is that the chain is woven directly onto the product, unlike other weaving methods.
- The thread needs to be secured to the back of your product.
- Then transfer it to the front and make a small stitch.
- Then pass it through again and bring it to the front side, in this way a loop is formed.
- You need to take the working thread and carefully tighten it into the resulting loop.
- After tightening, you need to intertwine, thus making a new loop.
- The further sequence of actions is the same. We don’t stop until we get the lace of the required length.
Important! Try to create tension in the fabric and secure it. Complete stillness and tension will greatly help you in your work process!
How to quickly make a twisted cord
The twisted version is one of the simplest elements that can be done quite quickly. Advantage
It is also believed that
you can make it of any thickness, as well as weave threads of different colors . This gives a rather interesting result.
- One side of the thread is fixed , on the other we begin twisting. The stronger the twist and tension, the more turns there will be .
- After this, we connect the sides and bend everything in half , causing the cord to twist on its own.
- The matter remains small. We need to straighten out various bruises and rough spots, and also tie up the knots at the ends of our work so that nothing comes undone.
How to make a cord from elongated loops
In this method, it is better to use only thick threads, preferably made of wool .
The meaning here is extremely simple. You need to fix the ends and make loops that will need to be threaded into each other.
Important! Always tighten the loop that is on top!
The algorithm is extremely simple, the main thing is not to get confused.
How to make a two-color lace
The result of the work will be impressive - both strength and aesthetics. To work you will need 4 identical threads
thickness, quite large, two colors. The main thing in this method is not to panic at the very beginning of work, when some nervousness appears. After a few steps it will become much easier.
You need to take two threads of a contrasting shade, tie them together and fix them to something to make work easier.
The order of weaving is as follows: dark threads in front and back, and light threads on the sides on the left and right. Gradually we twist the dark and light threads in opposite directions.
It turns out that we will weave lighter shades into dark ones. We repeat the process cyclically until the work is completed.
Master class on weaving a simple bracelet
To create a simple shamballa bracelet with your own hands you will need the following materials:
- 9-11 beads with a diameter of 8-12 mm;
- 2 beads with a diameter of 6-8 mm;
- nylon thread 30 cm long and 0.8 mm thick;
- two pieces of nylon thread 1.2 mm thick, 1 m and 60 cm long, respectively.
Before starting work, make sure that all beads can be strung on the selected thread. The work is carried out in stages, using a square knot.
Secure a 30 cm long thread to the pillow with a pin: this is our base. The meter thread is the working thread, we pass it under the warp so that 50 cm remains on each side, and tie the first flat knot.
Next, for reference: the working thread on the left is No. 1, on the right - No. 2.
Step 1. We draw thread No. 1 over the base. We pass No. 2 above No. 1 and under the base.
We draw No. 2 up to the left, into the loop of thread No. 1: it turns out that No. 2 passes under No. 1. Tighten.
Step 2: Now #1 is on the right and #2 is on the left. We draw No. 1 over the base. We pass No. 2 above No. 1, and under the base. We pass No. 2 up into the loop to the right of the warp thread.
We tighten it. The first square knot is ready.
Step 3. Using the same principle, we knit 4 more knots or more if you are planning a long bracelet. We move the bead to the last knot, tie another one, fixing it in one place.