In a modern, beautiful kitchen, everything should be perfect, clean and tidy, from the interior to such a small thing as oven mitts for hot utensils. They just wash very poorly, and therefore there should be enough of them in the house to easily replace them.
Sewing a cute little thing is not difficult. In addition, unique potholders made personally are a wonderful gift.
Patterns and manufacturing diagrams
The main task is to come up with and implement the design of the future craft. Not only beautiful textile remnants are suitable for this purpose, but also various shapes - circles, hearts, squares, mittens, pumpkins, butterflies.
The sizes of the product vary depending on functionality, so it is preferable to make a solid set for all occasions: several circles or squares, a mitten, decorative cute things that lift your spirits.
To sew a mitten, prepare a pattern of the required size in advance so that after finishing the work your hand can fit freely inside. For square and round crafts, pieces of canvas measuring 20x20 cm (or others according to your desire and taste) are suitable. A strip of fabric for the loop is required - 8x12 cm.
When making potholders, it is important to accurately select textiles and heat insulators in order to protect your hands from burns. The right solution would be to use natural materials - linen, poplin, chintz, soft flannel.
As an internal heat insulator, you can use synthetic winterizer, batting or an old terry cloth. When sewing a textile item, it is necessary to leave 6-10 mm on the seam.
Knitted potholders
Kitchen items are easy to knit using knitting needles or a crochet hook - the process will take literally a couple of hours. The product is knitted from the center or from the edge, in even rows, it can be decorated with braids, arans, lush columns, etc. But any openwork knitting options are unacceptable - the potholder must fully perform its functions, protecting your hands from burns. All knitted potholders are sewn to a piece of felt or made two-layer - then a padding polyester is inserted into the middle.
Round, square - simple knitting patterns
The easiest way to make a potholder with a crochet hook is in the form of a circle or square. The square “grabber” is crocheted from the middle, adding four loops where the corners should be. In total, you will need to knit at least 10-12 rows with single crochets. The last row is done in a different color; a loop is sewn to one corner. It’s easy to make a thing multi-colored by changing the thread at the beginning of each row, using yarn with a gradient transition from one color to another.
A square is sometimes knitted from a corner - a chain of 20-30 loops is made, knitted with single crochets, and at the end of each row the knitting must be turned. At the end there is an edging, a loop. The square is knitted with knitting needles from the corner diagonally. Round and polygonal items are also crocheted from the center - increases are made evenly to get the desired shape.
If you attach a black “tail” and a green leaf to a simple round model, you get an apple or a cherry. White “sectors” are knitted on it - a lemon or orange circle comes out.
Watermelon slices, strawberries - “berry” potholders
“Delicious” things depicting fruits are the most beautiful idea for the kitchen. How to crochet a watermelon potholder step by step:
- you will need red, dark green, white, black threads, a hook of appropriate thickness;
- knitting is done in the round - the first five to seven rows are made with double crochets and red thread;
- then one row of white color is knitted;
- the next two rows are done in green;
- the circle is folded in half, a padding polyester is inserted inside, the product is connected with a black edging row, and a loop is made;
- For believability, watermelon seeds are embroidered in black on a red background.
The “strawberry” potholder is crocheted, starting with the loop from which it will be hung. It will also be two-layer with thick felt in the middle. Knitting starts with green, then red is added, a “berry” is knitted, which can be decorated with white embroidered seeds. Almost in the same way, but having selected suitable threads, they knit raspberries, blackberries, a bunch of grapes, etc.
Bright knitted sunflower
To make a ripe sunflower flower you will need yellow, green, and black threads. The product will also be two-layer, with felt in the middle. Knitting is done by crocheting from the middle, with black yarn, and single crochet. After seven to nine rows are knitted, one row is worked in yellow. The petals are knitted like this: a chain of seven air loops is woven, after which seven single crochets are knitted on the same chain, then one stitch to the base, then the next petal is knitted. The back of the potholder is made completely green or yellow-green.
Cockerel potholder
A bright, multi-colored rooster potholder will become an original decorative element of kitchen decor in the Provence style. Knitting here is also done with double crochets and crochet in the round, but only two or three initial rows are made “full”. Afterwards, a loop is knitted on the “back” of the future bird, and the next rows are made open.
When another five to six rows are made, five lush double crochets are knitted in every third loop with a contrasting thread, which alternate with single crochets. On one of the “tops” of the broken circle, a bird’s head is knitted, which is decorated with a red comb of lush double crochets. A wing is knitted from the center of the product - preferably also contrasting, then the tail is finished with another row of fluffy columns.
The cockerel can also be double-sided - then two symmetrical parts are needed. A one-sided product is usually made textured, decorated with voluminous knitted details.
Other manually linked options
Experienced craftswomen invent many other interesting potholders:
- ladybug - knitted from black and red threads, black dots on the back, head with a loop, contours, you can sew button eyes;
- heart - usually made in red tones, decorated with lace of a contrasting color along the contour, with a long loop on top;
- pig - a large knitted circle here will become the body, a small one will become the nose, two triangles hanging from the top will be the ears, you also need small legs, eyes, and a tail-loop;
- mitten - knitted or crocheted, should be freely put on and removed from the hand, the loop is attached in the cuff area;
- lamb - has wavy edges, a voluminous muzzle with ears, horns is knitted in the middle, four legs and a tail-loop are also made;
- fungus - a red or brown cap is knitted, a white leg, grass at the bottom, a loop at the top;
- owl - usually made in the form of an oval, on which two round eyes are tied, paws with claws, wings, and a loop are attached to the head;
- an asterisk, a sun, a month - made in the appropriate shape, decorated with funny faces;
- scrambled eggs - made slightly asymmetrical for greater plausibility, you will need yellow, white, brown threads;
- shorts - crocheted, the contours of the pockets, the flies are sewn with a contrasting thread, a button is sewn in the middle on top, a loop is sewn in the corner;
- fish - consists of a head, tail, fins, eyes, if desired, scales are embroidered on it, the tail is worked on, a loop is attached to the tail or head.
How to sew potholders from fabric
When starting the creative process of making a kitchen accessory, remember a few rules:
- Choose a fabric that is easy to sweep away but does not fray.
- Do not use flammable synthetic materials. Hot objects can set the item on fire if it comes into contact with an electric or gas stove if handled carelessly.
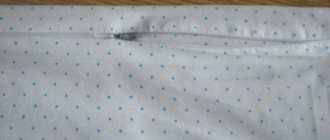
- When starting to cut, wash and iron the scraps. This must be done to prevent large shrinkage of the finished product, and also to check the strength of the coloring. If the fabric fades, it is better not to use it.
- Use adhesive interlining to adhere the layers together.
- For convenient storage of potholders, make a loop.
The process of making crafts begins with cutting out 2 parts each from a beautiful soft fabric. Then two non-woven and synthetic padding layers, made according to the same pattern. Next, we form a kind of puff “sandwich”:
- heat insulator - padding polyester or batting;
- interlining;
- two face layers facing each other;
- interlining.
You can do without adhesive material. We sew the resulting set on three sides, turn it right side out, insert a loop and sew up the remaining part.
You can arrange the craft so that the parts are only visible, and the batting is inside. Then you should trim the item with bias tape.
It will look very nice if you quilt the potholder.
Knitted potholders
Cute crocheted items turn out to be very original. Even the simplest weaving can make a lasting impression. However, three-dimensional schemes should be avoided, since using such devices will be inconvenient.
The process of creating attractive accessories will not take much time. For the simplest options, two hours is enough.
It’s a good idea to attach the knitted part to the lining and put a sealant inside. Otherwise, such devices serve only as interior decoration.
Let's look at the most available options:
- a modest square - just make a chain of the required length and build rows on it, alternating the colors of the yarn. Next, we will tie the resulting quadrangle in a curly row;
- motley ring - take a braid of 5-7 links, loop it and continue to weave, changing the threads;
- watermelon slices - we knit a circle, changing the threads on the crust, and then we fold the fabric in half, edging it along the edge, and embroidering black grains.
Knitting needles are also perfect for this craft.
From felt
The uniqueness of the material is that it does not crumble. By simply cutting out the basic shape, you can make any applique without finishing the edges. Pressed wool holds its shape perfectly. Bright yarn is suitable as decorative stitching; you can use beads and braid.
Patchwork technique
In this case, you need to have a lot of patience and a lot of practice. But the product comes out amazing! Potholders look impressive, but when you start sewing, learn the techniques for attaching scraps:
- standard blocks - you need to cut out the squares and stitch them on an overlocker;
- sewing according to a pattern - pieces are cut out according to blanks. These can be leaves, hearts, geometric figures;
- it is advisable to cut parts into crafts using a grain of thread to avoid deformation of the finished version;
- You need to sew on the base - here the particles are simply attached to the prepared substrate.
To make a simple product, we take three matching colors of fabric and the necessary sewing kit. We prepare fabric squares 10x10 cm, cut them into triangles and lay them out according to plan. We sew all the elements together - we get one piece.
We do the next half in the same way. Between them we lay batting or padding polyester. We process the edges with a finishing edging, attaching a loop.
From jeans
A very non-trivial option. The creation process is so simple that even a student can cope with the task.
Natural fabric in two layers is quite dense, so it does not allow elevated temperatures to pass through.
We take old jeans, cut out chic pockets with allowances for processing. We lay adhesive interlining between them and attach them to each other.
You can make a cute little pot holder out of old pants or a skirt without a sewing machine. Cut out 3-4 squares, pull out the threads along the edges, forming a soft fringe. We sew the blanks with any bright decorative stitch.
Main features of cutting and sewing
Potholders can be made of any size and type, but you don’t always get easy-to-use accessories. Therefore, patterns of simple shapes are often used. You need to be more careful with the decor. Beads, buttons, applique made of satin or other flammable materials are not the best solution. When choosing a model, you need to take this into account.
It is much more pleasant to use potholders made by yourself.
Basic moments.
- If the fabric frays, treatment will be required. In the classic version, an overlocker is used for this purpose. You can pass the needle by hand using a blanket stitch. It’s even easier to tape the seams or hide them inside.
- Regardless of the pattern, be sure to leave an allowance of about one centimeter for stitching and security.
- Potholders are usually hung on a hook, so you should immediately take care of the loop and the attachment point.
- You should not use felt-tip pens or markers for patterns; they do not always wash off and often appear on the other side.
To sew potholders, you will only need the skills acquired in labor lessons at school.
The last point is the most important: you need to determine the size. If the hand is large, for example, a man often works in the kitchen, then the pattern will have to be slightly enlarged. To do this, add 1-2 cm on all sides.
Owl potholder
For the craft you will need textiles in three colors, a sealant, edging, and a sewing kit.
We mark the templates on the material. Cut out the resulting elements:
- wings – 4 fabric, 2 padding polyester parts;
- 2 dark and light eye parts from a dense piece;
- body – 2 pieces of fabric, 1 gasket;
- beak – 1 piece.
Let's start making:
- We assemble the body patterns with the front surface facing each other, adding a seal. We attach the beak. Having fixed the layers, we attach it on both sides. We sew all parts of the material together.
- Add light elements of the eyes and stitch around the circumference. We chop off the dark elements and attach them.
- We fold the fabric patterns of the wings inside out, laying layers of sealant. We make a decorative seam in the middle. We trim the edges of the wings with edging.
- We collect the owl. We attach the edging to the wrong side of the craft, leaving the upper area. We unfold the trim to the front side and grind it.
- Cut off 30cm of the edging and mark the half. Aligning this point with the center of the open edge, sew on the piping. We turn it away.
- Then we process the rest of the figure.
- We form the ends of the edging into loops - ears and attach them to the body.
Square potholder in patchwork style
When creating potholders with your own hands from fabric with patchwork-style patterns, you can use fabrics of various shades. It all depends on what colors predominate in the kitchen. If it is beige, caramel or gray, then pastel colors are used. However, brighter options are also appropriate and are often used. Especially in an ensemble of a decorative element, such as a painting or a vase.
The materials are simple:
- 2 pieces of linen fabric 24*24 cm.
- 24 strips of the same fabric 2.5*24 cm.
- 2 pieces of wool or cotton batting 24*24 cm.
- Take the borders 25cm (so that it matches the main fabric). You can also make it yourself.
- And, of course, scissors, needles, iron, thread, sewing machine - all available tools.
Linen fabric is placed under the batting, and stripes are placed on top, which will need to be sewn to the batting. Two strips are applied to each other, folded in the center of the main part, and sewn on one side. The top strip will subsequently need to be folded back and the seam ironed.
Important! The stripes should “look” at the seamstress.
Then another strip is taken, placed on top of the ironed one and sewn on according to the same principle, and at the end it is turned away and ironed. As a result, the part should be completely covered with stripes. The second main fabric of the same type should be treated in the same way. Then a border is sewn onto these strips. The raw edge of the border must be connected to the raw edge of the potholder. First, from one corner it is sewn to one side of the clamp, and before each new corner the border is bent by 24 degrees. The result is that it is stitched around the entire perimeter.
At the end, it is worth returning to the starting corner and bending the border to the front side. Then, pinning it with pins, the tip becomes a “loop” and the rest is tucked inside.
You might be interested in this: Step-by-step instructions for sewing pillows for chairs and stools
The finishing touch is to sew the border to the front part.
In fact, in practice, you only need to try it once - and the patchwork style will seem the simplest of all.
Bell
Amazing caps are perfect for a teapot when brewing herbal tea or tea.
You will need textiles in two colors, lining and heat-insulating fabric, and a sewing kit:
- We cut out the blanks, leaving an allowance of up to 5 mm. We attach the sepals with a zigzag seam, arrange all the layers, and make a stitch.
- We mark the top of the bell, from which we draw a circle with a compass. We trim the excess fabric evenly in a circle. We trim the cuts.
- We bend the cap in half, not forgetting the loop. We sew the edges.
- We turn out a funny bell.
Material selection and preparation
To sew potholders, you can use any thick fabric. It’s good if they consist of natural or at least semi-synthetic fibers. Linen and cotton can withstand high temperatures well and protect your hands. New materials need to be washed, as they can shrink and fade. It is recommended to do this directly in the washing machine. The accessory will be used mercilessly, will get dirty, and it is unlikely that any housewife will care for it manually.
The exception is interior decorative potholders.
By the way, an excellent material for potholders is jeans (denim, denim). You don't have to run to the store to get it. Old pants and skirts are perfect for making a new item.
What else will you need:
- sewing needle;
- threads;
- ruler or measuring tape;
- scissors;
- pencil or piece of soap;
- pins.
As for color schemes, here you can show all your fantasies, come up with cool combinations or sew potholders to match the interior.
It’s good if they are combined with towels, curtains or other kitchen textiles.
Butterfly
To the standard sewing kit we add textiles in summer colors that match each other, lining, bias tape, decorations - beads, rhinestones, buttons, braid:
- We take fabric for the base, padding polyester, and cut out 2 pieces of the body and 4 pieces of wings according to the template.
- We reinforce the upper part of the wings with adhesive interlining or padding polyester. Having arranged them with the front surface, we stitch along the inner edge. Turn it inside out and grind along the cut.
- We fold the main blanks with decorative sides and secure them with hairpins. We prepare antennae from braid and attach them. We cut the seal at the base of the wings, turn it inside out and quilt the body.
- For the pattern, we cut out teardrop-shaped and round parts. Sew by hand.
- We attach decorations and perform finishing hand stitches.
- Assembling the wings and body. We trim the figure with binding and sew on a loop.
How to decorate
It is important to know that only the upper part of the item is decorated - the lower part, which is in direct contact with the hot air, should not be textured, for the sake of ease of use for its intended purpose.
How to design a finished potholder:
- embroidery - cross stitch, goat stitch, satin stitch, rococo pattern, etc. You can depict a whole plot picture;
- braid - usually the contours of the product are decorated with it, less often three-dimensional elements are created on the top of the object;
- beaded - potholders embroidered with beads, rhinestones, decorated with sequins, look beautiful, luxurious, expensive;
- applique - this is the simplest geometric pattern or a more complex, multi-color, multi-layered image.
For different styles, different decor is suitable - cross-embroidered, lots of lace “grabs” will decorate the baroque, checkered ones – country, smooth ones, in steel tones – hi-tech, linen ones, in natural colors – an ecological interior.
Cake
We use a universal sewing kit, textiles in two colors, synthetic padding, decorations - ribbon, button:
- Let's draw a template for half a cupcake and cut it out from the main and interfacing fabric.
- Quilt unfolded with vertical stitches. We bend it in half. Sew around the perimeter, leaving a small section.
- We turn it right side out and stitch it, making an indentation from the edge of 2-3 mm.
- Cut out two parts for the hat. Having arranged them with the right sides, we sew them on. Turn it inside out and stitch around the perimeter.
- We fasten both parts using a sewing machine or by hand. We decorate the delicious cupcake with a bow and a cute button.
patchwork product
With the onset of the warm season, the kitchen also requires bright colors. A rustic kitchen pot holder patchwork will be the best summer kitchen interior decor idea. In addition, the remnants of scraps of fabric that zealous housewives would be sorry to throw away will be used.
Patchwork potholders made in the applique style look extraordinary.
Recently, it has become fashionable to purchase sets of oven mitts: one large oven mitten and two smaller square models. Made in a beautiful colorful combination, they will become a real decoration of the kitchen.
Of course, this technique requires incredible perseverance and patience, because you need to sew the scraps together, after selecting the combinations, cut out the shape, sew, and decorate. But the result is worth it: your kitchen will receive a worthy element of decor.
The kitchen is decorated with various products and things, trying to give the room coziness and comfort. Sometimes things are completely useless. Kitchen oven mitts are not only beautiful, but also functional. They are used to remove hot dishes from the heat and to remove molds and baking sheets from the oven. They can also be used as a stand for hot pots and pans.
Buy these useful accessories for your kitchen, or better yet, sew them yourself, and your hands will be protected from burns and injuries.
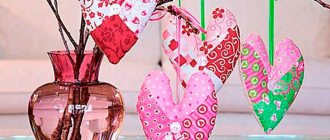
Heart
To the sewing kit we add textiles with a “heart” or other interesting pattern in two colors, plain and interlining fabric, a cute button:
- We apply the pattern of a large heart to the multi-colored material folded in half. By analogy, we cut out the following blanks from insulation and plain fabric.
- We form the layers with the wrong side facing each other, laying padding polyester between them.
- Using another template, we cut out small half-hearts from both types of fabric. Folding them inside out, we get two pairs, each of which we chop off with needles. We trim the straight edges with piping.
- We fasten all the parts and secure them with hairpins.
- We trim around the perimeter with edging, leaving a small section in the center. Here we will sew a loop and a decorative button.
A mandatory requirement is cleanliness.
Everything related to eating and preparing food requires special hygiene. Accordingly, potholders should always be kept clean. They need to not only be cleaned on time (washed, washed, etc.), but also chosen, keeping in mind the need for regular cleaning.
In this regard, silicone compares favorably with fabric and knitted potholders, since it is easy to clean and practically does not absorb odors. In addition, it is a bright and original decorative element that will decorate the kitchen and place accents in it.
How to sew oven mitts for the kitchen and at the same time make them as hygienic as possible, you can learn about this by reading articles about the properties of different fabrics and their ability to absorb moisture.
Fruits
Bright, attractive potholders in the shape of fruits will not only decorate the kitchen, but will also remind you of a warm, sunny summer throughout the cold winter.
Let's consider the technology for making crafts in the shape of an apple. First of all, let's draw a template on paper:
- We cut out parts from any plain fabric 1.5-2 cm larger than the drawing. We will sew patches onto it.
- Pin a small square 3x3 cm in the center. Take scraps of bright yellow, red or green color, sew them in a circle, bending them one by one until we fill the entire surface. It is advisable to immediately iron the results of the work, or draw them with a ruler.
- We assemble the craft - at the bottom there is a lining with the right side facing down, then a synthetic padding, and on top is our beautiful, ironed part.
- We fix the resulting “sandwich” with pins, quilt a little along the seams, and trim off the excess.
- Attach the loop to the back of the potholder.
- We process the resulting kitchen accessory with edging.
- Cut out a leaf from green thick wool and sew it onto a button.
Our sunny apple is ready!
Internal filling
You need to immediately decide what the kitchen accessory is made for. If you need a thin pot holder used to remove the lid or rearrange a frying pan or pan, then sometimes two layers of material are enough. For dense items that are used to remove baking sheets from the oven, you will need filler. Usually this is a thin padding polyester, although it does not have any positive properties, it does not hold temperature well. Batting, drape, or another layer or two of fabric will do.
To start sewing potholders, you first need to assess your strengths and, based on your skills, choose or come up with a model for the future product.
By the way, felt is very popular now. The material is easy to work with, does not require an overlocker, is dense, holds high temperatures well and is excellent for tacks. It can also be used as a filler.
Potholders - cups
In addition to the usual sewing kit, you will need textiles in two colors and a sealant:
- We cut out four rectangles measuring 17x22 cm from the main fabric. We round the corners at the bottom.
- From decorative fabric we will prepare 4 strips 6x17 and 2 for handles 6x20 cm.
- We cut out two pieces of 16x22.5 cm from the seal. We decorate the short side with a smooth line.
- To seal future handles, we will prepare 2 strips of padding polyester 1.5x20 cm.
- We sew decorative strips 6x17 cm onto the body of the cup blank.
- We form the handles by folding the patterns in the middle of the short side, inside out. Sew along the edge of the long edge and turn it inside out. We insert the seal into the handles.
- We quilt the body blanks for reliable operation.
- We assemble the potholder - attach a handle to the quilted main part. On top we place a piece of similar dimensions from the main fabric. We grind the product along three edges.
- Turn the potholder inside out. We trim the upper sections of the cup with piping.
All samples of kitchen utensils can be taken as a basis, looking for shapes that suit you. Any geometric shapes are suitable for this simple craft.
An excellent solution is fruits or vegetables. They are easy to make and look great. Perhaps it will be sunshine and clouds? The main thing ahead is to find the model you like and start creating.
The ideal option is a set of potholders
Pot holders of various types and shapes are best suited for the kitchen. Don’t get carried away and hang them on hooks literally at every turn. It is enough to set aside a corner and place there an apron, kitchen towels and oven mitts, both needed constantly and needed from time to time.
The kit required for every home includes:
- Oval or round potholders – 1-2 pcs.;
- Square or rectangular potholders – 1-2 pcs.;
- Mitten potholder - for one or both hands;
- Potholder-warmer for teapot;
- A butterfly grip, convenient for gripping the handle of a frying pan with one hand.
Original set of oven mitts for 2 hands. It resembles children's mittens with elastic bands. It is distinguished by functionality and convenience.
Potholders can be in harmony in tone, color, and finish not only with an apron or towels, but also with bread baskets, capes and chair seats, curtains on kitchen windows, tablecloths, etc.
Where else are potholders relevant?
- In the country. In dacha conditions, food is often prepared either on stoves or simply over a fire. Even if you have a modernly equipped cottage with an electric stove, you will need oven mitts.
- On a picnic. You can’t pick up a single grill without a handy cloth. It is better if it is prepared in advance and looks clean and original.
- In a studio apartment. Where the stove is located directly in the room, it is especially important to properly organize the space. The potholder can not only be used for its intended purpose: it can be conveniently hung on a hook, creating a visual boundary between the kitchen area and the room.
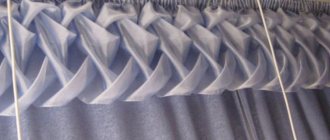
Curtain decoration
After leafing through a lot of magazines with beautiful interiors, there is a desire to do something original and always with your own hands.
All you need to make your dream come true are the remains of beautiful fabric, they can remain after sewing curtains and tulles, openwork or satin ribbons, ribbons, threads and much more.
You can make a varied collection of potholders for the same curtains and curtains. In this case, you can safely use accessories, beads, seed beads and other small accessories.
Variety of shapes
The mitten is the most popular and versatile option. The pattern is created by tracing the hand on paper.
Note!
Ideas for LD (a girl’s personal diary): step-by-step instructions for making it yourself, photo reviews of the best options
Educational soft books made of felt: materials for making, detailed instructions + reviews of plots for books (100 photos)
Original do-it-yourself valentines - design options, necessary materials, master class for DIY work
The two outer and two inner cut-out parts are first sewn separately, and then joined, stitched, and quilted. Then a piping and a loop are sewn on. The mitten is very maneuverable, comfortable and practical.