An unwanted dress length can ruin the mood of any girl. Be it festive or pleasure. When a problem needs to be solved quickly, and going to a tailor takes a lot of time and money, you can hem the dress yourself at home. However, this process causes fear and uncertainty.
In fact, if you study the recommendations and follow certain rules, this process will not take much time. If you are ready to take a risk and hem the dress yourself, then this article is for you.
Preparing the dress and necessary equipment
To hem the hem of the dress you will need:
- needle;
- threads;
- scissors;
- ruler;
- sewing pins;
- chalk pencil;
- iron.
Threads and needles must match the thickness of the fabric. Thick ones are used for dense fabrics, medium thickness ones are used for suiting, and thin ones are used for silk, chiffon, and chintz.
Before you start sewing, you need to prepare the dress:
- Smooth out the dress, try it on and decide on the desired length. If you plan to wear it with heels, then don't forget to wear them.
- Once you have decided on the length, take off your shoes and use a ruler to measure the length you need to cut. You may need an assistant in this matter.
- Remove the dress and turn it inside out. Place it on a flat surface and use a ruler and chalk pencil to measure the excess length at the hem.
- Next, draw a line along the hem along the marks.
- If you plan to sew with a hem, be sure to leave a few inches for it. To do this, draw another line below the first one. Otherwise the dress will be shorter.
- Carefully cut with scissors along the resulting second line.
Finishing the edge of a dress without hemming
To finish the edge of a dress without a hem, you do not need to leave extra length. Measure and immediately cut off the unnecessary part. Processing can be done in several ways.
Using an overlocker
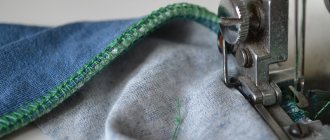
The easiest way is to use an overlocker. With its help, you can easily and beautifully process the edge of any material, both thin and thick. If you don’t have an overlocker, but have a sewing machine, you can select the “zigzag” function on it.
Before you start sewing, first carefully trim the edge so that the cut is even and the threads do not stick out. For this work it is better to use sharp scissors. If you sew on a machine, you can step back from the edge by 3-4 mm, stitch in a zigzag pattern, and then cut off the excess fabric.
Using bias tape
Bias tape is a strip of fabric cut on the bias. You can use it to finish the edge of a dress, and it is also good for finishing internal seams, especially for fabrics whose edges fray. The trim can be chosen both in color and varied, see how appropriate it will be. You can also use lace.
To sew bias tape to the hem of the dress, measure the length you need and leave 0.5 cm from the edge. Place the strip of fabric facing the edge of the dress. Pin the binding to the fabric or carefully baste it with thread. The bias tape should lie flat, do not pull it out, otherwise the fabric will ripple. Then sew a regular stitch along the edge, retreating half a centimeter. Remove pins and iron.
Turn the bias tape right side out and iron again. On the wrong side, you need to fold the bias tape to the edge of the seam allowance to fix it in this position, iron or baste it with thread.
If the bias tape begins to wave, then measure 2.5 cm with a ruler and cut off the excess fabric.
Next, turn it right side out and fold the binding over again, baste it with thread and sew it with a straight stitch, departing 1 mm from the edge. Remove the basting and iron.
You can see it more clearly in the video:
How to sew knitwear
Knitted fabric is loops intertwined with each other in the longitudinal or transverse directions. This structure provides the distinctive and irreplaceable qualities of this material: elasticity, softness, wrinkle resistance and comfort. Working with knitwear is pleasant and easy if you know how to approach this material.
Preparing for cutting
Depending on the type and quality, elastic materials can shrink up to 5-10% when washed and ironed. To avoid this unpleasant moment, the cut must first be decatified.
Ironing rules
Knitwear must be ironed from the wrong side (so that no shiny marks remain), without force, with a low or moderately heated iron. Under no circumstances should you stretch the fabric.
Patterns
Before sewing a knitwear product, you need to prepare patterns. To do this, the basic base of the adjacent dress is rebuilt taking into account the stretchability of the selected material. In the sewing business, this factor must be taken into account. According to the degree of elongation, three groups of knitted fabrics are distinguished: weak - from 0 to 40%, medium - from 41 to 100% and highly elongable - more than 100%. Both material consumption and calculations for the pattern depend on this indicator.
The degree of elongation is determined as follows: fold the fabric crosswise at a distance of 7-10 cm from the cut. Mark a 10 cm segment along the fold line and gently stretch it wide. The amount by which the length of the segment has increased is the degree of elongation: 5 cm - 50%, 2.5 cm - 25%. To construct a pattern, you also need to know the stretch coefficient of the knitwear.
The elongation coefficient is calculated by the formula: Kr = L.d: L.p, where L.d is the length of the segment before stretching and L.p is the length of the segment after stretching. Example: Kr = 10 cm :12 cm = 0.8. Therefore, the parameters Og, Ot and Ob must be multiplied by a factor of 0.8. We will get the result taking into account the tensile coefficient of the fabric.
The width of the neckline and armholes is also made smaller so that they do not stretch out in the product on the figure. The hose is built with a non-stop socket.
Secrets of the cut:
— When cutting, lay out all the parts taking into account the direction of the grain thread, observing the top and bottom, since knitted fabrics tend to change shades in different directions.
— Cutting details are fixed with fitting pins. If the needles leave marks, press down with weights.
— Cut from the wrong side in one layer so that the parts do not become deformed. Under no circumstances should the material be stretched across its width.
— Use sharp scissors to avoid the appearance of arrows.
Needles
For sewing knitwear, special needles are used, which differ from universal and standard ones in that they have a specially rounded nose, which carefully pushes the loops of the material apart during the sewing process, without violating their integrity and without forming puffs and arrows.
Typically, knitting needles are marked “Jersey” - for cotton and woolen knitwear and “Stretch” for lycra, “butter” and bi-elastic fabrics. The rounding and smoothness of the needle point is selected depending on the elasticity of the fabric. The looser it is, the larger the radius of curvature of the needle should be.
Threads
There are special long-fiber polyester and nylon fiber or textured threads. If you don’t have them, the most common ones will do - the “Ideal” type (in reels) or their analogues on large reels. The main thing: the threads must be thin and, at the same time, strong. Before you start working with elastic materials, your sewing machine also needs to be set up.
Paws
When working with thin and slippery knitwear, a regular presser foot may not apply enough pressure to it, as a result, the parts will be stitched unevenly. Therefore, it is necessary to adjust its pressure in advance, checking the required pressure on a sample.
A special foot for knitwear will make the work much easier. Its secret is that it ensures the simultaneous advancement of two layers of fabric along with the lower conveyor at the same speed and eliminates the problem of seating or tightening the lower part during sewing.
Knitted seams
Materials with low stretchability can be ground with a regular straight stitch in small increments of 1-1.5 mm, slightly stretching both parts (to impart stretchability). This stitch is suitable for longitudinal cuts of parts and products that are not very form-fitting (tunics, T-shirts and loose-fitting pullovers), processing collars, cuffs, and trims.
Cutting details of highly stretchable knitwear are best sewn with a narrow zigzag stitch: stitch width 0.5-1 mm and length 2-3 mm. A regular straight stitch is too vulnerable to tension. Zigzag allows you to stretch without tension.
In modern sewing machines, to make work easier, there is a set of special knitted seams: for stitching - a knitted small zigzag with a slight reverse stroke, which provides elasticity to the seam; dotted zigzag for processing the bottom of products and decorative elastic seams. Using these stitches, you can safely take on sewing products from stretch materials: swimsuits, jumpsuits.
Before work, you must also check and adjust the thread tension. Most often this concerns the upper thread. It shouldn't be too tight. It is necessary to lay several lines on the sample, grinding two parts, and then check them for stretchability and strength. If the thread breaks, loosen the tension. A correct and reliable knitted seam should stretch along with the fabric.
Thus, when starting work, you need to experimentally select the correct needle using a sample, set the required presser foot pressure, adjust the thread tension and choose a suitable seam for sewing knitted cut pieces.
If the machine stubbornly skips stitches, you can use a little trick: place a strip of paper under the presser foot, along the seam.
This method will help in many cases:
- eliminates omissions;
— will eliminate the problem with sewing very elastic materials that stretch even with a zigzag;
- tighten the clamp and pressure of the presser foot, if necessary.
Processing slices
The sections of the cut parts are processed with a large zigzag stitch, both parts together. Allowances should be no more than 1 cm. It is not advisable to press seams. The stitching becomes more vulnerable when tensioned. You can use a “pseudo-overlock” seam if your machine has one. Don't forget to change the presser foot. It should be delimited to the right. It is better to sew at low speed. This way you will prevent yourself from missing out. With this foot you can also sew with a zigzag, then the edge of the cut will not wrinkle. To prevent the material from creasing when sewing, you need to pull it a little behind the foot (it’s even better to do this by the ends of the threads, then the stitching will be stretched, not the fabric itself), straightening the cuts in front of the paw. If the wave does appear, it must then be ironed with an iron, and it will return to its place.
There are usually no problems with longitudinal cuts, and when processing with a large zigzag with a limiting foot, the processing is quite accurate. Cross sections are a little more complicated. You need to practice on the sample which is more suitable for your type of knitwear: stretch it a little or push it under the foot.
Shoulder seams
Shoulder seams in products should not be pulled out, so they need to be stabilized. This is done using bias tape or bias tape of a suitable color, which is tacked into the seam. You can use strips of regular or adhesive interlining for the same purpose, which are fixed together with the allowances. It is advisable to strengthen the seams on the shelf for ease of ironing. If the neckline along the back also needs to be protected from stretching, a velvet ribbon is attached to the seam.
Neck and armholes
To maintain the shape of the neckline, a chain stitch is placed along the cut at a distance of 1.2-1.5 cm. A quick and convenient way is to glue adhesive web onto the neck allowances and iron them inside out. Thus, we simultaneously protect the neck from stretching (if it is not necessary) and process the edge of the product without stitches. Similar actions apply to armholes if these are sleeveless products.
Methods for processing the neckline and armholes:
- Beikoy. Cut out a strip of fabric 3 cm wide and stitch along the front side at a distance of 0.7 cm from the cut of the neckline or armhole with slight tension. Fold the seam allowances around to the wrong side, iron and stitch from the right side into the binding seam.
- Like on T-shirts. A strip of fabric 3-4 cm wide is folded in half and stitched along the neckline or armholes, pulling slightly.
— If the edge of the knitwear is rolled up, you can decorate the neckline and armhole with strips of fabric 3-4 cm wide, sewing them in the center, and the edges will be evenly folded on both sides.
— The cuffs on the sleeves and the stand are golf. Fabric 10-20 cm wide is looped, folded along the floors and sewn into the neckline or bottom of the sleeve. For this purpose, you can use special knitwear - elastic.
Processing the bottom of the product
The bottom of the product can be processed in different ways:
— The simplest one is to leave it untreated. Suitable for lycra, supplex (fabrics that do not allow arrows), to add lightness to the product (circular skirt)
— In thin knitted fabrics, to give the bottom of the product, sleeves or ruffles a wave effect, process with a thick and fine zigzag, while stretching the fabric in front of the foot.
— In elastic products (swimsuits, jumpsuits, tight-fitting tops and dresses), it is best to use a dotted (knitted) zigzag. Leave an allowance of at least 1.5 cm, because when stretched it decreases.
— Modern machines have decorative knitted stitches, which you can also use to decorate your product.
— If the edge of the product does not require special stretchability, you can glue adhesive web to the seam allowances. This results in a very clean and neat finish.
- You can use a double needle. In this case, on the front side you will receive a double stitch, and on the back side there will be an imitation of an overlock stitch.
Loops, collars, trims
Before sewing buttonholes, knitwear must be reinforced with non-woven fabric, glue or web. Cut them with extreme care.
If the product is supposed to have slotted parts, these places are glued with adhesive interlining.
Collars and cuffs, as well as trims, are also glued with adhesive, preferably knitted, so that it follows the fabric.
And the last, finishing touch is ironing the finished product. This is a very important and responsible stage. The main thing: iron with a moderately heated iron, without force, pressing it to the surface of the product.
Finishing the edge of a dress with a hem
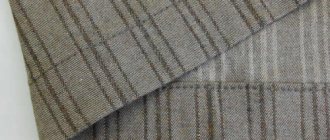
When preparing the dress, do not forget to leave 3-4 cm for the hem. This is the standard length needed to finish the edge.
Double hem
A double hem is an easy way to finish the edge of a dress. Suitable for almost all types of fabric. It can be done either manually or on a sewing machine.
- Turn the dress inside out. Measure the height of the hem and add 1 cm.
- Fold 1 cm from the edge and iron.
- Fold the hem height and iron again. If you doubt that you will be able to sew evenly, then additionally sew the hems with thread.
- Sew from the inside with an even stitch on a sewing machine, retreating 1 mm from the edge of the hem.
If the hem height is large and the hem edge is wide, then make two lines. The distance between them must be at least 5 mm.
Video:
Using the “Moscow seam”
The Moscow seam is well suited for flared items, chiffon fabrics, and thin silk. It can only be done on a sewing machine. The technique is not easy, it requires skill and patience. The line must go straight.
- Use a machine to select a seam of 1.5-2 mm, no more.
- Fold the fabric from the wrong side by 3-4 mm, as little as possible.
- Sew with an even stitch 1 mm from the edge.
- Using small scissors, carefully trim off the excess hem.
When stitching, do not pull the fabric or pull it in front of the machine foot; it should flow freely. Otherwise, the product will go in waves.
Video:
Seam "Blind stitch"
A hidden stitch or a hidden hem helps to beautifully and accurately finish the bottom of the product so that the seam is not visible from the front side. The work is not easy, you will need a special foot for a sewing machine, but the effort is worth it.
- Prepare the dress, measure the required length, leaving 3-4 cm + 1 cm for the hem height.
- Overcast the raw edge or stitch with a zigzag stitch.
- Iron the hem and turn the edge on the wrong side so that the overturned part of the hem protrudes 4-5 mm.
- Machine stitch from the wrong side along the very edge of the fabric.
Video:
Hemming with open cut
One of the most common seams. Performed on a sewing machine.
- Measure the required length, leaving 2-3 cm in reserve.
- Sew the raw edge using an overlocker or zigzag machine.
- Make a fold and iron. If you are not sure that you can stitch evenly, secure with pins.
- Sew an even stitch over the finished edge.
- When finished, remove the pins and iron again.
Secrets of wet processing of knitted items
Very often you hear from needlewomen: an iron will help correct deficiencies in their work. And this is so: with the help of wet processing of knitted products and an iron in particular, you can both make the product fit and stretch it. In general, an iron for needlewomen is an indispensable thing! But, you need to know the rules of ironing, otherwise you can easily ruin both a separate part and the entire product.
When making any product with your own hands, it is important to learn how to process the product and iron it. The finished item is assembled from individual parts. In order for the item to fit well on the figure, when assembling and ironing the parts, it is important to strictly adhere to the sequence of operations. What are these operations? Let's consider the operations that must be performed when assembling the product.
1. Pinning parts onto the pattern
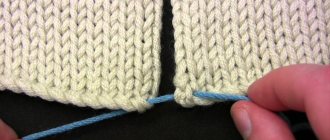
First, the ends of the threads of the knitted product are hidden on the wrong side using a hook. When threading the threads, you need to ensure that the fabric does not tighten.
The ends of the thread remaining from the beginning of the work should not be cut off - they are used to sew the model together. The knitting pattern is placed on a dark-colored mat and outlined along the contour with a bar of soap or chalk. The pattern is then removed. The part is placed on the resulting contour with the wrong side up. Needles are inserted along the entire perimeter (but first at the corners of the part) at a distance of 1 cm from each other.
The armholes are given a concave shape. Only the lower edge of the part is not pinned to avoid deformation. The side edges of the back and front rise 1.5-2 cm above the bottom line to avoid sagging. The fastener bar is pinned on the inside of the product.
2. Wet processing of parts with and without iron
The knitted product is ironed very carefully through two layers of damp gauze, literally above the surface. This is done in the case of not too convex knitting (small boucle, stocking, openwork, etc.). After ironing is completed, the finished item remains on the needles to dry for some time.
Products with an expressive texture cannot be ironed. In this case, the product is pinned onto a mat, two layers of wet gauze are placed on top, after a while the gauze is removed and the item is left to dry on the needles.
3. Sweeping
Thread is used to baste parts. For parts knitted with 2-3.5 knitting needles, a “forward needle” seam is used. Basting is done 1 cm from the edge. For parts knitted with knitting needles 4-8, an over-the-edge seam is used.
Sweeping is done like this:
1. All details are sewn along the center lines, the back and front are sewn along the waist line.
2. At the front and back, the side edges are chipped at 3 points: armhole, waist, hem. The product is basted on the wrong side, the seam is slightly stretched.
3. The front and back shoulders are pinched and swept along the back, and in the area from the middle of the shoulder to the neck they sit down a little.
4. If the neck loops are open, they are transferred to an additional knitting needle or thread.
5. Armholes are stitched.
6. The sleeve is basted, the upper and lower points are pre-chipped.
First fitting.
1. The product is put on wrong side out. The stripes are pinched in the middle of the front at 3 points: waist, bottom and neckline.
In this case, you need to pay attention to the width of the model and the direction of the shoulder and side seams, which should be in place.
When trying on, the following shortcomings are eliminated:
1. All the excess gets into the seams, the missing stretches a little.
2. The width and shape of the armholes are checked: they must fit against the arms, otherwise they must be placed on the back and in the area of the shoulder blades. It is also worth paying attention to the shape of the armhole.
3. Put on the right sleeve with the wrong side up. The sleeve must be positioned so that the middle line has a vertical direction.
On the armhole you need to put a mark where the middle of the sleeve is pinned. It's also worth checking the sleeve width. Then the sleeve breaks off.
4. The model is removed, the sleeve cap and armhole are measured. The length of the edging should be 3-4 cm greater than the circumference of the armhole. If the sleeve is narrower than the armhole, then it needs to be unraveled a little from the seam. You can do the opposite: take a little of the armhole into the seam. The excess also gets into the seam.
5. The armhole is folded in half, and the opposite fold is marked with colored thread.
6. Second fitting.
The model is put on with the front side up, and the width, length, direction of seams, position of darts and pockets are once again specified.
7. The right sleeve is put on with the front side already on and pinned to the armhole in two places: the middle line is connected to the top mark on the armhole, and the sleeve seam is connected to the bottom. The middle line should be directed vertically. The sleeve breaks off and the model is removed. Then they begin stitching the model.
How to sew a model
If the model is knitted with knitting needles No. 2-3.5, then the details can be stitched on a sewing machine using a large stitch. But coarse, coarse knitwear is sewn by hand. It is important to remember that trim strips, cuffs, etc. connected manually.
The model is stitched in the following sequence:
1. Shoulder, side seams and sleeves are stitched. The basting is removed and the seams are ironed through two layers of damp gauze on the edge, and then on both sides.
2. The sleeve is sewn in. First, the sleeve is inserted into the armhole, pinned with needles and sewn on the wrong side.
3. Then the sleeve is pressed on and the seam is pressed onto the edge. Then the sleeve is placed with the front side on the sleeve and ironed again.
Practical advice
— Knitwear cannot be ironed dry. Otherwise, shiny places may appear on the canvas.
— If you prefer to wash the product first before tattooing, then it is recommended to wrap the item in a terry towel after washing, and only after removing excess moisture, pin the product onto the canvas.
— To maintain the elasticity of the knitted elastic after wet processing, do the following: stretch the elastic in height and lightly iron it in this position through 2 layers of damp gauze. Then pin the elastic onto the pattern, stretching it out slightly. When ironing, do not touch the elastic band.
— Knitwear is easy to sew with zigzag seams. If the fabric is rough, use thread No. 10.
— It’s better not to connect the parts using a hook: the seam turns out to be very rough.
— To avoid seams being imprinted on the front side when ironing thin knitted items, place several layers of paper underneath them.
Using adhesive tape
Adhesive tape or web is a godsend for those who do not know any sewing techniques and who do not have a sewing machine. With its help you can hem trousers, curtains, dresses, skirts. Suitable for thicker fabrics and non-flared items. The method is quite easy.
- Prepare the dress by measuring the desired length. Leave 2-3 cm for hem. Cut off the excess edge.
- Pin the hem with sewing pins and iron.
- Take the adhesive tape and measure the required length. You can cut it into small pieces or take a long one at once.
- Place the web inside the hem, and fold the raw edge and secure with pins. Make sure that the adhesive tape does not show through.
- Iron well, pressing the iron against the fabric using steam. Hold the iron for a few seconds to release the glue.
- Remove the pins and go through the iron again.
In this technique, the main thing is not to overexpose the iron so that the adhesive tape does not overheat, otherwise it will deform the fabric.
Disadvantages of using adhesive tape:
- not suitable for thin fabric, because the web adds rigidity due to the hardened glue, and on thin clothes it will bulge;
- When ironing, a tape mark will appear on the front side;
- This method is short-lived; after washing, the tape will come off over time.
Caring for knitted items
We properly wash, dry, iron and store knitted items.
We have heard a lot about how knitwear requires special care. But we don’t always know how to do it exactly and correctly.
I come across knitted items that have been damaged by improper care (washing or storage). As a rule, this comes from ignorance, and not from your untidiness or laziness.
Let's discuss this topic in more detail and learn how to properly care for your favorite sweaters, cardigans, shawls... and they will serve you for a long time, making you happy and warm.
I want to assure you right away that you will not encounter anything difficult or impossible regarding the proper care of knitwear.
So the first stage is washing:
- First, the product must be turned inside out.
- You can wash knitwear either by hand or using a gentle machine wash cycle (I trust all my personal knitted items to a washing machine, but only in a gentle cycle).
- It is necessary to use only mild detergents (without bioactive and bleaching agents). If possible, I recommend purchasing special washing powders for washing wool products. They will perfectly wash your knitted items, both natural and artificial fibers. If you wash by hand, first dissolve the powder in water before washing and only then put the knitted item in it. Under no circumstances should you sprinkle powder on the item you are washing - this can ruin not only the color of the item, but also the structure of the thread. You can also use soap shavings. I very often use shampoo when washing mohair.
- Pay attention to the water temperature. It should not be more than 30 degrees. Especially if the yarn contains wool.
- When washing by hand, try not to rub the product. Knitwear does not like to be subjected to mechanical stress - the product can stretch and lose its shape. Let the product soak in water and detergent for a while, and then gently and gently remove any dirt. But remember, you can’t soak knitwear for a long time. Do not twist, squeeze slightly.
- Tip - when machine washing woolen items, it is better to place them in a laundry bag.
- Remember the necessary rule when washing by machine: when washing by machine, set only (!) gentle spin, with a lower number of revolutions. It is necessary to use the mode either for delicate fabrics or for wool.
- To remove all stains when machine washing, dilute a detergent with a higher concentration than usual in a bowl of water. Carefully inspect the entire product and soak the stained areas with a solution (!) of detergent. Leave the product for 15 minutes and then place the product in the washing machine.
- Use conditioner when rinsing.
- In particular, rinsing knitted items: to maintain the brightness of the color, add a little vinegar, and to add softness, a teaspoon of glycerin. A product made of angora and mohair will be especially grateful to you and will respond with special tenderness.
- When rinsing, the water temperature should not differ much from the water temperature when washing, and also try to rinse the product thoroughly...
- And once again as a reminder: do not twist knitted items, squeeze them carefully; it would be good to do this first by wrapping them in a terry towel.
- It is not recommended to wash knitted items frequently; it is better to air them out more often.
Second stage: Drying knitted items:
1. Dry knitted items flat on a horizontal surface. Away from heating devices.
2. Do not hang-dry knitted items - they will become deformed after drying this way.
3. It is prohibited to dry knitted woolen items on radiators.
4. It is best to lay out a terry towel (washed, non-fading) on the floor or table and place the washed knitted item carefully laid out. Without stretching. Personally, I change towels (I have several of these) when they get wet. Things washed using a washing machine dry much faster and this is a huge plus.
Third stage: Iron or steam knitted items?
- Woolen items should not be ironed, but steamed. I recommend placing a damp cotton cloth on the product and running it with a well-heated iron, lightly touching the fabric. If the product has a voluminous pattern or bulges, place a thick terry towel under it. Steam aranas and braids very carefully; as a rule, they do not like ironing.
- For cotton items, you can use more vigorous steaming.
- You can only iron items with a flat pattern without pressing the iron too hard against the fabric.
- Never iron wet knitted items - this will lead to deformation of the product.
Well, there is also a very important stage in caring for knitwear: how to properly store knitwear.
Knitted items should be stored folded in not very tight piles.
How to store knitted items:
- Before storing a knitted item in a closet for storage, it must be washed and dried well.
- It is not recommended to hang products on a hanger to avoid deformation and stretching.
- It is allowed to hang sleeveless knitted items made from linen or cotton yarn on hangers.
- When placing yarn in the closet for a long time, do not forget to use special anti-moth products.
- Are there any pellets? - no problem! it’s simple and easy to remove them and the thing will be like new again - you need to use a special brush or machine to remove them.
- Have you noticed any tightness on the product? - do not cut them, very carefully pull them with a hook or needle to the wrong side and secure.
- Are your mohair products stale or has the pile stopped being fluffy after numerous washes? I resort to two methods: immediately after the products dry, I wrap them in a bag and place them in the freezer for 2 hours. They become fluffy and cozy again. If washing takes place while traveling, after it has not completely dried, I comb it very carefully and gently with a hair brush with natural bristles.
A couple more tips:
- Wrap wooden buttons with foil or cling film before washing; they will not get wet or darken.
- To improve the functioning of the zipper, rub it with soap.
- Apply colorless varnish to the buttonholes on the inside; they will not stretch out and will last much longer.
That's all. I hope the practical advice and this knowledge will allow you to give your knitwear a pleasant, neat appearance and prolong their life for a long time. Wear, care for, warm up and enjoy! Be perfect and unique in cozy, delicate knitted items.
How to hem a dress by hand
"Blind stitch" by hand
Above we described how you can make a “Blind Stitch” on a sewing machine, but there is an option to do it manually. Start at the seam of the dress to secure the thread and hide the knot.
- Prepare the dress, measure the required length, leaving 3-4 cm + 1 cm for the hem height.
- Make a hem, iron and baste with thread.
- Turn back the edge of the hem by 3-4 mm.
- Insert the needle under the hem, catching 1-2 threads.
- Make the next stitch on the hem.
- Take a step forward and stitch under the hem again, catching no more than 2 threads with the needle.
- Repeat steps along the entire hem.
- Do not tighten the thread too much, otherwise the fabric will wrinkle.
Video:
"Goat" for knitted fabrics
Not all sewing machines are capable of stitching knitwear evenly; the “Goat” technique is perfect for this fabric. The work is done from left to right, but the needle should be inserted from right to left.
- Fold the edge of the dress, secure with pins, and iron.
- Prepare a needle and thread. It is better to start from the seam of the dress to hide the knot of thread.
- Fix the needle from the edge of the hem by 3-4 mm.
- Taking a step to the left, insert the needle under the edge from right to left, hooking 2 threads.
- Then we take a step to the left again and, retreating 3-4 mm, insert the needle from right to left.
- In this way, go along the entire edge of the hem of the dress.
- The seam should look like a cross.
- Do not pull the thread or take a large step so that the seam is elastic.
Video:
How to prepare knitted parts for assembly
You can often hear the following saying from experienced needlewomen: “The iron will correct defects in the work.” And in fact, with skillful use of the iron, it can perform miracles: it will iron, fit or stretch, if necessary. After ironing, the parts will take the required shape.
But at the same time, an iron can ruin an ideal part to the point of being completely unusable. It is simply necessary to be able to properly process product parts. Preparing the parts and assembling them into a product that fits perfectly on the figure requires not only skill and experience, but also a lot of patience.
The main rule for ironing and joining parts is to adhere to the strict sequence of all operations.
1. Threading
First of all, hide all the ends of the threads on the wrong side of the piece. When threading, try not to pull the fabric of the part. If you have ends left from the beginning of work, then do not cut them off, but use them when sewing together the parts of the product.
2. Pinning parts onto the pattern
Place the pattern of the part you knitted on a soft mat. Trace it with a pointed piece of dry soap, and then remove the pattern.
Place the piece on the resulting outline with the wrong side up.
Insert pins at an acute angle, first only into the corners of the part, and then along the entire contour, sticking them in at a distance of 1 cm from each other. Insert pins into the very edge of the part, into the edges.
If the piece is knitted from light-colored threads, then in order to avoid the appearance of a rusty stain from the pins after wet-heat treatment, it is better to place a piece of cotton wool under each pin.
For a better fit of the sleeves in the finished product, it is better to give the armholes a concave shape, even if they are knitted in a straight line.
It is better not to prick the bottom edge of the part, otherwise it will turn out jagged and uneven.
To avoid sagging of the side edges of the front and back parts, it is necessary to raise them 1.5 - 2 cm above the bottom line.
If a fastener bar is knitted on the shelf, then it is pinned on the inside of the bar. To prevent the edge of the strip from being damaged, pins are inserted between the strip and the shelf pattern.
3. Wet-heat treatment of product parts
If the pattern of the knitted fabric is not too convex (for example, it is stocking stitch, fine bouclé or openwork) and the product is knitted from black or cotton threads, then it can be ironed through 2 layers of gauze, lightly touching the surface. Stop ironing when the gauze becomes almost dry. Remove the gauze from the product part and leave it pinned until completely dry for several hours.
Knitwear should never be ironed until completely dry. It is always necessary to finish ironing while steam is still emanating from the part. In this case, the surface of the knitwear remains convex and no stripes remain on the fabric. This ironing method is also recommended for removing marks on a product.
When knitting with an expressive pattern texture (rubber bands, large bouclé, patent patterns, plaits, raised stripes) or from mohair thread, silk, viscose or synthetic threads, the details of the product cannot be ironed. To give the details an ideal appearance, simply pin them on the mat and put 2 layers of wet gauze or towel on top. After 2 hours, remove the gauze and leave the part pinned until it dries completely.
Some needlewomen prefer to wash the parts before pinning them, even if they are clean. It is better not to do this unless absolutely necessary, especially if the pattern has a pronounced texture. However, if you still wash the parts, then after washing, keep them in a terry towel. When the parts give up excess moisture, pin them onto the pattern with the right side up. In this case, the relief pattern will change less. Stocking knitting fabric can be ironed through 2 layers of dry gauze (in this case it is pinned with the wrong side up). In other cases, it is better not to use the iron.
To maintain the elasticity of the elastic after wet processing: stretch the elastic in height so that it shrinks well and lightly iron it through 2 layers of damp gauze. Allow the elastic to dry completely. Next, slightly stretching the elastic band, we pin the part onto the pattern. Cover the part with damp gauze, leaving the elastic band open. After this, iron the part without touching the elastic.
You might be interested to see:
| How to connect product parts | Knitting edge loops |
Copying site materials is possible only with an active direct link (open for indexing) to the source and a mention of the author of the material.
© 2021 Brand new. All rights reserved.
