How to properly knit a collar for a women's sweater, jumper, jacket - we tried to present to your attention the most popular types of collars: a cowl collar, a shawl collar, a boat collar, an English collar, a stand-up collar or a golf collar. Knitting a collar and processing it is one of the important components of working with knitting needles.
Knit a collar with knitting needles - collar, shawl, boat, English, stand-up
How to properly knit a collar for a women's sweater, jumper, jacket - we tried to present to your attention the most popular types of collars: a cowl collar, a shawl collar, a boat collar, an English collar, a stand-up collar or a golf collar. Knitting a collar and processing it is one of the important components of knitting.
Cowl collar - how to knit it
Let's figure out how to beautifully knit a cowl collar. After all, this is perhaps the most popular knitted collar for women. Let's consider 2 options - a small (shallow) collar-collar that completely covers the neck (Fig. 243) and a large collar-collar that folds in folds on the upper part of the shelf (Fig. 244).
Small collar collar
You can knit on circular needles, or on simple ones, and then sew the edges.
We start knitting the collar from the bottom (Fig. 246). Let's take a centimeter in our hands. We measure the Neck Circumference and add 2-3 cm to this number (in our case, this is the sewing line - 42 cm).
Then, using a centimeter, we estimate how high the collar we want to make. Considering the elastic band is 3 cm, let's see how many more cm to knit. For an average size from 42 to 54 you need another 10-14 cm. Or even higher - as you like. Well, let's start from the bottom - see how many loops you need to cast on in order to get 50-52 cm.
The sewing line should be equal to the neck of your product!
So, we cast on the required number of loops and knit either with garter stitch, elastic, or the main pattern. Don’t forget to make decreases, it’s very easy to calculate the number of decreases - (52 - 42): number of rows in height. At the end we change the knitting needles to a smaller size and make a 1/1 elastic band.
We don't close the knitting! We collect the loops on circular knitting needles. We sew the side edges, fold them so that the sewing edge coincides with the middle of the back. We connect at several points. We sew the collar collar with knitting needles using a “loop-to-loop” stitch, or make a beautiful “kettel stitch”:
Large collar collar
This collar (Fig. 244) is knitted from the bottom, it turns out to be in the form of a rectangle (Fig. 247). Such collars are made with thick knitting needles, preferably in garter stitch. Once you have reached the desired height, switch to circular knitting needles and sew the side seam of the hem. Fold the thief in half and pin it to the neck in several places. All that remains is to pin the collar to the inside of the sweater.
Sweater with large cowl collar
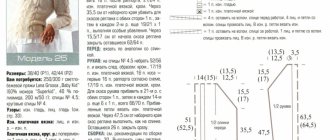
Let's try our skills on a cowl neck sweater knitted in a very simple stitch. Suggested yarn: Pierrot Yarns Junmo Namibuto2 (100% wool) - 40 g / 72 m - 13 skeins (510 g) Size M (44-46). Regular and circular knitting needles 4.5 mm. and 4.25 mm. Markers, needle. If you work on regular knitting needles, the seams will have to be sewn together at the end. OG - 91 cm, sleeve length from neck to end of cuff - 78 cm, back length - 45.5 cm, front length - 38 cm. Knitting density: 10/10 cm = 18 sts/27 rows. So, we are knitting a sweater with a high collar.
Translation of terms from English: Pattern - pattern repeat (pattern), cm - centimeters, knit - front, sts - loop, rows - row, garter st - knitting in a circle, rounds - circular, times - times, times, repeat - repeat .р Sleeve - sleeve, Collar - collar, Back - back, Front - front.
In this diagram we see the pattern repeat (in gray) - it is 16 stitches/24 rows. Bottom - garter stitch. Garter stitch. The bottom of the blouse, collar, and cuffs are made. Everything else is done with the basic pattern. The front of the sleeve is decorated with a braid of crossed loops. Knit the sleeves separately on regular knitting needles. We knit the collar after we have sewn all the parts of the product: we raise the loops in a circle and work according to the pattern on circular knitting needles.
Sweater back
We cast on 4.5 mm knitting needles. 82 p. (45.5 cm) and knit 7 cm. (28 rows) in garter stitch. If you work on ordinary knitting needles, use only faces. R.
28th row: purl; 29th: persons. row; 30th: k1, 16 rapport stitches (gray) - repeat 5 times, k1.
The repeat is 24 rows, use markers for marks.
This is how we knit 20 cm (54 rubles) from the set of stitches. We have 82 loops.
Next, we start decreasing on both sides.
1st, 2nd decrease - edge, 2 stitches together with a tilt to the left (see “symbols” below), knit until the last 3 stitches, last stitches - 2 together with a tilt to the right, edge. (-2 p). *3rd r. with decreases (-2 p). 4th: no decreases.* - repeat 8 times. (rest. 62 p.). 18th and 19th rows: with decreases. 20th: no decrease. *21st with decrease, 22nd without decrease* - repeat 8 times (remaining 42 sts). 36th and 37th row: decreasing. 38th without decrease. *39th with decreasing, 40th without decreasing.* - repeat 6 times. 49.50 rub. - no decrease There are 26 sts left. Close off 26 sts for the neckline.
In total we must knit 18.5 cm (50 rows) from the beginning of the decreases.
Front end
We cast on 4.5 mm knitting needles. 82 sts and knit 7 cm (28 rows) in garter stitch.
Next, we knit with the main pattern 20 cm (54 rubles) from the set of stitches. We have 82 loops. We begin decreasing for the armholes. At both sides. We read the diagram from bottom to top:
every r. 1 p. * 7 times - that is, decreases in 7 rows of 2 p., (decreases, as on the back) rest. 68 p.
in each 2nd r. 1 p. each - row without decreasing, row - decreasing, p. no decrease (rest. 66).
10 rows of 2 decreases. in every r. (rest. 46).
row - decreasing, p. no decrease (44).
Variation twelfth: “boat” in stocking stitch
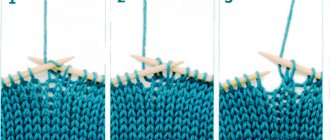
A diagram of the product is made, on which we draw a new cutout line and a 2.5 cm strip. Upon completion of the main work, knit. 2.5 cm stocking stitch, then several. R. auxiliary thread, do not close the st, remove the work from the sp. and make the front part. The basted boat is sewn with a kettel stitch, without passing the needle to the faces. side of the product - grab only half the thickness of the thread.
Shawl collar
Before us is a women's blouse with a shawl collar with knitting needles (Fig. 235). Here the collar is connected to the transverse direction. And the second option is a jacket with a shawl collar, where the shawl collar can be made directly together with the front.
The collar placket is made in garter stitch. Estimate the size of the bar in advance. On the knitting needles we cast on the number of sts + sts for the bar. We make the right shelf simultaneously with the bar to the place where the collar widens. From this point, start adding stitches between the shelf and the bar in every 4th row. Add a st using a yarn over. r., next same r. we knit these stitches. behind the back wall - so that the holes in the additions are not noticeable. We reach the desired height, on the back without approx. We also make the left shelf, and at the end we sew both halves of the hem together.
And the second option - after both shelves are ready - rise from the edges of the shelves. This model is usually made with raglan. And this will already be knitting the collar and fastening strap in the transverse direction:
Jacket with shawl collar
Variation tenth: with binding and Italian edge
We start like double binding, but for the elastic band we knit 1 x 1, alternating l. p. and i. P..
In the last 4 pp. take sp. half a size smaller and continue. knit the neckline. In the first of the last 4 pp. every l. We remove the item, as with facial expressions. elm., and pull the thread through the p.. I. p. as well as. P..
In the words r., each and. n. we remove, as with the inside out. elm., and stretch the thread in front of the p.. L. p. like l. P..
Once again repeat. these two r. and fasten the last point. R..
Stand collar
How jackets and sweaters with stand-up collars are knitted - let's understand the knitting technology. When knitting a stand-up collar with knitting needles, we leave the back neck loops open so that later, after lifting the front loops, all stitches on the collar are knitted, adding the required number of stitches.
We knit all subsequent rows (stand) with an elastic band of 1/1, 2/2, or as you prefer. We do the last row of stitches lightly and close the work. The average size of a stand-up collar with a lapel is 18-20 cm. This collar is also called a golf collar. Suitable for both adults and children.
Sweater with stand-up collar
Knitted sweaters are often made with a cuffed stand. Suggested yarn: Pierrot Yarns Bruno (80% merino wool, 20% yak) 93 m./30 g. 15 skeins (450 g) are used.
Size: Chest circumference - 102 cm, central back from neck to cuff (with folded cuffs) 78 cm, back length - 56 cm. Used knitting needles 3, 3.6, and 3.9 mm.
Knitting needles 3 mm thick. - for cuffs. Knitting needles 3.6 mm. - collar and main knitting.
Knitting needles 3.9 mm. - collar.
Knitting density 10/10 cm. for pattern A = 25 p./32 r.
Knitting density 10/10 cm. for pattern B = 27 p./34 r.
Translation of terms from English is at the beginning of the article.
On video: how to calculate the loops for a stand-up collar:
Option four: separate binding (first method)
This treatment is also universal for tying the necks of products for adults and children. Using regular knitting needles, cast on the number of sts we need, then “rib” for seven rows.
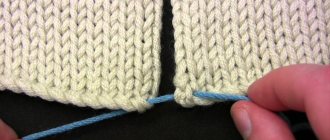
Now we compare two loops - from the binding and from the neckline, and connect them using a free kettel stitch.
We start it from the wrong side, inserting the needle and thread immediately into the second loop, then bring the needle out from top to bottom to the back side through the first loop. Next, at the bottom we bring the needle into the third stitch, and from the front side to the back side into the second and then by analogy, thus connecting the frame and the cutout on both sides.
If we do everything correctly, the processing will look like this:
Knitting lessons-3 Collars on knitted items.
I am sharing a selection of Knitting a collar on men's garments. But the principle of knitting is the same and applies everywhere.
POLO COLLAR The name of this type of collar is borrowed from the sports game of polo, whose players wore sports shirts with similar collars. A distinctive feature of this collar is that the neckline turns into a small placket with buttons. To decorate the collar, a bosom is knitted on the front half of the sweater. At a distance of about 12 cm from the middle of the front neckline in the center of the front of the sweater, close several loops (about 2-3 cm). Next, knit each side of the front separately from the beginning of the bosom to the neck line. Knit the neckline and shoulder bevels according to the pattern.
Take knitting needles one size smaller than the main ones. It is more convenient to lift the loops with a crochet hook and then transfer them to the knitting needle. We knit a placket with buttons.
Along the left shelf, pick up and knit with a 1×1 elastic band a number of rows equal to the number of closed loops. For men's products, knit a placket on the right shelf. Close the loops by knitting them with an elastic band. We knit a placket with buttonholes. From the front side, pick up the loops and knit half the width of the placket with a 1×1 elastic band. On the next row for three (or more) buttonholes, bind off the stitches just below the neckline. The number of closed loops depends on the size of the button. Then, evenly across the entire bar, close the loops in two more (or more) places at the same distance from each other. To create button holes on the next row, cast on the appropriate number of new stitches above the cast-on stitches. Then knit the second half of the width of the placket with an elastic band. Close the loops by knitting them with an elastic band. We connect the planks with the shelf. Lay the sweater right side up and connect the bottom edge of the buttonhole placket to the closed loops of the chest base. On the wrong side behind the buttonhole placket, sew the bottom edge of the button placket.
Collar Finish the shoulder seams. Place the sweater right side up. At the neckline, pick up an odd number of stitches, starting from the right side and passing the loops of the straps. Next, starting from the wrong side, knit with a 1×1 rib. Purl 1 at the beginning and end of each row.
Having knitted the required collar height, close the loops by knitting with an elastic band.
Note: Knit the last 2 rows of elastic with knitting needles one size larger than the main ones, and use them to close all the loops so that the knitted turn-down collar does not puff up.
Double stand collar.
This collar is used on polo jackets and pullovers. The double stand-up collar holds its shape well and, when unbuttoned, looks neatly finished on the inside, since the folded edge of the collar is hidden under the stand-up collar.
1. Start casting on circular knitting needles from the outside of the product from the middle of the right fastener bar. In the areas where the edge of the neck is rounded on the right and left, the number of stitches cast on should be the same, and the total number of loops should be sufficient so that the neck does not tighten. The total number of stitches cast on for this model is a multiple of 4 plus 2 more loops. Work 1 purl row with purl loops, 1 knit row with knit stitches and 1 purl row with purl loops, then leave the loops temporarily and cut the working thread. After every 10th stitch, use a contrasting thread to make a mark.
Beautiful neckline with knitting needles
Neck with scallops
Don’t know how to knit a neckline beautifully? A crocheted neckline looks nice, because you can make openwork edges or knit an entire collar. With knitting needles, a beautiful neckline comes out with knitting needles if you use various special knitting techniques. For beginners, the scallop neck option is suitable. This pattern is easy to knit, more details below.
The process of knitting tape with teeth:
- First, knit a 1 by 1 elastic band to the required height.
- Next, knit a row as follows: two stitches together with a knit stitch + yarn over and so on according to this pattern until the end of the row.
- Knit the next row with purl stitches.
- And then knit the second part of the binding with a pattern: 1 purl loop, the other knit, and so knit row after row according to the pattern until you reach the same height as the first half.
Serrated edge of the neckline
After finishing the process, you should bend the elastic in half so that you get teeth at the top of the neckline and sew with an invisible seam.
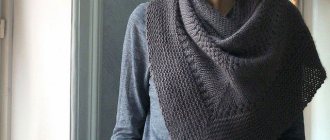
Scarf collar with braids
We will need :
- yarn, alpaca (50g per 167m) – 150g;
- circular sp. No4 with line length 40cm;
- circular sp. No5 with line length 60cm;
- marker (M).
- shawl pattern: all sts in all r. – facial;
- persons satin stitch: alternate rows of knit stitches/purl stitches;
- patterns according to diagrams.
Density: face. Satin stitch using knitting needles No. 5 with double thread 17p. for 22r. correspond to 10cm by 10cm.
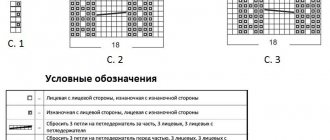
We cast on with knitting needles No. 4.5 with yarn in two folds of 47 sts. (of which 2 cr.). and do 2p. shawl pattern. Let's go to sp. No5 and knit 2p. persons satin stitch Don't forget - the outermost stitches in the row are edge stitches! In persons row we add 6 stitches at equal intervals. In total we have 53p. We continue knitting: next. R. (front): 1 cr., 18 p. – diagram C.2, last loop cx. S.1, 14p. – diagram C.1, 18p. – diagram C.3, 1cr.
Option five: separate binding (second method)
Another way to tie the neck separately.
Using knitting needles, cast on the required number of stitches, then use a 2 x 2 elastic band.
Having made 7 rows in this way, we perform double knitting. We remove the first edge with knitting needles without knitting, yarn over, l. p. and so on until the end of the row.
In the next row, remove the purl stitches without knitting, always keeping the thread in front.
Having reached the yarn overs of the previous row, we knit them with facial loops.
Turn the knitting over.
We continue further: reaching the yarn overs, knitting. from l. p., remove all other p. without knitting, always keep the thread in front. Having knitted three more rows, we divide the knitting in half into 2 separate sp. Close the loops on one of the joints. in the manner described above.
We smooth out this part well and the second one, which remains with open stitches for now. We apply the parts one to the other and sew them together with a quilt stitch.
We sew the part with open loops on the wrong side using an overlock stitch.
As a result, we will end up with processing like this:
Scarf collar with arans
Collar width is about 17cm.
- yarn h/w (50g per 50m) – 150g;
- knitting needles No. 8;
- add. Arana needle;
- marker (M).
- shawl pattern: all stitches in all rows. facial;
- arans - see diagram.
How to perform short rows on both sides of the collar:
- 1st row (face stitch): 6p. handkerchief rice, turn the canvas;
- 2p. (purl stitch): tighten the thread and knit 6p. plat. pattern;
- 3p: knit all stitches;
- 4p.: knit the initial 6p. shawl knot, turn;
- 5p.: tighten the thread and knit 6p. handkerchief knot;
- 6p.: knit all stitches.
We cast on with knitting needles No. 8 24p.
Track. R. (front side): 6p. – board drawing, 12p. according to the scheme, 6p. – board risk. We continue to knit the pattern, while simultaneously performing shortened rows every 6cm, as described above. Set M at the beginning of the trail. R. on the front side – the height of the part is 22 cm. We used a marker to mark the seam of the collar.
Continue to a height of 76cm (measure in the center). We finish with the last p. Arana schemes. Closed p. We join the closed edge and the side of the collar, guided by M - see as in the photo above. We make a seam.
Option seven: V-neck (first method)
We start by casting on sts, as shown in the photo below.
After casting on the loops, you can start knitting 1x1 elastic.
The height should be selected depending on the type of product. Upon completion of work, all items should be closed like l. p.. At the cape we sew the edges together using thread and a needle.
Knitted scarf collar for beginners
The length of the fabric before the seam is made is 90cm. When sewn, the length is 21cm.
- h/w yarn (50g per 75m) – 150g;
- sock knitting needles No.5;
- marker (M).
- shawl pattern: all stitches in all rows. facial;
- pattern - see diagram.
Density: face. satin stitch 17p. for 22r. will be 10cm by 10cm.
We dial 35p. and do 2p. handkerchief rice.
Further in persons. r.: 2cr. – shawl knot, 1 p., 30 p. = 3 p. x 10 repeats – pattern C.1, 2 cr. – board knot We continue using this algorithm until the height is 21cm. Install M (useful during assembly). After 89cm we switch to a scarf. pattern. Need to knit with 2p needles. and close p.
Along the long side of the scarf, carefully sew the short edge, guided by M.
Knitted scarf - collar with buttons
Size: 34cm by 60cm.
- yarn h/w (50g per 75m) – 250g;
- knitting needles No; and No5;
- markers (M);
- buttons – 4 pcs.
- shawl pattern: all stitches in all rows. facial;
- pattern - see diagram.
Density: 17p. for 22r. will be 10cm by 10cm.
Using knitting needles No. 4, cast on 62 stitches. and do 1p. knit stitches. This row will be purl. Next (personal row): 6p. – shawl knot., 2l., *2i., 2l.* – from * to * repeat up to 60 p., 6p. - handkerchief knot. Having knitted 4cm, we switch to sp. No5. Distribution p.: 6p. shawl knot, 50p. – сх. S.1, 6p. handkerchief knot Having received 20cm of scarf height, close. 6p on both sides. Cut the thread and set aside knitting. We knit the second part of the scarf in the same way.
We cast on 6 stitches with knitting needles No. 5, transfer stitches from the first part of the scarf set aside to the knitting needle, transfer the loops of the second postponed part here, and cast on another 6 stitches. There are only 112p in work. We work with them like this: 6p. handkerchief rice-k, 100p. – сх. S.1, 6p. - handkerchief risk. Having completed it to a total height of 34 cm, we move on to sp. No4. Add evenly to the trail. R. 2p. and knit: 6p. - handkerchief rice. 2l., *2i., 2l.* – from * to * repeat until 6th last. loop. We knit them with a handkerchief. drawing. There are only 114p in work. Continue 4cm in height with an elastic band. Closed p. Sew the fastener, sewing buttons through two layers of fabric.
Option two: decorative small zigzags
Another simple decorative neckband that even novice craftswomen can do. To begin with, we make seven rows of l. P..
We do the eighth row as follows: 2 l. p.vm. l..
Then we make a yarn over, and again 2 liters. p.vm., yarn over again, and so on until the end of this row.
Having reached the purl row, all stitches of the previous row should be knitted only purl.
Next - again 7 rows of l. P..
Now we will need another joint. as an auxiliary stitch, we cast on loops from the cast-on row.
Now the binding is bent in half lengthwise along the pattern line. After this, right sp. grab the item from the far back..
We put it on the back, which is in front.
We knit from the front sp. 2 p.vm. facial (crossed and own). This will give us a row of small cloves.
This is how the processing should look from the inside out:
Front side of the neck:
Knitted scarf hood with collar
A very original solution to combine a scarf, snood and collar in one model allows you to knit an irreplaceable item for cool weather.
The diagrams assume that the hooded scarf with a collar is knitted by machine.
But, for a knitter with even minimal experience, it is quite possible to knit such a model by hand with knitting needles. We use the same patterns for the model as for machine knitting. For the collar we choose an elastic pattern, the main part is knitted with a “rice” or “honeycomb” pattern. The main thing is that the yarn should be very thin, otherwise the knitted scarf-hood will be bulky. And it is very important to make the seams carefully.
Option one: smooth edge
This type of knitting of the neckline is universal: it is suitable both for products for children and for framing “adult” clothes.
To create it, you should knit all the cast-on loops in seven rows of k. P..
Eighth row - i. P..
Next - again seven rows of l. p. and bend our neck inward along the line from i. P..
Turn the knitting inside out and carefully, not tightly, using an overlock stitch, sew the edge to the finished product.
From the wrong side of the binding it will look like this:
From the front side, the processing looks perfectly smooth.
Wide braid collar
Dimensions: approximately 23cm by 73cm.
- h/w yarn (96m per 100g) - 200g;
- knitting needles No. 7;
- marker (M).
- shawl pattern: all stitches in all rows. facial;
- patterns - see diagrams.
Density: face. Satin stitch with knitting needles No. 6 13p. on 17r., knitting needles No. 7 12p. for 16r. will be 10cm by 10cm.
Using knitting needles No. 7, cast on 33 sts. and knit: 10p. – diagram C.1, the rest of the items – shawl pattern. Having knitted 24cm (we measure along the edge of the scarf), we put M at the end of the p. (front side facing us). We continue knitting up to 75cm and closed. P.
We sew the closed edge to the left long side (the front side is facing us) between the starting row and M.
Option eight: V-neck (second method)
We cast on the loops in the usual way, starting from the shoulder side.
First r. - elastic band, thread the right sp. through the cape. in the first and third sts of the left back.
Leave the second loop on the left back.
We transfer the first and third stitches again to the left back.
We do 3 sts. persons..
We continue knitting in the same way as before.
