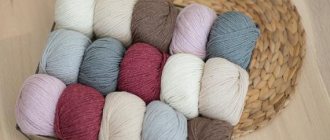
Knitting from thick bulky yarn is at the peak of popularity among needlewomen today. When it seemed that nothing new could be invented, yarn manufacturers began to surprise with unusual balls of impressive size. The oversized fashion has reached its peak, and now the more the merrier!
Knitting with thick yarn has both pros and cons. The first is that the items received look very unusual and incredibly stylish, and a large item can be knitted in just a couple of days. Well, there’s probably only one minus – the high cost of yarn. The skeins have a very short footage, so a considerable amount of them is required to complete the product.
But for a hat you only need one, maximum two skeins. Knitted hats are one of the favorite accessories for both beginning and experienced craftswomen. Let's look at how to knit a stylish voluminous hat from thick yarn.
We pay attention to the raw materials for the future hat
The material should always be selected according to the time of year. In winter frosts and winds, wool or its threads will be especially useful and warm. For your baby, you need to choose a material that does not cause allergies.
Attention!!! Those who are just beginning to comprehend the art of knitting want to do it only with natural raw materials (wool). This error can “crawl into the light” when knitting a hat with only wool. Later, such a headdress will lose its shape, lumps and depressions will appear on it, and the wool itself will darken. For a hat, it is better to use mixed yarn.
How to finish a hat with knitting needles
After the hat is knitted to the desired length, you need to start narrowing the crown. To do this, you need to decrease a few loops in the following rows. Decrease - knitting two loops together . As a rule, when knitting a hat, rows with decreases alternate with rows knitted according to the pattern. This reduces the number of loops through which decreases are made.
For example, first every 10 loops, then every 9, then every 8 and 7 loops. When there are no more than 20 loops left, pull the thread through them and pull off. This completes the knitting of the hat.
We choose knitting needles according to your wishes
First you need to find out the diameter of the thread, because we will select knitting needles based on it. They come in 3 types:
- Wooden.
- Plastic.
- Metal.
For the hat you need 5 knitting needles with fishing line. If we work with two, we will get a cloth that needs to be sewn to get a headdress. In this case it will have a seam.
Crochet Patterns for Thick Yarn
The most common pattern for thick thread should be considered a bump.
The second most popular pattern is
fancy and with lush columns.
Very simple with a simple alternation of curved columns .
A variant from the fantasy series.
Some craftsmen are happy to come up with their own designs. Therefore, creative inspiration to everyone. Maybe soon you will be able to come up with something that all other masters will use.
Earring for the whole ear, what is it called?
DIY curtain clips
Knitting methods
There are three simple patterns that anyone who starts knitting should master: rib stitch, stockinette stitch, and purl stitch.
- The elastic band is simple. The simplest pattern. Used by beginners to make simple products. Perfect for a headdress.
- Purl stitch. The basic method of knitting a hat. Easy to do. It will always be modern for all kinds of masters.
- Facial surface. Very popular among English fashion designers.
- English gum. This pattern is used to knit almost everything: from scarves and socks to sweaters.
Acorn hat knitted
Large knitted Acorn hat from Bernat
The next style, the description of which we will look at, is a women's knitted large knitted Acorn hat from Bernat on knitting needles. The cap has a slightly elongated crown, reminiscent of an acorn. You will need: – Bernat Mega Bulky yarn, 300g/58mt; – knitting needles No. 19. Density: 5 p. = 10 cm
In Bernat's original, the hat knitting pattern is presented on straight knitting needles, but you can knit it on circular knitting needles, then garter stitch needs to be knitted differently: 1 r. facial, 1 rub. purl.
Operating procedure:
- Cast on 26 stitches.
- Work 5 rows in garter stitch (knit all stitches). Consider the first row to be purl.
- Next row (RS): knit 7, knit 2 together, knit 8, knit 2 together, then knit until the end of the row. (=24p.)
- Then continue knits.p. to a height of 20.5 cm from the beginning of work (finish purlwise).
- We form the top of the head: 1p. (RS): * K4, k2 together. * – repeat until the end (= 20 p.) 2 and all even ones: purl. 3p.: * 3knit., 2 knits together.* – to the end (=16 p.) 5p.: * 2knit., 2 knits together.* – to the end (=12p.) 7p.: * 1knit., 2 knits together. .* -…(=8p.)
- Break the thread and pull through the remaining 8 stitches, tighten and reinforce, sew a back seam.
How to find out the required number of loops before work?
The thickness of the yarn does not often coincide with ideals. Either the size is too small or too narrow. In order not to make mistakes in measurements, you need to make a blank of 10 cm. Next, you need to close the loops in it and measure its thickness.
If we need a hat of 40-50 cm, in order to find out the required number of loops before work, we should measure the first sample (cast-on loops). If it comes out 7-13 cm, then there will be 23-28 loops.
Helsinki hat, knitted with elastic band
This will probably be the thickest elastic you've ever knitted!
- Everything here is the same as with the basic model, only to work you need to cast on an even number of loops.
- Before starting work, you need to knit a sample with an elastic band, keep in mind that an elastic band knitted with thick yarn stretches twice as long as a regular one.
- You can cut the loops just once, then pull off the remaining loops and sew on the pompom.
Knitted hats are a great field for creativity, experiment, and approach fashion with a bit of humor!
DIY hat for a woman
If you have a good command of the knitting tool, it will not be difficult for you to knit any hat of different styles and colors. Women's hats are the leader in terms of choice of colors, styles, and patterns.
Knitting method "braid"
This method will be both easy and difficult, depending on your skill or style. Making such an elm for a beginner will not be particularly difficult, because it is easy to perform.
The many options for this style will amaze many beginners in knitting, but if you can choose the right colors, you can end up with a real masterpiece. A hat with a graduated effect is a great option. To work you will need purple and pink threads. You can add purple, it won’t spoil the color.
If you knit first with lilac and then with violet thread, you will get a beautiful effect of pouring one color into another without delineating the boundaries.
Progress:
- We cast on 80 purple or pink loops. It is important to ensure that they all remain the same thickness.
- We knit in a thickness of 5-6 cm, this stage is best done with a simple elastic band.
- We make a “braid” pattern with purple yarn.
- We knit the next 6-9 cm with pink thread, later we begin to add purple yarn. The result is a graduated cap.
We wear bright things in winter!
Head size: 52-56 cm To make a women's hat with large threads with braids you will need: – 100 grams of Softy yarn, 98% wool 2% polyamide, 53met/50g, green;
– 50 grams of orange; – stocking needles No. 8 and No. 10 Basic pattern: the pattern is knitted according to the pattern in circular rows. It consists of two sectors: the first 6 pet. – this is a small braid, repeat it every 5 rubles. in height. The remaining 14 sts (large braid) - repeat from 1st to 12th p. Density on knitting needles No. 10: 8 sts = 10 cm
Knitting pattern:
- On the sp. No. 8 in green, cast on 44 sts, close the knitting in a circle and knit 2 cm with a 2x2 elastic band (2 knit, 2 p).
- Next, change the tool to No. 10 and knit 1 r. knits.p., while adding 16 sts in this order: 10 times alternately after every 2nd and 3rd sts, then 6 times after every third sts (=60 sts).
- Then knit three repeats with the main pattern.
- After knitting 13 p. change the thread color to orange. After another 13 r. – to green.
- From this moment you need to start decreasing to form the top. For this: * 6p. pattern with braids, purl 5, knit 4, purl 5 * – repeat until the end of the p., at the same time make decreases: 1 p.: in sectors with 5 p. knit the middle 3 stitches immediately purlwise (=48 stitches) 2-4p.: without decreases 5p.: in the sector with 3p. again 3 stitches at once (= 36 stitches) 6-7 p.: no decreases 8 p.: all loops 2 at once knit (= 18 p.) 9 p.: knit. p.
- Pull the remaining loops together with working yarn and secure.
- Using the remaining green and orange threads, make a pompom with a diameter of 8 cm and sew it to the hat.
Green and orange hat pattern
Knitting a turban hat for beginners
Beauty is a deadly force. This was proven by singer Kylie Minogue, a beauty queen. She completed her look in a brown coat with a cute turban hat, which she later admitted she made herself from a simple knitted scarf. After such a tremendous success of the turban, craftsmen from all over the world hastened to add their own twist to this headdress.
Knitted turban
The sequence of steps in the work is simple, but requires some preparation.
- We measure the dimensions of the head, write them down (or remember them).
- We knit the fabric according to the received numbers.
- We wrap the resulting fabric around the head and sew it together.
Do-it-yourself voluminous hat made of yarn
A voluminous hat is a modern headdress. Little tricks will help you create a work of art.
- To make the hat as warm and voluminous as possible, you need to take thick yarn (or fluffy). You can also make your own fabric from 2-3 layers of regular thread. You need to knit with thick plastic or wooden knitting needles.
- The elastic band of the hat or its edge should be knitted with smaller diameter knitting needles. If we initially knitted with sixth needles, we need to take fourth ones to the edge.
- For a large hat you need textured and bright patterns: cones;
- braid (or tourniquet);
- English gum.
Types of yarn for large knitting
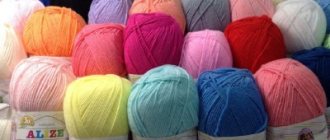
Many types of thick yarn have appeared on the craft goods market. Threads come in different compositions: mixed or completely natural, as well as synthetic. Here are just a few of them (in order of thread thickening):
- Aurora from Magic (59m/150g). Wool 36%, acrylic 52%, alpaca 12%;
- Combo from Himalaya (40m/100g). Wool 50%, acrylic 50%;
- Country from Alize (34m/100g). Acrylic 55%, polyamide 25%, wool 20%;
- Marine from Gazzal (15m/150g). Australian wool 97%, elastane 3%;
- Zephyr from the Trinity Worsted Factory (50m/500g). Merino wool 100%;
- Cloudlet (50m/1kg). Merino wool 100%.
Flap hat made from regular yarn
This style of hat suits absolutely everyone.
How to make your own lapel
- If you are going to start knitting a cap with a lapel with a simple elastic band, you need to make it as wide as possible. For an ordinary hat, the length is 6-11 cm, but we need 19 cm. You can wear such a hat without a lapel.
- If you knit with one of the elastic bands and plan to make a hat with a lapel, then the hat needs to be made longer - up to 8 cm. This is a kind of “transformer”, because you can always remove the lapel and wear the hat as usual.
- You need to make sure that the pattern or pattern on the front of the cap and the back should not be different.
For the brave and daring - we knit a super-voluminous hat
A hat made of bulky yarn with knitting needles, popular among young people, looks unusual and trendy due to the very large pattern. It is easy to knit; you don’t even need a pattern, since it is knitted with a classic 2x2 elastic band.
Necessary materials:
- thick yarn (40 m in 50 g) with the following composition: 45% - alpaca, 46% - merino, 9% - polyamide - beige - 150 g;
- circular knitting needles No. 10 with a cable length of 40 cm;
- stocking needles No. 10.
On a note! The description is given for head size 56-60. The knitting density is 8 stitches. x 12 rows = 10 x 10 cm.
Step-by-step description of the process:
- Cast on 48 stitches.
- Mark the transitions from one row to another.
- Knit knit 2 in the round with an elastic band. x 2 p.
- Having knitted 31 rows (approximately 26 cm), from the first, begin to reduce the number of loops.
- On row 32, in each purl row, decrease 2 stitches six times, purling them together.
- The work will become 42 pets.
- From the 33rd row, knit all odd rows according to the picture.
- At 34 - repeat the steps of row 32. 36 stitches left. Advice! It’s more convenient to decrease stitches on stocking needles!
- At 36 - in each front row, knit 2 stitches together 6 times (30 stitches).
- At 38, you need to knit 2 together 12 times to reduce the number of loops to 12.
- You can cut the thread. Pull the remaining loops on it and secure the end of the thread.
- Make a lapel (optimal width - 8 cm).
DIY hat for a man
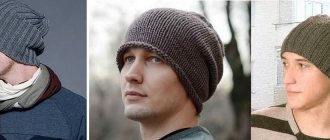
A hat (especially a knitted one) is a very common item among men. If his other half knows how to knit, she can sew an excellent hat for her husband right at home, and it will be no worse than brand models. There is practically no difference between men's and women's hats, except perhaps the color and design.
Winter hat for men
In order for a hat to really warm you in winter and not be a decoration, you need to find warm and high-quality yarn. It could be:
- Sheepskin (sheep's wool).
- Angora.
- Llama wool.
- Mixed yarn, where there will be half synthetic, half hare or goat down.
When choosing sizes for a future product, a beanie hat would be an excellent option; it can easily fit in your pocket. More suitable for cold autumn-winter. The winter version can be knitted from regular yarn and two knitting needles, sewn, and later insulated with a special material.
Accessories for successful work:
- Knitting needles, you can take two pieces, sew the resulting fabric.
- Black and white threads. White yarn will make a beautiful ornament, black yarn will be the basis.
You need to knit from the top of the hat. You need to make Turkish loops, not ordinary ones, so that you can knit in all directions at once. You can simply knit the insulated fabric and sew it.
We cast on several loops, taking into account the size of the head. We knit to the middle and begin to make patterns (ornament). If you have a rich imagination, then this will not be a problem. Next, our product needs to be finished. We decrease 8 loops one by one until there are 10 left. We collect the rest on the needle and simply sew it together.
Useful tips
- The simplest patterns for knitting hats with thick threads are stocking, garter or rice stitches, as well as elastic - regular, English or puffy. You can choose not a single color, but a melange yarn with a non-uniform color, this will make it possible to combine a hat made from it with things of different colors and will hide imperfectly even loops in the pattern.
- To make the thread thicker, you can fold it 2 or more times when knitting. It should be remembered that the thicker the yarn, the higher the number should be on the knitting needles.
- If you don’t have circular knitting needles of the required number at hand, you can use a set of 5 knitting needles (for knitting socks and gloves). Since the needles in such sets are short, knitting will be convenient. If the hat is planned to be voluminous, it is better to attach stops to the knitting needles, then the loops will not fall off when knitting.
- A hat knitted in garter stitch can be decorated with embroidery made from contrasting threads or a specially selected brooch. The decoration should not be heavy so as not to stretch the fabric of the product. Embroidery threads should not shed, otherwise the product will be damaged when washed.
- The hats are also decorated with large beads made of glass, wood or plastic. They can be sewn evenly over the entire hat or decorated only on the lapel. You should be careful with adhesive rhinestones - they fall off during washing and can ruin the appearance of the product. Rhinestone glue can also leave unsightly marks on the canvas.
There is nothing difficult in knitting a hat with a large knitting stitch and using thick threads for this. You just need to follow the instructions.
Hat for a child from 3 months to 3 years
You can also make a cute and beautiful hat for your child that will protect him from inclement weather. For the pattern, you can take a simple cat.
We will need:
- Black yarn, we need a small skein.
- Knitting needles with fishing line 3.5-4.
- A needle to sew the resulting fabric.
Progress:
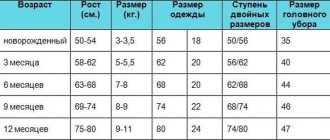
- For a baby (or toddler) from 5 months to a year, a hat with 40 stitches will fit, for a 3-year-old - 45. We knit it like a regular hat, in the round. It is preferable to knit in stockinette stitch. In the end, you just need to close the yarn and sew the resulting fabric.
- Ordinary ears will work perfectly for the pattern. To make the pattern, you need to stitch each corner with black threads. Next, we simply embroider the pattern on the front side of the hat.
If you are a beginner, we advise you to take a hat that is easy to make. This hat will do its job perfectly, keeping your baby warm on winter days.
Choosing thick yarn and hook
yarn can be used for a hat , but not so massive that it will only cause discomfort and disapproval from others.
Medium thread and thread thickness equal to medium weight merino yarn are suitable. As for color, its play cannot be limitless. One of these options is multi-yarn already used by the master for a new model.
The hook for such a thread must be strictly sized, since a good volume of thread will not be knitted with a large hook. The thread will begin to sag, and this will only make the item untidy.
Therefore, the hook here is strictly based on the thickness of the thread; the number of knitting needles and hook is often indicated on the yarn for an ideal result.
Spectacular crochet winter hat
Warm cozy set for the winter
The first option is a bright knitted hat for the winter and a crocheted snood. The set is knitted from thick section-dyed yarn, so you can knit it in a few days, even if you are a beginner knitter. The principle of knitting embossed columns is shown in the photo step by step, the pattern is completely simple.
You will need: – yarn with parameters 100m/100g – 200 grams; – hook No. 8; – faux fur pompom with a diameter of 15 cm.
Pattern for a scarf: (multiples of 4) 1st row: 3 air loops (VP), then s/n stitches; 2p.: 2 VP, * 2 embossed columns s/n (RSSN) behind the front wall (the hook must be inserted in front around the column s/n of the bottom row), 2 half-columns * - repeat from *, finish 2 RSSN behind the front wall, 1 half-column. 3p.: 2 VP, * 2 RSSN behind the back wall (insert the hook from behind into the bottom row), 2 half-columns * - repeat from *, finish 3 half-columns. 4p.: 2 VP, * 2 half-columns, 2 RSSN for the front. wall *, 3 half-columns. 5p.: 2 VP, * 2 half-columns, 2 RSSN behind the back wall * 3 half-columns. Repeat the pattern the first time from rows 1 to 5, then from rows 2 to 5.
Elastic band (for a hat): (circular rows, multiples of 4) 1st row: 3 VP, then column s/n, finish 1 connecting column in the starting point; 2p.: 2 VP together with the 1st p/st, * 2 RSSN for the front wall, 2 p/st *, finish with 2 RSSN for the front wall, 1 RSCH, 1 connecting column. to the second initial VP.
Density: main pattern 7 p. = 10 cm.
Description of knitting hats:
- Cast on 36 VP, close it in a circle with a connecting column.
- Continue working with a 14 cm ribbed pattern.
- Begin rounding the cap to form the crown. In the first r. knit all the half-stitches together (=27 stitches). In the second r. knit raised treble stitches together (=18 stitches). Next, knit a row of treble crochets, knitting them 2 at a time (=9p.). One more r. without decreases and pull the remaining ones together with a working thread. Strengthen it firmly.
- Make 1 row along the edge of the hat. in a crayfish step (place dc/n from left to right).
- Sew on the pompom.
Loop scarf: Start with a chain of 24 ch and 3 ch for the rise. Continue with the pattern for a 170 cm scarf. Sew along the short side. Source: Little Diana magazine.
Hat with flower
Natalya Vereziy's story on how to crochet a women's hat (with a flower):
“I want to share my experience of crocheting a women’s hat. I bought two types of thread, one angora and the other cotton.
So, let's start knitting a hat. For me, it’s better to start knitting a hat from the headband; to do this, I cast on a chain with a length equal to the circumference of the head. Next, I connect the chain into a ring, while making sure that the chain does not twist. Having connected the chain, we continue to knit in a circle with single crochets until the headband of the hat reaches approximately 8 - 10 centimeters in width. Next we proceed to knitting the pattern, which we knit according to the following pattern.
We knit according to the pattern until the hat reaches the desired height. I determined the height by regular fitting. Having put on the hat, we try to connect its edges on the top of the head; if everything is connected, then the height is sufficient.
The result of the work is like this.
Next, turn the hat inside out and sew its edges together in the shape of a star, as seen in the photo.
When the hat is turned right side out, the seam will look like the following photo.
The hat is ready, all that remains is to decorate it a little, you can sew on buttons or decorate it with stones, I decided to knit a flower.
Flower diagram.
In the pattern, you need to take into account that the sixth row is knitted in the second layer, tying from the wrong side to the third row. As a result, the flower turns out to be voluminous.
Using a needle, sew the flower to the hat.
This is how I crocheted a hat with a flower. It turned out to be a very budget option.
See also:
Spring-autumn crochet hats
In order not to forget the page address and share with friends, add it to your social network:
More interesting:
Tags: Knitted hats, DIY hats
Attention! It is better to write urgent questions in the comments on the website (form at the bottom of the page) or, better yet, directly by email. There are no notifications about comments from the VKontakte form! This form is more for feedback. 
Discussion: 5 comments
- Lydia:
January 15, 2015 at 2:25 pmOnce upon a time I crocheted, I’ll try to remember, maybe I can knit a hat for my daughter, thank you.
Answer
- Tatiana:
January 15, 2015 at 6:46 pm
What a gorgeous flower!!! Very beautiful. I also really love hats with large flowers on the side.
