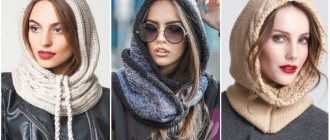
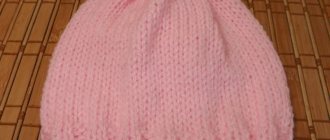
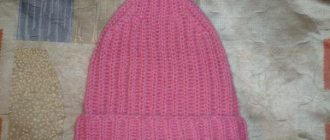
In the very first year of its appearance in fashion trends, the women's pumpkin hat with knitting needles simply blew up the knitting world. It is perfect for a voluminous down jacket, coat, trench coat and short faux fur coat, will be relevant this season and will be an ideal accessory for women with any type of face.
Bows with a pumpkin hat
The shape of the model resembles a beanie hat with a lapel and an elongated crown, which holds heat and shape well. Stylish simplicity will be a universal addition to women's, men's and children's wardrobes. We'll tell you how to knit a pumpkin hat after spending just a couple of evenings watching your favorite TV series: a detailed master class with step-by-step descriptions can be done even by novice craftswomen and those who haven't picked up knitting needles for several years.
How to choose yarn
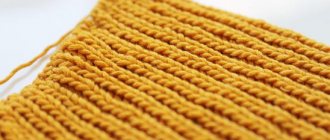
The quality of the thread affects how beautiful, durable and textured the model will be. The knitting of the hat is a simple 2x2 English rib, so it is important that the model retains its elasticity when worn and does not stretch when washed.
Merino yarn
Tips for choosing thread.
- Decide on the season. For winter, it is better to choose thicker yarn with an increased wool content. Warm and cozy products are made from fluffy mohair or threads containing alpaca wool.
- Wool yarn may not be suitable for allergy sufferers. Craftswomen in this area advise choosing threads from merino or goat wool, yak wool, thick cotton and acrylic.
- If you are knitting for a child, pay attention to special “baby” yarn or threads that are soft to the touch. The cap should not prick, rub or cause itching.
Preparation and materials
Before you start knitting, measure the circumference of your head along a line 1.5-2.5 cm above the eyebrows and the most protruding part of the back of the head. You also need to choose which model you will knit - with or without a lapel, and then calculate the height of the product. The indicator is usually measured from the crown to the end of the ear and is summed up with the amount by which the crown will be raised and the height of the lapel.
Mohair cap with English elastic band
It is more convenient to knit on circular knitting needles - then the product will turn out neat and seamless. The size of the knitting needles is often indicated on the yarn packaging: for English rib, it is better to take a smaller number so that the hat does not turn out loose.
How to knit a hat with an elastic band, descriptions from the Internet
How to knit a pumpkin hat with an elastic band using knitting needles
The pumpkin hat is a trend for the cold season. Although it is simple, it looks very stylish and knits up very quickly. Just one evening is enough to knit this pattern. Difficulty level: very easy, you will knit a hat even if you are a beginner!
For work we will need:
- 1) Merino yarn 100% (approximate yardage 50m/90g);
- 2) Circular knitting needles No. 4;
- 3) Markers;
- 4) Scissors.
Watch the master class at the link
We knit a hat with an elastic band with a unique crown and a lapel
Difficulty: medium Working time: 1 day Materials: yarn, circular knitting needles, double needles, markers, extra knitting needle.
Master class on knitting a hat with an elastic band, part 1, part 2
Women's hat knitted with English elastic
The author of the work is under91 from the country of Moms. Knitting needles No. 4.5, 40 cm circular, for the Italian cast-on I used No. 4. Yarn ADELIA NELLY, 70% wool, 30% acrylic 100 g 100 m color 08, it took a little more than 1 skein. Set of loops 52+1 for closure in
Read more…
Double hat with knitted elastic band
For a hat with an elastic band, you need 100% wool - I love natural ones. But you can use other yarn. One skein weighing 100 grams is enough. If you use leftover yarn and are not sure that there will be enough for the entire product, you can knit the inner part from a different yarn. The inner part is half the height of the hat minus 4 cm (so that it is not visible).
First, let's decide on the size:
1) measure your head circumference - this is the width of the cap;
2) measure the distance from the lobe of your right ear to the lobe of your left - this will be the height of the hat.
We have decided on the size, now we knit a sample. This is necessary to determine the number of loops so as not to knit by eye. It can be very disappointing if, after knitting half of the product, you realize that it is too big or, on the contrary, too small.
Step-by-step master class at the link
Calculating the number of loops
To calculate the number of loops, you need to calculate the knitting density. To do this, knit a small sample with an English rib from the yarn selected for the hat. The pattern is very simple: you need to alternate two purl stitches with two knit stitches.
Wash or steam the knitted fabric. After drying, measure the number of loops per 10 cm, and divide the resulting value by 10. Then multiply the number by the circumference of your head - this will be the number of loops for your hat.
English rib knitting pattern on circular knitting needles
For example, the standard head circumference of an adult woman is 55 cm. For knitting with thick yarn, we will take the very practical Alize Superlana Maxi yarn. Having processed the sample, we calculate the density: in 10 cm - 12 pets, which means in 1 cm - 1.2 pets. Multiply 1.2 by 55 and get 66 pets.
This is important: the number of loops must be a multiple of four. Therefore, you need to either subtract or add 2 loops from the obtained value, depending on which headdress you are more comfortable wearing - tight-fitting or looser.
If you want to knit a hat for a child, then consider the allowance for a girl’s hairstyle and a tight fit for an active boy.
Video tutorials on knitting hats with an elastic band
The hat is knitted with an elastic band with an elongated crown
I suggest you, together with me, knit a beautiful warm hat with an elongated crown. The hat is ideal for winter, as it has a double elastic band at the bottom. In this hat, the ears are well protected from wind and cold. The hat is suitable for a head circumference of 54-58 cm.
To work you will need:
- Yarn. I used Alise Lanagold. The meter of this yarn is 100 g. - 240 m. You can use this yarn or another with a similar yardage. You will need approximately 80 grams for a hat.
- Shortened circular knitting needles No. 3 and another additional pair of circular knitting needles no larger than No. 3.
- Stitch marker.
- A hook and a small piece of waste thread for casting on loops.
- Set of double needles No. 3 for closing the crown.
The video should load here, please wait or refresh the page.
How to knit a men's hat with knitting needles using a 2x2 elastic band
Using the proposed method, you can knit not only men's, but also women's and children's hats.
This master class is aimed at a head circumference of 60 cm, but due to the fact that the main pattern is a 2x2 elastic band, this hat is perfect for smaller sizes.
Yarn used: Alpaca Wool Vita in 2 threads. Composition: 40% alpaca, 60% wool (laster). 100g/300m.
Tools: circular knitting needles 3.5 mm and 4 mm, markers, crochet hook No. 2, scissors.
The video should load here, please wait or refresh the page.
How to knit a hat/pumpkin with an elastic band
The yarn used is Alize Baby Wool. Knitting needles 3 in 2 threads. Consumption: no more than two skeins.
In a children's hat, the first decreases are after 17-18 cm. In an adult hat, the first decreases are after 20-22 cm. The height of the “pumpkin” hat itself is 4-7 cm.
The video should load here, please wait or refresh the page.
Let's get started
For the selected yarn, knitting needles No. 7 or No. 8 are suitable. We cast on 68 stitches + 1 edge in the classic way, distribute them evenly along the fishing line and close the knitting in a circle. Then we knit with the selected pattern the entire length of the lapel and the height to the crown.
Classic set of hinges
After the “body” of the hat is knitted, you can work on the crown. For convenience, you can change circular knitting needles to stocking ones.
- 1 row. We make decreases: we knit all the purl loops of the row together, and the knit stitches according to the pattern.
- 2nd row. We continue to knit according to the pattern: we alternate two front loops with one purl one.
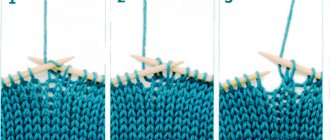
- 3rd row. This time we decrease the knit stitches by knitting them together, having first turned them around with the front walls (to do this, they need to be transferred to another knitting needle).
- 4,5,6 row. We knit according to the resulting pattern - with an English elastic band 1x1. You can experiment with the number of rows - it depends on how elongated the crown will be.
The process of sewing a hat
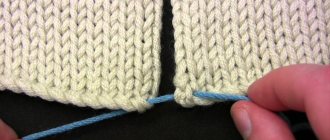
How to close the crown? Cut the thread, leaving a tail 20-30 cm long. Thread it into a special knitting needle with a large eye and transfer the loops from the knitting needles onto it. Then the thread needs to be tightened and brought to the wrong side of the hat. Go through the loops again with the needle to secure them well, then tie a knot and tuck the end in. The new stylish hat is ready!
Pumpkin hats of different heights
Tip: There are several ways to knit a crown. The appearance of the model and its fit depend on the design.
Taking measurements
Having made sure how necessary it is to calculate the loops for knitting a hat, you can knit any hat (men's, women's, children's) with a pattern that you love.
But first of all, you need to measure your head. Such data will be needed to calculate loops. As a rule, the following measurements are taken:
- head circumference - measured in a circle along a line from the eyebrows to the back of the head;
- the distance from the top of the head down to the most convex part of the head.
Knitting a sample and a little trick for correct calculation.
To correctly count the stitches, cast on the knitting needles a small number of stitches (20, 25 – it doesn’t matter. You can focus on the pattern’s repeat and cast on in proportion to it) and knit approximately 7-10cm.
The classic method: measure how many centimeters the sample is wide. Let's say that we cast on 20 loops and knit them with a height of 12 cm. Let's calculate, for example, a women's hat of size 56.
We make up the proportion: 20p – 12cm X – 56cm
20 x 56 / 12 = 93p
This is a standard option for calculating a knitted hat. But, as my personal experience shows, it is not always possible to calculate correctly.
My secret for how many stitches to cast on:
We do the same as in the first case. We measure exactly the same way. Now we stretch the sample a little and measure again in a stretched form. It turns out: 20p, and the width is 14cm.
Again we calculate the number of loops using the proportion.
20p – 14cm X – 56cm
20 x 56 / 14 = 80 loops.
Compare, according to the first calculation, you need to dial 93p on the cap, and according to the second - 80.
Based on my practice, you need to dial the average value between these two values. (93 + 80) / 2 = 86.5 sts. Round to 86 stitches.
You can use this calculation for knitting hats, cardigans, sweaters, etc.
My advice: this calculation takes longer, but this way you won’t be mistaken and will knit exactly according to the girth of your head.
This math will work if you need to tie a hat over the head. To calculate the loops of models hanging slightly behind, use the first classical method, because the model assumes some volume.
Often inexperienced knitters knit the sample tightly, but the main knitting is looser. Try to stick to the original density!
So, we have calculated the loops for knitting the main hat pattern. If the model consists of one pattern, then the calculation of the set of loops can be completed.
