Now you know how to hide scratches on leather goods. If you do everything carefully, no one will even notice that there were defects on your boots, handbag or jacket.
And now you can watch a video tutorial in which a shoemaker explains in detail all the intricacies of making “liquid leather.”
Now about the restrictions. “Liquid leather” is only suitable for the restoration of surface-coated leather. On uncoated leather (suede, nubuck, velor) it will stand out and differ sharply in structure from the rest of the surface.
“Liquid skin” is applicable only on surfaces that are not subject to fractures, mechanical stress and surface friction. “Liquid skin” does not have adhesive properties and cannot seal large through holes.
Giving things a second life is creativity! We offer you step-by-step instructions on how to give a second life to old jeans and turn them into a stylish travel bag! Give useful recommendations to your friends, they will surely be grateful.
How to glue the sole of a shoe at home: rules, nuances, examples
We've all experienced a situation where a crack has formed on our favorite pair of shoes. The question arises, how to glue the sole of a shoe at home. To do this, you will need to select some materials, study the procedure and completely follow the instructions.
When walking, it is the sole that suffers the most, so it wears out faster. Over time, cracks and holes form on the sole of the shoe, which are difficult to eliminate. You may need your everyday boots tomorrow, so you need to know how to seal your shoes at home. First of all, you will need to choose glue.
Ideally, it is better to contact a specialist if the sole of your shoes is cracked. They will be able to quickly fix everything in the shortest possible time. In order for the work to turn out beautiful and of high quality, it is necessary to choose the right adhesive depending on the characteristics.
Causes of scratches
There are a huge number of reasons for damage, and it is quite difficult to protect yourself from them. Thus, you can “injure” the skin or its artificial analogue when traveling on public transport, walking in the park, tripping over a curb or stone, doing gardening or other work.
Scratches on shoes not only spoil their appearance, but also accelerate physical wear and tear. This happens for the simple reason that moisture gets into cracks that are not protected by the surface layer, which is detrimental to any materials. Dirt also accumulates there, causing damage to neighboring areas. Preventing aging, restoring the original appearance and hiding scratches on shoes is quite possible, and there are many ways to do this.
What should I use to glue the sole?
If you do not want to ruin your shoes, it is recommended to select a special adhesive. Usually the packaging contains a corresponding mark. You can choose one of the following options:
- "Moment Marathon". The substance is intended specifically to repair broken soles. It is characterized by high resistance to humidity and other adverse weather conditions. Can be used in hot or severe frost. For some types of manufacturing materials, use is not recommended. This list is on the packaging, so please read it carefully before purchasing. Quite easy to use. You can wear the boots within 24 hours after gluing them.
- "Shoemaker" or "Nairit". The composition uses natural materials that provide high adhesive properties. Makes it possible to easily glue a broken shoe sole. Can be used for gluing the inside of boots, as well as small cracks. It is recommended to leave the work for several days to dry completely. Otherwise, rapid re-breakage is possible.
- Epoxy resin. Is a powerful adhesive. It has a high density, which is suitable for boots that are actively used every day in aggressive conditions. It will take several days for the damp surface to dry completely. After this, the shoes can be worn at your usual pace.
- Bonikol or Kenda Farben. Industrial imported products that are used in professional crafts. Suitable for problem areas, gluing heels, soles, socks, insoles. One of the best options for how to seal shoe soles at home.
"Desmokol". Used for shoe repair. Helps against burst soles. More suitable for synthetic materials and suede. Sold only in specialized stores. Used in practice by professional workers.
Genuine vs faux leather
Leather is a high quality natural material, very durable and wear-resistant. Subject to operating conditions and good care, leather will last for many years without losing its original appearance and structure. During the dressing process, different thicknesses and textures are achieved, the skin is dyed and tinted in different colors.
Natural material is used for sewing clothes, shoes, hats and accessories, for upholstering furniture and making decorative items. Leather products are comfortable to wear and durable. The upholstery is practical and comfortable, looks great in the office and at home.
Advice! Natural leather, especially soft and thin, is easily damaged; an artificial alternative is better able to withstand mechanical stress.
Artificial leather has adopted all the external characteristics of its natural counterpart. However, the performance characteristics of leatherette are significantly lower. Fabrics that imitate leather are much cheaper and easier to care for, taking on any shade and texture. The strength and durability of artificial leather and suede is practically not inferior to natural material, but synthetics are less resistant to negative environmental factors: humidity, high and low temperatures, and changes in these indicators. The latest high-quality imitation leather products include eco-leather, a two-layer material that is resistant to abrasion and tearing.
Which adhesive is not recommended to be used?
The substances listed in the previous section are the best options for gluing shoes yourself. There is also a group of products that are not recommended to be used if cracks have formed on the sole of your shoes. Do not buy these products:
- Super glue. A fairly hard material that roughly fixes and deforms the sole. Repairing the sole with such material is not recommended, as you will completely ruin the shoe.
- Ceiling tile adhesive. Can handle rubber and leather. This will leave traces that will be difficult to remove with improvised means.
- PVA. It is not stable. It is not recommended to seal a crack in your shoes, as it will immediately fall apart.
Removing stains from the surface of shoes
Not only shoes are made from suede. Accessories such as bags and gloves are no less in demand, and the likelihood of them getting dirty is very high.
A major alteration or purchase of new boots or accessories requires an investment that not everyone can afford. For this reason, it is important to know how to renew and remove stains from the suede on shoes, bags, gloves and boots.
Grease stains pose a particular danger to the material, but if you know how to deal with them, they will disappear without a trace. This is done as follows:
- Soak a cotton swab in purified gasoline.
- Wipe off the dirt and then sprinkle with talcum powder.
- Wait until the grease dissolved by gasoline is absorbed into the talc and brush it off with a soft brush.
If you need to restore suede shoes and rid them of stains, you can use a special stain remover. When purchasing, make sure that the product is intended specifically for suede!
You can use a special stain remover to clean suede.
The substance is distributed on the surface of the contamination and then cleaned off with a soft brush. It is important not to overdo it when cleaning and not to rub the stains with force - this will damage the surface of the suede.
To ensure that suede products do not lose their attractiveness for a long time, they should be cleaned and updated in a timely manner.
How to glue the sole at home using improvised means?
After choosing the glue, you can try one of the ways to repair the sole of your shoe if it has burst. To do this, you need to carefully follow the instructions and follow the technology. Otherwise, you will not be able to achieve the result. Follow the algorithm:
- Clean your winter shoes from dirt and dry everything thoroughly so that no wet marks remain.
- Inspect the work surface for integrity. If the leather on the sole is cracked in several places, it is recommended to completely tear it off and glue it back. Also consider the surface texture. This is very important as the procedure will be different for different types.
- Clean the surface from any remaining old adhesive. Treat with alcohol to degrease the surface.
- Take something to seal the sole with. Apply to surface according to package directions. The adhesive layer should not exceed a few millimeters.
- Wait a few minutes for the surface to set. Press the sole down so that there are no untreated areas.
- Now leave the shoes under high pressure. To prevent it from deforming, place pieces of newspaper inside. You can use clothespins to secure the seam. Do this carefully so as not to damage the leather on your boots.
This is a cold technology for gluing winter shoes. The hot methodology is as follows - you need to heat the adhesive and carefully press the surface of the shoe. After this, you can wear your favorite pair of shoes after a few days.
Scuffs and shiny pile
Don't despair, scuffs and shiny spots are just crushed pile. Restoring the original appearance must be carried out carefully so as not to spoil the structure of the material . You can remove such defects using home remedies:
- Dry fine (extra) table salt.
- A solution consisting of one teaspoon of soda and a glass of milk.
- A mixture of table vinegar and water in a ratio of one to four. Use this solution to wipe shiny stains, then wash it off with clean water and treat it again with a vinegar solution (only the second time, the acid concentration should be much less: one teaspoon per liter of water.
- Steaming over boiling water or using a steam generator.
How to glue the sole of sneakers?
Sports shoes are subject to a lot of pressure. While running or walking, the sole of a shoe can easily burst or a sock can come off. Therefore, it is necessary to know the sole repair procedure.
What to do with holes?
On sports shoes, the sole is very soft and sensitive, so it can easily break in half. If there is a large hole, you will need to fill it with glue. To ensure surface integrity, it is recommended to use special construction tape. It allows you to maintain the original shape of the product.
For gluing it is best to use a specialized sealant. It allows for the highest gluing density, which extends the service life of the product. Moreover, the cost of such compositions is much more expensive than conventional glue.
What to do with cracked socks?
Socks are the part of sneakers that deteriorate the fastest, as they are subject to a lot of pressure. If you urgently need a working method on how to seal the soles of sneakers, you first need to treat the working surface. Use alcohol to get rid of fat. Apply the patch, glue it and leave the shoes until all the glue has dried.
What to do with voids in shoes?
In winter, problems with shoes often arise due to unfavorable weather conditions. Let's try to figure out how to restore it. Winter boots most often have a porous surface, so you will need to fill the voids or completely replace the insole. Remove fats from the surface with alcohol and treat with glue.
How to make a thermal patch
- A patch can help disguise frayed socks on sneakers or even noticeable holes.
- Be sure to wash and dry your shoes before repairing them!
- Before as attach the thermal patch, sew pieces of raincoat fabric onto the frayed areas. This should be done from the outside so that after repair the shoes do not sting and there is no discomfort when walking.
- Preheat the iron to maximum, but turn off the steam function.
- Cut the thermal patch in half. Remove the protective film and apply the cloth to the shoes.
- Iron the thermal patch until the wrinkles disappear. If any pieces of fabric turn out to be unnecessary, cut them off using nail scissors.
How to glue the sole yourself? Which glue to choose?
Even the highest quality and strongest pair of shoes gradually becomes damaged during frequent or constant wear from the influence of moisture, dirt, reagents and simply time. The sole is exposed to a greater degree of stress, which is often the reason for going to the shoe workshop.
In an ideal scenario, it is better to replace a damaged pair of shoes or take it to professionals, however, if this is not possible, you can glue the sole or fix a small defect yourself. The durability of “home” repairs depends on the quality of the chosen glue.
In this article, we will tell you what to do if the sole has come off, what kind of glue you can use to glue the sole of a shoe at home, what compounds are best not to use, and we will also share life hacks for repairing different types of shoes and damage.
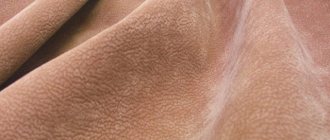
Advantages and disadvantages of nubuck shoes
Nubuck is the leather of young cattle.
On one side, the leather is treated with abrasive materials, due to which it has a fleecy, rough surface. Products made from such a natural and durable material that appeared on the market quickly gained trust among buyers. The main advantages of such shoes:
- Lightness, strength, convenience.
- Excellent ventilation;
- Ability to retain heat.
Mold on kitchen and bathroom walls can be hazardous to your health. Find out the reasons for the appearance and ways to get rid of mold on the walls.
With the appearance of a cat in the house, did a specific smell also appear? Read here about how to remove cat urine from different surfaces.
- Instability to moisture;
- Need for special care.
To ensure long-term preservation of the performance properties and attractive appearance of products, it is important to clearly know the rules for caring for them.
How to glue the sole of a shoe?
To ensure that the repaired pair of shoes does not fall apart on the first day or, even worse, does not deteriorate completely, you need to choose an adhesive suitable for shoe repair. Below are adhesive compositions that can be safely used:
- “Desmokol”
is a transparent adhesive composition with polyurethane, intended for gluing PVC, repairing leather and suede products, including gluing shoe soles. This composition has earned the trust of professionals and is sold in specialized stores. - Moment Marathon glue
is specially designed for repairing shoes. It is water and frost resistant, as well as elastic and resistant to negative environmental influences. Not suitable for gluing a number of materials (styrofoam, polyethylene, polypropylene, plasticized PVC). Consumers love this glue for its ease of use. Within a day, the shoes are ready for use. - Epoxy resin (B7000)
- after drying, the composition turns into a durable, elastic, waterproof layer, which is excellent for shoes that, by their nature, are always in motion. When mending shoes, it produces minimal shrinkage, but may require 1-2 days to dry completely. - “Nairit”
or
“Sapozhnik”
adhesives contain polychloroprene rubber, adhesive enhancers and organic solvents. Designed primarily for shoe repair. These compounds glue the leather upper of shoes well to rubber soles (except for polyurethane), and are also suitable for gluing insoles, linings and other elements. You will be able to wear the repaired product only after three days. - Kenda Farben
and
Bonikol
are special compounds for the footwear industry from European manufacturers. Guarantees reliable adhesion. Suitable for gluing leather and leather substitutes, as well as heels, insoles and cork.
What to do if you don’t have a glue gun - glue for foamiran
The best glue for working with foamiran
– this is silicone glue, as it can be used with a glue gun, which is very convenient.
But if you don’t have this tool on hand, you can use other types of glue to work with plastic suede:
- Cosmofen CA 12 (COSMO CA-500.200) . It grips many different materials, quickly fixes the surfaces to be glued, has high strength, is resistant to external atmospheric influences, high and low temperatures, and does not contain dyes. It is used in the production of toys, processing of rubber, including foamiran, plastics, making jewelry and in many other industries. The cost of a tube weighing 20 g: 99 rubles.
- PVA White Glue from Leeho. It does not deform the surfaces being glued, does not soak the paper, has a thick consistency and white color, and becomes transparent after drying. Does not contain toxins. Used in cardmaking, quilling, scrapbooking and many other types of creativity. Excellent gluing of paper, cardboard, wood and fabric. Suitable for gluing various decorations to foamiran. It has two different dispensers at both ends: for spot application and for applying glue over a large area. The cost of a tube weighing 28 g: 50 rubles.
- Moment Crystal. A clear, quick-fix adhesive solution suitable for both soft and hard materials. Used for gluing rubber, PVC, paper, plastic, foam rubber, cardboard, wood, metal, glass and ceramics. Cost of a 30 ml tube: 58 rubles.
As mentioned just above, it is most convenient to use a glue gun to assemble foamiran parts.
But when using it for foam, you need to know the rules for working with it:
- Before starting work, insert the glue rod into the special hole in the heat gun;
- Plug the tool into a power outlet;
- Heat the gun for 5-7 minutes;
- Carefully pull the trigger - if glue starts to come out of the nozzle, it means it has melted and is ready for use;
- Unplug the heat gun from the outlet for 5 minutes if you do not use it for a while;
- Apply glue evenly and in small quantities to the foamiran, gently pressing the trigger;
- Do not touch the melted glue while working with it, otherwise you may get burned;
- When finished, unplug the gun and let it cool down;
- Wipe off any remaining adhesive with paper or cloth.
How to make a rose from foamiran master class
To create a rose from synthetic suede you will need the following materials:
- Foamiran of any color;
- Strong-hold foamiran flower glue or glue gun;
- Toothpick;
- Regular sponge for washing dishes;
- Wire;
- Beads;
- Scissors.
VIDEO INSTRUCTION
Let's get started:
- On paper, draw three circles that will differ from each other with a diameter of 1 cm;
- Using scissors, cut out the petals from the resulting circles and make them wavy along the edges;
- The smaller the circle, the fewer petals you draw on it;
- Take a sheet of plastic suede;
- Trace the petal shapes on it using a toothpick so as not to stain the material with a pen or pencil;
- Cut petals from foam;
- Bend them into bubbles. They are easy to make from beads glued to hairpins;
- Heat the iron to the starting temperature;
- Attach the petals to the sole of the iron;
- When the material heats up, it will deform on its own - at this moment it must be removed from the sole;
- Place the heated foamian on the sponge and press it inward in the center of the petals;
- It is recommended to stretch the edges of the petals - this way they will become more like a real flower;
- Deform the middle of the petals. To do this, heat it and press it with bubbles - the harder you press, the more closed the bud will be;
- Do the same operations with the other petals;
- To connect them, put a bead on the wire, then twist its edge so that the bead does not fall out;
- Make small holes in the middle of the petals with scissors;
- Pull the wire into the middle of the circle of the smallest petals;
- Apply glue to the area where the wire passes;
- Lower the bead to the gluing area and press it with the petals;
- Bend the petals slightly and apply a little more glue mixture;
- Press them down so that the center of the rose is slightly closed;
- Do the same with the other rows of petals;
- Place all the following petals so that they fit slightly on top of the previous ones;
- The last row can be lightly pressed against the core - then you will get a blooming, lush rose.
By making several of these roses you can create a luxurious topiary. Foamiran is an easy-to-use material from which you can create the most beautiful flowers and other handicraft materials.
“And they are still fighting for the honorary title of a house of high culture and life!” - said Anton Semenovich Shpak to the search dog in the immortal comedy “Ivan Vasilyevich Changes His Profession.”
You will not find information on what to do if your suede jacket is stolen in this article. But you can find out! Let's find out!
Suede is a soft, velvety leather made by fat tanning (to give the material elasticity and strength) from the skins of small animals.
Suede is a very thin and delicate velvety leather that absolutely does not tolerate walking through dirt, dust or in rainy times. At the same time, she won’t like the dazzling summer sun either! How to care for such capricious material?
5 stages of suede care.
- After each walk, suede shoes should be cleaned with a special suede brush.
- Dirt that the brush cannot remove can be removed with a special suede eraser. It will also return the velvety feel to the material that was crushed during wear.
- Serious stains can be removed with a foam suede cleaner.
- Moisture-repellent sprays and gels help avoid unnecessary contamination.
- Suede paint can restore the color of shoes.
Which glue is better not to use?
The range of adhesive compositions goes far beyond the scope of the listed products and some of them can also cope with the task. In order not to confuse you, we decided to indicate which adhesives should absolutely not be used, since they either will not provide sufficient strength or will further damage the pair being repaired.
- PVA glue
is not waterproof, so the shoe will fall apart after the first puddle. - Superglue (Moment glue, Second glue, etc.)
assumes a rigid connection, and the sole and material of the shoe are deformed when walking. The material simply cannot cope with such a load. - , adhesive for ceiling tiles
copes with the repair of leather, textile and rubber products, but leaves stains on them that cannot be removed.
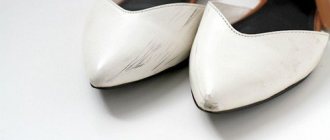
Removing scratches from leather shoes
Expensive leather shoes require careful handling, and therefore a caring owner regularly takes care of the surface, applying creams, aerosols and waxes to protect the surface, give shine and a neat appearance. Even a thin layer of decorative cream or protective wax can prevent minor damage caused by abrasive substances that are present even indoors. But these measures cannot prevent the appearance of distinct scratches caused by brute mechanical force.
How can you remove scratches from leather shoes? There are “folk life hacks” with which you can level out minor defects, and there are also quite professional means. The owner chooses which method to use, but first it is worth examining the damaged area and making a conclusion about the depth of the defect: only the paint is damaged or deeper layers are affected.
- A marker that matches the color will temporarily help get rid of noticeable damage. The product is good until the first cleaning. Therefore, you need to put a protective layer of varnish, glue, and wax on top.
- Shoe cream. A good product for eliminating minor defects that only affected a layer of paint. But, like the marker, the cream is very short-lived and therefore requires regular updating.
- Collodion. It is a chemical substance consisting of a solution of cellulose in ether. Like varnish, it dries quickly and forms a protective cover for the area with compromised integrity.
- Wax. Regular beeswax works well to restore the integrity of the skin even with deep damage. Before use, the substance should be heated and a coloring agent selected to match the color of the skin should be added.
- Leather glue. A professional product that can restore damaged areas of material.
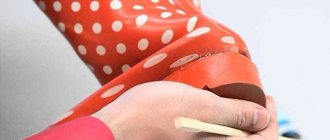
- Liquid skin. A type of adhesive composition that is quickly absorbed into the base, creating protection for the treated area. Helps to paint over scratches and restore the uniformity of the surface layer. After application, the liquid product is leveled and dried for half an hour. During this period, if something goes wrong, the liquid skin can be washed off with plain water. Cream or wax must be applied over the dried glue. In case of a deep cut, applying several layers is acceptable.
As you can see, each case has its own means and possibilities. Some of them are less durable, others are more durable, but they all cope with the task very successfully.
Gluing the soles at home?
To glue the sole on yourself, you need to follow simple instructions:
- Thoroughly clean the damaged boot and dry it completely.
- Carefully inspect the sole; if it comes off in several places, it is better to tear it off completely and re-glue it. In addition, some shoes have honeycomb soles, which require special care.
- Using a spatula, clean the surface of old glue and degrease (acetone or alcohol).
- Apply sole glue to both surfaces according to the instructions. Most often we are talking about a thin layer of glue - no more than 3 mm.
- Wait a few minutes and press the sole firmly against the shoe so that there are no gaps between them.
- Secure the boot in this position for at least 10 hours. You can put a weight on top, having first tightly stuffed the boot with paper or newspapers so that it does not lose its shape. The second option is to fasten the seam with clothespins, just be careful not to scratch the skin.
The described method is called cold. The hot method differs only in that the applied composition must be left until completely dry (about half an hour), and then heated with a hairdryer and pressed firmly onto the surface for 20 seconds. You can wear repaired shoes after two days.
Painting over scratches on patent leather shoes
No matter how high the quality of the varnish layer, it is subject to mechanical wear and cracking. You can remove damage to patent leather shoes: the main thing is to carry out the manipulations as carefully as possible. Before using one method or another, you should thoroughly clean the surface with soapy water and a soft swab. After such a wet “disinfecting” prophylaxis, the stain must be dried. Next we proceed using the following means:
- Nail polish. Colorless or in a tone that matches the skin tone, apply a thin layer and restore the area of paint and varnish;
- A nail polish remover that, once applied, can dissolve nearby areas of remaining nail polish and heal the tear. The product is effective for minor scratches;
- Eraser. Using a light colored eraser, you can smooth out the torn edges, then wipe the area with alcohol. Take a soft cloth moistened with mineral or vegetable oil, wipe the area and polish with a dry cloth;
- Superglue, which is applied in a thin layer to the damage, gluing areas of leather and varnish;
- Polish for patent leather, which is guaranteed to restore the original look.
All means are quite applicable and mask marks on patent leather shoes well, but they only work for a while, so the operation will have to be repeated periodically.
How to glue the soles of sneakers?
One of the most common problems is with sports shoes, namely sneakers. Due to intensive use, the toe may come off or the sole may puncture while jogging.
How to seal a hole?
Due to their specific nature, sports shoes (sneakers, sneakers) often have rather soft soles, so stepping on something sharp can leave a hole. The problem can be solved at home using glue. The edges of the hole must be cleaned and degreased, and then sealed with glue. In the large hole you need to additionally put a fiberglass mesh.
To ensure that the sole remains level, after filling the hole with glue, it is better to seal it with construction tape until the composition dries completely.
As for glue, the best option would be American polyurethane glue and sealant Seam Grip
. This composition is used to repair rubber boats, so you can be sure of the durability of the repair. The problem is that it cannot be found everywhere, and it costs more than other adhesives.
An alternative may be domestic epoxy glue
or imported
DoneDeal
.
How to seal the toe of a sneaker?
The second weak point of the sole of a sneaker is the toe. To repair, the thinning area must be treated with sandpaper and degreased. Next, you need to cut out a patch from rubber or polyurethane, sand its edges and apply glue to both surfaces. Press the patch firmly onto the sneaker for 15–20 seconds, and then leave it under pressure for another day.
On a note
- Each stage of cleaning should be accompanied by complete drying of the shoes.
- Suede is afraid of moisture, and it takes an average of 20 hours to dry completely, so it is not recommended to wear suede shoes every day.
- You can polish suede using a lint-free, dry cloth.
- In order to restore heavily worn suede, you need to use dry cleaning services.
All you need to live gracefully and comfortably is a pair of suede shoes... Three pairs.
Mother of two children. I have been housekeeping for more than 7 years - this is my main job. I like to experiment, I constantly try different means, methods, techniques that can make our life easier, more modern, more fulfilling. I love my family.
Now the fact that our ancestors walked without shoes a long time ago seems at least quite strange. After all, in the twenty-first century, no person in his right mind would leave home without shoes. An exception may be the desire to walk with your feet on grass that is pleasant and tickles your feet. In everyday life it is difficult to live without shoes, rather impossible. Unfortunately, even the best quality shoes deteriorate over time. And you can't do anything about it.
So, how to seal shoes? This is quite simple to do, and there is nothing complicated about it. First of all, you need to find a universal and durable glue that can hold the patch for a long time. And of course a patch. After that, degrease the patch and the place where it will be glued. Then, let the patch dry for about two minutes, and you can begin gluing. The main thing is to correctly calculate the amount of glue and the force that will need to be applied to the patch. You need to press it hard enough, it depends on how long it will last.
How to clean white shoes that get dirty so easily? It all depends on the material. Rubber shoes just need to be wiped with a damp cloth. Everything is simple with sports shoes, which, in most cases, can be thrown into the washing machine. But if the shoes are made of suede, then you cannot do without a special brush or thread. It is strictly forbidden to use cleaning products that are not intended for suede, as unsuitable products can ruin the appearance of the shoes.
Few people think about how to sew up shoes. After all, as a rule, such shoes can be thrown away. Why fix something that is completely broken? Most people do not repair shoes, but simply take these shoes to their country house. After all, at the dacha you don’t have to worry about your appearance. And even more often, such shoes are simply thrown away. But in fact, there is nothing complicated in the process of sewing up shoes. You just need to choose the color and buy special threads, as well as an awl with a hook for stitching shoes.
How to restore suede shoes? After all, suede shoes, which have become so popular lately, are quite easy to damage. You should treat it with the utmost care, because if it comes to damage or scuffs, you will have to fork out money and buy special means for restoring suede. It is simply impossible to restore suede shoes without special products. Apart from them, nothing really will help.
Recently, white shoes have also become widespread. And the question of how to whiten white shoes has become much more common. But it’s easier than ever to do it! All you need to do is take mint toothpaste and a soft cloth. Instead of a cloth, you can use a soft toothbrush. After that, carefully apply a certain amount of toothpaste to the surface of the shoes. All you need to do is rub the paste in thoroughly and diligently.
Products made from suede require careful handling, as it is a very delicate and capricious material. However, even with careful care, a variety of stains and dirt may appear on suede products. It is especially difficult to remove traces of glue from suede at home.
First you need to carefully (with a knife or blade) remove excess glue. This will greatly facilitate further work on cleaning the product.
Petrol
To do this, you need to moisten a dry cloth in gasoline and wipe the contaminated areas with it. But this method will only help when the stain is completely fresh. If the glue has already set, you can try to remove the stain with paint remover or a specialized glue solvent. These products are sold in building materials stores. It should be remembered that suede should not be overly wetted.
Acetone
You need to lightly moisten a napkin in it and gently rub the stains. You can also use any nail polish remover. Acetone is not as effective as gasoline, but it is gentler on suede and helps maintain its good appearance.
Ammonia
To get rid of old stains, use a 5% solution. You need to soak a piece of foam rubber or fabric with this product and wipe off the dirt.
Fresh glue stains can be removed with simple hot water (only the dirt is wetted, not the whole thing) or a cosmetic product for removing false eyelashes. According to some women, this product even removes traces of superglue.
What will help restore the product?
Steam
enhances the impact of all of the above. The suede product is kept over steam for 7–10 minutes, after which it is wiped with one of the products and the glue is carefully removed.
After using any alkaline product, the product must be treated with a special grease for nubuck and suede.
.
This will not only extend the life of the item, but will also help restore the properties of the material. After cleaning, it is advisable to use a special brush or eraser to lift the lint.
You can also hold the item over steam again, this will improve the appearance of the suede.
Finally, be sure to apply a water-repellent spray to the product.
Thus, there are a lot of ways to remove glue from suede items. Well, if you can’t remove glue stains at home, you can always go to dry cleaning.
For home handicrafts, crafts and souvenirs. To fasten natural leather and leatherette, adhesives with completely different compositions are used - based on rubber and polyurethane, polyamide, perchlorovinyl and polyvinyl acetate substances. It is worth understanding their features and rules of use.
How to seal a sole with voids?
Quite often, demi-season and winter boots are made with honeycomb-shaped soles, in which voids appear over time. Repairing such a pair of shoes yourself is a little more difficult: the empty honeycombs need to be filled with scraps of micropore or other porous rubber; for this, most likely, you will need to bend the insole. Next, fill them with sealant. In some cases, it makes sense to tear off the insole and replace it with a new one.
After the sealant has hardened, you need to degrease the surface again and seal it using the usual method.
What can I do to prevent my shoes from slipping?
You can also use glue to prevent shoes from slipping. Apply the pattern with Moment glue or other superglue to the sole, let it dry, and then rub it with coarse sandpaper. For greater effect, you can sprinkle a little sand on the still wet composition.
This anti-slip protection will last 1-2 weeks.
You can also glue special anti-slip/anti-icing pads.
How to properly seal suede boots
Before carrying out repairs, suede boots should be thoroughly dried and the shoes should be cleaned from dirt.
Working with the sole
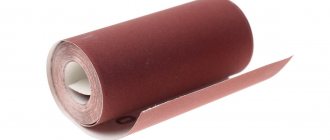
- To restore the adhesive seam, it is necessary to prepare the sole and the tightening edge of the boots. Use sandpaper to remove dirt and glue residues from surfaces. The resulting dust is cleaned with a brush.
- A layer of Desmokol glue is applied twice to the edge of the upper of the product and the inner surface of the sole . The glue can be applied with a flat brush or toothbrush.
- Be sure to follow drying conditions.
IMPORTANT! After the first application of glue, the film is dried for 10–15 minutes, after the second application, 30–40 minutes.
- Before gluing, the surfaces of the adhesive films are heated to a temperature of 60–70 degrees . To activate the films, you can use a hairdryer; the films can be heated over an electric stove burner.
- After this, the sole is pressed tightly against the edge of the shoe top, it is advisable to trim the adhesive seam . It is not always convenient to do this at home without additional devices. The strength of the sole is checked after the adhesive seam has completely cooled .
Gluing the top
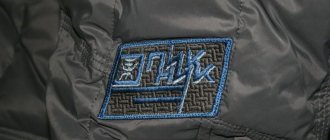
If there is a tear in the upper material on the product, the defect can be repaired by gluing in an internal patch .
What products to use for suede
It is important to remember that shoes with suede uppers require constant care.
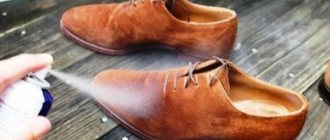
Cleaning the pile surface of leather should be done without much effort, using soft cloths or clothing brushes.
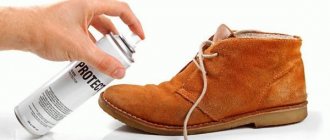
After cleaning, shoes should be treated with water-repellent impregnation from Salamander. The spray protects shoes from getting wet and salt stains.
If stains appear, they can be removed with a solution of water with the addition of ammonia and liquid soap.
It is recommended to use rubberized brushes to lift the pile, and to restore the color, tint the shoes with aerosols.
How to restore pile?
After cleaning, you should renew your suede shoes and restore the lint. This can be done in several ways:
- A school eraser will help lift the worn suede fibers - it will not spoil the surface.
- Steam baths have a good effect. You need to hold the boots over steam and then lightly rub the surface with a dry cloth or a special brush.
- If abrasions have formed in the area of the boot, you can iron them from the wrong side and then “comb” the pile.
- If you don’t trust traditional methods for restoring suede shoes, you can use special chemicals that you can find in stores.
After cleaning and restoring the suede, it is advisable to treat the surface with a special water-repellent agent. Do not put on boots immediately after treatment. They should dry completely at room temperature.
Knowing how to tidy up suede shoes, you can maintain their attractive appearance for a long time.