Recommendations from experienced knitters
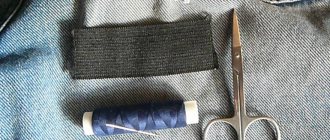
- Knitted parts should be connected with the same threads from which they are knitted or with a flat thread of the same shade;
- Before sewing the fabrics, you need to perform a WTO, that is, wash them with a special conditioner for knitted items. Some craftswomen wash with the addition of shampoo without using conditioner. It is better to dry by rolling it in a towel.
- After drying, the fabric should be basted and tried on;
- The knitting description should indicate the sequence of stitching of the elements. If it is not there, then the shoulder seams are sewn first, then the side seams, and then on the sleeves. Next, the sleeves are sewn in and finishing is done;
- The stitching thread should not be too long. 45-50 centimeters is enough;
- Beginning knitters can baste with contrasting thread;
- If there are errors in knitting, then you can adjust the knitted fragments by performing a small adjustment. But such an adjustment can be made if the difference in the length of the two canvases is no more than 1.5 centimeters;
- For parts such as golf collars or cuffs with cuffs, part of the seam is made on the front side, and part on the back, then the sewing line will be inside the part.
Finding material
If the hole has uneven edges, then you need to arm yourself with scissors and trim so that the hole becomes the correct geometric shape. The best option is a rectangle.
Do not be afraid that the hole will become larger in size. But thanks to this, it will be easier for you to sew on the patch.
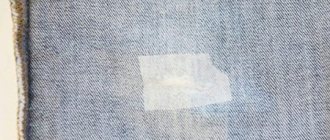
The most important question: where can I get exactly the same fabric? There is one trick. On many things, especially branded ones, a label with the company name is sewn onto a double piece of fabric. The label is on the collar: on the wrong side of the item, at the top.
Using a seam ripper, remove the label. Using thin nail scissors with sharp blades, cut a piece of fabric that is the same size as the hole. To do this, first measure the hole itself using a ruler or soft meter.
Early strawberries can be hazardous to health: what you should pay attention to
Children born after infertility treatment differ in height from their peers
The Ministry of Health named the period for the decline in the incidence of COVID-19
Once you have cut a piece of material, use a thread and a needle to mend the label back so that the missing material is not visible.
Types of seams with diagram and description
As soon as the process of creating a woolen item is completed, the task immediately arises of how to seamlessly and beautifully combine the parts into one product. It is important for every craftswoman to have something in her wardrobe that would be neat from all sides.
Needlewomen most often sew parts together with a needle. There is a very simple seam called a kettel stitch. It is used for sewing on trims, pockets or trims.
Kettel seam pattern:
- Insert the wool thread into the needle.
- Starting from the wrong side, pass the needle into the 2nd loop.
- Then from the top into the 1st, then pierce from the bottom to the top, pulling through the 3rd loop.
- Next, insert the needle from top to bottom again into the 2nd loop, and then pull it through the 4th loop from the bottom to the top.
In this way, sew to the end of the intended row. When you finish the work, secure the thread. You will see that the junction of the parts is completely invisible.
Vertical
The next seam is also made with a needle. It is called vertical because it is laid vertically. It joins knitted fabrics at the edges. The fabrics connected by it are held firmly, without revealing the place where the knitted parts are attached.
One type of vertical seam is called a mattress seam. Description of the invisible vertical seam: To prevent the stitching from being visible, start working on the right side of the bottom edge.
On the right fabric, use a needle to catch the thread between the edge and right loops. On the right - between the edge and the last loop of the knitted edge. Continue working to the limit you need, grabbing loops, now from one fragment, now from another.
If you do not miss a single loop, the stitching track will turn out neat and invisible. To make the connection stronger, tighten the thread a little every 3 centimeters. Do not pull too hard, the seam should be elastic.
Mistakes when sewing a knitted sweater
Threads from the inside out
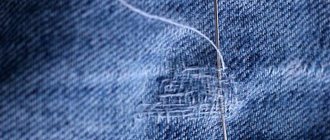
Sewing up with regular threads from the inside out, as housewives usually do with holes in their fabrics, may not be the best solution. Knitting threads, even if matched tone-on-tone, will stand out due to their density, and a large pulled seam will also be visible.
contraction
Pulling the edges of a hole in the fabric and sewing it up with the same threads is also not always a good idea, because depending on the size of the tear, the appearance of the entire sweater may change. This technique can also lead to additional breaks where the threads were weaker.
Often, tightening leads to the fact that the sweater fabric is higher in one place and more stretched in another. This method can work on the inner parts of the sleeve.
How to Sew Open Edges
The work is also carried out using a needle. Bringing the edges with the loops closer, insert the needle into the first loop of the bottom fabric, pull the thread through, and lower the loop. Pass the needle through the stitch on the top piece, pass the thread through it, and lower the loop. This is how the stitches of the lower and upper panels are stitched alternately.
- It turns out a very straight line.
- This is how the seam is made on the purl loops.
- The thread passes under the middle part of the purl stitch next to the edge stitch alternately on both parts.
- Serrated Edge Connection
Alternately insert the needle into the knot of the left and right parts, without tightening the thread too tightly. The resulting stitch looks like an extra purl stitch.
How to connect the transverse and lobar parts of knitted elements with an invisible seam?
Pass the needle and thread one row below the closed edge, then pull it out. Then, picking up the broach, pull the thread between the edge and the next loop. This way you can sew on the sleeves.
Elastic connection
First we will make the connection on open loops. Knit 2 more rows with an additional thread. Steam the parts and unravel the additional rows.
Place the product on a flat surface. First you need to make a seam on one side of the part, then on the second. Insert a needle and thread into 2 stitches of the bottom fabric. Pull up, then insert into 2 answer stitches of the top fabric. The thread must be tensioned.
Having finished work on one side, you should go to the opposite. Straighten the loops and repeat the entire described algorithm. The thread must be tightened periodically.
We will get an invisible seam that repeats the main knitting.
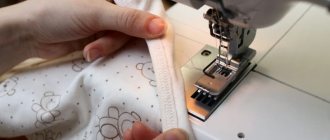
Stitch like on a typewriter
Fabrics sewn with a “back needle” seam are not pulled together. When sewing this stitch, it is important to ensure that the edges are aligned exactly. The stitching should follow the same row of stitches on both fabrics.
We retreat from the row with closed sts by one row. insert the needle between the loops.
Let's put the stitch back, insert the needle in front at a distance that is equal to the stitch. And so we sew the entire row.
Chain stitch
This chain can be used to process armholes, bottom edges, necklines, and perform decorative processing of parts.
First, you should fasten the thread on the wrong side, then pull it out. A loop is formed, insert the needle into the hole of the loop. We pull out the needle and tighten the thread. When making the next stitch, insert the needle into the middle of the previous one. Make sure the stitches are the same length.
Kitchener seam
Earl Kitchener demanded that the toe of his socks end smoothly and beautifully. This is where the name of the ordinary horizontal seam comes from. It is performed with a needle and knitting needles. We place two knitting needles with open loops nearby. The thread goes to work:
- Insert the needle into the 1st st on the 1st knitting needle, as when knitting purls, leaving the st on the knitting needle. Then we insert the needle into the 1st st on the 2nd knitting needle, as when knitting, leaving the st on the knitting needle. Then on all the loops we work alternately, first with 2 stitches of the 1st needle, then with 2 stitches of the 2nd needle.
- Continuing the work, we insert a needle into the 1st st on the 1st sp, as in k/p, remove this st. Insert the thread into the 2nd st, as in p/p and leave it on the knitting needle. Tighten the thread.
- We insert the needle into the 1st st on the 2nd needle, as in k/p, lower this st. Insert the needle into the 2nd st on the 2nd sp, as in purl/p and leave it on the sp. Tighten the thread.
- When there is 1 stitch left on the knitting needle, insert the thread into the 1st stitch, as in k/p, and lower it. Insert the needle into the stitch on the 2nd sp., as in purl/st, and lower it. We bring the end of the thread to the wrong side and carefully weave it into the fabric.
Holes from fabric unraveling
Question two from Anastasia:
My mother was ironing a white long sleeve blouse. I didn’t set the temperature, and as a result, I burned the blouse in several places until there were vertical holes... as if the fabric had unraveled... I sew and can fix everything... but I just can’t find any ideas... I’ve looked all over the Internet but there’s nothing... the blouse is working and her favorite. Please give me ideas for correcting this oversight.
This is the advice I received in a letter from Irina Prikazchikova with advice for Anastasia about a damaged blouse with vertical tears.
This is what Irina advises: “It all depends on the places where the “cuts” appeared. You can thinly stitch it from the wrong side, and sew beads on the seams from the front side, it will turn out original. It is fashionable to make embroidery appliqués with nylon, but again, not under the armpit. »
How to join open loops
We will work with crochet. Connect the two open edges.
We fold the knitted fragments face inward and hook two loops, one from each element. Next, pick up the next two stitches and pull them through those on the hook. We will continue until the end of the work. You will get a seam in the form of a pigtail.
Crochet when one edge is open
If both edges are closed, then one of them will have to be opened. We also fold the elements inside out. We pierce the closed edge with a hook between the stitches, pick up 1 stitch from the open edge, and pull it through the fabric.
We will pierce the fabric again, pick up the stitch, and pull it through the part and through the loop on the hook. We continue to work this way.
Connection - cord
Operating procedure:
- Let's lay out both fragments on the table.
- Let's put three loops on the knitting needle.
- Raise the 1st stitch of the right knitting element onto a knitting needle. We knit this loop together with the 1st loop of the cord in 1 k/p.
- Next we knit 1 k/p on the cord.
- We knit the third p. of the cord and the 1st p. of the left part in 1 k/p with a broach (= 1 p. we remove the front one, 1 k/p, we pull it through the removed p.). Continue until the full length of the seam.
Iron holes
The first question was sent by Tatyana: “I burned a hole on the back of my blouse with an iron, about 5*5 cm. How to disguise it?”
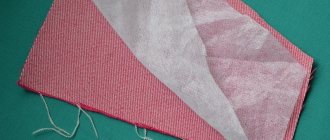
Of course, if I knew exactly where the hole appeared, I could more accurately advise how to disguise it, but in this case I had two options:
In the first option (on the right), I would cut an even larger hole in the back and insert lace there (using the direct or reverse appliqué method). And in the second case (if the style of the blouse allowed) I would design the hole in the form of a drop and edge its edges with bias tape.
Beautiful patches
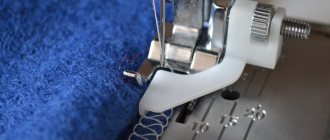
If a small hole is easy to eliminate using ordinary methods, then with a large defect you will have to use your creative abilities. The easiest way to carry out repairs is with thermal stickers. They are sold at any craft store.
Various decorative stickers are selected according to the style of clothing. By the way, this way you can not only mask damage, but also create original clothes. For children's dresses there are patches with hearts, for boys' T-shirts and pants - with images of cartoon characters.
Bursting upholstery on a sofa or chair seat is also masked with patches. You won’t be able to sew up holes on the thinnest tulle unnoticed, but thermal stickers with floral patterns, butterflies, etc. will come to the rescue.
Important The patch should not only completely cover the hole, but also extend beyond its edges. This guarantees the integrity of the product.
Do not rush to get rid of the product if its defect can be repaired. A neat stitch or a beautiful appliqué will bring the item back into service.
Rust from rivets
The third question is also from Anastasia:
Mom was washing her favorite white summer jacket with short sleeves and pockets with metal rivets with a hole at the top of the pocket. When my mother washed them, the pockets became rusty from these metal rivets. I would like to please my mother and correct this defect after washing. Please tell me how to do this. There aren't really any ideas on the Internet. And your site is such an interesting one. Thank you for such a site. On your website I looked at an article about stains and patches, but it’s a little different... Or maybe I don’t have enough imagination.
Thank you in advance. Thanks again for everything.”
Regarding the restoration of the blouse, it is difficult to say anything specific without seeing the blouse and the degree of damage caused. If anyone has any ideas other than those listed above and ideas for remaking T-shirts from Lyudmila Petrova, please send them to me and I will publish them on the mailing list.
Regarding rust, I can recommend the following options:
1. cut off the pockets completely, or reduce them in size by cutting off the rusty areas;
2. cut out rusty rivets and stained fabric and sew an applique or flaps on top;
3. Carefully remove the rivets and do embroidery in their place, possibly leaving holes decorated with embroidery. By the way, embroidery can be done with threads that match the fabric, so that it will not be noticeable.