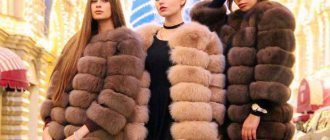
Fur products: clothing, accessories, jewelry and some decorative interior items have become an integral part of our lives. They are used by both women and men. But over time, their appearance can deteriorate, because fur tends to fade and fade. In this case, the product will no longer look beautiful. You can correct the situation by dyeing natural fur. In this manual we will look at how to dye the fur of arctic fox, mink, rabbit and muton at home.
Preparation for the process
Before painting, the product must be prepared. How to clean fur:
- a teaspoon of dish soap; 2 teaspoons salt; 10 g soda; 5 g of ammonia; liter of water.
The components are made into a homogeneous liquid. Clothes are hung on hangers or placed on the table. Apply the cleanser with a brush and leave for a few minutes. Wash off with running water so that it does not get on the lower part.
What else is suitable for cleaning:
- mix water, vinegar, alcohol in equal proportions; distribute over product, rinse.
Afterwards the item is dried outside or in a ventilated room. Do not hang it next to a stove or radiator.
These methods are suitable for cleaning mink, rabbit, silver fox, arctic fox fur - any natural fur.
Cleaning is necessary to ensure even paint application. Dirt and dust will not allow this to happen.
The leather part of the clothing is treated with ordinary hand cream. It will not dry out or crack.
Custom dyeing of skins
WE DO NOT DYE FUR COATS, COLLARS, HATS, CUFFS!
We dye mink in skins or other types of fur skins to order in a short time (from 7-10 days) to create your unique product!
Raw materials for dyeing are available.
MINIMUM QUANTITY OF FUR PELS FOR DYING MINK:
1. Male (larger in size) - from 20 units
2. Female (smaller) - from 30 units
FOX: from 10 units
RABBIT: from 5 plates size 120*60
RACCOON: from 15 skins (Raccoon dog - feathery Finnish, Russian or Chinese raccoon)
Arctic fox: from 10 skins
CHINCHILLA: from 20 skins
We dye other types of semi-finished fur products by agreement with the technologist
Check the cost of raw materials for dyeing by calling: 8 (495) 645-08-98
Production engineer phone number
Types of fur
Useful tips for coloring fur depending on the type:
- White wool is the easiest to dye. Chinchilla and rabbit fur coats are easy to dye. This is done carefully so as not to damage the delicate fur. If the white fibers turn yellow, they are lightened with hydrogen peroxide. Then any color will lie flat. The arctic fox's hair is dense and will take a lot of time and paint. It is easier to work with arctic fox, the paint applies easily, and the color remains for a long time. Dyeing a mink coat is not easy. It is difficult to paint.
- Items made from nutria are easier to paint than mink. It is similar to mink, but lighter. She has three types of hair in thickness and length, so her fur is close-fitting. The painted muskrat turns out pinkish with white spots. After a short time it fades. The fur of a sheared beaver cannot be lightened beautifully. It will turn yellow. It is worth using darker paints to match the original color. It is not easy to dye a mouton fur coat due to its high density. It is necessary to carefully distribute the dye and carefully monitor the uniformity of application. Otherwise you will get stains. When dyeing silver fox fur, the new color is usually given to the longest fibers.
Hair dye should not be applied to faux fur. Aggressive substances will ruin it.
A new product should not be painted, as this will shorten its service life. Only an old, worn-out item is subject to this process in order to serve its owner a little longer.
Before painting, check the readiness of the leather. Tear off a little of the lining and moisten the skin with plenty of water. If you pull too hard and it tears, you cannot paint it, otherwise the finished item will fall apart into pieces. If it stretches, painting is allowed.
You have to pay for the color
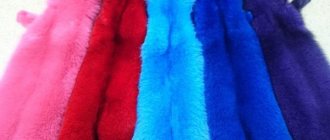
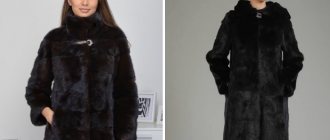
Different colors of mink also cost differently. The simplest option is light brown or walnut mink. A little higher in the price category is dark brown mink, and it is surpassed by all shades of red - from honey to amber. Black, grey, beige and blue mink are even more valuable.
I would like to talk about the latter separately. Just a few years ago, due to its popularity, blue mink was worth very impressive money, but now the passion for blue fur has faded, and this type of mink has become more affordable. A smoky brown mink with a beige undercoat and dark, coarse long hairs will cost even more. Snow-white mink is also comparable in price, as is another version of white fur - white skin with a slight splash of long gray hairs.
The so-called “black diamond” has remained unsurpassed in price for a long time. This color, even deeper than black, delights with its rich, almost violet hue. However, no matter how expensive and luxurious the “black diamond” is, it is still not the dream of all customers - some people like dyed mink in extreme colors.
These are the luxurious colors that natural, undyed mink can have
Most often, customers believe that the dyed mink was white before this process, and therefore can cost a significant amount of money. However, this is not always the case - modern dyeing technologies make it possible to successfully introduce color into fur of a light walnut shade, as the cheapest option. However, if you want to buy a fur coat made of bright pink or blue fur, then you need to take into account that it was originally white, that is, very expensive.
Dyed mink - fresh and rich colors
Where do they paint?
Where can you dye a fur coat or fur item:
- In a studio specializing in fur processing. They will repair and paint it there. Some dry cleaners offer a fur dyeing service. They paint in factories, but usually in large quantities. If you wish, you can find a company to dye your fur coat. It’s easy to do it yourself at home.
It is recommended to paint small items or parts of large items yourself. There is a possibility that you won’t be able to make an even, monochromatic color.
Sequence of painting in the workshop
Before processing, the specialist examines the fur coat for the condition of the fur, skin, and the strength of the seams. The owner chooses the future color of the product. Experts do not advise choosing bright, unnatural colors: red, blue and the like. These dyes contain toxic substances that can ruin fur and skin.
To restore the color of products, several dyeing methods are used:
- namazny;
- dipping;
- combined.
Experts will advise which method is best to choose. To get a quality product, it is better to use deep coloring rather than tinting.
Well-dyed fur remains soft, the skin does not lose elasticity, and the color is distributed evenly. After painting, the mink coat is completely renewed and its wear life increases.
How to care
Proper care to preserve color and newness:
- sometimes comb your hair with a special brush; dry clothes if it’s snowing outside; clean contaminated, worn-out areas in a timely manner; Before storing, remove stains and dust; Use a cover for storage after winter.
Painting a fur product is not a difficult task if you approach the process correctly and follow all the instructions. If the item is badly damaged, you need to dye the entire fur coat, or you are afraid that it won’t work, it is better to contact a studio.
Currently, fur products are very popular. The choice of outerwear made from natural fur today is truly extensive. Both the variety of products and the variety of materials are simply amazing in their versatility, beauty and uniqueness.
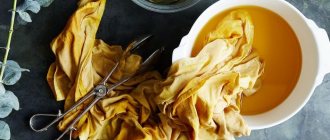
Mouton is rightfully considered the most versatile type of fur. It is distinguished by its special wearability, and besides, it looks incredibly elegant and graceful. During the processing process, such material as mouton can be given absolutely any shade you like. That is why, often some fashionistas, after wearing their fur coat for several seasons, want to refresh the fur, simply giving it a new fresh shade. This procedure can also be done at home. At the same time, you need to know that there are two main ways of coloring a mouton: tinting the fur and dyeing with oxidative dyes. The most popular method is undoubtedly the second. Today we’ll talk about how to dye a mouton fur coat using oxidizing agents.
What is needed for painting?
So, if you also have a fashionable mouton fur coat in your wardrobe, and you have a burning desire to tint it in order to update, refresh and give it a marketable appearance, you should follow the instructions very carefully. In addition to the fur product itself, prepare the following substances for painting:
- water, temperature about 35 o C,
- 1 gram of any available detergent per 1 liter of water,
- 2-3 grams of ammonia (25%) per 1 liter of water,
- salt, regular kitchen salt, at the rate of 20 grams per 1 liter of water,
- hair dye – any kind too.
How to dye a mouton fur coat - process
Before painting a mouton at home, you need to check the skin for the welding temperature. This is important, since an old fur coat may simply not survive the painting procedure and simply fall apart; therefore, it is better not to expose such things to such effects at all.
First of all, you need to prepare the fur for painting. The preparatory stage is as follows: you need to put the skin overnight in a chrome tanning solution.
The quality of painting will significantly depend on the extent to which the dyes can penetrate deep into the mouton pile - well enough or not. Note that dirty pile will not be able to allow the dye solution to pass into its structure, and this may cause uneven coloring of the mouton. In this regard, it is strongly recommended to wash the fur before painting. To do this, you need to prepare a simple solution, which will consist of the following components: water, salt, ammonia and detergent (you can find the proportions a little higher). The mouton skin should be dipped into the prepared solution, and then the fur product should be moved in the container for half an hour. After this, remove it from the ammonia solution and squeeze it thoroughly.
A little about secrets...
When making fur hats using the mold method, when sewing fur caps, sometimes it is necessary to insert light fur. After dyeing, pulling a fur cap over the block and drying, it turns out that light fur has a different color. In this case, you can tint the skin directly on the deck by removing the nails. High concentration paint is applied a second time to the unpainted area. After dyeing, the paint is washed off and the fur is quickly dried with an air stream.
As a result of prolonged wear and strong exposure to sunlight, mink fur becomes hard to the touch; such fur must be checked before cutting. A piece of such fur is dyed separately, after drying the fur is dyed disgustingly, the ends of the hair turn grey, the color is very bad. Sometimes, in a hurry, such fur appears on the finished cap, then you need to cut out this piece and replace it with a good one.
Often relying on the quality of the skin, it turns out that after dyeing the skin begins to tear. You can get out of this situation, pull the dried cap onto the finished block and glue the entire cap with pieces of spunbond using MOMENT 1 glue. When pulled onto the finished block, the skin will no longer tear.
When sewing a fur cap for a hat made by molding, you need to remember that the skins decrease in size after dyeing and drying, so the cap is cut out larger in the beat.
Restoration of fur coats, repair of sheepskin coats and fur products photo
Before fur coat collar refacing After fur coat collar refacing
Before restoration of a fur coat sleeve After restoration of a fur coat sleeve