The world of leather and fur is a fascinating world of handicrafts, which allows you not only to acquire wonderful clothes or a handmade handbag, but also gives a lot of positive creative emotions. Working with fur requires certain knowledge of the technology of sewing natural or artificial fur. They include the ability to choose the right fur, practical skills in sewing fur products on a furrier's machine. You need to know how to sew fur using a furrier's hand stitch, as well as know the types of fur, their features and differences. You need to know how to cut correctly, and to cut fur skins you need to be able to use a special knife.
Video of a furrier's hand stitch for sewing fur skins. The video is in English, but it is understandable. As a last resort, you can switch the subtitles to the language you need.
Natural fur, unlike faux fur, can be sewn with high quality only on a furrier’s machine and you must be able to use numerous special tools and devices, from an awl to a hammer to soften connecting seams. In addition to the shoe knife, with which the fur skin is cut, special adhesive and cushioning materials, seam “enhancers”, various accessories, for example, fur coat hooks, etc. are used.
It is also important to understand that no books, video tutorials or courses on technology for working with fur can provide the most important thing - experience that appears only years later. If you want to learn how to sew fur , read this entire article. A fur studio technologist will share his experience with you.
Video on how to repair a bald spot on a fur coat, this method is called the “fish cut.” A very simple way to save on fur coat repairs. All you need is a needle and thread.
How to sew fur with a hand furrier's stitch
Sewing fur parts into one whole, unlike leather, is necessary not on a straight-stitch machine, but with a special furrier’s machine, or with a hand furrier’s stitch. If you sew fur on a regular sewing machine, the seam will be stretched, wavy, of poor quality and weak. And only faux fur can be sewn on a regular machine. There are several types of hand furrier stitches for joining fur skins. But you just need to learn how to sew fur with at least one of them, for example, a furrier’s stitch with a “double puncture.” This type of furrier stitch is made from right to left, and the needle enters the same hole twice, which is why it is called that. A furrier's hand stitch with a “double puncture” is performed using regular stitches (thread in one fold) across the edge from right to left, with small steps, the dimensions shown in the figure. A stitch is laid and the thread is tightened. The next stitch is made in the same place, without shifting, and only after that the needle moves to the left, make a new stitch forward, stitch in place, etc. It turns out that the needle must go through the same hole twice. The needle pierces the edge of the fur skins folded together from the reverse side, towards itself.
This hand-stitch seam provides maximum joint strength, so do not try to use particularly strong and thick threads. Moreover, the thread should not be folded twice. Thin, elastic and durable thread in one fold is ideal for sewing mink, fox, nutria fur, etc. The stitch density and puncture height depend on the thickness of the fur leather fabric. A slight difference in the hair length of the two skins being stitched can be hidden by moving up the edge of the skin of the fur with the longer hair. In this case, the stitch must be tightened tightly to fix this displacement.
Before sewing the fur, the edges of the fur skins need to be trimmed and folded together with the hair inward. You need to fold it so that the hair does not interfere with the needle while sewing the fur. They must be completely hidden and not “stand out” in the resulting seam. The furrier places the hair between the skins with an awl, without sweeping away the details. If you find it difficult to master the techniques of working with an awl, you can baste the parts with wide stitches before making a furrier's seam. This will keep the skins from moving and will make styling the hair easier. But you still have to learn how to use an awl, since this tool will also be needed for other operations.
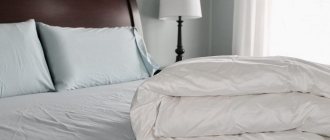
Caring for fur clothing
Don't put mothballs in your fur coat. Some furs, including humans, are allergic to mothballs. Protect natural fur from rubbing; such areas make the fur coat very old. Faded and elongated areas of fur on a fur coat may appear when driving a car. Try not to ride in a car wearing a long fur coat, it is uncomfortable and will quickly ruin its appearance. Natural furs must be protected from direct exposure to various chemicals and perfumes. This can cause the hair to lose its shine and the skin tissue to lose its elasticity. Try to avoid getting fur clothing too wet. If you do find yourself caught in wet snow, dry your fur coat or fur vest at room temperature in a ventilated area, but not near a heater.
source
Source →
To work with fur you need a special tool
Working with fur requires the use of a special tool. In addition to the shoemaker's knife, with which (not scissors) the fur skin is cut, many other tools are used. For example, you will need a hammer to smooth out and soften seams, adhesive spacer adhesive tapes that reinforce the edge of the leather, special sewing needles, a furrier's awl, a comb for styling fur hair, etc.
A small hammer is used constantly when working with fur. Any rough seam can be easily softened by lightly tapping it with a hammer. You will also need a hammer to stretch the moistened skin, since the edges of the moistened skin will have to be “nailed” to the wooden surface with nails.
With the help of “amplifiers” the edges of the stitched skins are strengthened. The edges, reinforced with adhesive tape, when joined on a furrier's machine, will not stretch much, and the fit will be minimal. In addition, the adhesive tape further strengthens them. It is especially important to glue the connecting seams with such reinforcing tape in the armhole, neck, and collar areas.
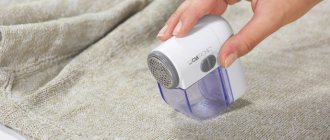
No matter how hard you try to sew the fur well, the connecting seam on the front side will still be noticeable. To hide this seam, you need to pull out the hair caught in the seam with an awl, and then carefully “comb” this area of fur. To do this, use a special comb or brush, which pulls out the fur hairs caught in the seam and places them in the desired direction.
In addition, in order to eliminate the “wavy” connecting seam, stretch the fur skin, or rather the collected piece of fur for further cutting of a particular part, on a wooden surface. Just note that this operation is performed before cutting the parts of the product. One pelt of fur is not always enough to cut out a sleeve or a shelf. First, they need to be combined into one, carefully selecting the shade, hair height, etc. So that it is not noticeable that they are sewn from different skins, the “collected” large skin needs to be moistened and stretched. You need to wet it over the leather fabric, and nail it with small postal nails or long push pins. Dry away from heaters and direct sunlight.
Connecting furrier seams need to be stretched
Pieces of skins connected into one whole must be stretched on a wooden surface. To do this you will need small nails and a hammer. A fur skin collected from different pieces is lightly moistened with a damp sponge from the side of the leather fabric and then nailed along the edges with nails to the board, at the same time slightly stretching it. This is a very complex process, experience is required, so I will not dwell on it in detail. I will only say that with the help of such an operation, the fur skins are leveled, the seams are straightened, and sometimes it is even possible to increase the size of the skin.
The correct selection of fur parts makes the seams invisible
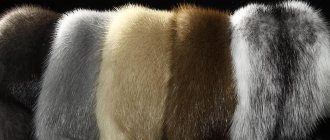
Working with fur has one important advantage. You can always sew the missing piece to any part or replace part of the worn fur with another. This is possible due to the fact that the connecting seam is easy to hide in thick fur. This advantage is also the main criterion for the professional level of a furrier. Selection of fur of different quality and shade of skins is the most important process in the technology of working with fur. It is especially important to be able to choose the right fur when sewing outerwear. The correct selection of fur will make a fur coat or vest look like it was sewn from one large skin, without focusing on the joining of sections of fur of different quality. A good master furrier, like a sculptor, feels fur and sculpts a real work of art from different pieces. That is why the cost of sewing fur products is the most expensive service of the atelier.
Some seams need to be taped
Some areas of fur clothing need to be duplicated, for example, hem, collar, hem and others. Duplicating with cushioning material will protect them from stretching and give them the required shape.
It is imperative to strengthen connecting seams such as armhole seams, neck seams, and shoulder seams. These areas are subject to stretching and the tape sewn into the seam strengthens and strengthens it. In sewing accessories stores you can buy regular cotton tape 1.5-2cm wide and use it for these purposes. There are also special adhesive tapes, which furriers call “amplifiers.” They are also used when sewing products made from genuine leather. The tape is placed on one side.
How to sew fur on a furrier machine
Fur skins can be sewn together using a hand furrier's stitch, but such a stitch has many disadvantages and requires a lot of time. Professional work with fur involves the use of a furrier's machine for stitching fur. Moreover, in a “good” workshop there is not one furrier’s machine, but several. For each type of fur, depending on the thickness of the leather fabric and the dressing, a corresponding furrier's machine is used. Their markings are classified into classes from No. 1- to No. 5. So, for example, the furrier's machine 10-B belongs to the third class. On a furrier's machine of this class it is possible to sew sheepskin, nutria, fox and other furs of medium thickness leather fabric (hide). But for stitching the finest mink skins, it is no longer suitable; you will need a furrier’s machine of class No. 1 or class No. 2.
To make a furrier's seam on a machine, the skin at the joint is folded with the hairline facing each other. Gently tuck the hair inward with your index finger or an awl and sew the edges of the leather fabric together. The needle and thread should match the thickness of the leather fabric, and the color of the thread should match the color of the skin. When working on a furrier's machine, you should carefully tuck the hair inside, since un-tucked hair can cause needle breakage, skipped stitches, etc.
In this video you will see how the 10B furrier machine works. We sew together two small pieces of fur especially for you.
For arctic fox and fox skins, thread No. 80 is used, for thin rabbit skins - No. 50, 60, for other skins - No. 40, 50. Furrier's seams are smoothed with the butt of a knife, tailor's scissors, or by gently tapping a small hammer.
Fur can only be cut with a special shoe knife along the underside of the fur (the inner side). The fur is laid out on a plastic board or plexiglass, a cut line is marked on the leather fabric and cut off with a shoe knife, moving towards you. If you cut fur pelts with tailor's scissors, the hair of the pelt will fall off. Later, when you sew the fur, it will no longer be possible to hide the connecting seam.
Video on how to cut fur pelts with a knife.
Otter fur is considered the most wear-resistant.
Fur skins have a standard of wearability. Otter fur is considered the most durable and resistant to waterlogging. It is the otter that has the honor of being the standard for all fur-bearing animals, and the fur of fur-bearing animals is compared against it. Even sable fur is inferior to it in strength and wear resistance.
So, if otter fur is 100%, then sable has 80%, mink - 70, arctic fox - 65, astrakhan fur - 60, fox - 50, muskrat - 45, squirrel - 30, ermine and weasel - 25, rabbit - 12, mole and gopher - 10, hare - 5.
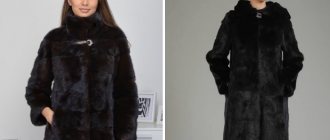
We sew a short fur coat from faux fur
For sewing you need 2 meters of fur material (according to your taste and color) and the same amount of fabric for the lining. Main stages of work:
- We form a pattern and cut the fabric according to the design;
- We cut out two shelves, a back and sleeves;
- We connect the back and front shelves by forming a shoulder seam;
- We fix the sleeves with pins and carefully sew them in;
- We make side seams along the body and seams at the bottom of the sleeve;
- We duplicate the process with lining fabric;
- We sew the seams of the main and lining material around the neck, front and central parts of the fur coat;
Important ! At this stage, leave the lower part unstitched, then turn the fur coat inside out and finish the job.
- We sew the sleeves with an allowance of 2-2.5 cm;
- The fur coat is ready.
Attention ! If desired, you can install fittings at the stage of connecting the base material with the lining.
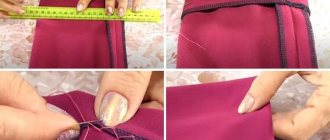
Finding a template and taking measurements
The first step is to create a fur coat pattern made from natural fur. Or search for a pattern for a pattern in open sources, for example, in fashion magazines. In order for the pattern of a fur coat made of natural fur to be successful and the product to fit well, focus on the outerwear you already have, for example, a jacket or coat.
To ensure that your future fur coat suits your body type, find out the following parameters:
- chest height;
- waist and chest circumference;
- shoulder and back length.
There will be a table where you got the pattern from - choose the appropriate size. To cut out all the parts evenly, transfer them to paper. When you start cutting, do not forget to mark the places where joining and stitching will subsequently take place.