Home / By purpose
Back
Published: 07/13/2021
Reading time: 1 minute
0
8
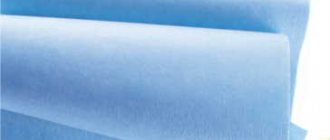
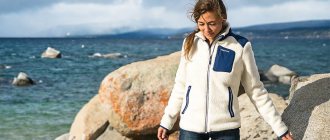
Shirt fabric is intended for making underwear. These are sleep shirts, home pajama suits, bathrobes, etc. The peculiarity of the material is good indicators of breathability and hygroscopicity. The aesthetic side of the canvas may be somewhat “lame”, since products made from it are most often not visible to people around.
- 1 Selection criteria
- 2 Summer options
- 3 Warm models
- 4 What can be sewn from shirt fabric
- 5 Conclusion
Types of materials for shirts
In ancient times in Rus', people slept in whatever they needed.
During the reign of Peter the Great, following European fashion, first the nobility and the clergy, and then the common people, began to put on special clothes before going to bed - nightgowns.
Now the choice of fabric for a shirt is very extensive, but previously it could only be sewn from the most popular material - linen. Silks were extremely rarely used for the production of such products - materials that were expensive and inaccessible to most in those days.
Over time, people fell in love with the shirts so much that they began to be separated into separate clothing collections. Some fabrics are used for sewing summer products, and others for winter models. There is even a group of demi-season shirts. Classic versions of such clothes are worn at any time of the year.
What can you sew from shirt fabric?
The choice of shirt materials is large, and both underwear and other items of clothing are sewn from them.
| Name | Application area |
| Satin, calico, poplin | Bed sheets |
| Tartan, luxe and foulé (checkered fabrics) | Men's shirts, children's clothing, home sets |
| Flannel | Baby Clothing |
| Bamboo | Clothes, bed linen |
Summer
When sewing shirts for hot summer nights, different types of fabrics are used, the most important requirement for which is the ability to allow air to pass through. Most often, models consist of the following materials:
- Chintz. This fabric belongs to the cotton category. It is created by plain weaving and has a delicate and fine texture.
- Calico is a hygienic, lightweight and wear-resistant material. Unlike chintz, calico has high strength.
- Satin is very resistant to abrasion, so it is quite durable. In terms of its properties, satin is almost no different from silk - natural or artificial. This material can consist of both natural and synthetic fibers.
- Batiste is a translucent material that is absolutely safe for allergy sufferers. It is very thin and hygroscopic, and is used for sewing nightgowns with exquisite designs.
- A veil is a light transparent fabric, most often used in the production of erotic collections of shirts.
The main rules for choosing a nightie
A nightgown is not only a useful, necessary thing for relaxation, but also a very attractive, erotic object of seduction. Modern light industry produces women's shirts of various styles. How to choose a decent shirt, what to pay attention to? Here are a few points to consider when purchasing a product for relaxation and sleep:
- Material. Choose natural, breathable, soft. Consider the season. For warm weather - thin linen, natural or viscose silk, satin. For autumn and winter - natural or viscose wool, modal, fleece, knitwear, flannel.
- Model. The style and cut must correspond to the intended purpose of the product. For a comfortable, cozy stay, choose a loose-fitting item.
- Size. The nightgown should be loose, slightly emphasize the curves of the body, and not restrict movement during sleep. The main criteria when choosing a size are the length of the product, free width at the hips, waist and chest.
- Color spectrum. Choose warm, soft pastels. Calm shades have a beneficial effect on the nervous system, soothe, and encourage a cozy rest. Classic colors - gold, blue, pink, lavender, coffee - are suitable for adult ladies. Active young women can afford brighter, provocative tones and shades - black and white mix, red, purple, bright turquoise, rich pink.
- Quality. Carefully examine the quality of cut and tailoring. Look at the even stitching, the processing of the seams, the even distribution of gathers, the ruffle in the product. Sticking threads, rough decor, crookedly sewn flounces, and lace indicate the poor quality of the shirt.
Winter
The main requirement for the selection of materials for a winter nightgown is the ability to retain heat. One cannot fail to take into account sleep hygiene, which presupposes the ability of products to provide comfort to the body during rest. The choice of fabrics for sewing these types of shirts is small:
- The bike is an ergonomic natural material. It has a fleecy soft surface that provides excellent thermal insulation and comfort.
- Flannel is a wool, half-wool or cotton material. There is a soft brush on both sides of the flannel fabric. This fabric is pleasant to the touch and very beautiful.
- Bumazeya is a kind of flannel. It is produced only by twill weave, and has a pile on only one side. Its properties are similar to flannel.
DIY nightgown (video):
A little history
It is difficult to imagine that once upon a time people did not have special clothes for sleeping and went to bed in ordinary dresses, shirts and pants, which was, to put it mildly, not entirely hygienic. Some, however, still undressed and slept naked.
The first nightgowns appeared only at the end of the 15th century and were a huge piece of material gathered at the throat. Due to their great similarity, they were given the name “sleeping skirt”. Such a product was quite expensive, so only very wealthy ladies could own it.
Only at the beginning of the 19th century did the nightgown turn from a luxury item into an everyday wardrobe item and became accessible to various segments of the population. It is noteworthy that at that time not only women, but also men slept in shirts. The attire of the stronger sex was complemented by a nightcap, and for beautiful ladies - a cap.
Currently, shirts have left the men's wardrobe, giving way to pajamas. For women, on the contrary, nightwear became not only an item used to provide warmth, but also an attractive accessory, an attribute of seduction.
Demi-season
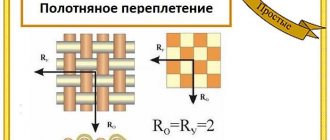
In the production of nightgowns for the off-season period, materials of medium surface density and thickness are used. They are usually made using plain or twill weave. The range of materials for demi-season shirts is extensive, so let’s look at the most common ones:
- Rep is a dense and heavy material with ridges on the surface.
- Zephyrin is a low-stretch, dense material with a sparse longitudinal scar. It is made from combed yarn.
- Poplin is 100% natural cotton material, characterized by its high density. This fabric has a soft texture, making it very comfortable for the skin of the body.
- Tartan is a multi-colored, high-quality fabric. The fabric has a high density, stretches well and does not cause difficulties during sewing.
Non-iron processing
There are now quite a few shirts on sale made from fabrics marked easy iron, non-iron, wrinkle-free, and easy care. Such materials are characterized by minimal creasing; They are easy to iron and do not wrinkle too much during wear. Of course, their characteristics vary greatly. The cheapest fabrics of this kind may not last long; In addition, they can be harmful to health, and their appearance and tactile sensations often leave much to be desired. In most cases, the non-iron/easy iron effect is achieved by treating the fabric with formaldehyde or other chemicals, so here it is worth giving preference to well-known and reliable manufacturers who actively sell their products in Europe and the USA. Their products meet strict safety standards and are unlikely to harm your health, although they may still cause allergies in some people.
Charles Tyrwhitt non-iron shirt
Let us add that there are easy care fabrics and shirts with completely natural processing, but they are usually expensive and very rare.
Classical matters
Len has not left the sphere of production of things for sleeping. Although now it is not the only material from which nightgowns can be sewn, many people choose this particular fabric due to its excellent qualities. Linen nighties are warm in winter and cool on hot summer nights. The skin under this natural material can “breathe” calmly, resulting in a truly high-quality night’s rest.
Both main types of silk - natural and artificial - belong to the category of classic shirt fabrics . Shirts made from natural silk are elite, expensive models. The surface of silk is shiny, it is a translucent and iridescent material.
In nightwear made of artificial and synthetic silk, the body is no less pleasant. The products are distinguished by their sophistication and lightness due to the texture and properties of the material.
Silk shirts are recommended for women whose skin is prone to irritation and allergic reactions.
The composition of such silk may include other fibers to improve clothing models.
Characteristics
The characteristics of shirt fabric directly depend on its type. Materials vary greatly in their properties. As an example, here are the characteristics of some fabrics.
Tisi:
- composition: 65% polyester, 35% cotton;
- density 110-240 g/m2;
- twill or plain weaving;
- surface: rough or diagonally ribbed;
- durable;
- stain-resistant;
- does not wrinkle, does not shrink, does not fade;
- does not stretch;
- easy to care for;
- hot for summer, cold for winter.
Shirt flannel:
- composition: cotton, viscose, wool, polyester in different proportions;
- density 170-257 g/m2;
- twill or plain weaving;
- surface: soft, fleecy, sometimes ribbed;
- density 170-257 g/m2;
- absorbs moisture well;
- warm;
- breathable;
- strong and durable;
- retains color well;
- can roll down, sit down;
- takes a long time to dry.
Composition and properties
The fabrics that make up nightgowns have different composition, structure, finishing and weave of threads. The properties are almost identical if we consider them based on group affiliation.
Natural materials guarantee high hygienic characteristics of products. They allow air to pass through well, do not cause allergies and are quite wear-resistant. Synthetic fabrics are very durable, they do not shrink and practically do not wrinkle.
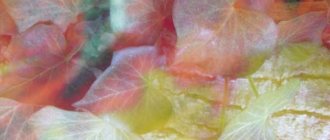
Nowadays, fabrics for shirts that imitate natural motifs have come into fashion: tree bark and foliage, animal skins and reptile skin . Classic lace is often replaced by new bright prints, effects and unusual finishes.
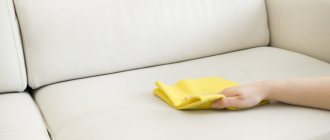
Features of care
Regardless of what fabric you choose, you will have to take care of it carefully. Even if high-quality fabric is used in sewing the product, it requires delicate, careful care:
- It is better to wash shirts by hand or in a washing machine separately from other things;
- Products cannot be bleached or machine dried;
- You can iron at low temperatures without using steam.
Thus, the choice of the modern nightgown buyer is not limited by anything. You can choose fashionable or familiar classic models, comfortable and extravagant, simple and exclusive, made from the same or several fabrics.
Master class: how to sew a men's shirt
And then you can take on a more complex option - a shirt with a tie. They differ in that a summer shirt has a softer collar and you can use a brighter fabric for it, on which sewing errors are not so visible. For a classic shirt, the seams are made without overlocking, with closed edges, the so-called. closed seam. But you and I are learning, so we’ll start with simple seams. At the end of the master class, I will show you the execution of sewing seams.)) Model 133 from Burda magazine 04/2006 was taken as the basis for the men's shirt for this master class and slightly modified, namely: the sleeve was lengthened, a cuff was added, and the collar with bones was changed the shape of its corners resembles a wide knot of a tie. The cuff can be removed from a finished shirt, as can the sleeve length. The short sleeve lines of the pattern were extended downwards. On the back half of the sleeve, about a third, a cut line for the cuff is drawn along the bottom. The length of the cut is 12-15 cm. The excess width of the sleeve is folded before sewing the cuff.
Later issues of the magazine have shirts that are both fitted and long sleeve, so you can simply use a different pattern to avoid alterations.
Here are more options for shirts made using this pattern:
Decating the fabric First you need to select the fabric and decate it. Since the shirt is washed often, the fabric should be soaked in warm water, wrung out and dried. Then the wet cut needs to be ironed from the inside out to dryness. The main thing is not to iron the fold of the fabric, otherwise you won’t be able to get rid of it! Since to strengthen the collar we take adhesive calico of various densities, it also needs to be soaked in warm water and dried, because calico can shrink significantly when gluing.
Cutting When cutting fabric into stripes, the fabric must be folded so that the strip matches along the cross section of the cut, even if the edges of the fabric do not match!
The details of the yokes, collar, stands and cuffs need to be laid out not along the lobar, but along the transverse in order to change the direction of the strip. For convenient cutting, it is better to make the patterns of these parts in whole form, and not in half the parts, as in the magazine.
Cut out the shirt pieces with 1.5 cm allowances along all edges. There is no seam allowance on the long cut of the double one-piece strip at the front!
Small details (collars, stand-ups, pockets, cuffs, trims and facings of sleeve cuts) should be cut out with allowances of 1 cm.
Tip: shirt fabrics are thin, so you need to choose the most appropriate way to transfer the contours of the pattern onto the fabric. Copy paper often leaves traces that are difficult to remove! To mark allowances, it is better to use chalk (buy at the Burda store), soap or aqua marker; traces of it are removed by wetting with water (buy at the Burda store). Excellent scissors for work can also be purchased at the Burda store.
Strengthening parts Strengthen the parts of the collar, stand and cuff with an adhesive pad. Glue calico is best suited for this purpose. It is sold in various hardnesses.
Depending on which collar is needed - hard or soft, choose the degree of rigidity of the adhesive pad.
For a soft collar, the gasket is glued in one layer along with the allowances on the part. For an office shirt with a tie, you need a stiff collar.
For a rigid collar, the gasket is glued in two layers. The first layer of gasket is glued to the upper collar piece with allowances, and the second layer is glued on top of the first layer of gasket, but without allowances. You can glue the second time not the entire collar, but only the corners of the collar. This depends on the thickness of the adhesive pad. The thicker it is, the fewer layers are required. Instead of a second hard layer of gasket, you can strengthen the ends of the collar with plastic bones - plates. In this case, you need to make drawstrings for the underwires on the lower collar. In a commercially made shirt, the pits may be hidden inside the collar.
Tip: since the collar is subject to heavy loads when worn and washed, you need to take a high-quality adhesive pad and iron it carefully, otherwise after several washes it will begin to partially come off or, as they say, bubble.
Sewing: shirt strap Process strips on the front parts. Most often in men's shirts there is a placket with two lapels, the so-called “double” placket and “men's” placket. Double strip When cutting along the edge of a double strip, no seam allowance is given. The width of the strip is from 2 to 4 cm.
Iron the strip twice onto the wrong side of the front and stitch to the edge (at a distance of 1 mm from the fold).
But you don’t have to adjust the bar.
In this case, it needs to be basted in the middle after ironing. In the future, the loops and buttons will fix the bar and prevent it from turning away.
Men's plank
The “male” bar is made only on the left shelf for hinges. In this case, a regular double placket is made under the buttons. The width of the strip in the cut is 3-4 cm + 1 cm. Iron the strip 3-4 cm wide twice onto the wrong side of the front, sew a line at a distance of 5 mm from the fold, then turn the strip back and iron it. The cut of the strap was stitched in its fold. It remains to stitch the second fold of the strip at a distance of 5 mm.
Side of the shelf Shown here are regular seams with the edges processed using an overlocker. I will show you the sewing seams at the end of the master class. They are more complex and require more accuracy and sewing experience.)
Sew the side of the shelf to the shelf from the side of the barrel, overcast the seam allowances together and iron to the middle of the shelf.
Sew the flange along the seam of the barrel stitching.
Double yoke The yoke can be either single (consisting of one piece) or double. When sewing a shirt with a single yoke, the seam allowances for the front and back stitching are pressed onto the yoke. Finishing lines are laid along the yoke.
When sewing a double yoke, there is a little trick with which the seam allowances appear to be inside the yokes. How to do it? It’s very simple - you just need to roll up the parts of the shelves and back, then everything will work out! Since the cuts in this case are not processed with an overlocker, they need to be equalized, that is, trimmed to 5-7 mm so that they look more neat.
Place on one piece of the yoke and pin the details of the shelves and back.
Roll up the shelves and back onto the yoke.
Place the second yoke on top of the rolled parts, wrong side up.
Sew the details of the yokes, grabbing the shelves and backs lying between them. Trim allowances to 5-7mm.
Pull the shelves and back through the neck of the yoke.
Press the yokes and seams.
Sew the yokes along the stitching seams of the shelves and back, if provided for by the model. Stitch the neck edges of the yokes together.
Sleeve The sleeves in a men's shirt are sewn into the armholes before sewing the side seams of the shirt and the sleeve seams.
Pin the sleeve into the armhole, aligning the marks on the sleeve and the armhole.
Sew the sleeve into the armhole from the sleeve side. Overcast the seam allowance and press it onto the armhole (fronts, yoke and back).
Topstitch the shirt at the armhole along the seam.
Place the sleeve sections and the side sections of the front and back together, sew with one line, overcast the seam allowances together and iron onto the back.
Cuff and sleeve cut There are several ways to process the sleeve placket. We chose the simplest one (a description of other methods of processing a man's strap can be found in specialized literature). Cuffs can vary in shape - rounded, straight or with a beveled corner, like ours, as well as in height - one or two buttons. Despite this, their processing does not change.
Sleeve cut
Mark a 14 cm long slit on the back of the sleeve. Sew a placket from most of the sleeve along the slit. The plank should be 4 cm longer than the cut. The width of the plank is 7 cm (finished 2.5 cm).
Cut the cut, not reaching the edge of the line 1-1.5 cm. At the end of the cut, cut a triangle towards the end of the line and in the other direction from the cut.
Iron the long allowance of the placket onto the placket, and fold the other edge of the cut twice by 5 mm and stitch. Iron the resulting triangle at the end of the cut upward.
Iron the placket onto the cut. Iron the placket in half, overlapping the stitching line of the placket with the fold.
Stitch the fold of the strip next to the stitching seam (at a distance of 1 mm from the seam).
Fold the top edge of the plank into a corner.
Sew the corner of the placket onto the sleeve. The distance from the corner to the transverse stitch is 3-4 cm. From the inside of the sleeve, this stitch grabs the fold of the small corner at the top of the cut.
Cuff
Reinforce the outer part of the cuff with padding along with seam allowances. Iron the bottom edge of the reinforced part of the cuff inside out.
Stitch the pressed seam allowance to the cuff.
Fold the cuff pieces face to face and stitch.
Cut seam allowances in the corners and trim to 5 mm.
Turn the cuff inside out and iron it.
Place pleats along the bottom of the sleeve. The rule is this: the fold of the fold on the front side faces the cut. There can be several folds - two along the front (largest from the seam) part of the sleeve, and sometimes, if the sleeve is wide, another fold is added along the back of the sleeve.
Place the cuff on the sleeve with the unreinforced side on the wrong side! Sew the cuff to the sleeve. Iron allowances onto cuff.
Cover the stitching line with the fold of the outer cuff and stitch it to the edge (1mm). Topstitch the cuff.
Collar without bones Cut out the parts from the adhesive pad: - along the upper collar and along the stand together with allowances - according to the pattern (pattern) of the upper collar and stand without allowances or only along the corners of the upper collar without allowances. First iron the lining piece with allowances onto the upper collar from the inside out. On top of it there is a piece without allowances and (or) on the corners of the collar there is a piece of gasket without allowances. Iron the gasket thoroughly, hold the iron in one place for 20-30 seconds, then iron the part with steam. The part should lie flat until it dries and cools completely. In the same way, strengthen the part of the inner stand (the one that will be adjacent to the neck) with a gasket.
Trim the lower, loose part of the collar along the top and side edges by 2-3 mm. Mark the middles of the upper and lower collars. The collars must be absolutely identical before trimming! If they are not, equalize them first.
Place the collars face to face and pin, aligning the cuts, thereby positioning the upper collar relative to the lower one. Stitch the collars from the side of the lower (not reinforced and trimmed) collar.
In the corner of the collar you need to make 1 transverse stitch, blunting it. When sewing collars, you need to set the stitch frequency to a minimum so that the trimmed allowances do not come out in the corners.
Cut out allowances in the corners of the collar in three steps at a distance of 1 mm from the stitching. Step 1.
step 2 and 3. Then trim the straight allowances at a distance of 5 mm from the stitching.
Iron the seams of the top collar onto the bottom.
Turn the collar inside out, straighten the corners and iron with a transition edge 1 mm wide on the side of the lower collar. The transition edge is the transition of the upper collar to the lower one: it is made so that the stitching seam is not visible. Iron to a flat edge using a wooden ironing press.
Stitch the lower edges of the collar to the width of the foot (5-7 mm). Fold the collar in half, check the symmetry of the corners of the collar and trim the lower edges so that they are even along the entire length.
To stitch the collar evenly in the corners (this is where the stitching most often gets lost due to thickness), you need to pull an auxiliary thread through them. When turning the needle in the corner, you need to lightly pull the thread, then the machine will not slip and the stitching will turn out neat. For topstitching, the stitch width is slightly increased.
Topstitch the collar to the desired width from the top collar side.
For a more even distribution of rigidity, you can strengthen both parts of the stand with a gasket: The inner one (which is adjacent to the neck) - completely along with allowances, and the outer one - without seam allowances.
At the inner stand, iron the stitching allowances into the neckline inside out.
Topstitch the bottom edge of the inner stand at a distance of 7-10 mm from the fold, taking the edge of the ironed seam allowance.
Place the collar on the outer stand (with the reinforced side up), place the inner stand on the collar, align the parts along the cuts, pin and stitch along the top cut of the stands. Please note: the bottom edges of the posts do not match, as the cut of one post is folded in!
Tip: Before sewing the post pieces, fold them in half and check the symmetry of the ends of the collar and posts!
Trim the allowances in the curves of the stand to 1 mm. Trim seam allowances to 5 mm. Turn out the parts of the stand and iron them without a transition edge.
Draw a line on the outer post along the fold of the top post. This will mark the seam for stitching the stand into the neck.
Sewing the collar
Pin the collar and thread it into the neck. Sew the collar into the neckline along the marked seam markings.
Press the seam allowances for attaching the collar onto the stand.
Pin and baste the folded edge of the stand, overlapping the stitching line for the collar with the fold.
Sew the stand along the contour to the edge (at a distance of 1 mm from the edge). It’s better to start stitching from the middle of the top edge of the stand, so you will avoid bartacks in the corners of the stand, where it is thickest.
Collar with bones for office shirts A collar with bones in manufacturing differs from the usual one only in that a part with a drawstring is first fitted onto the part of the lower collar (not reinforced with a gasket), into which the bones are then inserted. In this case, the upper collar is not glued at the corners.
Cut out two corner pieces with the same allowances as the collar pieces. The width of these parts should be such that the collar bones fit on them along the bisector of the angle.
Iron the inner cut of the parts inside out.
Place the parts on the corners of the lower collar, matching the cuts, pin and place the bones along the bisector of the corners of the collar. Draw the width of the seeds.
Stitch the details along the folded edge and bone lines. These are the drawstrings for the bones. Next, process the collar in the same way as described above for a hard collar. Insert the bones after sewing the shirt. Don't forget to take them out before washing and ironing your shirt!
A soft collar for summer shirts is sewn in the same way as a hard one, only the thinnest adhesive pad is used to strengthen it. The parts of the collar, stand and cuffs are glued with a gasket in one layer. Tip: you can also use non-adhesive pads; they strengthen the collar more gently. In this case, the gasket is basted to the parts before grinding them down.
Bottom of the shirt Before processing the bottom, fold the sides of the shelves together and check their length, trim uneven cuts! Fold the bottom allowance once by 7 mm, baste 1 mm from the fold and iron.
After this, turn the seam allowance up again by 7 mm, baste and iron. Only then will the hem of the bottom not worry and gather in curves. Stitch the hem to the edge (1 mm from the edge of the fold).
Loops and buttons
Mark the loops with an aqua marker (traces of such markings can be washed off with water). The loops are marked in the middle of the front and sleeve strip and along it and along the cuff. The loop should be 2-3mm longer than the diameter of the button. Punch the loops, cut them, mark and sew buttons. You can cut the loops with a seam ripper. In order not to cut the loop further than it should be, a needle is inserted into the end of the loop across the loop.)) That's it! All that remains is to finally iron the shirt. Ready!