Why is gabardine interesting?
Gabardine fabric, undeservedly forgotten in modern circles of scissors and needle makers, combines three criteria for an ideal material: ease of use, elegance and high quality. This material is reluctant to get wet in the rain, but still breathes. By choosing the right density of gabardine for clothing, you will never sweat in the summer heat. By the way, both everyday and festive outfits are made from gabardine;)
Nowadays, both 100% gabardine (merino) and mixed fabrics are used. Woolen material is a dense fabric that you will certainly distinguish from many others due to the presence of a raised oblique hem. To reduce the cost of the material and its density, others began to be added to wool fibers:
- polyester - such gabardine will be smooth, with a barely noticeable scar;
- cotton is a thin fabric that is pleasant to the body;
- silk is a shiny, very smooth and thin material.
Modern industry also produces completely artificial fabric, similar to gabardine. It is usually used for sewing bedspreads, curtains and upholstery of upholstered furniture.
A-line dress for plus size people
The A-line dress style is suitable for plus size girls.
Beautiful models of flared dresses with flowers will look perfect in a summer wardrobe, and dark colors are suitable for the autumn-winter season.
Advantages of gabardine dresses
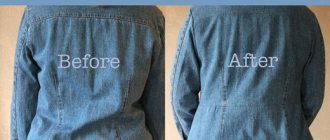
Gabardine is ideal for sewing women's dresses! The fabric holds its shape remarkably well, fitting into even, neat folds. The bottom of the dress does not rise or ride up when moving (this point will be greatly appreciated by lovers of tight skirts).
High-quality gabardine, provided that the washing and drying regime is properly selected, retains its color for a long time. By the way, products made from this material can be washed either by hand or in a washing machine - the fabric does not shrink even after ten washing cycles!
Gabardine is hypoallergenic, so it does not irritate or irritate the skin.
From this material you can sew not only a sheath dress or a summer sundress - the style of the product, depending on the density of the fabric, can be almost any! Gabardine fabric looks good on oversized dresses, maxi dresses with a deep neckline, asymmetrical models with a short front skirt... dozens of different options!
We recommend paying special attention to fitted gabardine dresses - they hide flaws well and emphasize the strengths of the figure. A pencil dress will add volume to the hips and lengthen the legs, visually elongating the female figure.
A short
The short A-line dress is a classic 60s style that is extremely popular today. Such dresses are made with long and puffy sleeves, sleeveless, and decorated with flounces, belts, buttons and other accessories.
A trapeze with a flounce adds volume, so curvy girls should treat this model with caution.
Fitted dresses with flared bottoms are a fashion hit for 2021-2022.
The nuances of sewing gabardine products
Gabardine is an easy-to-work material, but with it you must not forget about three points:
- fabric composition - for summer dresses, choose fabrics with the addition of cotton, linen or silk; for winter dresses, it is better to choose dense 100% merino;
- quality of material - choose only high-quality gabardine, since low-quality fabric can become covered with pills after 5-6 washes;
- The sewn product should be thoroughly steamed (you can steam a piece of fabric before proceeding with cutting and sewing) - such material will drape better.
Midi
Midi dresses do not leave the ratings of the most popular and sought-after models of 2021-2022. The beautiful cut line, flared silhouette and optimal length allow you to wear an a-line dress in everyday life, to work and to any celebration.
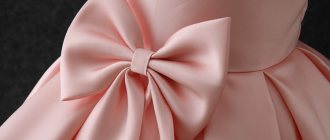
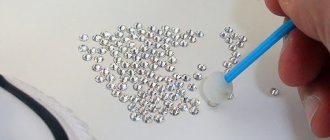
Decor and accessories
You can decorate a finished gabardine dress with beads, rhinestones, or soutache embroidery - this is quite simple, since the material has a porous structure that vaguely resembles canvas.
When choosing accessories, pay attention to the density of the material: the stronger and thicker the fabric, the more reliable the buttons, zipper or any other fastener should be.
Pay attention to the color of the fittings - golden is more suitable for warm-colored fabric (yellow, pink, red), while silver or bronze goes well with cool colors (black, blue).
A-line dress 2021-2022: what to wear with
Fashionable styles of a-line dresses are combined with shoes of different models and styles. For inspiration, see photos of street style looks from Milan Fashion Week
With rough boots and cowboy boots.
A-line dress with sneakers or heeled sandals.
A-line dress with trendy masculine sandals or cute pumps.
How to sew a gabardine dress with your own hands: MK
The full-scale pattern can be found in Burda magazine, March 2015 (page 43, model 108 B).
For work we will need the following tools and materials:
- a piece of gabardine 145 centimeters wide and 2 meters long for 34-44 pp. (as a replacement, you can take any other dress fabric that holds its shape well);
- interlining G 785 size 25x90 centimeters;
- non-woven formband;
- hidden zipper 40 centimeters long;
- foot for sewing a hidden zipper;
- threads;
- sewing machine;
- scissors;
- pencil;
- chalk;
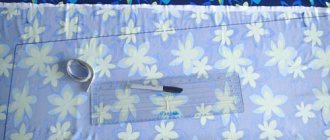
- tracing paper for transferring patterns;
- tape-centimeter;
- pins;
- needle for hand sewing.
The dress pattern in the magazine is marked in pink. We place the tracing paper on the pattern sheet and pin it with pins. We transfer the blanks to the appropriate size by tracing the appropriate line with a pencil. Don't forget about markings and inscriptions!
We determine the dress size by chest circumference:
- 34 rub. – 80 centimeters;
- 36 rub. – 84 centimeters;
- 38 rub. – 88 centimeters;
- 40 rub. – 92 centimeters;
- 42 rub. – 96 centimeters;
- 44 rub. – 100 centimeters.
Pink extra pattern, sheets A and B
- A: child. 1, 2, 3, 4.
- Q: Det. 5, 6, 7, 8.
The layout plan shows the optimal location of the blanks on the fabric. We pin them with pins.
Cut details:
- one blank with a folded front yoke;
- two pieces of a one-piece front bodice with sleeves;
- one blank with a folded back yoke;
- two pieces of a one-piece back bodice with sleeves;
- one blank with a fold of the front skirt fabric;
- one blank with a fold of the back panel of the skirt;
- one blank with a folded front neck facing;
- one blank with a folded facing for the back neckline.
How to sew a gabardine dress: master class
Cutting blanks 1, 3, 5 and 6
Lay out the gabardine in one layer, face up. From the edge up we measure 72 centimeters and pin this place with a pin. We fold the fabric face inward, aligning the edges with the pins. We place paper pattern blanks 1, 3, 5 and 6 on the gabardine to the folds and pin them. Around the paper blanks we mark the seam allowances with chalk: for hemming the bottom - 4 centimeters, for all other cuts - 1.5 centimeters. We cut out the blanks along the allowance lines.
Cutting blanks 2, 4, 7 and 8
We lay out the remaining fabric, then fold it in half lengthwise, facing inward. We place paper blanks 2, 4, 7 and 8 on the gabardine, while blanks 7 and 8 are placed on the fold. We pin it with pins. Using chalk, we outline seam allowances: for hemming the bottom of the sleeves - 4 centimeters, for all other cuts - 1.5 centimeters. We cut out the blanks taking into account allowances.
Interlining G 785
Fold the spacer in half along the top with the adhesive side facing inward. We place paper blanks 7 and 8 on the folded lining to the fold. We pin it with pins. We mark allowances for all cuts of 1.5 centimeters. We cut out the blanks. Iron the interfacing to the underside of the neck facings. Set the iron's thermostat to the "silk" position, move the iron over the pad, holding it in one place for about eight seconds.
Seam lines and markings
We fold the blanks duplicated with the lining in half again, facing inward. We pin the paper blanks. The contours of all components of the pattern (lines of seams and bottom cut), as well as all drawn lines, with the exception of the lines of the grain thread, are transferred to the wrong side of the cut details. At the cutout marks for the zipper and at the transverse marks along the upper cuts of blanks 5 and 6, we make notches of 5 millimeters on the edges of the allowances.
Non-woven formband
We iron the upper sections of both panels of the skirt from the inside out, while the chain seam on the interlining should be aligned with the marked seam line on the cut detail.
Preparing workpieces for assembly
Along the lower edges of the front and back yokes, on both sides of the marked seam lines, we lay seams with large stitches, starting and ending them at a distance of 1 centimeter from the marked relief seam lines. We do not fasten, we leave the ends of the stitch threads to hang down to a length of 5 centimeters.
Raised seams of the dress
We place the details of the one-piece bodice with sleeves on the front yoke face to face. We chop off the relief sections with pins (mark 1). We grind. We apply similar back parts in the same way to the back yoke and cut off the relief sections (mark 2). We grind. We sew the allowances together with a seam and iron them to the line of the middle of the back and front.
Transverse seams
We place the front bodice on the front of the skirt face to face and pin it with pins, starting from the side cuts (mark 5) and ending with the relief seams. Holding the threads of the gathering lines firmly, we tighten the front yoke so that the lower section of the front bodice and the upper section of the front of the skirt are the same length. We distribute the gathering evenly and pin the front yoke. We make a transverse seam. We overcast the seam allowances and iron them upwards. Using the same method, we sew the back bodice to the back panel of the skirt (mark 6).
Shoulder seams and top sleeve seams
Place the front on the back face to face. We cut off the sections of the shoulders and sleeves. We sew, starting and ending the seam exactly at the intended neckline. Press seam allowances and overcast them.
Neck facing
Neck facings (7 blanks and fold them face to face, chop off the shoulder sections. We sew, starting and ending the seams exactly at the intended neckline. We iron and overcast the seam allowances. We also overcast the inner edge of the facing.
We apply the facing to the neckline face to face, matching the shoulder seams. We cut off the neck sections. We grind. We cut seam allowances as close to the seam as possible, and make notches in the rounded areas. We turn the facing of the neck upward and adjust it to the seam allowances of the stitching closer to the seam. We turn the facing inside out. Iron the neckline. We sew the inner edge of the facing by hand to the seam allowances of the shoulders and raised seams of the bodice.
Hidden zipper in left side seam
We place the hidden zipper, unbuttoned, with its upper side along the left side of the back, retreating 5 millimeters from the edge of the allowance. We align the upper teeth of the zipper with the upper cut mark (notch). We sew the zipper between the cut marks using a special foot, the needle of the machine should be located to the left of the teeth.
Fasten the zipper. We place another ribbon on the left side cut of the front and pin it with a pin at the top cut mark. Unzip the zipper again. We sew another ribbon between the cut marks (notches), the sewing machine needle goes to the right of the teeth. Fasten the zipper.
Side seams and bottom sleeve seams
In front, we place it on the back with the right sides inward, pin the left side sections above and below the zipper and the bottom sections of the left sleeve with pins, while turning the end of the zipper towards the edges of the allowances. We sew the sections as close as possible to the ends of the zipper stitching seams. We iron and overcast the seam allowances, and do the same with the allowances along the edges of the cut.
Place the front on the back with the right sides facing inward. We pin the right side and bottom sections of the right sleeve with pins, aligning the transverse seams. We grind. Press seam allowances and overcast them.
Hemming the bottom of the dress and sleeves
We sew the hem allowances for the bottom edge of the dress and the sleeves, then we sew them inside out. Iron them thoroughly and sew them on by hand using hidden stitches.
A-line dress: the history of the creation of the legendary silhouette
The idea of creating the legendary A-line ( or trapezoid style) belongs to the French fashion designer Yves Saint Laurent. The a-line dress first appeared on the catwalk in 1957, when the young couturier was still working at the Christian Dior fashion house.
The Mondrian collection literally revolutionized the fashion world of the 1960s and gave women a comfortable A-shaped silhouette, which replaced the tight and most fitted dresses in the New Look style.
Modern A-line dresses 2021-2022 have different types of cut, style and length. Stylish A-line is not only flared dresses in the style of the 60s, but also feminine, graceful styles with an emphasis on the waist. A fashionable A-line dress 2021-2022 can expand from the chest area or from the waistline, providing a large range for choosing an image and silhouette.
How to sew a shift dress from gabardine: MK
The full-scale pattern can be found in Burda magazine, June 2013 (model 133).
For work we will need the following tools and materials:
- gabardine mixed with the addition of cotton, 140 centimeters wide and 2.1 meters long for 36 rubles; 2.15 meters for 40, 42 rubles; 2.2 meters for 44 rubles;
- interlining G 785 5x20 centimeters;
- elastic band 1 centimeter wide, approximately 70 centimeters long;
- one small tight button;
- threads;
- sewing machine;
- tracing paper;
- pencil;
- sharpened scissors;
- centimeter;
- pins;
- a piece of chalk;
- needle for hand sewing.
Face:
Wrong side:
The dress pattern is highlighted in pink in the magazine, you can easily find it on the pattern sheets.
So, we put the tracing paper on the pattern sheet and pin it with pins. We translate all the components of the pattern into the size that suits you, tracing the corresponding contours with a pencil.
Important! Don't forget about markings and inscriptions!
We glue blanks 3 and 3a along the connection lines. To simplify the cutting process, we translate part 3 again. The pocket marked on part 1 is removed twice as a separate part.
Pink extra pattern on pattern sheets, A and B
- A: child. 1, 3 and 3a.
- Q: Det. 2.
We determine the dress size based on bust measurements:
- 36 rub. – 84 centimeters;
- 38 rub. – 88 centimeters;
- 40 rub. – 92 centimeters;
- 42 rub. – 96 centimeters;
- 44 rub. – 100 centimeters.
The layout plan shows the optimal location of the blanks on the fabric. We pin them to a piece of gabardine 140 centimeters wide.
Cut details:
- one blank with a folded front;
- two pocket blanks;
- one blank with a bend in the back;
- two sleeve blanks.
Patterns for facing the front cut (a), bias tape (b, c) and bias tape for the air loop (d) are not provided on the pattern. We draw these blanks directly on a piece of fabric. The sizes are indicated below in the “Cut” subsection.
How to sew a gabardine dress: master class
Cut
We turn one edge of the canvas (edge) towards the face at a width of 40 centimeters. Place the child on the folded fabric facing inward. 1 and 2. Det. 3 and pockets (1) we place on the face of the canvas laid out in one layer - the right and left blanks are located symmetrically. We pin it with pins. There are children around. We mark the patterns with chalk allowances: for the hem of the lower edge of the sleeves - 3 centimeters, for all remaining cuts - 1.5 centimeters. On a piece of gabardine, we draw out the facing of the front cut (a) 17 centimeters long and 4 centimeters wide. We cut out the blanks.
Bias trim cut
We fold the remaining gabardine so that the edge forms a right angle. Iron the fold slightly. We lay out the material again. Along the ironed fold we draw bias tapes 3 centimeters wide: b) one tape for edging the neckline cut - 60 centimeters; c) two ribbons for edging the edges of the pockets - 50 centimeters; d) one string for an air loop - 7 centimeters. We cut out all the blanks.
Seam lines and markings
We transfer the outlines of the pattern blanks (seam lines and bottom cut) and darts to the wrong side of the detail. cut. We transfer the fold lines, transverse marks for pockets and the front cut line (middle front line) to the face, laying large running stitches.
Front cutout
Along the intended cutout line from the inside out, iron a strip of interfacing 2 centimeters wide. We pin the facing of the neckline over the markings face to face. We sew a seam from the inside around the neckline line. We make a cut between the seams, and make oblique notches in the lower corners, reaching as close to the stitches as possible. We turn the facing inside out. Iron the edges of the cut. We turn the facing sections to a width of 7 millimeters and pin them. From the front side we cut off the cut, retreating 5 millimeters.
Air loop
Fold the bias tape (d) in half, facing inward along the long side. Stepping back 3 millimeters from the fold, we lay a seam. To turn the part out, do not cut the threads on one side. We thread the long ends of the threads from the seams into the eye of a darning needle and tie them tightly. We pull the needle with the eye forward through the “roll” and turn it inside out. We are temporarily putting this part aside.
Shoulder seams
We fold the front and back in half face to face, and pin the sections along the shoulders with pins. We sew the parts, starting and ending the seams exactly at the intended neckline. We cut off all seam allowances as close to the seam as possible, stitch them together and iron them onto the back. We cut off the allowances at the neckline.
Gathering the neck
To gather the neckline, we place a stitch 5 millimeters from the front and back neckline cuts, the stitches are as wide as possible. We lay another seam 5 millimeters from this seam. Firmly holding the bottom threads of the gathering seams, we tighten the neck sections on the seam threads: the front neckline cut to a length of 15.5/16/16/16.5/16.5 centimeters, the back neckline cut to a length of 22/22.5/23/ 23.5/24 centimeters. We tie the threads of the seams. We distribute the assembly evenly along the entire length.
Ironing and stitching the neck tape
To process the neckline, we fold the bias tape in half, inside out, along the long side of the piece. Iron the fold. Lay out the binding. We alternately turn both longitudinal sections inside out to the ironed fold. Iron it. We lay out one cut of the binding again and pin it to the cut of the neckline facing the wrong side, the ends of the binding should protrude beyond the edges of the cut of the front part. We carefully sew the binding into an ironed fold (at a distance of 7 millimeters).
Neck trim
We cut off the ends of the edging trim of the neckline, retreating 7 millimeters from the cut edges of the front. We turn the binding upwards, tucking in the ends. We turn the binding over the face, going around the edges, fold it over and pin it over the stitching seam. From the “roll” that we previously set aside, we form an air loop. At the right edge of the front cut, we insert a loop into the open end of the edging; The length of the loop depends on the size of the button. The bottom edge of the binding for the edging is adjusted to the edge, and the ends of the edging are stitched.
Side seams
We fold the front and back face to face, pin the side sections from the armhole sections to the cut marks with tailor pins, aligning the seam lines. We sew on a sewing machine. We iron the allowances and sew them from the top to the ends of the seams.
Hem hem
We iron the hem allowances for the bottom edge and the allowances along the edges of the side edges inside out, fold them in half and iron them. We sew the lower edge of the dress and the edges of the cuts from the front side at a distance of 7 millimeters, at the upper ends of the cuts - across to the seams.
Sleeves
On the front side of each sleeve we place and sew up folds. The direction is indicated by arrows. Fold the sleeve in half, facing inward. We pin all the cuts together. We sew on a sewing machine. Press seam allowances and overcast them. Turn the sleeve face out.
Bottom sleeve sections
We iron the allowances along the lower edges of the sleeves on the wrong side, turn them up to a width of 1.5 centimeters, baste them and sew them into the edge, leaving 2 centimeters in the lines open for threading elastic ribbons. From the elastic braid we cut two pieces 30/31/32/33/34 centimeters long and thread them into the drawstrings. We sew the ends of the ribbons at a width of 1 centimeter. We sew open areas of stitches manually or using a sewing machine.
Sleeves
We pin both sleeves with pins, first only to the bottom of the armholes, matching the stitching of the sleeve with the side seam, as well as transverse marks 4 on the front armhole and on the sleeve. From the inside out, first we combine the upper transverse mark on the sleeve collar with the seam on the shoulder, then we chop off the collar with the armhole. We sew in the sleeves.
From the sleeve side, we sew each sleeve into the armhole, starting from the seam of the sleeve. To easily remove the basting, we lay the seam close to the basting stitches. We sew the allowances for the sleeve seam together and turn them over the sleeve. We remove the basting.
Pockets
We cut off the allowances along the rounded edge of each pocket. We edge this cut with bias tape, as we did earlier, but we do not tuck the ends of the tape for edging. We iron the allowance along the straight cut of the pocket (the entrance to the pocket) on the wrong side, turn it under and stitch it on the front side, retreating 5 millimeters.
We pin each pocket to the front part between the transverse marks, aligning the entrance to the pocket with the side seam. We customize the pocket by placing a stitch in the existing seam of the pocket edging. We cover the button with fabric and sew the front part to the edging at the left edge of the cut.
Making a print
If you would like to repeat the print of this model, its description can be found in Burda magazine, June 2013, page 75.
How to sew a dress, shirt and T-shirt using one pattern: MK
This master class is suitable for sewing several models of clothing: dresses with dropped shoulders, nightgowns and T-shirts.
The description and pattern of the gabardine dress is presented for sizes 34, 36, 38, 40, 42.
The length of the finished product is 103 centimeters.
For work we will need the following tools and materials:
- a piece of gabardine or wool crepe 1.5 meters wide and 1.5/1.55/1.55/2.2/2.2 meters long;
- grosgrain ribbon 45-40 centimeters long and 2 centimeters wide;
- cotton ribbon 60 centimeters long and 1 centimeter wide.
- darning needle;
- threads;
- sharpened scissors;
- sewing machine;
- tracing paper;
- pencil.
Pattern for summer dresses made of gabardine
We make patterns on tracing paper for the details of the front (a), back (b), sleeves and burlap pocket in full size.
The front looks like this:
The paper back piece has the following appearance:
Sleeve drawing:
The full size burlap pocket looks like this:
All dimensions in the drawings are given in centimeters.
To make it easier for you to navigate the drawings, we have translated the terms from German into Russian:
- fadenlauf – direction of the longitudinal thread;
- saum – hem of the lower cut;
- schulter – shoulder cut;
- vorne – front detail;
- rueckwaertigeMitte – middle of the back;
- stoffbruch – fold of fabric;
- vordereMitte – the middle of the front part;
- naht - line.
Don’t forget to add allowances: for hemming the bottom edge of the dress and sleeves – 4 centimeters, for all other edges – 1.5 centimeters.
How to sew a gabardine dress: master class
Cut
Cut details:
- two front blanks;
- one blank with a bend in the back;
- two sleeve blanks;
- four blanks of burlap pocket.
The layout of parts on a piece of fabric for sizes 34-38 is as follows:
The layout of parts on a piece of fabric for sizes 40-42 is as follows:
Seams on front and back parts
We carry out the middle stitch along the front part, while starting the seam exactly at the transverse mark. Iron seam allowances. We make seams on the shoulders, aligning the transverse marks of the upper cut of the back with the outlined contours of the neckline of the front part. At the same time, we do not grind the allowances along the neckline of the front part. Press the shoulder seam allowances. We iron the seam allowances along the neckline inside out, turn them up to a width of 8 millimeters and stitch them.
Sleeves and side seams
We sew the sleeves to the front and back parts between the transverse marks. We turn the sleeve allowances that remain free at the ends of the seams upward and pin them together. We stitch the side seams from the seams of the sleeves to the bottom, leaving the entrances to the pockets open. We remove the pins. We make the seams of the sleeves.
Pockets and seams
We pin the burlap pockets individually to the pocket entrance allowances, right side to front, and sew along the pocket entrance exactly along the side seam line. We iron the burlap in advance and grind it down.
Hem
We iron the hem allowances for the bottom edge of the dress and sleeves inside out, and sew them by hand with a blind seam.
Gathering tapes
We apply the grosgrain ribbon from the inside out to the left shoulder seam and then to the left sleeve along the marked shoulder line. We pin the ribbon with the fabric using pins. We tuck one end of the tape near the finishing seam along the neckline, the other - 7 millimeters above the bottom edge of the sleeve. We stitch the grosgrain ribbon along the longitudinal edges to the edge, but do not stitch the ends of the ribbon. We thread the cotton tape into the drawstring along the shoulder seam and sleeve. At the neckline, pull the end of the cotton ribbon outward by 3 centimeters, turn it to the wrong side, turn it over and adjust it onto the grosgrain ribbon so that it forms a loop. We tighten the left sleeve and the same shoulder seam with tape to 20 centimeters, holding the second end of the tape. We do not tighten the last 4 centimeters to the bottom edge of the sleeve. We turn the bottom edge of the sleeve to a width of 4 centimeters on the wrong side. We put a cotton ribbon on the wrong side of the drawstring, thread the end of the ribbon into a loop and tie it.