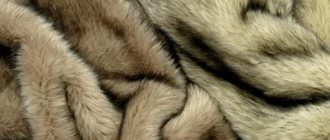
Things made from natural fur are not cheap, so they are bought not for one season, but for several years. During prolonged wear, the appearance of the product suffers: the fur wears out and becomes dull. How to restore your favorite fur coat to its former glory? Of course, you can take it to the dry cleaner, which means spending money, or you can dye the fur at home, thereby breathing new life into the fur item.
During prolonged wear, the appearance of the fur coat suffers: the fur wears out and becomes dull. One possible solution to the problem is to dye the fur of the fur coat in a different color.
About painting
Dyeing fur with hair dye at home is now widespread. The fur of mink, khanorika, kolinsky, marten, muskrat and other animals can be painted with durable household cream paints. Currently, there are a large number of different cream paints on the market, prices range from several hundred to tens of rubles.
To dye fur, it is advisable to choose a paint that is not expensive, light-resistant and resistant to the aquatic environment. It is very convenient to paint small skins, pieces and ready-made fur caps for hats with such paints. One or two packs are required for one skin, depending on the size of the fur and the fur. Paint consists of the contents of two tubes: a tube of paint and a tube of oxidizing agent (peroxide). After mixing the contents of two tubes in a separate container, the paint is applied as a spread and rubbed into the fur with a swab.
Spread paint application
When dyeing fur with oxidizing or acidic dyes, many inconveniences arise. For example, when painting with oxidizing dyes, it is not advisable to paint one or two skins or a sewn fur cap for a hat, since several components are required: black urzol for fur D, pyrocatechin or resorcinol, ammonia 25%, salt and oxidizing agent (perhydrol 30%). Before painting, the fur must be etched in a chromium paint in an acidic environment. The etching and painting processes are lengthy and take up almost the entire daylight hours; painting is carried out using the dip method in separate baths at a temperature of 35 -38 degrees.
When dyeing fur with acid dyes, the skins must be tanned with an increased amount of chrome tanning agent so that the skins do not cook. The temperature of the dye solution is 60 - 65 degrees.
It is not advisable to dye fur in small quantities; it is more economical to prepare a batch of skins and spend the entire daylight hours on dyeing.
When dyeing fur with hair dyes, everything is much simpler; you can dye one or two skins in 1 - 2 hours, using a spread method, rubbing the dye into the fur. This wastes one or two packs of paint. The costs are small.
How to choose paint?
Restoring your favorite item will require some time and effort. Choosing paint is the first task that needs to be resolved before starting work. To decide on the right color, it’s enough to imagine the product after dyeing and understand how you want to see it. If the owner only plans to restore things to their lost beauty, shades that are as close to natural as possible suit him. Whereas a radical change in color implies a careful choice of dye.
Faux fur is dyed using standard hair dye. It is important that the mixture is of high quality, provides a stable result and does not spoil the material. Shampoos and tonics will help those who are only going to slightly “refresh” their clothes or accessories without radically changing their color.
What hair dyes can you use?
From a large number of household cream paints, you need to choose paints that provide dyed fur with good resistance to light, water and mechanical stress. When painting mink fur, depending on whether the fur is old or new, the paint consumption is small. If we need to dye skins with long-haired fur (Arctic fox, fox, silver fox or sable), paint consumption increases significantly, especially when dyeing light skins in dark colors and new fur. In this case, the issue of price is acute.
For dyeing mink, muskrat and other fur skins, the following stable household cream hair dyes have proven themselves to be effective: FARA, IMPRESION +, PRESTIGE. Dyed items retain their color for 2–3 years, are not washed off with water, and are almost indistinguishable in color from natural, undyed skins.
Paints Fara, Impression, Prestige
Preparing for painting
To dye fur, you must first prepare it. During wear, dirt accumulates on the surface of the product: particles of dust and grease. You cannot wash fur items using conventional methods, but before painting you need to thoroughly clean the surface to be treated so that the paint lays evenly and penetrates well into the fibers. What to do? You should carefully treat the fur with an alkaline solution , which will dissolve fat and remove dust particles.
Before painting, the fur should be cleaned: carefully treated with an alkaline solution
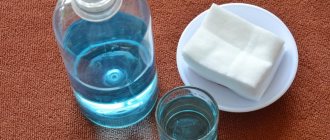
It’s easy to prepare the mixture: add 3 tsp to 1 liter of water. salt, 2 tsp. soda, 1 tbsp. l. dishwashing detergent and 5 g of ammonia. But here is another option: water, vinegar and alcohol are taken in equal proportions. All components of the solution must be thoroughly mixed, the dry components must be completely dissolved.
You can clean a variety of types of fur with this liquid, for example, mink, silver fox, arctic fox, fox or rabbit. It is possible that after such simple cleaning the appearance of the product will improve and the need for painting will simply disappear.
Perhaps after cleaning the appearance of the fur coat will improve and you will change your mind about dyeing it.
Before applying the resulting solution to the fur, you need to treat its underside - the inner side. The fact is that skins can crack or become deformed after getting wet. Therefore, after the color is restored, you may be in for an unpleasant surprise - the product will decrease in size or simply lose its shape. To prevent this from happening, it is best to properly treat the lining with glycerin or any nourishing and fatty cream , which will require carefully ripping open the lining.
After processing the skin, the fur is carefully laid out on a flat surface and an alkaline solution is applied. It is best to distribute it over the surface of the product using a brush. With this treatment, the liquid will be distributed along the entire length of the villi. Then the product must be thoroughly rinsed from the fur and proceed directly to dyeing.
Selection of shades for different fur colors
You need to dye the fur in a tone that will be an order of magnitude darker than the existing one. For example, if you need to dye brown mink fur, be sure to use a darker dye. FARA paint – dark brown No. 502 is suitable for natural brown mink. Mink fur, like any other, is dyed differently. New fur that has not been exposed to sunlight (new skins) dyes very poorly; you have to increase the concentration of dye by adding a darker one.
So, for example: you can add half a tube of black paint No. 501 to dark brown paint FARA No. 502. You can increase the concentration even more by adding half a tube of dark brown paint No. 502 to a tube of black No. 501.
New mink or muskrat fur does not dye well, so often after drying it has to be re-dyed in the same way to achieve dark shades. Old (worn) fur of mink, muskrat and other animals, which has been exposed to sunlight, dyes much better and the longer the fur is worn, the more intense the color. Within 30 minutes to an hour, the skin is completely painted with dark brown FARA dye No. 502 or No. 501.
Tinted shampoo IRIDA
Light tones of fur, for example: gray or blue mink, are better tinted in the same tone with hair dye - IRIDA. For yellow or white mink it is also better to choose paint to match. After dyeing, the fur is renewed, the color becomes brighter and more saturated. Light new skins are difficult to dye in dark tones; it is often necessary to repaint them, increasing the concentration according to the method described above. There are no such problems with old light fur; it can be easily dyed black or brown.
It is better to tint long-haired fur (arctic fox, fox) in a natural color, choosing paint according to color. When painting in dark colors, and even when the skins are new, much more paint is used.
Photo tips on how to dye fur
How to iron shirts - tips on how to properly iron men's and women's shirts (85 photos + video)- How to iron trousers with creases: step-by-step instructions on how to properly iron classic trousers (tips + 110 photos and videos)
How to dry sneakers: how to quickly and easily dry sneakers after washing (75 photo ideas)
Read here How to put things in a closet - compact storage methods and useful tips for organizing your wardrobe (115 photos and videos)
Did you like the article? Share 
0
1
Preparing the product for painting
Worn and moth-eaten areas
Fur skins, individual pieces or a ready-made sewn fur cap for a hat need to be prepared for painting. Fur pelts must first be tested for exposure to water. Fur, before dyeing, must be degreased and cleaned of dirt by washing. Then it is thoroughly washed in water, dyed, washed and washed again. Skins, due to long-term storage or wear, new skins due to improper dressing may lose their strength and, when exposed to water, swell and tear. That's why all skins need to be tested for water before painting. Separate pieces or thin places of the skin are soaked or thrown into a bowl with warm water and observed for 10 - 15 minutes; if nothing happens to the skins, they remain strong, such skins can be dyed. It happens the other way around: the skins swell, tear when stretched a little, and even worse, become limp, like blotting paper. Such skins must be discarded, otherwise big problems will arise.
Before painting, defects on the skins are eliminated: bald spots, worn out and moth-eaten areas, bites and tears. These places are cut out in the shape of a fish, inserts are sewn in, or simply cut out and stitched. Weak skins, especially at the seams, are strengthened by gluing strips of spunbond non-woven material or non-woven material with MOMENT 1 glue. MOMENT 1 glue is ideal for skins.
Coloring stages
First you need to prepare for staining.
You need to put the fur coat on the table. If only the collar needs dyeing, it is better to protrude it. It is also important to test the paint tolerance on a small section of the product. To do this, the composition is applied to the sample. If after the procedure there is no damage to the villi or inner parts, and the color suits you, you can begin painting the product. For the procedure you need to use a special brush. Apply the paint evenly so that the shade is even on both the top and deep layers. After 40 minutes, remove the product with warm water. It is not necessary to paint a fur coat in one tone - highlighting will be an original solution. To do this, the painted ends are wrapped in foil. After some time, the foil is removed. Highlighting looks luxurious and rich. This staggered procedure also looks original. It is recommended to carry out the procedure with a suede treatment product.
Note!
Before the procedure, you need to study the characteristics of the material; some types, such as mink, are difficult to dye. Therefore, more helmets will be required.
The process of dyeing natural fur with hair dye
Before dyeing, a fur skin or a fur cap for a hat, which you have cut out and sewn from whole skins or worn fur (an old hat or collar), must be degreased by washing, since oily and dirty hair does not dye well. Unpainted areas and stains appear.
Prepare water at room temperature in a cup, add washing powder in a small amount and wash gently. The skins should already be tested for water, as sometimes the skins swell and tear from water. To prevent the skins from tearing, wash them without sudden movements and try not to twist them when squeezing. After washing, the skin is rinsed in clean warm water, lightly wrung out and prepared for painting.
Paint preparation process
The paint is prepared according to the instructions included in the box. Squeeze the hair dye and oxidizing agent (peroxide) out of the tube into a separate bowl and mix everything well. The paint is spread onto the skin or a sewn fur cap using a sponge and rubbed into the fur. The skin is rolled up and placed in a cup. After 10 - 15 minutes they come up and rub the paint well into the fur again. They constantly watch how the skin is dyed. After half an hour, darkening of the fur appears (if the mink is dyed brown), the longer the dyeing, the darker the color. Worn fur dyes faster.
At the end of painting, the skin is rinsed in clean warm water, and then washed with powder in warm water, rinsed several times until clean water. The skin is wrapped in a towel and gently squeezed without twisting, so as not to tear. Then the skin needs to be dried.
How to dye faux fur correctly
Tinting faux fur
When dyeing, the main thing is to achieve uniform application of paint to each area of the product. To get a good result, the fur should be stretched and secured with clothespins on a board, table, or chair.
The paint is diluted according to the manufacturer's instructions, and you can use a small clothes brush to apply the mixture to the fabric. You should dye the fur in the direction of the pile, pressing lightly on the brush to paint the fabric base.
Having distributed the coloring composition evenly over the surface of the material, you need to leave the product for the time specified in the instructions so that the paint is thoroughly absorbed and fixed to the fibers. Then the fur is carefully washed with water, and where necessary, the remaining dye is removed with a damp swab. Do not rub the fibers too hard against each other to avoid damaging the structure.
Immediately after dyeing, the still wet fur should be combed with a sparse comb with rounded ends, and then leave the product to dry completely. Dry fur should be combed again, giving the pile the desired direction.
How to dry fur properly
Old-style vacuum cleaner
To dry dyed fur, you need to use a hair dryer; it is best and more effective to use an old-style vacuum cleaner with reverse draft. Under the influence of an air stream, the fur quickly dries and fluffs up. If these are new skins and not cut along the belly, they can be pulled over the rules with the fur outward and dried. The cut ones are stretched with nails on the shield with the fur facing out, after drying they are removed and crumpled. Such dyed skins can later be used to sew new hats or repair fur coats. Finished sewn and dyed fur caps for hats made by molding are dried with an air stream and, half-baked, pulled onto the block.
When repairing mink coats, it is sometimes necessary to tint the brown fur directly on the coats. The paint is rubbed with a swab into the faded area, after painting it is quickly washed off with water and dried with an air stream.
How to dye mouton fur
Mouton fur is a popular material among fashionistas. A fur coat made from this material is very warm and comfortable. But even such high-quality fur loses its original appearance. It is easy to restore its attractiveness if the coloring is carried out taking into account the characteristics of the material. Painting this fur yourself is no different from manipulating other types.
Mouton has a thick, dense structure, so its processing will require more paint than usual. It is important to distribute the coloring pigments evenly. This will ensure that the villi are stained. Before the procedure, it is better to test the paint on a small piece of the product. If problems arise, it is better to trust the professionals and refuse to paint the house.
A little about secrets...
When making fur hats using the mold method, when sewing fur caps, sometimes it is necessary to insert light fur. After dyeing, pulling a fur cap over the block and drying, it turns out that light fur has a different color. In this case, you can tint the skin directly on the deck by removing the nails. High concentration paint is applied a second time to the unpainted area. After dyeing, the paint is washed off and the fur is quickly dried with an air stream.
As a result of prolonged wear and strong exposure to sunlight, mink fur becomes hard to the touch; such fur must be checked before cutting. A piece of such fur is dyed separately, after drying the fur is dyed disgustingly, the ends of the hair turn grey, the color is very bad. Sometimes, in a hurry, such fur appears on the finished cap, then you need to cut out this piece and replace it with a good one.
Often relying on the quality of the skin, it turns out that after dyeing the skin begins to tear. You can get out of this situation, pull the dried cap onto the finished block and glue the entire cap with pieces of spunbond using MOMENT 1 glue. When pulled onto the finished block, the skin will no longer tear.
When sewing a fur cap for a hat made by molding, you need to remember that the skins decrease in size after dyeing and drying, so the cap is cut out larger in the beat.
Features of painting a mink coat
A mink coat has an excellent appearance. However, over time it also begins to fade, so painting the fur coat is inevitable. The procedure should not cause difficulties, adhere to the following scheme:
- First you need to clean the fur from dirt, then apply a rich cream to the inside.
- Moisten the villi with water by spraying them with a spray bottle.
- It is also better to apply paint using a spray bottle, after diluting it with water.
- Comb the fur with a comb and wait about half an hour.
- Remove the paint with warm water and shampoo, then rinse with conditioner and rinse the product again.
- Re-treat the inside with cream, comb the villi in the desired direction.
- Hang the fur coat to dry on a hanger.
Other dyeing methods
Fur can be dyed in many ways. For these purposes, there are oxidative, direct, active, acidic and a whole range of dyes, including natural preparations. When painting, the dipping method is mainly used and, less often, the spreading method. All these methods are labor-intensive and require, in addition to the use of basic dyes, a whole range of additional preparations.
Aerosol paint spraying
When dyeing fur at home, it takes all daylight hours. A finished fur product (hat, fur coat, vest) cannot be dyed using the dipping method; it is necessary to separate the fur skin from the lining material, and during painting the skins may shrink, and the skins decrease in size when drying. You can tint some defective areas (worn or faded), for example, on a fur coat or hat, by rubbing the paint into the fur using a spread method, and then quickly rinse with water and dry. With this method, household cream hair dyes have proven themselves to be excellent. Sometimes such problem areas are tinted with aerosols by spraying paint.
How to clean and dye natural fur at home
In this small master class I will show you how you can clean and tint yellowed natural fur at home.
I will say right away that any fur can be cleaned in this way, but the process of dyeing or tinting is only suitable for small fur products, their parts, elements.
It is impossible to dye the entire fur coat in this way, because... you will not be able to ensure uniform coloring of all the fur in the product.
For cleaning and subsequent tinting we will need:
1. Cotton pads or white cotton cloth for wiping
2. Alcohol or vodka
3. Spray paint for fur, FURASOL or Salamander (exactly for fur!)
4. Comb (comb) or brush for combing fur
5. PVC film to protect the table surface from paint
6. Rubber or any other waterproof gloves to avoid getting paint on your hands.
and, in fact, the fur itself.
I will show the whole process on a piece of fur from an old gray-blue mink, yellowed with age.
I'll try to restore her lost beautiful look.
First, I comb the fur thoroughly, running the comb in the direction of hair growth, and then in the exact opposite direction. And so I comb back and forth several more times.
I try to comb the underfur completely, but without “strong zeal” so as not to comb out too much.
Then I wipe it with a cotton pad moistened with vodka (or alcohol) and clean the surface of the fur from dust, at the same time degreasing it and preparing it for tinting with spray paint.
This must be done carefully so as not to wet the leather part (the skin itself), only the fur. I wipe, if necessary, also in different directions, replacing the cotton pad with a new one if necessary.
The main thing is not to wet the skin - this is important!
After the fur is cleaned, I comb it again and leave it on the table until it dries completely under natural conditions.
When the fur is completely dry, I will definitely comb it again.
In this way, you can clean not only the fur on your handbag, collar or other fur accessories, you can also clean some dirty places on your fur coat.
Now that the mink fur is completely dry, let's start tinting it.
I select the spray paint closest to the shade or sometimes a little brighter (depending on the desired result).
Important!
- Always choose paint only for fur!
If, for example, you take a spray paint intended for leather, after treatment the fur will stick together and become even worse than before.
- Be sure to try it on a very small piece or in an inconspicuous place first!
Rarely, but there are cases when the chemical composition of the paint in contact with the chemical composition of the processed fur can give an unpredictable reaction! For example, go green!
Therefore, it is very important to first test your fur for reaction.
So, let's paint))
Be sure to spray the paint evenly, from a distance of approximately 20-25 cm, slightly at an angle to the horizontal surface of the fur. If you don’t have any experience with this, it’s better to try it on a piece of fur first. You can even just use a blank sheet of paper to feel how hard you press and how evenly the paint will apply.
.Spread the film, put on gloves and spray! I also have a white sheet of paper underneath (to absorb excess paint, but this is not necessary).
To illustrate the result, I paint only half a piece of mink, quickly rubbing the paint with light movements to ensure uniform coloring:
Then I comb it and leave it alone for a while to dry naturally.
When it dries, the color becomes less intense and if this effect is not enough for you, you can repeat the spraying. The main thing is to do it evenly and from the right distance.
For not very old, slightly yellowed fur, you only need to spray a little paint. Then you get a soft, pleasant shade.
In my case, the fur is old, yellowed and very faded, so I repeat the whole process again:
And now I’m already waiting for it to dry completely, I recommend at least 24 hours.
Then it is advisable to comb it: in the direction of hair growth, against the direction of hair growth and finish in the direction.
Shake and admire the result!
Well, as they say, feel the difference!
I'll add two more important points:
1. When working with fur, protect the leather part (inner) of your product from moisture (alcohol, paint...) If suddenly such an oversight occurs, under no circumstances use any drying devices! Natural drying only.
2. If you feel that you have applied too much paint: while still wet, you can lightly evenly touch the surface of the fur to remove a little excess paint using a piece of white cotton cloth or a cotton pad. If this is not enough, you can lightly dampen a cloth with alcohol and repeat. Then be sure to comb the fur and let it dry.
In parallel with the gray mink, I tinted a piece of very yellowed white mink with the same paint (also not completely, for comparison):
For hiding heavily yellowed fur, this is a good result.
But, I want to draw your attention to the fact that if you look closely: the long (guard) hairs of the once snow-white bleached mink are difficult to dye, although in general the effect is not bad.
I tried to show in more detail and collect here all the most important information on this topic. I hope it will help you and be useful in caring for your furry products!
If you have any questions, I will be happy to answer!
This is my first master class for you, I will be very, very glad for your support 
Thank you!
Your Tatyana
Spray for coloring fur
Often finished fur products (hats, fur coats) look excellent when worn for a long time, but faded spots appear in some places. In this case, there is no need to paint the entire thing; it is enough to touch up the problem areas with a spray.
To dye fur, you can use aerosol paint for caring for suede. It consists of metal cans of spray paint.
Aerosol for suede care
You need to choose the right shade correctly, otherwise the dyed fur will differ sharply from the main one. The area that needs to be tinted is cleaned of dirt and can be degreased with alcohol and wiped with a swab. It is advisable to cover the fur with any material, except for tinted spots. We spray the paint at a distance of 30 -40 cm so that the fur does not stick together and a uniform color is obtained. In this way you can get an excellent result, the painted areas will not differ much from natural fur, the paint will last for several months.
Coloring the flesh
The inner layer is the top layer of skin on which the fur is attached. Usually it is light, but it also has to be processed, especially old products with thinning pile. The finished silver fox product, where the flesh is too transparent, is easier to process with a black marker. So, the fur coat will look thick, and the inner layer will be less noticeable.
If it is a skin, the inside is painted with paint for leather and fabric. Then it needs to be treated with a rich cream (to soften it). Home dyeing is a risky undertaking, because there is a high probability of damage to the product. If the procedure is unavoidable, use shampoo with a coloring effect or tinting dye. You should purchase quality paints. Their application must be careful - you can harm your skin and the product.
Caring for dyed fur
As a result of painting fur skins, individual pieces, fur caps for hats with persistent household cream hair dyes, carried out using the spread method, by rubbing the paint into the fur, we obtain a stable color. The paint is resistant to light, water and mechanical stress when wearing fur for a long time. Such items do not require special care; the requirements are the same as for any fur product.
The requirements for fur dyed by spraying are completely different. The color is not particularly durable, so it is better to protect such a product from the influence of light, water, mechanical stress and elevated temperature.
In order for the dye to stick better and the fur to shine, it can be treated with a special balm for the care of dyed hair. After this treatment, the fur becomes softer and fluffier.
Fur products require daily care, combing more often, and require thorough cleaning. Much depends on proper storage. Fur should be covered and stored in a dark place.
How to care for a fur product after dyeing
If the fur was dyed using a spread method (using paint), the result would be a color that is resistant to moisture and ultraviolet radiation. The shade will remain for another 2-4 seasons. The main thing in a painted product is not to get caught in the rain. The wet pile should be immediately dried with a stream of cool air and combed.
If the fur is painted by spraying, that is, using aerosol paint, the color will not last long.
After all, such a coloring agent only tints the pile. The paint will remain on your hands and objects in contact with the fur (on your bag, belt). The shade will easily come off if your fur coat is caught in heavy snow. The wet pile should be dried with a stream of cold air and combed. Faded areas can be re-touched with spray.
Express method
Specially designed fur dyes, which are available in aerosol form, will help you quickly refresh your fur product.
Using this spray can is quite simple. Keep it at a distance of 20-25 cm and spray one by one on individual strands. To prevent the pile from sticking together, periodically comb it with a comb.
Manufacturers position this treatment as tinting. Deep coloring cannot be achieved using this method. It is good when you do not want drastic changes, but want to disguise minor defects. For example, yellowed tips or spots. This can is also convenient for stenciling. The color range of coloring aerosols is classic: white, black, shades of brown and gray.
Paint for fur products
Since natural fur is similar in structure to human hair, it is recommended to dye it using hair coloring compounds. Don't save money. The higher quality and durable paint you buy, the better results you will be able to achieve. Try to choose a shade 1-2 shades darker than the existing base color. Trying to paint too lightly can give the most unexpected results, so if you want to get a lighter color, it is better to turn to a professional.
In order to return the natural color to white fur that has yellowed over time, first lighten it before dyeing. To do this, treat the villi with hydrogen peroxide. Do not over-expose the peroxide, otherwise the villi may deteriorate.
It is important to know
The stretch remains until the product dries completely, otherwise a change in its size is inevitable. The item can not only shrink, but also stretch unsightly, as a result of which it will look even worse than before work. It is not always possible to achieve the desired color the first time you dye it (especially if you have no experience). In this case, it is allowed to subject the artificial fur to this procedure again. It is only important that at least 10 days have passed since the first attempt.
You also need to understand that the result depends on the degree of wear. Unfortunately, not all products that have been in use for a long time are subject to rehabilitation.
How to lighten arctic fox fur
This method is great for whitening yellowed Arctic fox items or making a dark Arctic fox lighter. To do this, you will need a hair bleaching compound or simple hydrogen peroxide. When using clarifiers, follow the instructions included with them.
Dissolve peroxide tablets in water, apply the solution to the fur and leave to act for 15 minutes. It is not advisable to leave it for more than a quarter of an hour, as the pile may thin out and become brittle.
Rinse the product and dry it. Then you can tint it to your desired shade. You should not lighten the fur of an arctic fox more than once, otherwise you risk damaging it irrevocably.
Cleaning from contaminants
They begin manipulation after freeing the fur product from the lining. After which the inner layer should be lubricated with glycerin or fatty cream - this will prevent it from drying out.
Dirty fur is more difficult to dye, and the shade may turn out unexpected. Therefore, you need to clean the pile using the following composition:
- water – 1 l;
- salt - 2 teaspoons. spoons;
- ammonia (ammonia) - 1 teaspoon. spoon;
- detergent – 1 teaspoon. spoon;
- baking soda - 2 tsp. spoons.
The fur is treated with a cleaning mixture using a brush. After which the fur product is dried naturally at room temperature.
How to paint the interior?
If you are concerned about the light flesh or the fur is thinned out in places and the skin is visible through it, then you can dye the flesh in the desired color.
If we are talking about a finished product, you can use a marker that matches the color of the fur. If we are talking about skins, use paints to color the skin. Afterwards, the flesh must be softened with rich cream!
Dyeing finished products at home is often a lottery, but if you don’t mind an old fur coat, then you can experiment and use tinting shampoos to give the desired shade, different colors.
Oddly enough, cheap domestic hair dyes or bleaches give good lasting results (but they also need to be tested on pieces), and you will also have to experiment with time, because many of them have killer compositions. You can apply this paint and keep it until you get the desired shade.
To visualize how to dye fur or flesh, watch the video. There are two of them, which is usually enough to get an impression of the process.
