Being an exclusively men's item of clothing, the shirt has long migrated into the women's wardrobe and has become so firmly entrenched in it that it is almost impossible to imagine any fashionista's closet without this universal item. Shirts accompany us throughout our lives and form the basis of not only a business, but also an everyday look. Despite all the variety of models in stores, making a stylish and practical thing with your own hands is not difficult even for novice needlewomen. We offer a detailed master class with step-by-step photos, describing how to sew a stylish and simple women's shirt of various styles with your own hands.
Children's sweatpants
Free panties pattern from Katya Mkhitaryan (size 74-170 cm). Since I sew from very thick knitwear, I decided to make the pants without a side seam and without pockets, and the seam allowances were made not 1, but 1.5 cm. I glued the pattern of the front and back halves of the trousers together at the side cut, and also glued the pocket pattern with the front half in the appropriate place. The belt and cuffs are usually made from ribbed or cash-corse, but I made them from basic knitwear. I also added the belt pattern to the trousers pattern, as shown in the photo below.
We cut 2 parts of the trousers in a mirror image and 2 parts for the cuffs.
We bend each leg and grind the inner step edge where it is marked with clips.
We turn one pant leg inside out and insert it into the other face to face. We sew down the middle section (seat seam), where it is marked with clips.
Turn the trousers right side out.
We bend the strips for the cuffs and sew them into a ring, where they are marked with clips.
Bend the cuffs in a circle so that the seams remain inside.
We insert the cuffs into the trouser legs and stitch them in a circle, stretching the cuff a little.
We sew the upper section of the trousers (where the belt is) on an overlocker and bend it to the wrong side by 3-4 cm.
Cut the elastic a couple of centimeters less than the waist circumference and sew it into a ring. We insert the elastic band inside the waistband and make a straight stitch in a circle.
To prevent the elastic from twisting while wearing, I laid 2 lines in a circle at equal distances, as shown in the photo below.
Warm sweatpants are ready.
This is interesting: Pattern Sweatshirt with Christmas tree
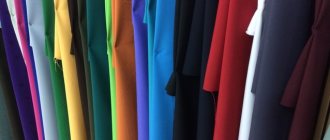
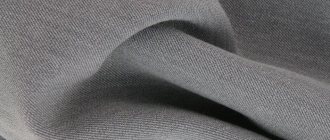
How to choose material
The appearance of any dress depends on the type of fabric that was chosen for sewing. There are several basic options for materials that are most often used for sewing this style of product:
Original wrap dress
- Velvet and satin are textiles that are suitable for creating a festive option. Going out in such a dress will definitely create a sensation.
- Linen and cotton are summer options that are ideal for evening walks, visiting the beach, or picnics.
- Knitwear is a standard and universal type of textile from which models for everyday use are made.
- Chiffon and silk are lightweight fabrics that will add romance to your look. Ideal for dates and visiting restaurants and cafes.
- Knitted fabrics, like knitwear, are classified as an everyday type of material.
Fabric for sewing
Please note! It is recommended to use exclusively natural material to avoid the troubles that arise when using synthetic fabrics.
You need to consider what event the item will be worn for. Individual preference will also help you make the right choice.
The benefits of making your own hoodie
As with any clothing, there are many benefits to making your own. The most notable of them are:
- Independent choice of high-quality fabric and its colors.
- The ability to sew a product that will look perfect and fit your figure.
Raglan sleeve
- Investing your soul and strength into the process of sewing clothes, which makes it more original and of higher quality.
- Pleasant psychological sensations from the process of work and wear.
- Opportunity to practice and achieve professional heights.
Important! There are also disadvantages to this type of hobby. At first, you will have to spend a lot of time creating patterns and sewing. Also, not everyone may like the process of sewing: some find it boring, others are ready to spend money on store-bought items.
Self-sewing is a useful hobby
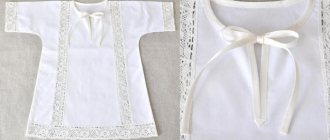
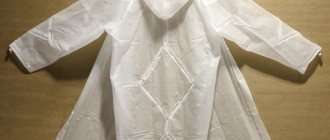
What is a christening shirt
The baptismal shirt is the first piece of clothing that a child is dressed in after the baptism procedure. According to the rules, such a shirt should be long and light-colored, mainly made from natural fabrics. Traditionally, the shirt is provided by the godparents.
Attention! There is a special pointer on the screw handle that helps the craftswoman find the correct grip, thread management, finding the tongue slot, etc.
Sweatshirt with set-in sleeves
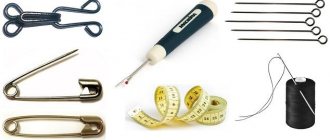
We will need:
- knitted fabric – footer, capitonium;
- material for cuffs - ribana, cashkorse, if desired, parts can be made of capitonium;
- threads, sewing tools.
Description and master class
A simple pattern for size 42/44 is shown in the photo below.
We mark the contours of the parts, laying out the patterns on the fabric. Cut with seam allowances. Next, we proceed to sewing the sweatshirt.
We sew the shoulder seams and sew the sleeves into the armholes.
Sew side seams and sleeve seams.
For the cuffs, we cut out two strips 12 by 21.5 cm and one 12 by 85 cm. To process the neckline - a strip 5.5 cm wide, length - as measured plus seam allowances. The part can be either one-piece or made from parts with a seam in the center.
Sew on the cuffs and facing.
Patterns of the same model of women's sweatshirt for three more sizes:
- 40 solution;
- 54 solution;
- 62 r-r.
Simple patterns for wrap dresses: we sew them ourselves
Clothing goes out of fashion very quickly, but the classics remain constant. Wrap dresses fall into this category. Many collections of famous designers of the World present the most diverse and incredible models. But you can sew such a dress yourself. Even a novice seamstress can prepare the pattern and even the sewing itself. You need to choose the right model and choose the material.
Ways to decorate a hoodie
As already mentioned, fabric with prints is often used to decorate homemade hoodies. These are drawings of various plants, animals or patterns on fabric. Sewing various cute appliqués onto the chest and belly is suitable for both children and adults. Additionally, they can be used to decorate pockets and places where defects are visible that were not noticed during the manufacturing process.
Homemade sweatshirt decor
Options with sewing on various details, sewing on elements from another type of fabric, for example, leather or its substitute, also look good. You can add shine to your jacket using a pattern of beads or sequins.
Product with factory prints
Thus, patterning a sweater with a hood is a fascinating and simple process that even a novice craftswoman can do. The main thing is to understand the nuances and sew the product according to step-by-step instructions from tailoring masters.
Features of clothing for baptism
An important criterion for choosing a baptismal shirt is the fabric from which the shirt is made. It must be natural. Cotton, cambric, thin linen are suitable. A shirt knitted with cotton threads will also work. The fabric should absorb water well, because this is the shirt the priest will put on the child after the bath.
The color of the shirt should be white. This symbolizes the purity of the newborn soul. It is allowed to embroider a cross on the chest or along the bottom of a boy’s baptismal shirt using blue, silver or gold silk threads. Also now a delicate blue color of the shirt is allowed, but it is better to ask the priest who will baptize the baby about this.
It is very important that the neck is wide enough. The head should pass through it easily and freely.
The baptismal shirt should be loose, not restrict movement, and not put pressure. The seams should be smooth and soft so as not to cause discomfort to the child.
The optimal length is below the knee, as the legs should be slightly open. At the end of the ceremony they will be anointed with Myrrh, so they need free access.
Clothing for baptism is considered elegant clothing and decorative decorations would be appropriate on it. However, we should not forget that even at this moment we need to show humility and avoid excesses. For very young children, decor with lace and embroidery is suitable. Despite all the beauty of a baptismal shirt, it needs to be simple. If the boy is not very small, then there is no need for lace. A laconic cross stitch on the chest and Christian symbols along the bottom will be enough.
Women's sweatshirt with decorative inserts
To sew a sweatshirt you need to take:
- knitted fabric – 1.3 m;
- acrylic paints on fabric for decoration;
- doublerin;
- threads, sewing tools.
Description
We make patterns of the required size:
- size 40;
- size 42;
- size 44;
- size 46;
- size 48;
- Size 50.
We receive patterns for all parts of the product.
The model can be made for a woman of average height and for a tall girl (the length of the product is 60 and 70 cm, respectively). The drawing shows both bottom lines.
We mark on the fabric and cut out the details of the front, decorative inserts and back.
We cut out both sleeves.
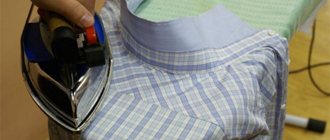
We apply the selected design to the front details with acrylic paints, carefully transfer it onto a towel and iron it through cotton fabric.
Next, we sew the products using the photographs of the master class.
We sew and stitch the inserts on the main part of the front.
How much fabric do you need?
During the modeling process, the question immediately arises as to how much fabric should be spent to sew the product? Naturally, a lot depends on the model and style. The “size” of the model, namely size and height, should also be taken into account.
How much fabric do you need?
Typically, the classic version of the dress requires 3 linear meters. From this quantity it is possible to produce all the necessary parts in full.
Sweatshirt in Russian style
Sizes: 44/46; 48/50; 52/54.
To sew a sweatshirt you will need:
- knitted fabric - footer, with a width of 1.5 m you need to dial 1.2 m; 1.25 m; 1.3 m;
- ready-made braid of two types in red and white colors in the style of Russian ornaments, 1.0 and 1.5 cm wide, 1.1 m each;
- interlining;
- sewing threads - white;
- threads for embroidery on a sewing machine - red;
- sewing tool.
Description
First you need to create a pattern. The schematic pattern of a sweatshirt with raglan sleeves is shown below for women in three sizes 44/46; 48/50; 52/54. The drawing of a sweatshirt with raglan sleeves does not indicate the depth of the neckline along the back and front. Approximately it is equal to 4 and 11 cm, respectively. But you can adjust it as you wish. Draw a sweatshirt pattern on a scale of 1:1 and cut it out.
Before cutting the footer, you need to decate the fabric.
We cut out all the details with seam allowances. If you sew parts with an overlocker, then a sufficient allowance is 8 mm.
Next we decorate the sleeves and front.
Now we will grind down the parts - see the sequence in the photo below. Usually this material is sewn with an overlocker. If it is not there, then you can stitch together the parts using any knitted seam, and overcast the sections with a zigzag stitch.
We sew the yokes together with the main parts of the front and back, after chipping the parts.
We cut out the facing for processing the bottom. Its dimensions are 12 cm by 94; 96; 98 cm. We process the lower edge with a facing.
The sweatshirt is ready!
Smells
Before going directly to the lesson, I want to show you what dress styles you can get thanks to such a cutting element as SMELL.
So... Let's see what they are, our wrap dresses.
Most often, the smell on a dress is found in its upper part - on the bodice of the dress. In the photos below you see a LOOS
- FITTING WRAPPED BODY
. The left half of the bodice overlaps the right - this overlapping of the halves on top of each other is actually called a wrap.
From stretchy stretch fabrics we cut a FOLDING BODY
WITH FITTING CUT .
Such a bodice visually enlarges the breasts, makes them fuller, and therefore attractive to the eyes of men.
And here are photos for you where you see WRAP BODY
WITH A COMPLEX CUT
. This could be a wraparound bodice designed as a lush drapery (like the black dress below). Or a smell with a slight gather in the place where it is sewn (like on the speckled dress below). Or a wraparound bodice with a pleat, where the right half of the bodice is much wider than the left and is laid in the form of an oblique fold (gray-black dress below).
You can also model a
Ruffled WRAPPED BODY . That is, when modeling, the classic details of the smell need to be stretched out wide and sewn onto the products in a clear or chaotic assembly.
THE SMELL
ON THE SKIRT PART OF A STRETCH DRESS
is good because thanks to this element of the cut, you can create an interesting drapery. This can be easily done if, when cutting out the skirt wrap, you make it wider than necessary, and then sew it on the intended place in an easy gather. Or you can make the drapery more complicated if you modify the pattern of the wrap, giving it a vector stretch in one direction or another, and, when sewing it to the hem of the dress, put the wrap in beautiful flowing folds.
ROAD
ON THICK FABRICS
can be a regular classic shape (that is, match the basic hem pattern) or have an interesting petal shape (as in the pictures below). Such a petal scent can have completely classic, strict outlines (as in the brown-and-striped dress below). Also, the petal wrap can be made on a cut-off hem, and then it will not be difficult to provide decorative folds on it (like on the white dress in the photo below). Or the smell on the hem can have a visual continuation in the form of a pseudo-smell on the bodice (as on the blue dress in the photo below - we see the pseudo-smell on the bodice even designed in the form of an elegant flounce with buttons).
If you are planning to sew a summer WRAP DRESS FROM THIN FLYING FABRICS
, then it is better to choose a cut that is also light and airy. Scents with a small flounce look very good (the colorful dress in the photo below). Or you can make two counter scents and put them in beautiful folds (like on the blue dress below). Or make one extended right wrap and sew it to the cut-off hem, forming folds so that it also gives a beautiful wave along its edge.
Also, from the same delicate flowing silk fabrics, you can simulate SMELL-DRAPE
. The drapery can resemble a knot (as on the black dress below). Or it could be a wrap with swing draping (like the pink dress below). Or you can drape not on the wrap itself, but on the rest of the hem (like the peach dress below).
Also, the smell can come not only from the waistline, but it can start from the chest line. SUCH SMELL FROM THE BREAST LINE
can start from the yoke (as on a black dress with a round yoke below). Or the smell can be a freely hanging continuation of the vertical drapery-gathering located in the chest area (as on the first black dress from the photo below). Or the wrap could be placed on a high-waisted dress where the cut-off hem line is just below the bust (like the pink dress below).
And of course there is also a WHOLE SMELL
- that is, the smell is not located on the bodice or skirt part of the dress, but is a one-piece side part of the dress itself. Such smells overlap each other (right over left) and are fixed from the inside - with a button or seam, and from the outside - with a bow tie or buckle on the left side of the dress.
Now let's model the pattern of such a smell using the example of one of the dresses taken from the photographs above. And why go far? Let's take the penultimate dress from our photo gallery - a wonderful orange color - a one-piece wrap dress.
And if my eyesight doesn’t deceive me, it seems to me that it also has a one-piece sleeve. So we will hug two birds with one stone again - we will learn how to cut a one-piece wrap and a one-piece sleeve - at the same time in one master class.
This is the dress - let’s first take a good look at it and analyze what we saw.
Let's look at the elements of the dress and compare them with the basic pattern:
We see that the shoulder line on the dress has been extended almost 2 times - it completely covers the shoulder joint and even freezes a little behind it (the light green line). We also see that the scent line starts at the side point of the neck (turquoise point). And that the line of the smell below the waist will go straight - vertically down, without curves (yellow line). There are no waist or bust darts on the dress because the dress is made of stretch fabric and does not need darts
In fact, our comparative analysis - (this is when we compare the line of the dress with the lines of the base pattern) - already allows us to mentally see the correct lines of our new model pattern.
And this is really what happens - you just need to analyze each element of the dress and each of its lines from the photograph (shoulder line, neckline, etc.) - and the model lines of this particular style of dress become clear in your mind. We already understand what exactly, and HOW exactly we need to draw - in order to get a PATTERN OF THIS STYLE from the Basic Pattern.
So, let's do everything in order together.
Step one - we trace our shelf of the BASIC PATTERN on a sheet of paper - 2 times.
We take our basic pattern and separate the front flange from it. Now, in order to get a solid front part from the shelf, we need to circle it twice on a new sheet of paper. Like this, as shown in the picture below. Place the shelf - trace it with a pencil - turn it over mirror-like (upper side down), join its edges with the outline you just outlined and trace the second half like the first. As a result, we get a WHOLE BASIC FRONT PATTERN - and on it we will further model our wrap dress.
From the BASIC front shelf - we make a solid front part
Step two - calculate the length of the shoulder and draw it on the pattern.
So now we will begin to actually draw our wrap dress pattern on the same sheet with a basic one-piece pattern. And we'll start with the shoulder line. As we remember, on a dress this shoulder line covers the shoulder joint completely and even slightly extends beyond it.
This means that in order for our dress to have the same shoulder length as in the photo, we need to draw a shoulder line on the pattern that is long enough for this.
How to find out the length? Very simple.
We take a centimeter, go to the mirror and apply it to ourselves - we apply it in such a way that it follows the line of the shoulder on the dress with its outline - that is, it starts from the base of the neck - goes to the shoulder joint - covers it completely and maybe even hangs down a little.
We measure the shoulder line directly on ourselves with a centimeter - and we do it in such a way that the centimeter starts from a point at the base of the neck, goes to the shoulder joint, covers it completely and even hangs down a little.
We measure the measured distance on our drawn base pattern - from the edge of the neck in the same direction as the shoulder line of the pattern. This way we get a shoulder line like in our dress with a shoulder allowance.
We placed the centimeter - we looked at how much he measured - and we measure this resulting distance on our pattern - starting from the edge of the neckline, and in the same direction as the shoulder line on the base pattern.
Everything is ready - we have a shoulder line. And it is exactly the length we need.
Step three - calculate the silhouette of the open neckline and draw it on the pattern.
But this part of the work is quite important. For the reason that we must draw a line of low-cut scent in such a way that our bra does not peek through it. And so that the dress during fitting covers exactly that part of the chest that we planned to cover.
That is, you need to draw a line of the edge of the smell in the chest area SO that the chest is covered and there is room for a seductive neckline. But first things first – now we will start working, and you will understand what we are talking about.
To correctly draw the neckline line (in our case, it is also the wrap line), you need to mark two landmarks on the pattern - the chest line and the central center line.
The chest line is already on our basic pattern - on the body it is located along the line of the tops of the chest. The center line is the line dividing the two shelves, that is, dividing the pattern in half vertically. So, a decent neckline is one whose depth does not extend below the chest line. The lowest point of the neckline in our dress is located where the wrap line intersects the center line because this is where the two wraps overlap.
As I have already briefly formulated in the picture above, a normal decent neckline on a dress should not extend beyond the chest line. That is, when modeling any dress, you can freely draw necklines in as many different shapes as you like - and there will be only one rule - do not swing the pencil over the chest line. And, of course, you need to take into account the cut features of the bra with which you plan to wear this dress - draw a neckline that will not reveal the straps or cups of your bust (unless, of course, you set yourself the goal of inadvertently showing off expensive new underwear).
But let's continue about our dress. As you understand, any SYMMETRICAL (that is, the same on the left and right) NECK has its deepest lower point exactly in the center - that is, on the center line. Therefore, we must draw with you a scent line that would intersect the center line in the area ABOVE the chest line.
In my drawing this is done - the line of the smell intersects the center line - higher than the chest line - I marked this intersection with a light green dot. The higher this point, the more modest the neckline will be. The lower this point, the deeper it will be.
By the way, this model of a wrap dress can also be sewn as a BEACH DRESS. In this case, it can have a completely open neckline, freely revealing the cups of the swimsuit. And then the point of intersection of the scent line with the center line can be located UNDER THE BREAST LINE - as low as you wish - even at the level of the navel - as long as you like it. As you can see, even with such a cut element as a smell, you can come up with a bunch of modeling options. As you draw, so it will be))
Well, now that the hardest part is over, let's draw the remaining lines of the dress pattern.
Step four - draw all the other lines of the right spare part of the front.
Everything will be very simple here.
We finish drawing a one-piece sleeve - its armhole side (that is, the sleeve hole) will be absolutely straight. Draw a straight line from the edge of the shoulder to the waist. And on this line at armpit level we mark a point. What is above this point will be the armhole - the hole for the hands. What is below this point will be the side seam.
The remaining lines repeat the outlines of the base pattern - only the left side of the wrap will be vertically straight.
Draw the remaining lines of the wrap pattern for our dress
Draw a straight line from the edge of the shoulder to the waist.
Place a dot on this line at the armpit level of the base pattern - this dot will mark the edge of the armhole, that is, where the arm hole ends (yellow dot).
The left edge of the hem wrap will be a straight vertical line. The bottom edge and right side line will match the lines of the base pattern.
Step five - draw the pattern of the back.
The back pattern is drawn very simply - take the back flange and trace it twice on a sheet of paper (as we did in the first step with the front flange). As a result, we get a SOLID BASE BACK PART. And on this basic part you need to make the same shoulder line and armhole line as the front wrap part.
We draw the shoulder line in the same way - the same length as on the front part of our wrapper. And in the same way, we connect the edge of the shoulder to the waist line - and put a dot at the level of the armpit - to mark the place where the side seam ends and the armhole begins (the hole for the arm).
Step six - take into account the percentage of ductility of the stretch fabric and reduce the width of the pattern by this percentage.
This step is optional - it is only for those who want to sew the same wrap dress - and so that it fits tightly on him, emphasizing the curves of the body.
If you want your wrap dress made of knitted fabric to fit tightly on you, and not dangle as in our photo. You need to shrink our pattern according to the stretch ratio of your stretch fabric or knit fabric.
That is, the tighter our stretch stretches, the more cm we need to shrink or reduce our pattern. Let me remind you that this is only necessary if you want a wrap dress with a tight fit - with a complete fit to the curves of your body.
What is the viscosity coefficient?
If the stretch stretches very weakly - for example, 10 cm of stretch fabric in a free position - in a stretched position it gives 12 cm - this means that the fabric gives a weak ductility coefficient of 20% - it can be ignored. And the pattern does not need to be reduced in width.
But if you took a stretch in which 10 cm when stretched gives 15 (an additional 5 cm means a coefficient of 50%). This means that your fabric can stretch 50% (1.5 times) in width. And so that it fits the body well, you can reduce the width of the pattern by a few cm - narrow it along the side edges. And then, sewn according to such a narrowed pattern, the dress itself, when put on, will stretch on the body - just as you wanted - clingy.
But I repeat, in our dress model you don’t have to do this. It will look beautiful anyway.
Step seven - cut out the details and sew the dress.
Now that our pattern is drawn, we cut out three parts:
- Back detail.
- The left part of the smell (smell with the left shoulder) - it will be inside, that is, it will be covered by the left smell.
- The right part of the smell (smell with the right shoulder) - this smell will cover the left smell on top.
It must be said that the right and left parts of the smell will be absolutely identical - only mirrored. That is, to cut out the left scent on the fabric, you just need to put the pattern of the right scent on the fabric with the right side facing up - and you will get a mirror pattern of the left scent.
When sewing a dress, you need to sew a button on the right inner side of the dress (i.e., at the right side seam on the wrong side) - on which the edge of the inner left flap will be fastened. Or if the dress is elastic enough and you can easily slip into it without undoing a button, then you can simply sew the edge of the left wrap (hidden under the hem) to the right side seam with thread.
And also on the right side, provide a fixing clasp or tie in the waist area. The header can be cut from a long strip of the same fabric. Or you can buy an elegant buckle clasp in a store - sew one half to the edge of the wrap - and the second to the left side seam - wrap the dress, connect the halves of the buckle - that's it, the wrap is closed.
That, in fact, is all the wisdom.
As you can see, modeling smell is not very difficult. And there is enough scope for designer imagination even in such a modest cut element as the smell. Model, train, experiment for your own pleasure.
How do you like our modeling lesson?
Happy sewing.
#modeling lessons #design lessons #dress modeling with smell
Sweatshirt with scalloped collar
For sewing you will need:
- selanik knitwear;
- elastic guipure;
- interlining;
- threads, accessories, sewing tools.
Description
For cutting you will need patterns printed in full size. Patterns of a sweatshirt with a set-in sleeve made for a height of 168 cm:
- size 44;
- size 62;
- 64 size.
We cut out the parts with 1 cm allowances for all seams.
We place the guipure parts on the corresponding parts made of the base material, and sew them around the perimeter with a basting stitch.
We sew the seams on the yokes, then sew the shoulder seams.
We sew together the details of the sleeves.
Now we will sew the sleeves into the armholes, controlling the coincidence of the boundaries of the areas decorated with guipure.
Next we sew the seams on the sleeves and side seams. Sew on the belt, cuffs, and collar.
Installing buttons.
We remove the basting threads and iron the finished product.
How to cut
The fastest way to make a pattern for an item is to fit the product according to the finished sketch. Usually in editor's magazines they offer this version of the pattern with different designations. How to work with the proposed workpiece:
- Auxiliary lines must be immediately highlighted with a felt-tip pen of a different color.
- A cut in the chest area is modeled.
- At the bottom, the bodice, which touches the waistline, needs to be slightly rounded.
- The sketch of the back does not need to be changed at all.
- Need to work on the neckline and sleeves.
- Model the sleeve you like.
Finished pattern option
Additional information! Don't forget to allow about 1.5-2 cm on the seams.
All cuts are made along the route, which is indicated by red lines in the figure.
How to sew a sweatshirt without a pattern
We will need:
- two T-shirts of contrasting colors, identical in texture and fabric composition.
- threads, sewing tools.
How to quickly sew a sweatshirt - step-by-step instructions
To sew a sweatshirt without a pattern, we use two T-shirts in contrasting colors. From one T-shirt we cut out the front and back. To do this, we deepen the armhole, cut off the sleeves, creating raglan lines.
Using the cut sleeve and the cut part of the front and back as a template, mark the contours of the sleeves. To do this, after folding the second T-shirt in half, you need to lay out our “pattern” along the fold line - see photo.
We cut out the sleeve, not forgetting to allow for seam allowances.
We sew the sleeves into the armholes and process the edges with an overlocker. We sew seams on the sleeves and sides, and overcast the edges.
We process the neck with a facing.
For the bottom elastic, cut out a wide strip and attach it.
Model options
The classic version of the item involves a straight cut with a diagonal intersection of the silhouette, as well as fixing the wrap on the side. Every year Burda magazine offers more and more new models of wrap dresses. There are several favorite options for 2021. Each one has a difference in terms of material and bottom style:
- Dresses with flared hem, pencil skirt, asymmetrical hem.
- By type of fabric - knitwear, knitted fabric, silk and others.
- With sleeves, with draped bottom or top, sleeveless.
- The length of the skirt is maxi, midi and mini.
Models of dresses
When it comes to colors, prints and decorative trims, there can be a lot of options.
Romantic knit dress
To create a beautiful thing for romantic dates, you can use knitwear. Typically, a long silhouette is used for such situations. A wrap dress pattern made from knitwear is constructed as follows, as shown in the photo below.
Ready-made patterns for women's sweatshirts with a hood
Such a sweatshirt with a hood can be sewn from cotton fabrics, fleece, footer, or soft wool. In a warm and comfortable hoodie, you can take long walks in the fresh air.
Sweatshirt patterns are made for the following sizes:
- 42 r-r, r. 164 cm;
- 44 r-r, r. 164 cm;
- 44 r-r, r. 176 cm;
- 46 r-r, r. 176 cm;
- 46 r-r, r. 176 cm;
- 48 r-r, r. 164 cm;
- 50 rr, r. 164 cm;
- 52 r-r, r. 164 cm;
- 54 r-r, r. 164 cm;
- 56 r-r, r. 164 cm.
Material selection
Traditional materials for wrap dresses include jersey, silk, satin, chiffon and knitwear. Knitwear perfectly emphasizes the curves of the figure, and alternative flowing jersey, silk and satin give any girl more sexuality. It is important that the fabric gathers well into folds, since wraps on the chest are often folded with ruffles or a twisting technique is used.
Ready-made sweatshirt patterns with set-in sleeves and swing clasp
For this model you will need:
- fabric, with a width of 1.5 m you need to dial 2.5 m;
- additional thin cotton fabric that retains its shape well - with a width of 1.4 m you need to add 0.5 m;
- interlining;
- buttons, buttons;
- threads, sewing tools.
Description
The sweatshirt patterns with set-in sleeves are designed for the following sizes:
- 42 r-r, r. 168 cm;
- 44 r-r, r. 168 cm;
- 56 r-r, r. 168 cm.
After the pattern of a women's sweatshirt is constructed in full size, we mark the contours of the parts on the main and additional fabric and cut them out.
Next we sew the product. The finished sweatshirt can be fastened in two ways:
- on a supate clasp, forming vertical swing folds with differences in length.
- on the wrap, forming horizontal folds in the style of a cowl collar.
Stylish outfit ideas
Having chosen the right one from a variety of models, a beautiful lady inevitably faces the question: what to wear with such a blouse? It largely depends on which direction she prefers.
For example, for sports style lovers, stylists suggest combining a chiffon, translucent blouse with a deep wraparound front with a crop top, boyfriend jeans and sneakers. However, there are also more restrained combinations.
So, in a business look, it is recommended to combine such a blouse with straight or slightly tapered trousers of standard or 7/8 length. Throw on a fitted jacket or a loose-fitting jacket with rolled up or ¾ sleeves over the top. It is best to choose shoes in this set with high or medium heels. These can be open sandals or classic pumps. For those ladies who prefer skirts, a pencil skirt would be an ideal option, especially if the basis of the look is a blouse with a wrap and drapery.
In evening looks, such a blouse, especially with a wrap around the back, is usually complemented with skirts. This can be a “floor-length” or “tea-length” model, but it must be of a style that fits tightly around the hips, for example, A-line or “mermaid”, and sewn from shape-holding fabrics. Shoes should be chosen exclusively with high heels. However, those with a slender and tall figure can afford to wear trousers that are tapered along the entire length for an evening out, combining them with flat-soled shoes, for example, designer ballet flats.
Off Shoulder Sweatshirt
For sewing you will need:
- fleece footer in two colors: floral print and plain;
- cashcorse or ribana for cuffs;
- threads, sewing tools.
Description
You can create patterns for such a model with your own hands, using our recommendations above. For beginning cutters, there are many sources on the Internet, for example, the Ottobre pattern magazine.
We prepare patterns, mark and cut out parts.
The most convenient way to sew footer parts is to use an overlocker. If it is not there, then we sew the parts together with a regular stitch using needles for knitwear. All seams are ironed after completion.
Next, we carry out sewing based on the photographs of the master class.
Basic pattern of a wrap dress and models based on it
If you have no experience in sewing such serious products, then it is better to start with classic, and therefore simple, patterns. A wrap-around robe dress is considered common. First you need to take basic measurements:
- neck girth;
- hip girth;
- shoulder girth;
- shoulder length;
- back height to waist;
- dress length;
- the length of the sleeve;
- distance from the bottom of the armhole to the waist.
Classic wrap dress pattern is simple:
- First, draw a rectangle on a huge piece of paper.
- We draw a line on the geometric figure to determine the neck.
- From the extreme point of the neckline, place a bevel for the shoulder.
- Next, all the cutouts and slopes are formed.
Pattern of a classic wrap dress
Next, you can cut the fabric in accordance with the workpiece. Based on the resulting base, you can create almost any model of this type of dress, adjusting certain details.
How to sew a sweatshirt for a nursing mother
We will need:
- sweatshirt fabric or finished product;
- hidden zippers to match the color of the fabric – 2 pcs.;
- threads, sewing tools.
Pregnancy and the birth of a child are an important, responsible and difficult time in a woman’s life. In modern stores you can buy various devices and clothes that make caring for your baby easier.
In Moscow and other large cities, fashionable sweatshirts for nursing mothers have long been on sale. But even a novice seamstress can sew such a sweatshirt with her own hands.
Constructing a sweatshirt pattern
The simplest pattern of a sweatshirt with raglan sleeves is used as the basis. The sweatshirt can have a hood or stand-up collar, pockets or other additional details. If you had a loose-fitting maternity sweatshirt, you can alter it.
On the shelf pattern we will draw additional lines as shown in the drawing. Let's cut a pattern using them. That's it, modeling a sweatshirt for nursing mothers is finished!
Comment
If you're redesigning your maternity sweatshirt, be sure to reduce the width of the front.
Sewing
We cut out the parts, making allowances of 1 cm along the modeling lines; on the remaining seams, an allowance of 5 mm is enough. We make raised seams on the upper and lower sections, leaving open areas for sewing in zippers.
We sew in the zippers with the zipper down. We make decorative stitches on both sides of the zippers.
Options for wrap dress models
The wrap dress is definitely one of the most feminine and sensual styles. It gives a woman sufficient freedom of movement, emphasizes the waist and chest, but can also hide figure imperfections. It is sewn from cotton fabric with a T-shirt-type sleeve or no sleeve at all. Another option is the model is made with long sleeves or three-quarter sleeves.
There are also differences in the length and style of the skirt - narrow, straight, sun, short, long. The good thing about the style is that it can be adjusted to suit any taste and any figure. A wrap dress is an excellent choice for those who tend to be overweight. If the waistline is high and is located approximately under the bust, then the cut will successfully hide the tummy and emphasize the neckline.
What to wear with
This version of the item is completely universal. You can combine this wardrobe item with rough options for shoes and tops. Various jackets, knitted sweaters, and leather vests are suitable. Elegant heeled pumps or wedge sandals or ballet flats will fit perfectly into the overall look.
A unique version of the naiad will complete the look and is also ideal for any event. In order not to storm boutiques and take a long time to select the right model, you should wash the item yourself. There is a huge variety of different patterns with different levels of complexity.
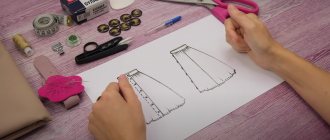
Pattern for the base of the dress. Step-by-step instructions for constructing a dress base pattern
Take the following measurements:
For example, I use the standard size 48, and you take measurements from your figure or from the figure of the person for whom you are going to sew this dress.
Name of measurements and symbols
Taking measurements
Measure at the base of the neck. The measurement is recorded in half size.
This measurement determines the size of the figure. The measuring tape should go along the protruding parts of the shoulder blades on the back and along the highest part of the chest. The measurement is recorded in half size.
Measure at the narrowest point of the waist. The measurement is recorded in half size.
Measure horizontally along the most protruding points of the buttocks, taking into account the convexity of the abdomen. The measurement is recorded in half size.
Back length to waist
Measure from the seventh cervical vertebra to the waist line. The measurement is recorded in full.
Measure by placing a measuring tape horizontally between the back corners of the armpits at the level of the protruding parts of the shoulder blades. The measurement is recorded in half size.
Front length to waist
Measure from the shoulder line at the base of the neck through the protruding point of the chest to the waist line. The measurement is recorded in full.
Measure from the shoulder line at the base of the neck to the protruding point of the chest. (This measurement is performed simultaneously with the previous one.) The measurement is recorded in full.
Measure along a horizontal line between the protruding points of the chest. The measurement is recorded in half size.
Measure along the shoulder line from the base of the neck to the shoulder joint. The measurement is recorded in full.
Measure around the arm at the armpit. The measurement is recorded in full.
Measured at the wrist joint. The measurement is recorded in full.
Sleeve length to elbow
Measure from the shoulder joint to the elbow. The measurement is recorded in full.
Measure from the shoulder joint to the hand. The measurement is recorded in full.
Measure from the seventh (protruding) cervical vertebra in the middle of the back to the required length. The measurement is recorded in full.
Loose fit allowances:
along the chest line 5 cm, along the waist line 1 cm, along the hip line 2 cm.
On the left side of the prepared sheet of paper, draw a vertical line on which to mark the length of the dress, in our case 110 cm, and put points A and H. Draw perpendicular lines through A and H to the right.
Rice. 1
Dress width . From A to the right, set aside half the chest circumference plus 5 cm. and place point B (48+5=53cm). Draw a line from B down to the intersection with the bottom line and place point H1.
Rice. 2
Back length to waist. From A down, set the length of the back to the waist plus 0.5 cm and put T (38 + 0.5 = 38.5 cm). From T to the right, draw a line to the intersection with line BH1, at the intersection place point T1.
Rice. 3
Hip line. From T down, set aside 1/2 of the length of the back to the waist and place B (38/2=19cm). From B to the right, draw a line, mark the intersection with BH1 as B1.
Rice. 4
Back width. From A to the right, set aside the width of the back plus 1.5 cm and put A1 (18 + 1.5 = 19.5 cm).
Rice. 5
Armhole width. From A1 to the right, set aside 1/4 of the half-circumference of the chest plus 0.5 cm. and put A2 (48:4+0.5=12.5). From A1 and A2 down, draw lines of arbitrary length.
Rice. 6
Back neck cut. From A to the right, set aside 1/3 of the half-circumference of the neck plus 0.5 cm and place A3 (18:3+0.5=6.5). For figures with fat deposits in the area of the seventh cervical vertebra, the neck width is increased by 0.5 cm. From A3 up, set aside 1/10 of the half-circumference of the neck plus 0.8 cm and place A4 (18:10 + 0.8 = 2.6 cm). Divide the angle at point A3 in half and draw a line. On this line, set aside 1/10 of the half-circumference of the neck minus 0.3 cm and place A5, (18:10-0.3 = 1.5 cm). Connect the resulting points A4, A5 and A with a smooth curve.
Rice. 7
Shoulder cut. From A1, set down 2.5 cm for normal shoulders, 3.5 cm for sloping shoulders, 1.5 cm for high ones and place point P. Connect points A4 and P. From A4, set aside the shoulder length plus 2cm for the dart and put P1 (13.5+2=15.5cm). On the resulting line A4P1 from A4 to the right, set aside 4 cm and place point O. From O down, set aside 8 cm and place O1. From O to the right, set aside 2 cm and place O2. Connect points O1 and O2. From point O1 through point O2, set aside a value equal to the segment O, O1 - 8 cm (so that the sides of the dart are the same length) and put O3. Connect points O3 and P1.
What fabrics and colors are used?
Careful attention should be paid to the material.
Important! You should not use linen to sew such blouses. In this case, the clothes will seem rough.
A wrap blouse will look best from:
- atlas;
- fine knitwear;
- polyester.
Important! Thin jersey or chiffon can also be used.
The colors are most often used in solid colors, since the cut of such clothes is quite complex. In some cases, designers develop models with the inclusion of an additional shade. It is used to place accents along the edges of shelves. Sometimes only one of them may be painted.
Don’t forget about prints, the use of which is also allowed on such clothes. In this case apply:
- A discreet check;
- Peas;
- Animalistics;
- Floral patterns.
Important! They have a common feature - the print is made in neutral or classic colors, which does not distract attention from the special cut.