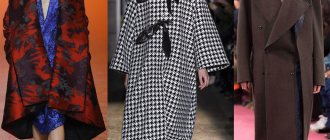
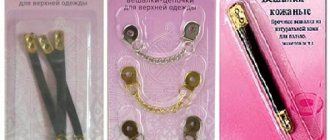
Required materials and tools
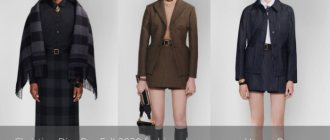
Traditionally, a women's cap is usually made of thick fabric (tweed, drape, etc.) . But a girl’s wardrobe will be perfectly complemented by, for example, satin ones. There are a variety of colors; as a rule, the cap is sewn to complement any ensemble.
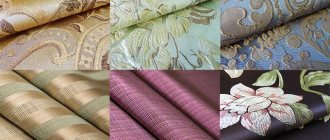
Common fabrics:
- tweed;
- drape;
- cloth;
- natural and artificial suede, leather;
- matting;
- thick fleece;
- atlas;
- brocade;
- jacquard;
- velveteen;
- spandex;
- velvet.
Advice! Thin fabrics must be backed with an adhesive pad.
Tool selection:
- sewing machine, preferably with an overlock stitch;
- ideally – overlock;
- thick needle No. 100-120, since it is necessary to sew several layers of fabric;
- chalk;
- awl;
- plastic folder or cardboard for the visor;
- optional accessories.
Short story
If we talk about Europe, then initially Italian and English newspapermen liked eight-piece caps. Together with them, students and athletes liked this style of headdress. At first, intellectuals and aristocrats were in no hurry to acquire such a cap. When Francis Scott Fitzgerald’s novel “The Great Gatsby” was published in 1925, almost all fashionistas were inspired by the style of the main character, giving their preference to the eight-piece.
And if we talk about Russia, here the cap with a base of eight wedges was worn mostly by hooligans and street boys. Most likely, it was precisely because of this that the rest of the population did not strive to acquire such a wardrobe item. But despite this, after a couple of decades, the eight-piece cap dominates the entire wardrobe of most men. And not only.
Measurements
We make the following measurements:
- Head circumference - measure the circumference at the place where the bottom of the cap will be. We leave the measuring tape, it will be useful for the next measurement.
- The height of the cap is the distance from the bottom line of the cap to its intended top.
Panama hat pattern
We will sew a Panama hat from fabric that is soft, but still holds its shape. For example, corduroy, faux fur (short pile), boiled knitwear, loden. Choose your option, and don’t forget to make a preliminary sample. A hat is a delicate matter, all proportions must be clearly adjusted and suit you.
The pattern is not complicated. Let's go step by step:
- The bottom - its circumference is slightly less than the circumference of the head, to which an allowance of 1-2 cm has been added (I suggest making the bottom circumference 4 cm smaller).
- The crown is 9-12 cm high. Form in accordance with the diagram.
- The brim of the Panama hat is cut out into 4 pieces, as they are processed in double pieces.
How to sew a women's cap with a visor with 6 gussets?
We will sew a gavroche cap with 6 wedges . This style involves increased volume of the upper part. Such a cap will add youth, give energy, and with it temperament.
Required:
- main fabric, area 0.5 m2, you can use scraps;
- lining fabric – 0.5 m2;
- material for the visor.
Due to the general softness of the gavroche design, its visor can be made without an additional dense layer.
Constructing a pattern
The construction is similar to a regular six-piece cap, but we add 2-3 cm in the middle of the wedge to obtain the required volume of the upper part of the cap.
- Divide the volume of the head into 6 parts, this will be the width of the lower part of the wedge.
- We set the height of the cap in the center.
- We determine where you will have the widest part of the wedge, it should correspond to the end of the vertical part of the cap. That is, after this section a flat bottom of the cap will form.
- We narrow the wedge.
- The band is a double piece with a length equal to the circumference of the head, you can add 1 cm for the fit.
- We choose the width of the visor arbitrarily.
- Its smaller circumference is approximately 1/3 of the head circumference, but this is also determined individually.
The patterns are designed for a head circumference of 54-55 cm.
- wedge - 6 parts;
- visor - 2 parts;
- band - 2 parts.
Cut on fabric
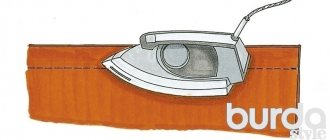
Lay out the patterns on the prepared ironed fabric . It is important to place all the wedges strictly in one direction along the grain thread:
- Let's shallow it. Allowances are 0.5-1.5 cm, depending on the fabric.
- Cut it out.
- We work similarly with parts made from lining fabric. We do not sew a lining for the visor.
Sew the details
Stages of work:
- We sew wedges. It is more convenient to do this in two blanks of three wedges each, you will get two semicircles.
- Sew these semicircles together.
- At the center we cut off the corners of the wedges so that there is no thickening.
- We work similarly with wedges made of lining material.
- We turn the main piece of the cap inside out and place the lining on top of it, face up. Sew on the lining.
- We sew together the visor blanks.
- Turn it inside out.
- Set aside at a distance of 0.75 - 1 cm from the edge.
- If you insert a seal into the visor, then make its drawing 0.5 cm smaller in all dimensions if your machine cannot sew several layers of fabric. In this case, the plastic part will be inside the “pocket”.
- We mark the middle of the band and the visor.
- We put the visor between two blanks of the band.
- We combine the marks.
- We sew the band and visor.
- We trim the corners of the allowances.
- We sew the band to the crown of the cap; to do this, we sew it between the parts of the cap and the lining.
Important! There are many ways to assemble fashionable women's caps, but here is the easiest one for beginners.
- We sew a finished button onto the top, or cover a piece of cardboard with the main fabric. Be sure to secure the lining fabric with a few stitches so that it does not puff up.
- Let's try it on.
We recommend sewing your first cap from inexpensive material in order to make all the changes to the pattern and “get your hands on it.” But then, you can regularly update your wardrobe with new hats without spending a lot of money.
What is a cap?
A cap is a headdress made of textile, sheepskin, leather or suede, the distinctive feature of which is the presence of a visor of various sizes.
The most common types of caps:
- The eight-blade cap, also known as the “hooligan”, got its name from the number of parts from which the top of the headdress is made. Well, the nickname is because in post-revolutionary Russia such a cap was loved by hooligans of all stripes. Suitable for everyone, has long been considered a classic. A distinctive feature, along with wedges, is considered to be a button - a button made of cap fabric.
- “Duck” is suitable primarily for men. The peculiar name is a tribute to the shape, similar to the beak of a duck. The visor, as a rule, does not stand out.
- “Airdrome” became popular in the USSR after the release of the film “Mimino”; it got its name for its flat top part.
- “German” or “cadet” came to us from the military parade ground. It’s hard to imagine a military style without such an accessory.
- The prototype of the “Cap” is a cap, which was very popular in Russia in the 19th century. Belts and embroidered cockades serve as decoration.
- “Gavroche” differs from other styles in volume and softness of folds. At the peak of fashion for several decades.
Technology for sewing a cap from 6 or 8 wedges
The peculiarity of assembling a cap from six or eight wedges is that you first need to sew two ladles from three or four parts.
It is easier to sew two halves of a four-piece cap together later than one wedge at a time. And most importantly, this technique will allow you to assemble all the wedges together, without distortions and symmetrically.
But first, before sewing both halves of the cap together, you need to cut off the corners of the allowances of the cap wedges at the top. This will avoid excessive thickening of the top of the cap and allow for better placement of ironed seam allowances.
It is best to iron the seams of the wedges assembled together on a special block for ironing sleeves.
“China is like China or the need for cunning inventions”
Good evening. Grab some popcorn and sit down. I ordered a laptop battery from one well-known website. I approached the order thoroughly - I looked for it myself, and consulted with experts. They (experts) said: “Good choice, pay.” I paid - I'm waiting. I waited a month, I waited two, all this time the goods were at the Chinese border, then they arrived in two days)))). But that's not what the story is about. With my hands shaking with happiness, I unpack the battery. Big, black, heavy... And then I notice that the battery has a built-in charge indicator. You press a small button and see the charge level - beautiful. Just like on my MacBook. Well, aren’t the Chinese great??! ! Just one small nuance. After installing the battery, the indicator appears under the laptop (looking at the table). But there have never been any lazy people in our family. If you want to see the charge, turn the laptop over, look, turn it back. Physical training!!!! Oh, two nuances. Because of this button, the battery does not fit exactly 5 mm into the socket. A trifle. The laptop is made of plastic, but at home there is a utility knife and a file. Whoosh!!! A small piece of the laptop was sawed off as if it was never there)))) Beauty!!! A little no)))) The metal terminals that come out of the laptop do not fit into the battery connectors - it (the battery) is 4 mm thicker than necessary. Bullshit!!! Remove the sticker from the battery and go over it with sandpaper. Beauty????!!! No! Still a bit thick. Bullshit!!! Carefully open the case of the old battery and smash the case of the new one to shreds. We replace the batteries along with controllers and other sensors. The control board of the new battery is larger than that of the old one (remember about the button))))). Again go for the toolbox ((((and I didn’t put it away))))). Using a metal file, we make a neat slot in the body of the old battery……… voila (as they say on the Internet), everything fits together as if it had always been there. With a slight click that caressed my ears, the battery fell into place. It’s bad, of course, that you’ll have to somehow live without a charge indicator. If someone is inspired by my example and also wants to use batteries, I warn you - if damaged there will be a lot of smoke and fire (dangerous in short).
The battery holds a charge. Day 4 - normal flight.
ChildSummer
3 days ago
Continuation of the post “The fight against alcohol, hobby – macrame”
In general, I received cotton cords and twine and began to slowly create.
This is item number 4:
Used:
Cotton cord 4 mm, denim color. About 40 meters.
The inside of the bag is made of black cotton fabric. (I had to go to my mother, I don’t have my own machine, I sewed from her)
My VKontakte
There’s a bag on the way that I struggled with for a long time, but I really liked it, and a bag with a belt or a belt, I don’t know which is right, for sporty girls. Small, beautiful for bodies and wallets (powder, mirror, etc.)