“Solokha” has come back into fashion, and now it is at the peak of popularity. This accessory complements different looks. Women wear it to the office, diluting the business style with a bright and interesting accent, on a date, making their look lighter and more romantic, and add it to the street style, making it more relaxed and “hooligan.” Depending on the occasion, the “solokha” is worn in different ways in order to avoid a funny and incomprehensible appearance. It is no longer a large scarf that needs to be folded, but has a finished look; a wire is inserted inside, which allows you not to tie a bow, but simply twist the ends.
Solokha on the head with your own hands: pattern and production
Solokha is a women's hair accessory in the form of a headband. Inside the headband there is a wire that maintains the shape of the hairstyle. With its help you can quickly style your hair. To create a hairstyle, you just need to twist the edges of the straw. The accessory for women is presented in a wide range and style: for everyday occasions, for work, for evening events.
Stylish headband
Solokha is a universal accessory that is suitable for women with different haircuts. It is suitable for any look, helps to emphasize individuality and make the look stylish. From the ends of the decorative headdress you can weave bows, knots, and also complement your hairstyle with various invisible pins, hairpins, and clips.
Solokha accessory for women
With frame
Some fashionistas love to fantasize so much and come up with such non-standard images that classical algorithms are completely unsuitable for them; they have to be modified to meet all the needs of beauties.
For example, a craftswoman wants her solokh to have very large tails and to point them in precisely specified directions. In such a situation, the accessory needs to be reinforced with a frame.
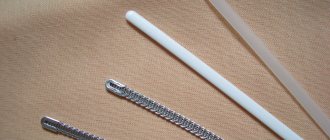
The principle of making a solokh with a frame is the same as the classic one. The only difference is that before the stitching stage, a wire frame is inserted into the ears (ends of the solokha), which will hold the shape of the product. The wire must be carefully stitched to the edges of the pattern from the wrong side (see photo below).
After completing the work, the ears need to be manually given the desired shape.
Since wire is an easily manipulated material, the shape of the product can be changed depending on the mood of the owner.
Historical reference
Solokha is one of the types of headband. The accessory got its name from the heroine of N.V. Gogol’s work “Evenings on a Farm near Dikanka” - Solokha, who was famous for her bad character and hung out with devils. The main character wore an unusual headdress - she folded an ordinary scarf several times and tied it around her head, leaving small ponytails on top.
Such accessories were most popular in the middle of the last century. This can be seen if you look at old pin-up photographs, where all the famous models pose in a stylish solokh. However, in later years, the unusual headband was widely used by many fashionistas. In the 21st century, the accessory has again become popular; many world stars wear it to various events and ceremonies.
The original headband on pin-up models
Important! Today, straw can be purchased in many stores, but you can also sew it yourself, based on your taste preferences.
You might be interested in: Patterns and sewing of trousers, as well as palazzo skirts
Product with elastic band
As you know, when you are in a hurry to get somewhere or try to look perfect, incidents and missteps begin to happen. That’s why it’s impossible to tie the straw at such moments as it should. Sometimes the bow is too big, sometimes it’s too small, sometimes it doesn’t tie at all.
Article on the topic: Do-it-yourself family hearth at a wedding: master class with photos
In order to prevent stress and prevent such minor failures, you can take care of yourself in advance and sew a straw with an elastic band. Such a headband will be easy and quick to put on and will not require constant painstaking tying.
The algorithm for making a solokha with an elastic band is also as simple as possible:
- We select the front fabric of the solokha.
- Prepare a rubber band or elastic band. To do this, the head circumference is measured. The length of the elastic should be one centimeter shorter than the circumference of the head.
- We cut out the details of the ribbon, knot and ears from the front fabric.
- We sew together the parts of the ribbon and thread an elastic band through it.
- At the last stage, we sew the ribbon and elastic band together and sew on the knot and ears made separately.
A stylish accessory for dynamic fashionistas is ready.
What is needed for work
Before work, it is necessary to prepare auxiliary equipment;
- a piece of fabric up to 90 cm long and up to 15 cm wide (the exact dimensions depend on the volume of the head). If the bandage is double-sided, you will have to take two pieces of fabric up to 7 cm wide and up to 90 cm long;
- scissors;
- strong threads, needles;
- a piece of wire up to 170 cm long, its diameter should be within 2 mm;
- cardboard (for creating samples);
- a simple pencil;
- measuring tape.
Sewing materials
Important! To decorate a fabric headband, you need to prepare beads, rhinestones, seed beads, and sequins.
Simple option
The classic solokha in this master class is sewn very simply:
- You need to select the fabric. It should be dense, not stretched out or lose its shape, but it is desirable that it be somewhat elastic, able to give and stretch a little.
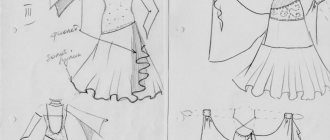
- Making a pattern for a solokha. At this stage, you need to decide on the length and width, as well as the shape of the ears. You can make them triangular, oval or beveled on one side.
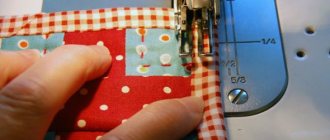
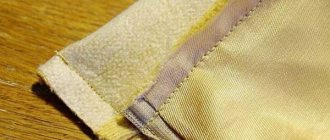
- The pattern is transferred to fabric and cut out. It is very important not to forget to leave seam allowances, otherwise the finished product will be smaller than the desired size.
- The parts are sewn together.
A simple solokha is ready, you can try it on.
Suitable for whom and for what occasions?
Due to the abundance of types, solokha can be worn under any clothes and for any events:
- parties;
- Job;
- walks around the city;
- summer holidays in hot countries.
Women's headbands for summer
The accessory looks appropriate on women with any hairstyle: both long and straight hair and cascading haircuts. Using an elastic band or wire, you can create voluminous hairstyles that are suitable for any event.
Important! The product is also used for newborn girls.
Solokha is a stylish head accessory that gained popularity back in the last century. You can sew the product yourself. To work, you only need fabric, a little wire or elastic and decorative elements. It will only take 30-50 minutes to make a stylish headband.
How to put on a “solokha”
Solokha can be worn with loose or tied up hair. When your hair is loose, it is tucked under the curls and tied at the top, and when it is collected, it is simply put on over the hair. To make the headband look beautiful, the bangs can be lifted and secured.
These are all the basic rules for wearing this simple accessory. Wear a “solokha”, experiment with it and be simply charming and attractive!
How and with what to wear?
In order for the solokha to emphasize the image and not make it ridiculous, you should follow several recommendations:
- You cannot wear a headband in combination with formal dresses and suits.
- When wearing a solokha with loose curls, it needs to be tucked under the strands and secured on top.
- When wearing a headband with your hair tied up, you just need to put the accessory on top.
- If there are bangs , they can be lifted and pinned using a flat clip.
- You can use an accessory of any length , since the ends are easily hidden deep into the styling, or form an interesting bow.
- The width of the solokha can also be a plus , since it is this size that allows you to better support your hair and maintain your hairstyle. For short and medium strands, the optimal width will be 2-3 centimeters, and for long ones – 5.
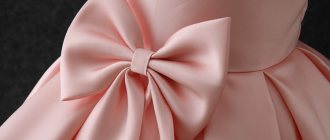
- From the free ends you can weave a wide variety of decorations: bows, flowers, knots, and also decorate these elements with the help of hairpins and clips.
- If you don’t have time to create a beautiful knot or bow , you should tie the straw from the bottom and secure it near the neck. This option is suitable for adults who love a discreet style.
- You cannot choose the color of the headband identical to the color of your hair. It is better to give preference to bright colors, and then support them with details in the main image, for example, a belt, shoes, lips, eyes, jewelry.
Hair plaits
Jewelry such as hair plaits appeared relatively recently. Especially popular among Americans. They look very interesting. The most complex harness is called the Celtic knot.
Making such a rope is not difficult, you need to take a thick rope, cut it into pieces 75-80 cm long. Next, take fabric or knitwear of the same length and width, equal to the diameter of the rope plus 1 cm. Stitch from the wrong side and turn it inside out. We make a Celtic knot and stitch it with a needle and thread to match the color of the fabric. This is necessary so that our knot does not come apart. Trim off the excess. Sew on elastic or tape.
This type of tourniquet is also called Greek. You can also make a tourniquet from an old T-shirt. It is enough to cut the strips, stretch them by the ends so that they curl into tubes. Tie a knot, sew the ends together, or simply tie.
A DIY headband is a universally convenient and effective thing that even the youngest girl can make. And what’s especially nice is that with our step-by-step illustrated master class you don’t have to delve into the intricacies of sewing.
Of the materials, this easy and exciting undertaking will require only a knitted garment that has served its purpose. From the mass of favorite, but definitely boring things, choose a T-shirt or tank top in the desired color. Any monochromatic options in classic colors - white, black, beige and brown - look harmonious.
You will need:
- Knitted T-shirt
- Scissors
- Centimeter
Let's get down to the simplest steps of making a headband with your own hands:
Carefully lay out the T-shirt, aligning the seams and straps symmetrically.
Cut a wide strip from the bottom - 15-20 cm.
* Experiment with the width, starting with the largest value. This will make it easier for you to understand what size you would like to wear on your hair. In any case, the headband will resemble a turban - due to a noticeable twist of the fabric, forming a knot and soft folds, and this will give additional volume.
Stretch the cut strip well so that the knitwear curls at the edges, and twist the loop in the middle in the form of a figure eight.
Do the figure eight again.
Fold the product in half.
Stretch the bandage again so that the twist forms a knot and divides the ring of jersey in the middle. Now four strips of fabric come out of the volumetric element in the middle
Wear a headband—for a matching updo or on loose hair.
Isn't it an interesting idea? Quick, easy and very comfortable to wear, a DIY headband can add all sorts of colors to your look, vary in width depending on styling, and can also be placed on your head in different ways, for example, by moving the knot to the side.
Fabric turban master class
To work you will need:
- Light fabric - width from 14 to 18 cm, length - 70-75 cm (2 strips). You can simply cut a long scarf.
- Centimeter.
- Threads to match the color of the fabric.
- Pins, scissors.
- Beads or rhinestones (optional).
- Thin wire 0.3 or 0.5 mm. (Needed for the turban to keep its shape).
We measure the head. The bandage should be no smaller, but slightly larger in size than the head. We fold both strips lengthwise and stitch the edges of both, leaving a 4-5 cm section unstitched - this is necessary for turning it inside out. We also stitch the transverse ends. Turn it inside out. It turned out to be two “pipes”. Bend the ends of the wire (make a loop at both ends). Place the wire into one of the pipes, inserting it into the sharp corner of the “pipe” and sewing it with thread. Sew open areas with a blind stitch. Next, we lay out both “pipes” on the table. Red “pipe” on top.
Pass one “pipe” into the other, as in the photo. We thread the red part into the burgundy one. Pull out the burgundy piece so that both “pipes” are connected together. Manually secure the joints of the parts with invisible stitches.
Can be decorated with beads or beads
Series of messages “Sewing”:
Part 1 - SEW A FRENCH KERCHIEF Part 2 - French headscarf! Methods of tying, pattern + master class... Part 37 - WALKING THROUGH THE HANDCRAFTS RUBRICS FOR THE CURIOUS AND SKILLED Part 38 - Sewing an elegant beret Part 39 - Stylish DIY headband Part 40 - Scarf with an elastic band Part 41 - Original headdress made of triangular fabric ... Part 46 - MASTER CLASS: BOOTS FOR BABIES Part 47 - SEWING SKIRTS: LARGE COLLECTION OF PATTERNS! Part 48 - HOW TO COMPETENTLY AND CORRECTLY SEW AN ELASTIC BAND INTO CLOTHES: 4 WAYS
Materials and tools
To make a headband, you can use ready-made scarves or make a fabric base using simple patterns. Suitable materials include cotton, silk (can be used with the addition of lace), knitwear, chiffon, satin, denim, wool (crocheted or knitted accessories).
To make a bandage with your own hands, you need the following materials and tools:
- a piece of fabric (no more than 12-14 cm wide, about 90 cm long, for double-sided dressings you need two different pieces of 6-7 cm wide);
- scissors (well sharpened);
- needles and threads;
- wire (diameter - 2 mm or less, length - about 170 cm) or elastic band (length - 7-8 cm, width - no more than 3 cm);
- cardboard or whatman paper (for sample patterns);
- chalk or pencil to make marks on fabric;
- tape measure;
- decorations (beads, beads, rhinestones).
The length of the fabric trim for the pattern will depend on the circumference of the head and the length of the ends, which will be located on top of the bandage. To measure the circumference of your head, you need to take a measuring tape and wrap it so that it is located above the forehead (approximately at the level of the hairline or slightly higher, depending on how the bandage will be put on). The lower part of the measuring centimeter should pass under the back of the head.
In order for everything to work out correctly, you need to wrap your head starting from the zero mark of the tape. It is imperative to double-check your measurements several times to eliminate the possibility of error. If you only have an iron or plastic ruler, you should use a regular rope: after the measurement is completed, you should attach the thread to the ruler. In addition to the bandage itself, you need to provide a supply of fabric for the ends and knot.
Sewing stages
The Solokh headband is sewn quickly, but depending on the option chosen, the pattern may differ slightly. If an elastic band is used (mostly suitable for comfortable children's headbands), it is important to remember that it will not be located along the entire length of the product, but only at the back.
Double sided for girls
To sew a beautiful and original Solokha headband for a girl, you need to follow a number of simple steps:
- Take cardboard or paper. Using a ruler and pencil, draw a rectangle - this will be half of the bandage. In this case, the width is selected individually (on average, five centimeters will be enough), and the length is calculated as follows: the circumference of the girl’s head minus 5 cm, divide the result by 2. Five centimeters, which according to the presented formula are subtracted from the length of the workpiece, are left for inserting with an elastic band ( if you add half a centimeter of allowance to the hem of the part, you get 6 cm). To the resulting length of the main part, you need to add 1-2 cm for the allowance (if the material is very unraveling, add 1 cm from each edge, if not - 0.5 cm).
- To one end of the rectangle, add “ears” or part of the bow, which will be located above the girl’s head after putting on the headband. The shape should resemble the flame of a burning candle. The sizes are chosen at the discretion of the craftswoman, but on average it is recommended to make such a bow: at the widest point - about 7 cm, length - about 12 cm.
- Draw a rectangle on paper for the back of Solokha, into which the elastic band will be inserted. Its dimensions: length – 6 cm, width – the same as the upper part of the bandage.
- Attach all the details of the pattern to the fabric, trace with chalk, and cut out. You need 2 elements for each part of the bandage.
- Place the identical parts of the “ears” next to each other, right sides inward, and sew them along the edge. Repeat the same with two pieces of the top of the bandage. Leave one edge unstitched and turn the workpiece inside out.
- Take two six-centimeter pieces of fabric and also sew them in the same way, but only on the two longest sides. Turn it inside out, insert the elastic, tuck the edges. The last thing is to sew all three blanks together.
For a girl, Solokha is best created in bright and unusual colors, if there is no attachment to a particular image.
Headband with wire
To make a Solokha with wire for a girl, you need to prepare the above tools and materials, choose a fabric suitable for clothes and check whether the wire is too hard. Algorithm of actions:
- take a thick strip of fabric, the length of which corresponds to the circumference of the head, plus allowance for a bow or “ears”, and the width is equal to twice the desired width of the headband, plus an allowance for tucking the material (1-2 cm);
- fold the strip in half horizontally and sew;
- pierce the workpiece with wire in the corner, rounding the end so as not to get hurt;
- thread the wire into a tube made of fabric and carefully sew up the edges of the bandage.
When putting on Solokha with a wire inside, you need to wrap it around your head so that the middle is at the bottom (below the level of the back of the head). The upper tips curl easily over the head, forming protruding “ears.”