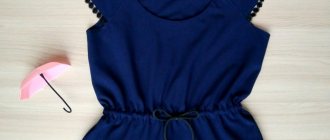
How to expand and increase the size of clothes with your own hands using inserts
February 23, 2017
February 23, 2017
Don’t be upset, and most importantly, don’t rush to give away or write off such beautiful and beloved things as scrap. Let's approach the problem creatively and everything will work out.
To begin with, remember - if the item was sewn, do you have any pieces of fabric left from it?
If you can find the fabric, it makes the task a lot easier. All we have to do is buy more buttons and we can bring our idea to life.
And the essence of our method is an additional insert that increases our product by a size or two.
We sew a strip from the fabric we found.
Depending on how much we want to increase our item.
We attach the insert on one side, for women it will be on the left, for men on the right.
In this way we seem to increase the smell on our product. And then we sew a row of buttons on the insert that we sewed.
Thus, we increased the size of our item by the width of the additional insert.
As a result, you didn’t have to break anything or redo the hinges; you got by with a minimum of rework.
By leaving the same row of buttons in the same place, you use the buttons as decoration, and this gives the item a finished look.
If the clothes were purchased ready-made in a store and you do not have the same piece of fabric, the issue can be resolved by using any other fabric at your discretion.
You can use a completely different color scheme and quality of fabric. This is where your imagination comes into play.
Sometimes using other fabrics gives an even more interesting effect. You can also use old things to create compositions. Sometimes you can unearth very interesting and beautiful samples of fabrics among old clothes. Your piece can even embellish your item. Become a fashion accessory in your outfit.
You can also use a zipper. The part (insert) can be secured with two locks (zippers) and it will look no less interesting and modern.
The main advantage of this method is its ease of execution.
As you can see for yourself, your favorite thing not only does not deteriorate, but even becomes more interesting. And most importantly, it can be easily returned (transformed) to its previous form if it is suddenly needed.
As you saw from our article, you only need a piece of fabric, buttons and a little time to bring your favorite clothes back to life in an even more original form.
Don’t hold back your flight of fancy and everything will work out for you!
Enlarging your jacket is easy and quick. Even a beginner can handle it
Sometimes, for a variety of reasons, we may need to enlarge clothing, such as a jacket. It would seem that the matter is complicated and you will either have to take it to a professional seamstress, or spend a long time and painstakingly making the side inserts with your own hands. However, there is an easier way to make a jacket larger, which even a fairly inexperienced person can handle.
You will need:
If your jacket does not have a belt, you can take a fabric that matches the color and texture. If it’s difficult to choose a fabric, don’t be discouraged, because in this case you can turn the place of insertion into a kind of accent. Take, for example, a contrasting color fabric or even sew some knitted pattern on top. Give free rein to your imagination.
Whatever material you choose, the algorithm for further work is the same. We take our jacket and try on the fabric and zipper on the insert. We cut off the amount we need both in length and width.
Youtube | amateur sewing
Now, in order not to rip off the zipper, we simply carefully cut it off, leaving the fabric part on the jacket.
Youtube | amateur sewing
We baste the belt or fabric and sew it on a sewing machine. We do the same with lightning. Almost done.
Youtube | amateur sewing
If there were buttons on your jacket, now we need to hide them. You shouldn’t rip off the buttons, because it won’t look very neat. We simply take the second part of our belt or fabric and hide the “stumps” of the buttons, covering them from above. We sew a strip.
Youtube | amateur sewing
This is what we had and what happened. The work took no more than 20 minutes. The insertion will only be noticeable to you, since you know about it. Others will take it as a feature of the jacket style.
Youtube | amateur sewing
You can watch a video on how to enlarge a jacket with an insert at the front at the link below.
Source
How to stretch something with baby shampoo
This simple method will allow you to stretch any clothing - from a T-shirt to sweatpants. To do this, you need to prepare a bowl, baby shampoo and two large towels.
- Fill the bowl with water, pour in baby shampoo, shake until a light foam appears, soak the clothes, while kneading them slightly with your hands so that the solution can penetrate between the fibers.
- Then we take it out and squeeze it, but lightly, and under no circumstances rinse or twist it.
- Now we take a dry large towel, straighten it, put the soaked clothes on top and roll it up, while pressing well on it. This will remove excess moisture.
- Then we put it on the second large dry towel and begin to pull it in all directions. It won't take much time.
- Let the clothes dry naturally.
The next time you wash already stretched clothes, you cannot use automatic drying, otherwise the item will not only return to its previous size, but will also become even smaller.
How to stretch their cotton clothes
Cotton is a material with a composition of natural fibers, so violation of the washing temperature or improper drying can cause the fabric to shrink.
To correct this unpleasant situation, you can use the following method:
- Pour hydrogen peroxide or vinegar into a container with water (3 tablespoons per 10 liters), soak clothes in the solution for 30 minutes.
- We place the soaked clothes on a dry towel and begin to stretch them to the desired size.
- Leave to dry. We perform the procedure 3 times.
During subsequent washing, choose only the correct mode and a mild detergent.
How to stretch woolen items
The reasons for the shrinkage of woolen items can also include an incorrectly chosen washing mode and aggressive washing powder, since the detergent for washing such items must be specifically for woolen items.
But experienced housewives know what to do in such a situation:
- We dilute a little shampoo in warm water or use a mild conditioner.
- Soak the item for 30 minutes and then rinse in cool water.
- We stretch the clothes in small sections, first in a horizontal position, then hang them on a hanger and continue stretching them from time to time until they are completely dry.
If you take 5 liters of water, dilute 3 tbsp in it. l. ammonia, 1 tbsp. l. turpentine and the same amount of vodka. Keeping a woolen item in this solution for an hour will not only stretch it to the desired size, but also make it elastic and soft.
How to stretch knitted items
In order to stretch knitted items, you can use different methods:
- First, soak the knitted item in warm water for 15 minutes, then wring it out and stretch it in the washing machine. We dry clothes only in a vertical position.
- Soak the item in warm water for 30 minutes, then wring out the clothing, but do it carefully, that is, do not twist it. Place on a dry towel, twist, leave in this position for 30 minutes. We unfold and steam the item with an iron until it is completely dry, while stretching the clothing in the right places.
If a knitwear item does not stretch well, then soak it in hair conditioner.
If the proposed methods do not help to stretch the item, then you can use a special clothes expander or take it to a studio. But if the item has become small due to excess weight gain, then you should put the clothes aside until better times.
How to properly wash and clean a coat
To prevent a wool, drape or cashmere coat from shrinking or becoming deformed, you need to properly wash or clean the product. This material is cleaned with a soft brush. To remove strong and difficult stains, you can soak the brush in water or soap solution. For cleaning and washing, it is better to take this coat to the dry cleaner.
At home, outerwear made of wool, drape or cashmere can be washed in a delicate cycle or a special cycle for wool at a temperature not exceeding 30 degrees. Products are washed by hand at a temperature of 20-25 degrees. For washing, use special soft gels or shampoos that are suitable for this type of material.
Before washing, be sure to remove metal objects and fur elements, collar and cuffs. If possible, unfasten or open the lining and wash and dry separately. Turn the coat inside out, fasten the zippers, buttons and snaps. Place the product in a cover or laundry bag, or in a regular duvet cover or pillowcase.
Add wool conditioner when rinsing. Wash without spinning and drying in a washing machine! After water procedures, wrap your coat in a light terry towel or sheet to absorb moisture. Then lay the clothes on a horizontal surface and leave to dry in a well-ventilated area.
The coat should only be stored upright and dry in a closed closet. You can use special covers for clothes. Once every two to four weeks, take out and air the products. Regularly clean the material from dust and dirt using a special soft brush. For more information on how to properly wash, store and dry a woolen coat, read the link https://vsepodomu.ru/garderob/mozhno-li-stirat-sherstyanoe-palto/.
Source
Simple Ways to Extend Clothes
The situation when a beautiful and comfortable piece of clothing becomes too tight is familiar to everyone. This may be due to weight gain, pregnancy, or the wrong choice of washing or drying mode. However, your favorite item can be remade so that it not only fits well, but also takes on a new original look. Below are several options for increasing the width of clothing by sewing in simple cut details. All of them are simple and require minimal sewing skills.
Transformation of an old coat
Options for increasing length and width.
Welcome to the channel!
Continuing the conversation about the old coat, today I invite you to think about whether it is possible to remake your old coat at home, which has become short or small, how to save it if stains have formed that cannot be removed or there is a hole from careless use
(for example, behind a nail).
Unfortunately, as fashion designers joke: “Fashion is constantly making its last squeak, but it never dies.” It often happens that you and I buy some fashionable coat silhouette, but after a couple of seasons no one wears such coats anymore, and in order not to look funny and inappropriate, we are forced to buy a new coat again.
Basic Rules
In order for remade items to look good, the work must be done very carefully. All expansions are carried out along the structural seams of the products, and the joints should not have holes or abrasions. The material for insert parts can be very diverse:
- fabric in tone or vice versa, contrasting;
- decorative braid;
- lace;
- satin ribbon, etc.
At the same time, you need to remember that fabrics of different densities and textures, firstly, can become distorted when sewing, and secondly, behave differently after washing. The easiest way to achieve a good fit is to use elastic materials, the choice of which is now very large.
Arranging the belt
Typically, the first sign of weight gain is a belt that is difficult to fasten. In this case, the easiest way is to alter the button. If the size of the belt does not allow this, then you can make a fastened strap, the design of which is shown in the photo. Material: grosgrain ribbon.
If the skirt or trousers have a beltless cut, then an effective solution is triangular inserts made of dense elastic material in the side seams. If there is a belt, then you can rip it off and then stitch the top, as shown in the figure.
Expanding elastic inserts
A comfortable and easy-to-implement solution is to replace a fabric belt with a strip of thick knitwear. It can be straight or with a scent.
Expectant mothers can thus remake any trousers that suit them. To do this, you need dense but elastic knitwear with a width of at least 20 cm, which is stitched just below the hip line.
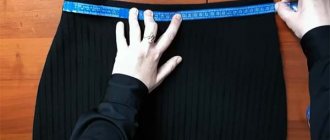
Increasing skirt and trouser sizes
With a uniform increase in the volume of the body, inserts on the skirt or trousers are made along their entire length in the places of longitudinal seams, most often side ones. The main problem with this is the fit of the belt. The simplest solution is to cut the belt and extend the flaring piece to the very top
If the belt is long enough, it is torn off, inserts are made, then sewn back on. The photo shows a redesign of a low-slung denim skirt by moving the waistband higher on the figure. The resulting reduction in the length of the skirt is compensated by the protruding corners of the bias-cut side inserts.
A simple but very original solution is to widen a skirt or trousers using an elastic band, shown in the photo.
How to lengthen a dress with lace, inserts, capes
Little troubles that happen in everyday life sometimes leave marks on clothes. Don't worry about a damaged item, everything can be fixed.
After learning several ways to lengthen a dress, you may be able to give a second life to your favorite wardrobe item. The reasons that made you pick up a needle and scissors are not so important.
The main thing is that now there is room for creativity and the opportunity to show imagination.
In what cases is it necessary
You always want things to fit perfectly and keep their shape after washing. Often, due to lack of time, you have to do everything on the run. A quick try-on can result in disappointment at home, and the poor-quality composition of your favorite product can upset you after the first time it goes into the washing machine.
It also happens that the purchased dress has become inappropriate for office work. The color, style, fabric are suitable - everything except the length.
And sometimes the very texture of the material forces the hem of the dress to rise, at the slightest opportunity exposing the legs for everyone to see, thereby creating awkward situations.
The answer to the question of what to do if the dress has become short is obvious: first of all, do not fall into despair. It can always be extended.
Ways to add length
Ideas for lengthening a short dress will not only help solve the hem problem, but also decorate the item, turning it into a creative, modern piece of clothing. It often seems that only a professional tailor can cope with such a task.
That is why many people wonder: is it possible to lengthen the dress yourself. The answer is clear - of course.
Many options will not only save precious budget and time, but also allow you to show maximum creativity at minimal cost.
Using lace or flounce
One of the easiest ways to lengthen a dress with your own hands is to sew a strip of material to its hem. To avoid damage to the appearance, you need to use exactly the same fabric as the one from which the product is made. If there is no piece of identical material, it is worth playing with contrast.
A slight difference in color or texture of the material or its weaving will be noticeable. Even a difference in one tone or another texture is noticeable. This greatly spoils the appearance of the dress.
You can lengthen the hem:
- Wide lace braid. Elegant openwork weaving is suitable for light summer dresses made of viscose, silk or other flowing materials. The color is selected to match the main shade.
If you are interested in how to lengthen a short denim dress, then lace will be one of the most successful options. Its beige or white shade without shine will emphasize the color of denim, playing on the difference in fabric textures.Thick bouclé fabrics for autumn-winter clothing also go well with this type of trim, but the shade of the insert should be darker than the main material.
- A shuttlecock made of fabric.
By choosing a material that is identical or similar in composition, you can decorate any dress, regardless of season and style. In this case, you should carefully consider the choice of color. To create a more complete look, you can further decorate the sleeve cuffs or collar area.
When lengthening the hem with lace or fabric, special attention should be paid to the pomp. To get a large volume of flounces, you need to sew twice as much material as the total length of the hem. Fluffy elements are suitable for a straight, tight knitted outfit. If you just need to lengthen the clothes, then the fabric is taken in a 1:1 ratio.
The flounces can be attached to the front or inside of the skirt. When choosing a way to lengthen a short linen dress, you need to take into account that the material loses its shape when worn, so massive ruffles are not suitable for this type of fabric.
In order to sew a fluffy hem, regardless of the type of fabric or braid, you must first thread the piece with a needle onto a long thread, straighten it evenly along the entire length, and only then sew it onto the bottom of the garment.
Dress extension with laceExtension with flounce
Making inserts on the skirt
Surely many have wondered: is it possible to lengthen the hem of a dress using an insert at the bottom. It is recommended to add them at the seams or by cutting the edge of the dress.
If you make wedges that exceed the length of the product by 10-20 cm, the skirt will appear visually larger. Guipure, mesh, and lace are great for this method.
As a result of such alterations, things are obtained with an echo of Spanish culture.
Particular attention should be paid to symmetry when inserting wedges. If you carefully observe the dimensions from the middle on both sides, the result looks like a factory one. If this rule is neglected, the alteration will be noticeable immediately.
Master class on lengthening a dress using insertsTools for workLace braid with a width of 5 cmMeasure 11 cm from the edge of the hem of the bottom and cut it evenlyTreat the sections with an overlock or zigzag stitchTurn the finished seams to the wrong side, baste and iron themSew the braid to the dressReady elongated outfit
Waist extension
When choosing how to lengthen a short dress, you should know that the methods are not limited to just increasing the size of the hem. Many models have a seam at the waist. If you add an insert in this place, the length of the bottom will drop by its width.
By using contrasting colors, you can focus on the graceful silhouette, and using different materials, you can highlight the texture to your advantage. This method is recommended for sun or semi-sun style products. Lengthening the dress at the waist for an a-line is also possible, but it all depends on the width of the cut angle.
If the material for insertion is similar, but does not quite match the main type of fabric, when combined with lace, guipure or mesh, you can visually hide the discrepancies.
Bodice extension
Options for changing clothing are not limited to the hem and waist area. In some cases it is possible to lengthen the bodice. This method will look especially beneficial on dresses in the style of Marilyn Monroe with a wrap around the bust area.
Adding fabric to the bodice area will be most preferable for styles such as sheath, pencil. When choosing a way to increase the length of a straight silhouette dress, do not forget about the importance of color.
A contrasting strip of fabric will visually highlight the bust. If you need to distract attention, you can divide the total width of the material in half and insert the first half into the bodice, and add the second half to the hem.
Creating a high waist
One way to lengthen a straight dress is to change the silhouette by creating a high waist. This option is not suitable for flared styles, since alterations in clothing will be too obvious.
The procedure looks like this:
- select a suitable piece of fabric;
- cut out the strip evenly;
- fasten with safety pins;
- stitch;
- we process the seams.
If you don’t have much sewing experience, after pinning the wedge with needles, you should baste the parts together from the wrong side. This is done to ensure that the seam is even when sewing.
Using cap elements
If you need to add length to dresses for special occasions, you can use cape elements. This option is stylistically not suitable for everyday wear, as it looks too elegant and pretentious.
Throw-on elements will advantageously set off models made of shiny fabrics, giving them an even greater touch of solemnity.
You should not use this method on silhouettes with flared hems.
Hanging flounces will be lost against the background of the folds of the skirt and will not retain their shape or visual effect.
For work, fabrics that hold folds well are used, for example, a veil. To make it, you need to hang the dress on a hanger, use safety pins to secure the textile with the required number of folds, and sew it. It is worth strictly ensuring that the shuttlecocks look symmetrical, preferably measuring the dimensions with a ruler or centimeter.
Another option for the cape method would be to make a translucent fabric with an identical cut, but longer, single-tiered or multi-tiered skirt.
Usually it is fastened over the dress, turning it into a transformer. A transparent case looks great in the form of a longer, but repeating the cut of an outfit made of veil or lace.
This method requires more fabric, but the results are worth it.
Creating a loop
Evening dresses attract attention with their style, decor and cut elements. It is this style that is more conducive to experimentation than others. Extension along the hem is possible not only with a straight strip, but also with geometrically irregular lines. The train on such a dress looks appropriate, adding zest to the image.
When making it, you need to be careful: a train that is too short or too long will look like an obvious homemade product. First you need to choose the right material. Next, divide it into several parts - front and back. It would be optimal to reduce the length of the first part by half.
The back part is folded in half, the elongated middle and short side edges are marked, an even straight line is drawn, and then the material is cut. After this, both parts are sewn in the same way as a shuttlecock. Short clothes, improved in this way, can be complemented with inserts on the sleeves or matching jewelry.
If the style and texture of the fabric match, creating a train will be the best way to lengthen the back of the dress.
Lengthening a knitted or denim dress
Knitwear and denim are a separate line in the list of fabrics for everyday wear. The softness of the first and the texture of the second do not provide much scope for creativity. Therefore, we lengthen a denim dress only with the help of flounces and lace.
Both methods can be performed by beginning craftswomen. Methods for lengthening a denim dress do not involve changing the cut due to the stitching, the violation of which is immediately noticeable.
For a knitted outfit, you can use inserts made of artificial leather, translucent fabric in the chest and waist area.
Decorating inserts
The final appearance of the product depends on the material used for the inserts, so you should choose it carefully. Stylists advise using not only plain fabrics, but also striped and polka dot colors, the main tone of which matches the color of the dress.
Leather and substitute inserts are recommended as universal, suitable for any fabric texture. Finished elements, if necessary, are decorated with rhinestones, beads, sequins or beads.
And if bright decor does not always look good on a casual dress, then on an evening or cocktail dress the elements will sparkle.
When solving the problem of how to beautifully lengthen a summer dress or clothes for the cold season, you need to understand that most of the options can be done with your own hands.
What looks like a complex design creation is actually easy to complete with a little time and research.
By changing the length of the dress, you can not only create a new product, but also show your creativity to the maximum.
Source: https://odezhda.guru/platya/sshit/757-kak-udlinit-plate
Redesigning a blouse and dress
The pattern of a blouse and dress is built according to certain rules, which must be taken into account when altering the product. However, in some cases, you can get a good result using the simplest methods, using simple-shaped details sewn on the sides, as well as in the center of the front or back. The easiest way to remake clothes is sleeveless. If the blouse has become tight in the chest and armholes, it is ripped out at the side seams and triangular inserts are sewn in.
For a rounded tummy, side parts that widen downward are inserted.
To evenly increase the volume along the entire length, you need to make a rectangular insert from the neck to the bottom
A bolder option is shown in the photo. The top is cut in the middle of the back, and is connected by two straps along the neckline and just below the armhole line. For those with curvy figures, it is better to cover the cut with lace or light fabric.
When altering clothes with sleeves, you also need to increase the width of the sleeves and armholes. The easiest way to do this is with a rectangular strip from the neckline to the bottom of the sleeve.
For a blouse with a large neckline, you can sew in pieces of wide braid
Upgrade ideas
An old and unused wardrobe item does not have to be thrown away. An unnecessary product is subject to rework, and there may be several of them. By adding or changing a few elements, you can create a new stylish outfit. For example, a long style can be cut by adjusting the length. You can, on the contrary, create an elongated version. For this, lace or material of a different shade will be useful.
In order to radically change the style, you can use several options.
Note. Any dress is suitable for work, even a wedding dress. You can make a classic or evening model out of it.
Expanding the dress using seams
Any clothing is unthinkable without seams. Depending on the type of material, seam allowances can reach from 0.5 to 2 centimeters. We leave the allowances minimal, rip out all the vertical seams - the middle one along the back and front, the side seams, and the raised seams.
In this way, you can get up to 5 centimeters of fabric . The more complex the cut of the dress, the more loose material there will be due to the seam.
Advice! To minimize allowances on elastic fabric, sew it with a narrow zigzag stitch or overlock it with an overlocker.
Making a new dress
Having ready-made samples greatly simplifies the work process. First of all, you need to decide what exactly needs to be changed . This determines which seams will need to be ripped out during the process.
Advice. If only the length and style of the sleeve changes, the side seams and hem line can be left unchanged.
An important step is the preparation of the product itself. The material must be clean and well ironed .
Tools for work
To make a new dress based on an existing one, you will need the following.
Completing of the work
After preparation, we begin the technological process. The necessary seams must be opened and the remaining threads carefully removed. The pattern is transferred to the fabric . A small piece of chalk is suitable for marking the outline. When working, it is important to leave seam allowances of about a centimeter. After preparation, each element is carefully cut out.
Advice. When working on a sewing machine, it is first recommended to process the shoulder seams and sleeves.
Many craftswomen treat the neck area with bright trim. Afterwards you can start working on the side seams and finishing the bottom.
Advice . Before you start sewing on a machine, you can overcast the parts and try on the product. This will help to correct any errors in a timely manner.
Inserts along the entire length of the dress
If there is no identical fabric, give contrasting details ! To make the item look harmonious, we make inserts not only on the sides, but also on the sleeves, shoulders or the lower part of the hem.
Progress:
- We outline where we will make additions.
- Cut out the dress fabric.
- We lay out the resulting parts on the fabric of the inserts.
- We shallow it, making allowances taking into account how many centimeters we need to expand the thing.
For example, you need 4 cm, one needs 2 cm. Along each edge of the insert - 1 cm:
- Cut out, don't forget the seam allowances.
- We sew in all the inserts.
- We steam the seams.
- Let's try it on.
Selecting fabric for inserts
The correct selection of fabric in this case is half the success:
- Try to choose fabric of the same thickness and density. Even if it is lace, the approximate thickness is still taken into account.
- Fabrics should require the same care.
- If you really like the top of the dress, but it is very narrow, make a blouse out of it, and use the skirt fabric for inserts.
Lacing
For the most daring and slender young ladies, lacing on the dress will be the way out.
Advice! Products with lacing look decent only if the holes for the lace are decorated with blocks. If you have a collet tool, then making lacing will not be a problem. No - contact the studio, this is a simple and quick procedure.
Required:
- Tailor's scissors and chalk.
- Threads.
- Lace.
- Blocks (rings).
Progress:
- We outline the cuts, their depth and width.
- We outline the location of the blocks.
- We cut taking into account the allowances.
- We process the edges of the cutout with a hem seam with a closed cut.
- We break through the blocks.
- We thread the lace.
- Let's try it on.
If open areas of the body in the sections do not suit you, then duplicate them with a contrasting insert.
When the dress becomes tight, do not rush to change yourself, just change the dress slightly!
Upgrading denim or how to “make” a new jacket.
Clothing has the right to be anything, but not boring! Maybe this is why ripped jeans regularly return to the catwalks and pages of fashion magazines. Coco Chanel said that fashion goes out of fashion, but style never does. Ripped jeans are, of course, a style . It’s not difficult to remake denim, the main thing is not to overdo it and do it beautifully, otherwise those around you will decide that life has not been kind to you :)) Although it all depends on upbringing and taste: once my dad, looking suspiciously at my insanely expensive torn designer jeans, carefully asked if everything was okay with my money. I also remembered how in the 70s my older sister gave me my first jeans (I was not the first owner of them and, I even suspect, not the second) and we friends ran to the embankment to “rub them correctly in the right places on the parapet.” It was considered “correct” to rub them without removing them, in those very “right places” after wetting your pants))). Eh, it’s a pity it wasn’t possible to film this action back then, I wouldn’t mind watching it now))). A couple of years ago I asked a friend from the States to bring me some denim jackets for painting. By default, I assumed that American jackets would come to me from America. But my friend decided that I would “spoil them” anyway and brought such terrible cheap Indian jackets that I didn’t waste any effort on them and put them away out of sight. And then I suddenly remembered and decided to try it after all. Before painting, we’ll try to make the jacket more interesting. I found some old, old, thin house jeans from the category of “you can’t wear them anymore, and it’s a shame to throw them away.”
We tear off the sleeves and belt from the jacket. From the sleeves to the cuffs. And we trim the collar from the inside.
We make a pattern in order to duplicate the details of the jacket with jeans from the pants. It is advisable to preserve the original seams on the jacket as much as possible, so without ripping, we place the jacket on tracing paper and pierce it with pins exactly along the seams. Then we trace the holes from the pins and get an exact pattern (this method is also “hello from the past”, when in an era of total shortage the clothes of girlfriends they liked were copied). We cut out the resulting yokes of the shelves.
It's even easier with sleeves; Pinned to the legs of old jeans and cut out. Here you need to pay attention to the seam on the leg, it should coincide with the seam on the sleeve (on jeans the sleeve is two-seam, it has a slit for a fastener), so that later it will be easier to duplicate the details “seam to seam” and the cut will be neat.
These are the details of the sleeves and shelves we got:
We sew the hem to the jacket details. We hide the cuts of the neckline and shelves under the collar and trims. We sew the opening on the sleeves by hand
Next we mark the locations of future holes. I just marked the lines with chalk. There is only one condition here - they must be drawn obliquely, so that later the holes do not spread (this is the chenille technique on fabrics, it is very interesting in itself)
We lay the lines along the chalk lines and tie knots at the ends of the lines:
This is what our sleeves and yoke look like now.
Assembling the sleeves. It is advisable to lay the stitch as accurately as possible at the location of the previous seam. The fact is that denim items are first sewn and then processed in a factory, and not only is the color more intense in the seams, but the fold is also very stable, and our task is to make it “as it was.” By the way, it is precisely the failure to comply with this that leads to the fact that altered jeans often look somehow artisanal.
The jacket was of an unclear length, so I shortened it and the length of the existing belt turned out to be too big. In order not to disturb the existing stitches, I simply cut the belt in half, shortened it and sewed it again.
The jacket was collected. Now it has become shorter, the yokes are duplicated with blue jeans and lines are laid for future cuts.
Now comes the fun part. Finally you can make holes! Carefully, so as not to damage the bottom jeans, we use nail scissors to make cuts between our lines.
Now let’s pummel them with pumice.
Well, that's all - our torn jacket is ready:
But everything was done for the sake of painting! So let's move on.....
I focused on Laurel Burch cats. It seems like making something “for yourself” doesn’t fall under the copyright law (although I was already in the process of thinking that I could just paint cats in the style of children’s drawings on the asphalt. Oh well, I’ll have time :)) To begin with, I just sketched out the outlines of a ballpoint with a pen (I didn’t want to draw with a pencil, and I’ve never had a disappearing marker. But if anyone has one, then of course it’s better for them.). Yavana and Pebeo fabric paints, black - my favorite Sapphire for leather (I dilute with water, it sticks tightly to the fabric).
I won’t describe the process, everything seems clear from the photos. The principle of children's coloring; I apply it the way I want :))
Please forgive the brightness of the photos, it’s a deep night outside and I had to take photos with a flash
We fix the painting with an iron. At the same time, use the tip of the iron to iron out the slits so that they look more impressive and the light-colored denim shows through more clearly. And here is the result:
For comparison, photos “as it was”:
and “how did it become” :)
Hope you like it. In any case, my assistant definitely liked it :)
Thank you for your attention, I will be happy to answer any questions :)
Modeling lesson: How to increase (decrease) a pattern
Evgenia Rodina
Fashion designer
Added: 10/23/2016
Hello, dear readers!
What to do if you need to reduce or increase the pattern of the model you like in accordance with your size?
For example, when the pattern developer did not make a set for your size, or you do not have a standard figure (for example, the bottom is one size and the top is another), or there are other reasons. To do this, there are ways to adjust patterns. A lot of them. I will talk about one of them in more detail.
In professional language, the method that I will talk about is called gradation using a proportional-calculated method using pre-calculated increments. I will not clutter the article with design terms, taking into account the fact that the material is read by tailors and sewing enthusiasts of different levels of training, and I will try to present everything as clearly as possible. But still, the topic of pattern reproduction is quite complicated, so be patient.
Schemes for changing patterns (patterns) by size
First, you need to understand that changing the pattern from size to size occurs while maintaining the inter-size interval. In simple terms, this means that each size differs from the previous one by exactly 2 cm (according to Cr - half chest circumference, since the pattern is usually built for half the figure) 42 r, 44 r, 46 r... and this interval when increasing or decreasing The patterns need to be kept along the chest line. You also need to take into account and maintain intervals along the waist line (up to 52 rubles is 2 cm, then 3 cm) and along the hips (up to 54 rubles - 2 cm, from 56 rubles - 2.5 cm). This is a rule for those who change the pattern of a model within the standard sizes.
On the pattern pieces, 2 base lines are established, which remain stationary and changes are made relative to them.
The basic lines are considered to be:
Back
- chest line
- line tangent to the armhole
Shelf
- chest line
- line tangent to the armhole
Sleeve
- sleeve width line under armhole
- line connecting the upper and lower ends of the front roll.
Trousers , front and back halves
Skirt
- hip line
- line of the middle of the front or rear panels
Now, having established the main lines, you can proceed directly to changing the patterns (pattern details). To do this, you need to arm yourself with the diagrams given below, according to which, and make adjustments. Let me remind you that changing the pattern by more than 2-3 sizes leads to an error and does not change the final result for the better. In order to reduce the pattern by a size, you need to use the increment values from the diagrams for each point changing position with a minus sign, i.e. in reverse order.
Adjusting patterns from size to size
The first scheme for increasing (decreasing) the basic pattern of the skirt from size to size for standard sizes.
Increasing (decreasing) the basic pattern.
It is easy to check whether the intervals between sizes have been preserved by adding up the increments in the area of the chest line. 0.5+0.3+0.3+0.9=2cm.
Increasing (decreasing) the sleeve pattern.
Increasing (decreasing) the trouser pattern.
Sewing the jacket to size yourself
Now let's look at how you can sew a jacket yourself, depending on where it is too big.
How to sew a jacket at the waist
One of the easiest ways to reduce your clothing size.
Typically its value ranges from 3.5 mm to 4.5 mm.
At the end of the work, you should try on the updated jacket.
How to sew a jacket on the back
For this option, you also need to decide on the scale and at what seams you will sew the item.
Now all that remains is to turn the clothes inside out so that they are right side out.
How to hem jacket sleeves
First you need to rip the fabric, namely its seam, on the sleeve (this seam should connect to the cuff). You should first measure the length you want to bend with a ruler. Most often this happens from about one and a half to three centimeters. Next, measure the distance from the edge to the straight line, which, therefore, will be the line of the new sleeve (take into account seam allowances). We shorten the lining to the same place. After this, compare the fabric and lining, they should be exactly aligned.
Source