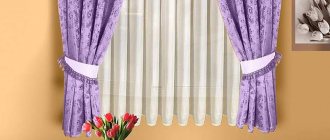
Recently, burlap is increasingly appearing in interior decor.
Burlap in the interior is loved by many designers; it can increasingly be found not only in village houses, but also in luxury apartments, restaurants, and banquet halls. Rough, unattractive in appearance and hard to the touch, the fabric is traditionally associated with a rural lifestyle and economic activity, and not with the stylish furnishings of a modern home, but despite this, designers willingly use it in their projects.
What is the secret of such popularity? It's all about the amazing versatility of burlap and unlimited creative potential, thanks to which the nondescript shade and rough texture of this material will bring grace, freshness, harmony, home comfort and sophisticated aesthetics built on contrast to the interior. It’s worth looking at burlap in a new way if you want to transform your home and revive a boring environment.
Furniture upholstery made of burlap in the interior of a studio apartment
Upholstering the headboard with burlap will add a special charm to your interior.
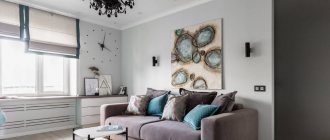
Living room combined with kitchen, in a classic style
Cozy dining room decorated in country style
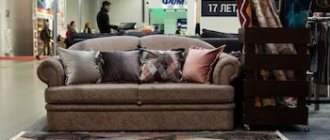
Upholstery for sofas and armchairs
If you have no idea how to use burlap in the interior, you probably imagine a rough, scratchy fabric. But it should be noted that burlap comes in 3 types:
- Jute. This material is made of the toughest fibers, but at the same time it is the most wear-resistant.
- Linen. The softest option, consisting of 100% linen.
- Mixed. A mixture of flax and jute 50 to 50. Durable but soft.
Mixed burlap is used for furniture - it lasts a long time and is pleasant to sit on. Some companies offer custom-made burlap sofas, but you can reupholster old furniture yourself.
Thanks to the neutral appearance of the material, you can use any decoration:
- the carriage screed looks amazing in the Provence style living room;
- prints a la prints from coffee bags are suitable for loft interiors;
- Stitching and large buttons would be appropriate for country design.
It is not necessary to select rough, suitable furniture for the decor; try to implement a certain oxymoron - combining incongruous things. Take a baroque chair or stool with carved legs and replace the rich velvet with burlap.
To highlight the original upholstery, surround the upholstered furniture with wood, glass or metal - sisal goes best with them.
The photo shows a version of upholstered furniture made of burlap
Journey from a dusty warehouse to a cozy home
For a long time, burlap was used exclusively in the economic sphere. Bags, work clothes, and shopping bags were made from this rough but durable material. For interior decoration, burlap was used only in village houses, where sophistication and sophistication did not occupy the first place, and practicality, wear resistance, durability combined with ease of care were valued above all.
Burlap decor looks very beautiful
Bedside table decorated with a burlap tablecloth
The clearly visible interlacing of fibers on the burlap looked too simple and uncomplicated, and the fabric itself was stiff and expressionless enough to be used for decorating city apartments. But that was before. Today, simplicity and naturalness are highly valued, pretentious and austere interiors do not give a feeling of peace, do not allow you to relax after a hard day, and the use of such “homey” and “country” material as burlap fills the house with serenity and harmony, which residents of megacities so lack.
Advice! With the help of burlap, it is easy to create a comfortable environment in your home that will be associated with home warmth, family idyll, comfort, and tranquility.
Small poufs will add comfort to your interior
A burlap sofa looks very interesting
A coffee table made from an old chest will add personality to your interior
Burlap is made from hard bast fibers of flax, jute, cotton, using the simplest weaving. This texture of the material provides high strength and wear resistance, while the cost remains very low. It is these factors, combined with versatility, that make burlap one of the most successful materials used in arranging the interiors of a wide variety of rooms.
With the help of such textiles it is easy to give the environment an aged look “with history”. In combination with roughly processed wood, massive furniture, antique furnishings (chest, bench), this material will help create a unique interior, practical, natural.
Tablecloth on the table
What type of burlap to use depends on the style, functionality of the table and your preferences. For the kitchen table, choose thin linen fabric; it is permissible to decorate a coffee table or bedside table with a stiffer material.
A regular tablecloth looks too simple, so decorations will not interfere with it. Sew frills, tassels, ruffles, flowers or ties. Decorate with white patterns or colorful embroidery. The combination with the most delicate lace looks especially harmonious.
Budget ceiling finishing options
If the most modern technologies require considerable investment, and you are currently capable of this, adopt time-tested ideas. And who said that the original ceiling surface is necessarily expensive?
It would seem that the cheapest thing you can do with your own hands is to whitewash the ceiling. But, firstly, whitewashing is only the finishing part of the work. It is usually preceded by putty, plaster and primer. And this is also a waste. Secondly, in a couple of years the problem of “how to decorate the ceiling” will confront you again, since whitewash is extremely short-lived.
You will find the brightest and most stylish solutions for decorating the ceiling with wallpaper in our next article: https://homeli.ru/remont-i-otdelka/potolok/oboi-dlya-potolka
What inexpensive finishing options are preferable:
- Painting. It will not cost much, but such a ceiling will not require new repairs soon. What you can play with is the shades of paint. Make sure that the color of the ceiling does not resonate with the color of the walls.
- Wallpaper. Take textured wallpaper, durable and beautiful, preferably one that can be painted. And then you can refresh them with a new color every year.
- The ceiling is made of plastic slabs. It’s not the most fashionable option to decorate the ceiling with plastic squares, but in some rooms it will look very appropriate.
- Liquid wallpaper. By and large, this is finishing the ceiling with the same paper, only combined with other components. You can make such wallpaper yourself. Only interior decoration is possible with such materials, but it has many advantages. This is both an original ceiling and a microporous, that is, breathable system.
Chair covers
Most often, chairs are “dressed up” on the occasion of an important event; burlap products are used to decorate celebrations in a rustic, boho, rustic or eco style.
The covers are one-piece, that is, they involve both the back and the seat - they require a soft or medium-hard fabric. And partial, that is, decorating only the back - any fabric, including jute, will do here.
For a home or cottage in a suitable style, the upholstery of chairs can generally be replaced with burlap. This furniture is ideal for a wooden interior.
The photo shows an example of using sisal on chair covers
DIY beauty
It is not at all necessary to ask a designer for help to create accessories from natural fabric for the home. Do it yourself! The main thing is to know what kind of burlap to use and for what. So, for curtains, tablecloths, napkins, furniture upholstery, choose a rough and dense fabric, and for small decor (for example, decorating candles or decorating burlap glasses) - soft and thin. For example, sewing curtains with your own hands is much easier than ever! We punch the rings to the required length and width (according to the window measurements). This component is sold in a specialized store. We process the edges of the fabric using a sewing machine or by hand. All is ready! And quickly, and most importantly – stylishly!
The curtain with eyelets can be strung directly onto the cornice pipe or you can use special hooks
For a country house or a room in a rustic style, you can use rope loops
Making your own pillowcase is just as easy as making curtains. To the required dimensions of the pillow, we cut the fabric folded in half with allowances of three centimeters. We sew three sides together, insert a zipper into the fourth and turn the finished product inside out. We put it on the pillow and fasten it.
A burlap pillowcase is easy to sew and looks stylish.
An old pouf with shabby upholstery will be radically transformed if it is draped with burlap.
Dishware or candle accessories are a thin strip of burlap wrapped around the item and secured with hot silicone glue. As you can see, burlap in the interior with your own hands is easy. Making accessories does not require any special skills or abilities!
Beautiful candle decor
Lace braid, burlap and a little time are all you need to make stylish cutlery envelopes
Wrapping a toilet paper roll in burlap makes a napkin ring.
Using burlap you can update flower pots, now they are all made in the same style
See alsoWood cuts for decoration
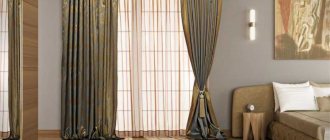
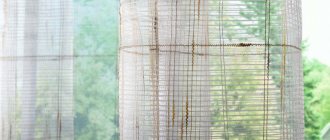
Curtains
Burlap curtains in the interior are extremely versatile:
- straight simple long curtains will decorate a Scandinavian or modern interior;
- models with ruffles and tassels are used on windows in classic decor;
- rolled or Roman ones suit the industrial style;
- multilayer figured curtains emphasize Provence and country style.
Combining burlap with other fabrics or decorative elements can produce amazing results. Play on the contrast of colors with bright chintz or combine textures with flowing organza. Ribbons, braid, lace, embroidery, and prints are suitable as accents. It is not necessary to combine the fabric; you can decorate burlap curtains using tucks or drawstrings.
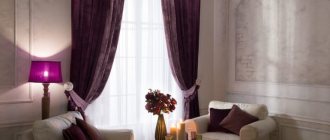
In the photo there are burlap curtains in the living room
Successful color combinations of burlap
Long gone are the days when burlap was perceived as a rural attribute from the villages. A creative approach to business allows you to decorate any house and apartment, not just a country home.
Thanks to the ability to choose the shade of eco-friendly fabric from light brown to rich black, reminiscent of the color of strong coffee, this canvas can look harmonious with almost any interior items. The fabric will complement almost any style direction or design idea.
Burlap looks very beautiful together with black, greyish, snow-white, beige and cream colors. Also, burlap in interior decor goes well with a pastel color palette. A good combination would be a soft lilac shade, blue, mint colors. In addition, experts recommend not to ignore such original combinations of the natural color palette of the canvas, among which burlap looks harmonious with rich tones of crimson, orange, green, and blue.
A rough-looking fabric can be harmonious in the company of a text print or natural fiber. It looks advantageous with bright chintz, braid for finishing, white lace, all kinds of beads, ribbons, fabrics with decorative floral elements and patterns.
Decorative pillows
Burlap pillowcase - ideas for any interior design. However, it is uncomfortable to sleep on such prickly material, so it is used exclusively for decoration.
If you want a pillow arrangement for your sofa or bed, make it yourself. Sew pillowcases and decorate them as you wish. Draw beautiful birds or animals, embroider bright birds, transfer a family photo, attach unusual buttons or ribbons.
Pillows need to be washed more often than other decor, but this should be done exclusively by hand and only in cold water - the fabric has a high percentage of shrinkage.
The photo shows cute handmade pillows
Review of stylish interiors using burlap
Most often, burlap is used to recreate the following styles:
- African;
- Moroccan;
- country;
- Provence
Due to its simplicity and original texture, it can also be used to decorate the following styles:
- loft;
- minimalism;
- eco style.
The only thing this natural material is not combined with is the high-tech style. To make burlap look more stylish, you can use the following decorative elements:
- lace, braid, satin ribbons, beads and beads, hand embroidery;
- wood, glass, forged metal;
- any other material of turquoise, purple and crimson color.
Now let's look in more detail at what products you can make from burlap with your own hands.
Curtain tiebacks
Such a small detail as a curtain tie, if chosen correctly, will become the highlight of the interior. Tie a burlap ribbon into a regular bow and you will already have an interesting shaped decor. But you can also work hard: make beautiful flowers, plant them on a ribbon and attach them to the curtains. The decoration made from seashells looks unusual.
It is better to use burlap tiebacks on contrasting light fabrics - linen, organza, cotton, mesh. If you have curtains made of this fabric, make a tie from the same fabric or take a jute rope.
Burlap on the walls
This material began to be used not only to create various accessories or decorative items, it became widespread as a material for decorating walls. Pieces of multi-colored fabrics and rough canvas will look no worse than a painting by a talented artist. This combination fits into different interiors, looks elegant, emphasizes the owner’s creativity and good taste.
Burlap on the wall can be found in the form of a variety of photo frames, which you can even make yourself. Also popular are items such as paintings, panels, and collages. This material allows you to experiment, decorate your home to suit your taste, turning the most creative ideas into reality. In addition, this canvas can be used on walls to create an “aging” effect, reflecting the life of a person during the Middle Ages.
Burlap wallpaper
Wall decor with burlap in the interior is an unpopular solution, but very original. In addition, such a finishing material will cost you about the same as middle-class wallpaper, and will last longer. The only negative is the presence of joints; most often they are hidden behind wooden planks, but they can also be replaced with jute rope.
Gluing fabric is more difficult than paper or non-woven fabric, but the result is worth it. If a plain wall design seems boring to you, you can always paint patterns on top with regular acrylic paint.
Materials for finishing, or what to combine burlap with
Combining this material is not as difficult as it might seem at first glance, especially in its natural, calm beige, light brown, golden or chocolate color scheme. The most popular option is decor with burlap and white or cream lace.
The same products made from natural ingredients – hemp, cotton, jute and sisal ropes – go well with this fabric.
Another way to combine is burlap and natural fabrics (cotton, linen) with a print or bright pattern. You can also use satin ribbons, bows, ruffles, and braid for individual items.
To emphasize the calm colors of burlap, the following can be used:
- bright small berries and flowers made of polymer clay, plastic, felt or paper;
- dried flowers;
- wooden buttons;
- multi-colored mother-of-pearl beads;
- decorative beads made of natural stones.
By correctly using various variations of these finishing materials, you can get real works of art. Let's talk about them in more detail. So, what can you do by skillfully cutting and sewing burlap?
Flower pots
Burlap, although coarse and dense, is still fabric, so you shouldn’t plant plants in the bag right away. But it’s perfect for framing flowerpots!
You can take the simplest route and put the pot in a bag - this way you can hide an ugly or unsuitable vessel from prying eyes. Plus, the neutral beige color of the material forms a natural unity with the green leaves of the plants.
Other options require imagination and additional time. Burlap is used to decorate any vessels - from an ordinary plastic bottle or tin can, for example, you can make a stylish planter for small flowers. If the result seems boring, decorate the pot with beads, lace, stones, and buttons.
The photo shows gift pots with succulents in rough fabric
Material care
It is easy to care for the material, because large textile products (bedspreads, tablecloths, curtains) are sewn from thick burlap.
- It is recommended to wash either by hand or in a washing machine with certain programs (minimum temperature and no spin) with the addition of liquid powder.
- It is advisable to dry “on the product” (if it is a cover for a chair or ottoman).
- Decorative crafts can be wiped from time to time with a damp sponge, brushing off dust.
Burlap is a grateful material with unlimited potential, which, with skillful hands and desire, will allow you to transform the everyday environment of your home.
© 2021 textiletrend.ru
Kitchen accessories
Burlap in the kitchen interior is used not only as a tablecloth, it is used to sew:
- napkins;
- potholders;
- covers for cutlery;
- hot coasters;
- aprons;
- practical bags;
- decorations for jars and containers.
Serving napkins can be labeled for each family member or beautiful designs can be drawn on them.
The bags are suitable for storing vegetables, fruits, cereals, coffee and sweets. Such kitchen decor is ideal for a summer house or country house, but in an ordinary apartment you can easily create the illusion of country life.
How to use burlap correctly
Burlap can be used in large quantities to imitate a village dwelling. And in some cases it is enough to place accents in the room in the form of:
- decorative pillows;
- lampshades;
- sewn soft toys;
- covers for pots with indoor plants.
In the most daring interiors, burlap is used as wallpaper.
Headboard
We have already mentioned that burlap is often chosen for upholstery due to its practicality and texture. The bed is no exception.
The classic version of a figured headboard with a carriage tie, made in jute fabric, looks both simple and impressive.
If you need to have certain skills to make a carriage tie, then anyone can make a stationary headboard from soft squares. Use thin plywood, padding polyester and burlap. Place the layers on top of each other, secure with a furniture stapler and install on the wall.
Idea selection
Before you take up threads and scissors, you need to decide on an idea for the craft. Reviewing relevant literature and online publications will help you do this. At the same time, it is advisable to use someone else’s work not as a model, but as a source of inspiration.
It is recommended to choose the manufacturing technology that you are inclined towards. If you feel that sewing and fiddling with paints is not your thing, you should not settle for an option that involves such types of creativity.
For beginners, it's best to start with something simple. Only after gaining experience can you move on to something more complex.
Shade
Make a pendant, table lamp or sconce the center of your interior! Replace the standard lampshade fabric with textured burlap and its weaves. Well-stretched material perfectly transmits light, and when assembled with a drawstring, it creates an intimate, homely atmosphere.
With diffused light in warm, natural tones, the room will feel cozier and the lamp will look like a designer accessory.
Advantages and disadvantages of burlap
Durability
Due to their high strength, burlap products are highly wear-resistant. This also allows the fabric to be used as furniture upholstery.
Burlap furniture covers
Availability
Low cost, especially if you purchase this product in large quantities.
Naturalness
This is an environmentally friendly fabric. It is made from rope and flax. Most often it is not painted; the usual beige-brownish shade is a natural color. Colored copies are also available for sale.
Versatility
The pronounced rough texture of the material goes well with other fabrics (from delicate lace to elegant silk). It also harmonizes well with wood, ceramics, metal and glass. It adds warmth and coziness to a cold, austere interior, suitable for use in a variety of design styles (African, boho, Scandinavian, Provence, eclectic, loft, eco, country, shabby chic, etc.).
Flower decor with burlap
Successful color combinations
Burlap can be purchased in several shades (from light brown to black coffee). This natural color palette combines harmoniously with neutral shades (black, gray, white, beige), pastel shades (lilac, blue, mint), as well as rich ones (orange, raspberry, green, blue).
Calms and helps restore vitality
Daily tactile contact with burlap has a beneficial effect on the nervous system. Use this fabric for decoration and you will soon notice how its appearance improves your mood.
Decorative burlap pillow with cats
In addition to the above advantages, there are also several disadvantages:
- Before use, it must be washed, as the material shrinks a lot and there is an unpleasant possibility of getting a result that is not what you expected.
- The fabric crumbles at the cut site, so take extra fabric and don’t forget to trim the edges.
- If used in rooms with high humidity, the burlap will begin to rot.
As you already understand, there are few downsides. There is a high probability that if used correctly, the disadvantages will not manifest themselves in any way.
Burlap tablecloth decor
Interior decor and accessories
Perhaps burlap in the interior is one of the most versatile and favorite materials for needlework among creative individuals. From it they create:
- vases;
- baskets for storing things;
- paintings;photo frames;
- Stuffed Toys;
- New Year's toys;
- candlesticks;
- interior dolls and much more.
In addition to the wear resistance, simplicity and environmental friendliness we have listed, burlap is highly breathable, easy to care for, and compatible with many materials. The disadvantages include strong shrinkage during washing and low moisture resistance - keep this in mind before you start creating.
Characteristics of the material, pros and cons of use in finishing and decoration
Burlap is a fabric formed by weaving various fibers; therefore, it can be:
- linen;
- jute;
- cotton.
Depending on the type, the fabric may have different densities. Thin, airy fabric is used exclusively for decorating small objects, and thick, “stuffed” fabric is used to make bedspreads and tablecloths, curtains and furniture covers.
The advantages of using canvas in the interior are based on the main characteristics of the fabric itself, these are:
- durability;
- wear resistance;
- hygroscopicity (the material “breathes”);
- versatility (combines well with other materials and fabrics);
- decorativeness (unique texture of the fabric);
- ease of care (interior attributes are easily erased);
- environmental friendliness.
There are few disadvantages, but there are:
- the material has some “shrinkage”, so it needs to be rinsed in water and dried before work;
- the fabric easily “crumbles” at the cut site, you need to leave some reserve during the first creative experiments;
- the canvas “does not like” dampness, and with excess moisture it begins to rot.
How to beautifully decorate a ceiling
For example, you don’t want to completely change the ceiling, but you don’t mind decorating it. And there are a lot of options here too. You can add more elegance to the ceiling with molding - a finishing material very similar to gypsum stucco.
A good option for inexpensively updating the ceiling is vinyl stickers. In the same way, you can simply repaint the ceiling a new color, and the space will be different. Read about this: https://homeli.ru/remont-i-otdelka/potolok/naklejki-na-potolok
What other types of ceiling design are actively used today:
- Wide cornice. This element gives the ceiling an expressive shape. It can be made from drywall. The frieze is the completion of the structure and the border between the base and substructure levels.
- The monotonous ceiling space is diluted with geometric shapes, usually they are three-dimensional, made from the same plasterboard, complemented by lighting.
- If your ceiling is wooden, then using special interior stencils, you can paint the surface with acrylic paints yourself. These are abstract drawings, stylized plants, ornaments, etc.
The ceiling, decorated with numerous modules, looks very beautiful. These are, for example, multi-colored wooden or plastic circles suspended at a distance of 30-40 cm from the ceiling. True, this option is good for high ceilings.
To completely transform a monolithic ceiling, try making it multi-level. This can be supplemented with structures of arches and niches, possibly stripes, however, the ceiling height should be at least 2.7 m, and the room space should be sufficient.
Be impressed, be inspired - even looking at the ceilings of offices, parking lots, museums, restaurants, you can take note of some idea and try to implement it on the ceiling surface of your home.
Alternative options
When asking the question of which ceiling is best to make, not everyone quickly finds the answer. Because some people want to create something unique and special. Molding is an interesting finish that resembles standard stucco. Thanks to this, you can periodically change the color and get something new and unusual.
What else needs to be highlighted:
- Make a ceiling from plasterboard. How is this done? It's simple: having created a frame, the fastening is carried out. In addition, wide cornices are made from this material, which can completely change the appearance of the room. And then something unique may appear on such a surface.
- The monotony is easy to break up with figures that appear on the ceiling, made from the same plasterboard. They are combined with lighting solutions. The result is a total eclipse of any other solutions.
- Another unusual option is the use of coloring.
Ceiling finishing with PVC coating
This refers to a stretched film web. Stretch ceilings are no longer even modern types of repair, but classic ones. The canvas is stretched over the ceiling area, hiding all defects in the rough ceiling.
The stages of work are few: take measurements, prepare the room and use a heat gun to stretch the fabric. For everything about everything – no more than 3-4 hours.
Such a ceiling is designed by specialists, so it is worth telling them about the planned lighting so that all communications are installed correctly. In addition, they will tell you how to protect the ceiling in each specific case from melting the canvas with a lighting fixture.
Installation of PVC covering (video)
Recommendations
Standard monolithic structures should be diluted with several levels. These can be arches, niches, stripes. But in a low room this is not relevant. Having many offers at hand, everyone can make a decision for themselves without any problems. It is not always necessary to call the experts. Something is created independently. Before starting work, it is worth understanding how to create this or that structure, and only after that start working. As a result, it is possible to get a new and modern coating for the ceiling of any house or apartment without any special expenses.
Liquid wallpaper for ceiling decoration
Among other types of finishes, we can highlight the ceiling cladding with liquid wallpaper. This process is more creative than the others. And if you are already working with ready-made materials, the task becomes easier.
After leveling the surface, all you do is buy the mixture you like, and then the real magic begins.
How to work with liquid wallpaper:
- Shake the bags with the mixture a couple of times, this is important - otherwise lumps may form on the work surface.
- You can stir the wallpaper in a bucket, a basin, or a bathtub. To dilute one package, you need an eight-liter container.
- Use clean water no higher than 30 degrees. In fact, the water temperature does not affect anything, it will just be easier to work.
- Pour the contents of the package into the container. Pour 5 liters of water into it.
- Stir the mixture with your hands for a long time until it resembles thick cream.
- If lumps form in the solution, remove them immediately.
- Let the solution sit for half an hour.
- Decorative additives, if any, are poured out at the very beginning of mixing.
The mixture should be neither liquid nor thick - liquid will flow from the ceiling, and thick will be problematic to apply.
Beautiful textile ceiling decoration
Usually the surface of the walls is covered with fabric, but the ceiling is also not new in this matter.
As for the choice of fabric, the following are suitable:
- Chintz;
- Linen;
- Silk;
- Tapestry fabric;
- Special fabrics for upholstery.
Of course, the stronger and more elastic the fabric, the more reliable the coating will be. Specially treated fabric is easier to work with. Velvet, suede and velor are usually glued on. Cotton and cotton-viscose fabrics are stretched. And for drapery they use thin and light fabrics, but of sufficiently high strength.
Finishing the ceiling with burlap
You can use the most original methods and forms of ceiling design. For example, burlap.
The sequence of this finishing:
- Break the ceiling into rectangles and squares;
- Make a timber frame exactly according to the given geometry;
- Tint it or paint it, then varnish it;
- Cut the burlap relative to the frame into the required number of segments, just do it with an allowance so that the burlap sag a little;
- You need to fasten the material to the beam with a stapler or rivets;
- Place lighting between the ceiling and the burlap under the frame to create subdued lighting;
- Small fans are also installed to create a water ripple effect.
Attach the chandelier only to the frame so that you can remove the burlap for washing if necessary.
Ceiling painting
When no option suits you, but there is a desire to use unusual motifs, painting will come to your aid. This is an opportunity to apply any design to the ceiling surface. This option will fit well into every room. It will be beautiful if stars, the moon, or just a beautiful space appears on the ceiling in the nursery to help the baby fall asleep.
Flowers or interesting paintings may appear in the living room or bedroom for adults. But to make the room perceived by the eye larger, you can draw windows, and any open spaces behind them. But how is this done? According to the experts, there are two main ways: call specialists or start the process yourself. The work has several steps:
- Old plaster is removed from the surface of the treated area.
- After which the ceiling is washed.
- The resulting gaps are removed using plaster.
- When everything is dry, you need to walk around the perimeter with an emery sheet.
- Next, finishing putty and acrylic primer are applied.
This was preparing the surface for work. Only after this can you work on the drawing. For the process to be successful, you should stock up on:
- Water.
- Acrylic paints.
- With a pencil.
- Coal.
- Stepladder.
- With brushes.
- A palette or something similar.
You need to create an image on a piece of paper. After which the image is transferred to the ceiling. You can use a pencil, but the best option is a projector with a zoom function.
