/Accessories and decor/Decoration/
There are several ways to sew tablecloths, because the corners and side cuts of the fabric can be processed in different ways. In this material we have described a traditional and basic method, having mastered which you will be able to sew with your own hands not only festive or everyday tablecloths, but also kitchen napkins, towels and runners with neat corners and edges.
To sew a tablecloth with your own hands you will need:
- A piece of suitable fabric needs to be the right size (from what material is best to sew a tablecloth, read the article “Choosing a tablecloth in 6 steps”; in this master class, the tablecloth was made from linen);
- Threads to match the fabric and decorative trim;
- Sewing machine;
- Sewing supplies: tailor's scissors, ruler, measuring tape, pins, thimble, thread threader, chalk or marker;
- Decor if desired (this could be: sewing, border, fringe, lace, braid, etc.);
- Iron.
We sew a tablecloth in 1 evening: a master class for beginners
There are several ways to sew tablecloths, because the corners and side cuts of the fabric can be processed in different ways. In this material we have described a traditional and basic method, having mastered which you will be able to sew with your own hands not only festive or everyday tablecloths, but also kitchen napkins, towels and runners with neat corners and edges.
To sew a tablecloth with your own hands you will need:
- A piece of suitable fabric needs to be the right size (from what material is best to sew a tablecloth, read the article “Choosing a tablecloth in 6 steps”; in this master class, the tablecloth was made from linen);
- Threads to match the fabric and decorative trim;
- Sewing machine;
- Sewing supplies: tailor's scissors, ruler, measuring tape, pins, thimble, thread threader, chalk or marker;
- Decor if desired (this could be: sewing, border, fringe, lace, braid, etc.);
- Iron.
Sewing decorative elements with your own hands: stages of work
Selection of matter
The crucial point before making napkins or a tablecloth from fabric with your own hands is the selection of fabric for sewing. The choice must be taken with special responsibility; the appearance of the models and their practicality in operation will depend on it.
Sewing them yourself is extremely easy.
Important! The fabrics chosen for sewing must have sufficient density and heaviness. In this case, the things you sew will not slide on the tabletop or lap
The material for making napkins should be dense but light, easy to wash and retain its original shape.
For everyday use, cotton napkins are best.
You can sew napkins and tablecloths with your own hands from various fabrics. Textile tablecloths and napkins can be made using both natural and synthetic fabrics, combining linen, lace, organza, and satin. By combining opposites, you will understand how beautifully you can sew linen napkins using scraps of organza and satin.
Napkins made from natural fabrics are not easily soiled and retain their shape quite well.
Natural fabrics (thick cotton, linen)
They are practical, have sufficient density and heaviness. Excellent moisture absorption. The material is practical and wear-resistant, irons well.
The linen and satin option looks more festive.
Traditionally, cotton, linen and satin are used to sew table linen.
Natural fabrics mixed with synthetic threads
The most common synthetic additive is polyester. Models made from mixed materials are more practical to use and shrink less. Even the most difficult to remove stains are easily removed from their surface.
The choice of colors depends solely on your desire.
Important! Items made from mixed fabrics should not be subjected to high-temperature processing.
Synthetic material
These are fabrics made of 100% polyester. Suitable for sewing tablecloths, but not advisable for sewing homemade napkins. The fabric is practically unable to absorb moisture. A napkin made from synthetics will be difficult to use. It will not remove moisture from the table; it is difficult to wipe your hands with it.
Napkins should be in harmony with the tablecloth and the overall decor of the room, both in color and texture.
Harmony means not only complete matching of colors, but also a successful contrast or mix.
Important! Do not wash at temperatures exceeding 40 degrees. Do-it-yourself table napkins made from fabric similar to that of the tablecloth look stylish.
Do-it-yourself table napkins made from fabric similar to that of the tablecloth look stylish.
How to beautifully hem a rectangular tablecloth
To work you need to prepare:
- piece of fabric;
- matching threads;
- sewing supplies.
Description
We measure the length and width of the tabletop, add two overhang lengths (usually from 20 cm to 40 cm) and two hem lengths (usually 5 cm per side).
It is advisable to wash and iron the fabric first so that shrinkage is minimal when used. The second way is to immediately increase the size by 10-15 cm when determining the length. This is especially important for natural fabrics.
With a hem allowance of 5 cm taken into account, its size in the finished product will be 4 cm.
Cut out a rectangle of the required size.
Place the fabric on a horizontal surface, wrong side up. We turn the cuts to the wrong side by 1 cm and secure them with pins.
Iron around the perimeter.
Then from each corner we measure in both directions an amount twice the size of the hem for the finished product. For example, if our final hem is 4 cm wide, then we measure 8 cm. We connect the resulting points on the fold lines with a straight line.
How to measure a table depending on its shape
How to reupholster a chair with your own hands: step-by-step instructions
Whatever your table is, glass, solid or rattan, you can sew an interesting tablecloth for it, which will complement the interior and make the house more comfortable. The shape of the tabletop and its size determine how much fabric we need to buy for cutting. Let's consider all the options and reveal little secrets for beginning needlewomen.
To choose the right shape for a tablecloth, you need to know certain nuances.
Round table
Let's measure the radius, the length of the overhangs and add allowances for the hem of the product.
Both square and round tablecloths look beautiful on round tables.
Example: Tabletop radius – 50 cm, overhang length – 30 cm, allowance – 4 cm. Total 50+30+4=84 cm. This is the radius of our future product.
You can even sew products of different shapes and combine them.
Knowing these numbers, we take the canvas, fold it four times (in half along the length and width) with the front surface inward. We pin it with pins so that the fabric does not move apart. Then, using a centimeter and chalk, we measure the previously obtained value. Carefully cut off the excess with scissors. We take out the pins. Our future tablecloth is ready for further edge processing and decoration.
This tablecloth will look very stylish on the tabletop.
Square table
Let's find out the size. Since the table has a square shape, all its sides are equal and we only need to measure one of them. Let's decide on the length of the hanging part and allowances.
For square tables, only coverings of the same shape are suitable.
Example: Side length is 100 cm, divide this figure in half. We get 50 cm. Overhang length – 30 cm, allowance – 4 cm. Total 50+30+4=84 cm.
To add style, two square tablecloths laid crosswise are sometimes used.
Now take the fabric, fold it in four with the wrong side out and pin it together. Let's measure the estimated 84 cm on each side. Next, using a ruler and pencil, draw parallel lines. Let's cut off the excess fabric along them and remove the pins. Now we can start edging our future tablecloth.
Oval table
First, let's make a pattern. In order for the product to look aesthetically pleasing and for the overhangs to be the same size, it is necessary to accurately replicate the oval of the table. Take thick paper and accurately draw the outline of the tabletop. Add the length of the hanging side, approximately 30-40 cm and seam allowances of 2.5-4 cm.
For an oval table, you can make a tablecloth in the shape of an ellipse or a rectangle.
Pin the resulting pattern to the fabric and cut out the panel. After that, we’ll break off the pins and start decorating the tablecloth.
Rectangular table
We sew a rectangular tablecloth for the table with our own hands. To do this, measure the length and width. Divide both values by 2. Add the desired amount of overhang and seam allowances.
A rectangular table can only be covered with tablecloths of the same geometry.
Example: The long side is 120 cm, the short side is 60, divide these values by two. We get 60 cm and 30 cm. Overhang length – 30 cm, allowance – 4 cm. Total 60+30+4=94 cm. 30+30+4=64 cm.
Sometimes special tracks are used as a covering for such countertops.
Take the selected panel, fold it in half along the length with the front side inward, then again along the width. We secure it with pins so that the fabric does not move during the cutting process. In accordance with the calculations, we measure 94 cm in one direction and 64 cm in the other. Then, using a ruler and chalk, we clearly draw the lines along which the cuts will pass. We cut off the excess material with scissors and remove the pins. Now you can begin processing the cuts and decorating the product.
A beautiful tablecloth can give a modern look to the interior.
How to properly hem a wide edge of a tablecloth
As in the previous master class, first we need to decide on the size of the tablecloth. We add two overhang lengths to the dimensions of the tabletop. For example, if the table measures 80 by 120 cm, then adding 50 cm to each size (25 cm for each overhang) we get 130 by 170 cm.
Before cutting, the fabric must be decatted so that shrinkage is minimal during the first wash.
The edging will be 10 cm wide per side. This means that the dimensions of the main part of the tablecloth will be 110 by 150 cm. Add seam allowances and get the final size of the central part 112 by 152 cm.
We will hem the tablecloth with a double edging, respectively, the width of each piece for it is 10 cm x 2 + seam allowances = 22 cm.
The length of the edging blank strips should be equal to the width and length of the finished tablecloth plus seam allowances. We cut out two strips of 132 cm (= 130 cm + 2 cm) and two strips of 172 cm (= 170 cm + 2 cm). For your own peace of mind, you can increase the allowance slightly.
We bend the cut strips in half and iron them. We get a strip 11 cm wide.
Take one of the strips, step back from the edge 11 cm (= strip width plus allowance), leaving a free end.
Along the remaining length we pin the strip to the wrong side of the tablecloth.
We retreat from the edge a distance equal to the width of the foot, and sew the strip to the tablecloth. In this case, we do not reach the edge of the side by an amount equal to the width of the foot.
In the next photo this moment is clearly visible.
We attach the remaining three strips in the same way. See the next photo for how the corners will look.
Fold the corner inside out, aligning the edging strips.
We apply a ruler to the edge of the fold, draw a line on the edge that is a continuation of the fold line.
Trim off the excess fabric, leaving a 1 cm allowance.
Unfold the edging strip. It turns out to be cut at an angle. We pin strips together.
We carry out the line according to the markings.
We straighten the edging to the sides, ironing the seam allowances.
We turn the seam allowances for stitching the edging and tablecloth to the side of the edging and iron them.
Turn the edging right side out and straighten the corners.
We turn the edges of the edging on the front side of the tablecloth inward so that the edge of the fold covers the stitching seam.
We fix the hem with needles along the entire perimeter.
We sew the line, retreating 0.5 mm from the edge.
What the seam looks like from the wrong side - see the next photo.
We remove thread debris and steam the tablecloth.
How to sew elastic tape from knitwear
Inexperienced tailors usually cut an elastic knitted binding for processing cuts in the transverse direction of the fabric (the direction of the weft). However, in this case, professionals adopt a direction of 5 degrees relative to the weft, at which such materials are formed.
1. If you don’t have a protractor, you can make a template from cardboard to determine 5° to the weft. To do this, lay a segment equal to 15 cm on the cardboard, designate its ends A and B. From point B, perpendicular to the segment AB, set aside 1.5 cm and designate point C. Connect A and C - this is the direction of 5° to line A B (Fig. . A). Cut out the ABC template. 2. Place the template on the fabric so that side AB coincides with the direction of the weft (Fig. B). 3. Draw a line AC on the canvas and continue it to the required length - this will be the direction of 5 degrees to the weft. 4. Mark and cut out strips of the required length and width. If necessary, you can connect their ends with a seam in the longitudinal direction.
How to make perfect “envelope” corners: 2 ways
Neat corners are an important part of great looking table napkins, towels or tablecloths. How to make corners perfectly: 2 options.
This master class is about how to carefully process corners in rectangular products or parts.
First of all, these are home textiles - rectangular tablecloths, towels, napkins, sheets, bedspreads, aprons and so on.
The first processing option is a little simpler, the second is a little more difficult, but it gives a more durable corner. Durability is important for products that are frequently washed and used extensively, such as kitchen towels or table napkins. Another plus of the second option: it is good for working with dense or voluminous fabrics and for hems of large width.
Life hack: how to sew a perfectly fitting pillowcase
For both options, in addition to the cut fabric, you will need:
- marker or pencil for fabric;
- fabric scissors;
- sewing machine and thread.
Sewing stitches: training for beginners
Option 1
Step 1
Divide the width of the allowances left for finishing the edges in half. Fold edges half the width of the seam allowance to the wrong side and iron.
Step 2
Fold the edge the second time to the same width and press again.
Step 3
Unfold the corner. Find the square formed in the middle and draw a line diagonally through its opposite corners.
Step 4
Step 5
Fold the corner over to the wrong side as shown in the photo and align the folds (marked in blue).
Step 6
Press the edges inward again.
Step 7
All that remains is to lay a line.
Option 2
Step 1
Divide the width of the allowance for processing the edges into 2 values. In this case, these can be either 2 identical values (for example, the total width of the allowance is 2 cm, divide into 2 equal parts, 1 cm and 1 cm), or 2 different values (for example, the total width of the allowance is 3 cm, divide by 1 cm for the first hem and 2 cm for the second). The second method may be better suited when working with dense, bulky materials and/or large seam allowances.
Turn the edge over to the wrong side to the desired width (the first part of the total width of the seam allowance) and press.
Step 2
Fold the edge over again (the second part of the total width of the seam allowance) and press.
Step 3
Turn over one fold and align the folds (marked in blue). Iron this corner.
Table decoration using napkins
There are many ways to decorate your table beautifully using napkins. Let's look at some of them.
Accessories
On sale you can find many different accessories for napkins, including clips and rings. These small decorative details can help create an unusual composition:
- Rings allow you to achieve rigor and elegance in your design. They can be decorated with rhinestones, feathers, flowers, personalized letters, made of different materials.
- Ribbons are designed for tying napkins and, if you look at it, they function as rings.
- Clips are also used to secure napkins. Additionally, they can be decorated with flowers or rhinestones.
Folding methods
There are so many options for folding paper or cloth napkins. But from them we can separately highlight several of the simplest and most successful:
- A sail is perhaps the most laconic way to design napkins. For this option, fold the napkin in half, with the fold facing away from you. Then fold the top corners to form a triangle. Next, fold the resulting figure in half (along the seam).
- Roll is most appropriate for official receptions. Fold the napkin in half with the fold facing you. Cover the cutlery with the left and right edges of the triangle. Wrap the resulting envelope.
- French is a very elegant option. Fold the napkin along a diagonal line so that the folded edge remains on the left side. Next, bend the top corner down, leaving about 2 cm of the right corner open. Now fold the right side down.
- The pyramid looks strict, but quite impressive. Fold the napkin diagonally and then fold the left and right sides together, end up. Next, bend the future pyramid along the center line.
- Fan - a product folded like a fan can be placed in front of a large serving plate. A fan in a glass would also be an original solution.
Interior Master class Sewing A beautiful corner on the tablecloth is just Fabric
Good day, dear craftswomen! As always, I desperately needed a gift. What to give to a person whom you not only practically don’t know, but also have no time to choose? Functional gifts are always desirable, at least that’s how I like them. My husband suggested the most ideal gift - money in an envelope. eww. what a bore! I offered another option - a tablecloth of my own design! Yesterday I rushed to curtain stores, looked for a rag and today I’m sharing it with you. When I worked in a curtain salon, they taught me how to make such a corner on tablecloths and napkins, and at one time I did them a lot. My daughter needed cute tablecloths and napkins for her room to create coziness and warmth. And they flew off like seeds. And today I sat down and... stuck! I do not remember! Oppa! Well, it’s okay, I sat there, twirled it, shook the dust off the roller balls and finally remembered! I knew it was easy. Well, I tell and show everything in very detail and meticulously.))))
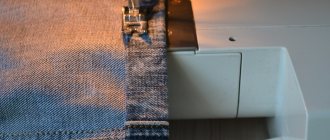
The first step is the most tedious. I use this help: I cut out a strip of cardboard 5 cm wide. The strip is quite long, 15-20 centimeters. This will be the pattern on which I will iron the hem. It is important! In order for the angle to be perfect, you need to work hard with the iron. Well, yes, it’s boring and dreary, but what to do? And for whom is it easy?!)))
Let's get started. I lay out the pattern and bend the fabric along it, and iron it, and with steam, slowly and without haste, so that the arrow is even and strong. This can be done using another method - draw lines on the fabric and iron along them. But I like it better this way and there’s less fuss, and they did it that way in the workshop, and they know better!
We folded and ironed once, and then tucked and ironed again. The result is a hem of 10 cm or two times of 5 cm. This is just right for a tablecloth! The edge is smooth and heavy, it holds its shape perfectly.
Here you can see how it turns out at the corners. We iron the corners to death! Letting the iron sit as it should. We will need those lines that are formed. We do everything very smoothly and carefully. Let's take our time. Then a perfect edge and a smooth, beautiful angle will be guaranteed!
Here I have it already ironed. It’s already beautiful!))) Iron the hem around the entire perimeter of the tablecloth.
During the ironing process, I pin along the entire hem. Since when sewing a corner I will be twisting and turning the tablecloth, I don’t want my efforts to go to waste. I remove the pins during the stitching process, but for now let them hold on!
This is what should happen after we have ironed everything so carefully. Such neat cells. We need a diagonal which I marked with a red line. I fold the fabric along this line, carefully matching the lines on both sides so that all the lines and angles match. It is important.
Here I have already folded it and pinned it with needles along the diagonals. I marked with a red arrow the line where the line will run. If suddenly in this place the lines are not very clearly visible, then you can complete them with a pencil using a ruler. We are finishing drawing this cell, I marked it pink. The sides of the cage are 5 cm.
Here you can see how I drew with a pencil. The pencil will not be visible - everything will go inside. We're scribbling. It is important that the line lies exactly from corner to corner! And so that the angles on both sides coincide. It’s better to double-check than to flog later!
Stitched. Trim off the excess. And cut off a small corner to the line. The photo shows where and what I cut. We no longer need this now.
We spread the seam allowance with our fingers and smooth it out slightly, so that when we turn it inside out, everything will lie neatly and beautifully. Let's turn it inside out! Turn it inside out and place allowances along the ironed lines. It is not difficult. It is important that all seam allowances are laid out neatly and evenly at the corner itself. We straighten the corner itself with a needle.
Voila! The corner is ready! Let's admire and praise ourselves! Well, I’m so smart and beautiful, and my hands stick out. Well, it doesn’t matter where they stick out from, the main thing is that they’re gold))))
Step three is as easy as shelling pears! Now all that remains is to sew the hem, not forgetting to pull out the pins from under the foot in time. Although even if you don’t have time to pull it out, as a rule it’s not a big deal, but sometimes the needle breaks, it’s rare, but it does happen.
Oppa! All is ready. Urrrraaaaaaaaaaaaaaaaa Ole-ole-ole! It took a couple of hours to do everything, including cutting out the tablecloth itself. By the way, I forgot to say. I cut such things when there is a huge flap, and I had 2.8x2.0, but I needed 1.6x2.2 very simply, although tediously. I make a notch on the fabric in the right place and begin to pull out the thread. I pulled it out, how much it twitched, it turned out to be a mark, I cut along it, then I pull it again and cut it again. If the fabric itself is not skewed, there are some that are, then the result is a perfectly even cut. No distortions. This was also taught in the curtain salon.))))
I also want to show how you can decorate a bedspread using this angle. This is a blanket for a sofa made of tapestry. I wanted to “put” him on a thermal stitch. In the atelier, the craftswoman who sewed bedspreads had two methods for decorating the edge, this is one of them. First I did everything as on a tablecloth, stitched the corners, turned them inside out, and then laid the blanket on the floor (I don’t have a large table) and inserted a thermal stitch under the allowances, cut exactly according to the bedspread; it wouldn’t be scary if it was even a little smaller in size. Then I swept it all along the perimeter, drew lines along which I later quilted on a machine. I didn’t make very small cells; there was no such need. And voila! The bedspread is ready. There will be a birthday present for my dear one on his favorite sofa, otherwise there is such fear and horror lying there. And he also resists, you see, it suits him. Men are sometimes completely incomprehensible in their masculine logic.
Stitching of facing parts
In overstitched parts with corners, before turning them out onto the front side, allowances in the corners should be cut off in order to obtain a clear, beautiful corner in the finished product. In this case, the following options are possible: a) A straight angle, the stitching goes along both sides of the corner, then the allowance is cut diagonally (Fig. B), when turning out, the remaining allowances fill the corner of the part without excess fabric. b) A straight angle, the stitching goes along one side of the corner, the other side of the corner is formed by a fold of fabric. In this case, the allowance in the corner is not cut off, because when turning the part out, the allowance fills the corner without excess fabric, forming a clear line (Fig. B). c) The angle is sharp, the stitching goes along both sides of the corner, then the allowances are cut to such a size that when turned out they fill the corner without excess fabric (Fig. B).
We sew a tablecloth in 1 evening: a master class for beginners
There are several ways to sew tablecloths, because the corners and side cuts of the fabric can be processed in different ways. In this material we have described a traditional and basic method, having mastered which you will be able to sew with your own hands not only festive or everyday tablecloths, but also kitchen napkins, towels and runners with neat corners and edges.
To sew a tablecloth with your own hands you will need:
- A piece of suitable fabric needs to be the right size (from what material is best to sew a tablecloth, read the article “Choosing a tablecloth in 6 steps”; in this master class, the tablecloth was made from linen);
- Threads to match the fabric and decorative trim;
- Sewing machine;
- Sewing supplies: tailor's scissors, ruler, measuring tape, pins, thimble, thread threader, chalk or marker;
- Decor if desired (this could be: sewing, border, fringe, lace, braid, etc.);
- Iron.
Careful preparation is the key to a successful result
It is necessary to prepare correctly so that the result exceeds all your expectations. A number of works must be completed before starting the sewing process:
- Choose the most suitable fabric.
- Determine the shape of the future product, since the material processing technology will be different.
- Prepare the necessary tools.
Choosing material
When studying information on how to sew a tablecloth with your own hands, you will find various fabric options. These can be either synthetic, natural or combined fabrics.
You should know that for everyday use it is better that the product is made of practical material. This is considered jacquard, which has the necessary strength and is also easy to clean. Its color range is quite diverse, so you can definitely choose the option that is most suitable for you.
A jacquard product for the kitchen, made independently, will definitely attract the attention of your guests and decorate everyday meals.
If you are interested in holiday options, then it is better to give preference to natural fabrics. Sewing tablecloths for celebrations is best done from the following materials:
- Cotton. Delicate, flowing material.
- Linen. Not as practical as cotton ones, but in no way inferior in terms of external characteristics. They are not impregnated, so they are not as durable.
- Silk. For a magnificent special event, a silk product will be one of the best options for table decoration.
The choice of colors will depend on the decor of your room, as well as personal taste preferences.
Deciding on the form
To choose the right shape for a tablecloth, you need to know the following nuances:
- A rectangular table can only be covered with tablecloths of the same geometry. Sometimes special tracks are used as a covering for such countertops. This is an original design technique that can give a modern look to the interior.
- For square tables, only coverings of the same shape are suitable. To add style, two square tablecloths laid crosswise are sometimes used.
- Both square and round tablecloths look beautiful on round tables. You can even sew products of different shapes and combine them. It will look very stylish on the countertop.
- For an oval table, you can make a tablecloth in the shape of an ellipse or a rectangle.
Make the world more beautiful
- How to starch a napkin
- Crochet Conventions
- Crochet
- Crochet collars
- Crochet napkins
- Crochet tablecloth
- Crochet snowflakes
- Crochet summer hats
- Crochet motifs
- Crochet shawl cape
- Crochet scarf cape
- Crochet Smiley Pincushion
- Crochet basket
- Slippers, slippers, crochet shoes
- Crochet phone case
- Sirloin knitting
- Knitting
- Knitted tablecloths.
- Knitted napkins
- History of knitting
- Knitted slippers
Polymer clay
- Kanzashi
- Kanzashi headband
- Rhinestones
- Salamander
- cat
- Balloon
- Fish
- Bird - Heat
- Russian letters
- English letters
- Spider
- Butterfly
- Symbol M and F
- Rose
- Homemade violets
Materials and tools for work
It is better to prepare in advance everything you will need during work, down to the smallest detail. This will help you fully concentrate on the process and not be distracted by trifles.
Naturally, you will need a piece of the required fabric for the future tablecloth . Determining the appropriate size is quite easy. Measure the length of the tabletop, add length for the overhang (from 20 cm to the floor) and 10 cm for the hems on all sides.
Choose the material and design at your discretion. But be sure to take into account the shrinkage of the material after washing .
IMPORTANT! To be sure of how much the tablecloth will shrink after being in the washing machine, you can wash and carefully iron the material before cutting.
Step-by-step instructions on how to sew a linen napkin with an elegant “Envelope” corner
Napkins. How diverse they are: crocheted, knitted.
Linen cotton, linen, silk. Plain, colored. Paper. For any occasion, be it an anniversary, birthday, or just a get-together with family and friends, decorating the table with linen napkins folded in an interesting shape will be a pleasant surprise for guests. In this article we will show a master class on how to make a linen cotton napkin with an envelope fold. The corner of a linen napkin can be beautifully processed, with a little effort and you have an original table decoration. The width of a square napkin is from 30 to 55 cm, the hem can be made 2-4 cm wide, in our case one centimeter. Step-by-step instructions on how to sew a linen napkin with an elegant “Envelope” corner - iron 1 cm sections of the fabric to the wrong side. An ironed seam will produce a smooth and beautiful edge, and besides, after ironing, the fabric acquires a somewhat dense structure, it is easier to work with the fabric and a more even and high-quality seam is obtained
-let’s mentally think through the main stages of making the “Envelope” corner: 1 - fold the edges of the hem in this way, 2 - a line will run along this line 3 - the outer edge of the napkin 4 - fold line when processing the corner
-Fold seam allowances in the corner area
-Fold the corner in half along the fold line to the front side.
-It turns out to be such a corner
-Relative to the fold line at point O, measure an angle of 90 degrees
-Machine stitching
-Having secured the beginning and end of the seam, cut the threads.
-Cut off the excess, leaving 0.3 cm. Cut off the sharpest corner.
-The inside of the envelope looks like this:
-Turn the corner out
-You should end up with a corner like this:
-We'll do the same with the rest of the corners of the napkin.
-After all the corners have been turned out, we sew the inside of the envelope and the hem.
-Place a stitch around the entire perimeter
-The last finishing line is laid 1cm from the edge
In the corners, insert the needle exactly into the top (seam of the envelope), so that there is a smooth and beautiful cape.
-The napkin with edges and “envelope” corners is ready.
Decorating models
Tablecloths and napkins can be sewn from thick natural fabric with light lace inserts with flowers added around the entire perimeter. A good addition to the models would be embroidery or appliqué.
You can find many accessories for napkins on sale.
The model with the addition of organza is luxurious, will beautifully decorate the table in the dining room, and will be an appropriate addition to a romantic dinner.
When choosing fabric for napkins, use pieces of material left over from making other products, for example, after making tablecloths.
We will show you how to quickly sew a tablecloth from organza or decorate napkins served on the festive table with it.
Even novice needlewomen of a young age can make such napkins with their own hands.
Organza inserts are usually sewn into the center of the tablecloth or used to decorate the corners of the overhang. A pattern with organza flowers will perfectly complement festive textiles.
Do-it-yourself napkins are most valued.