A tunic is an indispensable item in the wardrobe of a modern fashionista. It is so versatile that you can wear it to the beach or an evening walk, as well as to work or a date. Nowadays, things made by yourself are gradually coming into fashion, and you can quickly sew a tunic with your own hands without a pattern. This work will not take much time, and the result will be stylish clothes like no other.
How to sew a tunic
To sew the tunic, coupon fabric was used: fabric width - 1.5 cm, coupon width - 1.5 cm.
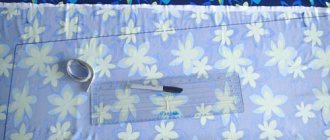
Before you start cutting, check the fabric for defects. If a defect is found, then circle it with chalk so that it does not get on the parts.
Decorate the fabric (iron the fabric with a steam iron so that it shrinks) and start cutting.
This is interesting: Tunic pattern for pregnant women
Greek dress patterns from Marlene Mukai
Using the drawings published below, you can sew a dress in sizes from 36 to 56, a size chart is attached.
What you need
To work, you will need a piece of chiffon or cambric measuring approximately 3.6/1.4 m; you can use 2.3/1.5 m knitted tulle as a lining; you may also need interlining and decorative elements for the belt and collar.
You can also use any lightweight fabric for dresses that can drape easily.
Greek dress with American armhole
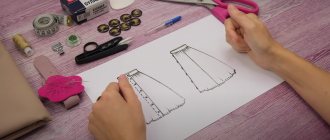
Draw a pattern of the desired size on paper, following the drawings. Cut out the details and transfer to fabric.
Greek dress patterns from Marlene Mukai
size table
Cutting out knitted tunics
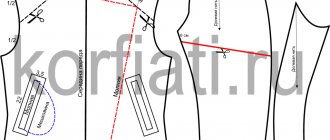
To cut the tunic, I used basic patterns of size 46
Lay the fabric out on a flat surface with the right side facing you (this is if the pattern needs to be adjusted).
From the bottom of the fabric up, we set aside the length of the tunic and lay out the patterns for the front and back, adjusting the pattern in the most advantageous places.
My patterns are made in half size, so I will trace one part of the pattern first, and then the second part (without disturbing the centers). This way the details of the shelf and back will be solid and with a selected pattern.
At the same time, do not forget to put the measurements of the figure on the outlined parts (in the event that the pattern does not fit):
- chest dart height;
- breast volume;
- waist and hip circumference;
- front length to waist;
- back length to waist;
- shoulder width;
This is necessary to ensure that the product fits exactly to the figure. My pattern is basic, made for a standard figure. It is used as a base, I make adjustments to it immediately on the fabric, depending on the model. If you use the same patterns, be sure to include your measurements in the base pattern.
Once all changes have been made, check your measurements again, taking into account the necessary allowances for loose fit. Usually, when cutting knitwear items, no increments are made. My client wanted a loose-fitting tunic, so I used 5.0 cm increases for the bust, waist and hips.
Apply allowances:
- on the sides;
- shoulder;
- armhole and neckline cuts – 1.0 cm;
- Bottom – 2.5 cm;
All seams will be processed using a universal machine for knitwear - a carpet locker. She sews and overcasts the seams at the same time, so the allowance in this case is 1.0 cm. What is the advantage of such a seam? It gives maximum stretch and elasticity to the seams, which is important when wearing knitted items.
Now you can cut out the shelf and back. To make the cut more precise, first cut out one part of the part, turn it over and cut out the second part along it. This way the design doesn’t get lost and the cut is precise.
We take the sleeve pattern, look for a suitable pattern on the fabric, trace the pattern and add an increase in the girth of the sleeve (if necessary).
Determine the length of the sleeve and mark the allowances. At the seams of the sleeve and the hem - 1.0 cm, at the bottom - 2.5 cm. First we cut out one sleeve, then we look for a suitable pattern on the fabric (if any) and cut out the second sleeve according to the finished sleeve. Be careful not to cut two sleeves on one arm.
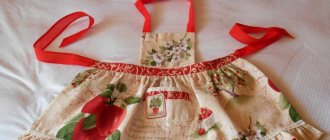
Tunic of two scarves
These clothes are designed for warm summer weather. It is loose and light, so it will save you from the heat and scorching sun.
The most successful and comfortable options are tunics made from chiffon, silk, linen, satin or cotton. To make such a tunic you need:
- Take several scarves, at least 1 meter wide, and apply them to yourself.
- Fasten the fabric to the shoulders with pins and, having removed the header, sew the shoulders using a sewing machine.
- Next, sew the sides. By adjusting the length of the stitch, you can make different tunics to get a completely closed one - you need to stitch from the arms to the very bottom, for a looser version - from the arms to the waist.
- You can complement the product with a belt or colored lace.
Preparing for the first fitting
We check all the details of the cut, move the darts to the wrong side and sew them away.
Then we sew up the side seams.
Shoulder seams and right sleeve (for the first fitting, only the right sleeve is basted, it does not fit into the armhole).
We bend the bottom of the product and the bottom of the sleeve along the marked lines, and cover it with hand stitches. The tunic is ready for the first fitting.
What can you sew from?
An unusual wardrobe item can be sewn from any fabric, light and thin. Fabrics made from natural fibers will keep you cool under the burning sun, a model made from synthetic material will last a long time, viscose is an inexpensive option for a beautiful design. You can use fabrics of different textures:
- Silk fabrics attract with their luxurious smoothness and shine, bright tints, ease of drapery, and durability. Silk is able to absorb odors and inhibit the growth of bacteria. The colors can be very different - jasmine, lilac, sakura flowers.
Tunic suitable for any age
- Chiffon varieties are delicate, fragile, airy, and sandy to the touch. The fabric is perfect for a tunic - a few seams and the model, whose flowing folds curl around the figure, is ready. All that remains is to complement the tunic with bright accessories and additional details.
- Women like staple tunics because of the brightness of their color, which does not fade or fade. The fabric is soft, elastic, lightweight, and drapes easily.
- The cambric types are delicate with an impeccable pattern. Products made from chintz are soft, delicate, airy.
Note! Knitwear is distinguished by high quality, pleasant texture, and brightness of color. It is easy to drape, but the texture is denser, so it is not suitable for a summer tunic. In autumn or early spring, knitted models will look stylish and catchy.
Knitted tunic
Choice of material and style
The tunic can be combined with jeans, trousers or leggings, and can also be worn on its own to the beach. It is better to choose a natural material - cotton, linen, silk. Thin and light chiffon looks good. It can also be made from a regular scarf.
The style of the tunic is loose . Such a wardrobe item will look great both on thin girls, emphasizing their individuality, and on plump women who want to hide figure flaws. In the summer heat, a tunic made of thin fabric will easily flutter in the wind and protect from the scorching rays of the sun.
You can decorate it with all kinds of accessories from various belts to beads and brooches. It all depends on the imagination. The main thing is not to overdo it. When wearing an outfit to the office, a thin bright belt will be enough.
Preparing for installation
After trying on, we make all the necessary changes (if any), grind the darts, after cutting off the excess, the allowance is 1.0 cm.
Then we sew down the side seams.
We sew the seams from the side of the shelf, as they will be ironed onto the back.
Next, iron the dart allowances to the top.
Iron the side seams to the back.
This is interesting: Tunic pattern with pockets
Tunic base
After the seams are processed, you need to make the base, i.e. make changes after trying on and cut off excess. To do this, lay out the product on a flat surface, bend it in the centers and combine the side seams. We pin the darts with pins.
We outline the armhole using a special “six” pattern at the points where the sleeve was inserted. We measure the armhole.
Then we measure the sleeve cap after fitting. We compare the received values: the size of the armhole and the edging. The sleeve cap should be 2.5 - 3.0 cm larger than the armhole . This difference is given for a beautiful fit of the sleeve and ease of movement.
Also on the base we outline the neckline and the length of the product. We outline the allowances:
- along the neck - 1.5 cm;
- armhole – 1.0 cm.;
- at the bottom of the sleeve and product - 2.5 cm;
Next we process the shoulder seams. To do this, cut out two strips from adhesive fabric, 1.0 cm wide, length equal to the length of the shoulder seams. Glue them to the shoulder seam allowances of the front rug using an iron. This will prevent the shoulder seams from stretching out. Sew the shoulder seams on the carpet.
Sleeve processing
Sew the seams on the sleeves.
Sew the sleeves into the armholes, matching the sleeve seams with the side seams, distributing the fit evenly across the hem. If there is too much of it, then you can lower it down a little. The main thing is that there are no creases.
We sew in the sleeves on the carpet from the product side.
After processing all the seams, do not forget to remove the basting threads. Iron the seams on the edge, and press along the edge towards the sleeve.
Baste the bottom of the product along the marked lines.
And the bottom of the sleeves:
And also the neckline by 1.5 cm. Finish the bottom of the product, the bottom of the sleeves and the neckline with flat seams on the carpet. The flat seam forms a double stitch on the front side and a cut edge stitch on the back. This seam stretches easily and does not burst under stress, which is very important in knitted products.
Constructing a template
The tunic is a loose blouson with a round, bob or cape neckline, dropped sleeves to the elbows or three-quarters, length to the middle of the buttocks or slightly below. The clothing element goes well with trousers, jeans, a skirt or acts as a stand-alone dress. Making a tunic pattern with your own hands is quick and easy. Measurements to be taken:
- Hip girth. This is the width of the product, for a loose fit plus 2-10 cm;
- Arm width. The girth is measured at the fullest part plus a few centimeters for a loose fit;
- The length of the sleeve;
- Length of the product. The measurement is taken from the shoulder seam to the required length.
Interesting: if you don’t know how to draw at all, use old T-shirts or T-shirts. Folding them in half makes a great template that can be transferred to fabric.
Practical wearing tips
Long tunics with a large neckline look better with tailored trousers and heels. If you choose a pastel monochromatic color scheme, this look is suitable not only for everyday wear, but also for a business woman.
If the tunic is white, it will be ideally combined with blue or blue jeans; you can also use frayed ones. This combination should be complemented with bright shoes.
If the tunic is transparent, it is suitable for a casual summer walk or used as beachwear. In this case, it is combined with shorts and a hat - you get a great airy look.
In the case of autumn or spring coolness, the tunic can be combined with long boots, nylon tights and a narrow skirt.
It turns out that this irreplaceable piece of clothing can be easily sewn with your own hands, without much time, effort and materials, which makes it even more attractive to modern women.
Necessary materials
Girls who have never sewed clothes before are interested in how to sew a tunic with their own hands quickly and without a pattern. You can watch the master class and follow the instructions of the master. To sew a simple-cut product, you need to prepare:
- 2-2.5 m of fabric;
- a sharp thin piece of chalk or soap for drawing lines;
- template or pattern of the top;
- braid 1-2 cm wide, depending on the design of the finish;
- scissors or rotary cutter;
- French pins for basting parts;
- needles, threads, sewing machine.
If you choose chiffon fabric, you will need an overlocker because the edges of the chiffon unravel. If there is no overcasting device, then you can process the edges of the fabric in any studio.
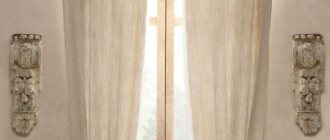
Greek style
A Greek style tunic looks very feminine and can be used to create a spectacular romantic look. Such a thing appeared in ancient times, when only one square or rectangular cloth was used for clothing, tied at the shoulder with a knot. The ancient Greeks slightly changed its appearance; instead of a knot, various large brooches were used.
Today, the Greek-style tunic is the epitome of simplicity and charm. The classic model has a high waistline, which is decorated with a belt or thin lace. It visually lengthens your height and hides figure flaws. It also has the following features:
- it has no sleeves;
- there are vertical folds;
- V-shaped neckline;
- For sewing, plain fabric is used.
The Greek style tunic is traditionally presented in white with gold trim. But now there are models of other light and delicate colors: pale pink, green, blue.
A tunic is a universal wardrobe item that has gained popularity among women of different ages and shapes. She is able to emphasize lightness and beauty, as well as hide imperfections in appearance. Using simple patterns, you can make this stylish item with your own hands.
Taking measurements
To create a pattern for a simple tunic, you need to take traditional measurements:
- in order to adjust the sleeve width, you need to measure your arm circumference;
- The construction of the sleeve in these models is carried out from the chest, so this measurement is taken from the center of the chest to the desired sleeve length, and not from the shoulder.
- You will need measurements of your chest, hips and waist.
Taking measurements for a tunic
General recommendations for cutting and sewing
A loose shirt made from a rectangular piece of fabric can decorate a girl’s wardrobe. Step-by-step instructions can be used to make any model for any size:
First you need to decide on the necessary measurements (length and width of the product, waist circumference).
- All patterns are made using a shared thread.
- After the pattern is transferred to the fabric, you need to draw seam allowances.
- It is necessary to baste the product so that all edges match and try it on.
- The tunic is sewn from the center down.
- It is more convenient to trim the edges with braid. To prevent the seams from unraveling, they need to be overcast.
You might be interested in Ready-made patterns for fabric mice and rats: sewing with your own hands
You can quickly sew a model in the shape of a circle:
- A circle is drawn on a large sheet of paper, the circumference of which will be equal to the circumference of the hips.
- The radius of the circle is calculated by the formula: the circumference (hip circumference) is divided by the mathematical value 3.14. The resulting number is multiplied by 2.
- The radius of the circle increases by a distance equal to the length of the future product from the hips to the shoulders. A new circle is drawn.
- You should cut out a large circle and remove the smaller one from it.
- The pattern is folded in the middle so that the neckline is at the bottom. The distance for the neck is outlined, lines 5 cm long are drawn to the sides of it (these are the shoulders). After the pattern is transferred to the fabric, the front is sewn to the back at this point.
- All that remains is to complete the finishing.
Tunic in the shape of a circle
Another model in the shape of a circle with sleeves:
- The start of work is carried out in the same way as in the first option. After the neckline is cut out and the center of the future product is determined, a line is measured that is equal to half the half-circumference of the hips with an addition of 2.5 cm.
- From this point a perpendicular descends down. This is the side line along which the fabric is sewn. There is room at the top for your hands, which can be adjusted at your discretion.
- The decoration of such a product will be a drawstring belt.
A long, loose-fitting shirt will make a woman feel elegant and independent.
Simple and stylish patterns
In recent years, the Boho style has become popular. A Boho tunic for plus size women is easy to sew with your own hands. To do this, you need to choose light linen or cotton fabric. It’s easy to make patterns for loose silhouettes yourself.
Ready-made patterns for a simple tunic with one-piece sleeves
A tunic is a thing that is distinguished by an individual manner of execution. The one-piece model is cut together with the sleeve, so the complicated process of sewing in the sleeves is eliminated. Ready-made full-length patterns can be found on the websites.
Tunic pattern with one-piece sleeves
Important! The size of the fabric cut is length - 1.4 m, width - 1.3 m.
To implement the plan, it is necessary to take measurements:
- The length of the shoulder is measured - from the neck to the shoulder line;
- to measure the length of the sleeve, descend a centimeter from the shoulder along the arm to the desired length;
- It will be necessary to measure chest circumference. If the product consists of two free shelves, then the half-chest circumference should be divided by 4;
- waist circumference;
- after the length of the product is determined, it is necessary to connect the bottom and the sleeve with a smooth line (you can draw an arc using a pattern).
This model opens up great possibilities for imagination: the sleeve can be made in the “kimono” style, or like a regular shirt with cuffs. You can sew on a belt, thread a drawstring, or design the fastener in the form of large buttons.
Cotton tunic without pattern
A short, loose dress is convenient to throw on on a hot summer day after swimming in the sea. Light cotton will emphasize the slimness of young girls.
- How to iron a long-sleeve shirt quickly and without wrinkles, with or without an iron
Greek tunic
A tunic reminiscent of a Greek one in cut can be made in an hour, because there is no need to take measurements and create a pattern. The step-by-step process will be as follows:
- Take a brightly colored fabric (width - 2 m, length slightly longer than the intended length of the product. Iron the fabric well and fold it with the right side inward.
- Measure 1 m 50 cm along the fold line and draw a circle of the same diameter along the edge of the fabric. This is the bottom of the product, the edges of which can be folded, sewn on a machine, or sewn on with braid or trim.
- Choose a shape for the neckline, measure it on the fabric, cut it out and decorate it.
- Having connected the sides, create a drawstring. For it, you can take braid or sew a narrow strip (4 cm width, 70 cm length) from contrasting fabric. The drawstring can be sewn to the product or holes can be made in the side sections.
You might be interested in this All about industrial sewing machines in production
A handmade beach dress will allow you to create a stylish look.
Simple tunic made of light chiffon
For the beach option, you can use chiffon fabric.
Additional Information! Chiffon is such a thin fabric that you can hardly feel it on the body. It dries quickly and is not hot.
Beach tunic
To fulfill the intended option, it is better to take a material 2 m wide, characterized by an impressive print and original decor. There are two measurements to take: from elbow to elbow (width) and from shoulder down (length). The further sewing process is as follows:
- the canvas is folded along its length and a rectangle is marked: width is the first dimension, length is the second;
- the neck of the desired shape is drawn and cut out;
- the product is ground down on the sides.
A model made of chiffon with lace inserts and bright trim can serve several beach seasons.
Tunic made of bright scarves
It is very easy to make a loose shirt from bright decorative scarves. If the scarves are small, then you need to fold their width. The total should be 2 m and another 10 cm for the seams. It is better to choose scarves measuring 90 by 110 cm. The color and texture of the tunic, as well as the length, can be very different. The silhouette of this option is straight. It is easy to stitch, leaving armholes for the sleeves. The neckline is shaped from the center: a square with a side of 20 cm is laid out, the shape of the neckline is the designer’s imagination. The shoulders are marked, the tunic is washed off and tried on. If the product fits the figure, all that remains is to complete the construction, iron all the seams and complete the intended finishing. For this you can use braid, piping, trim. A model trimmed with a satin ribbon will look interesting. Slender girls can have a drawstring or belt around their waist.
Note! A scarf tunic will be worn for more than one season, because, as a rule, the base taken to make the model does not lose its color from frequent washing.
- How to sew a sundress with your own hands - patterns and how to do without them, tips on choosing fabric
Option of bright scarves
Silk pareo tunic
A light long sleeveless vest made from a bright silk pareo will be amazing. Whether the pareo is the right size for a new product is determined in a simple way: you need to attach the scarf to your shoulders. If it is significantly larger than the shoulder line, then you can get down to business:
- it is necessary to fold the pareo so that all the edges match;
- cut out the neck and process the cut, because the edges of the silk quickly crumble;
- try on the tunic, determine the waist line, fold the front and back parts separately in equal folds, stitch;
- stretch a belt or ribbon;
- Sew the sides, leaving room for the armhole.
Processing the tunic does not take much time, because it is made from a ready-made pareo.
Tunic "sun"
To make the “sun” model, you will need a square of light fabric, the side of which is 160 cm. The sewing technique will be as follows:
- the fabric should be folded to form a rectangle, the length of which will be 160 cm, width - 80 cm; the fold is at the top;
- fold the cut again to form a square;
- using a pattern or compass, draw a semicircle in the left corner and cut the fabric along the drawn line;
- mark the neckline, which can be adjusted during fittings;
- when opening the neck, retreat 5-6 cm and set aside 20-22 cm for the armhole;
- the fabric is cut along the fold and the sleeve and armhole are shaped.
The sewing is finished. All that remains is to sew on the decorative trim - and the summer new thing for the child is ready.
New thing for a girl
Bat tunic
The beauty of the lightweight batwing dress pattern is the soft, cascading folds of fabric that fly away as you move. To achieve this effect, the model requires light fabric: chiffon, thin cotton. Fabric consumption depends on the length of the product (the length of the product must be multiplied by 2). During the work process, you should adhere to the following points:
- the fold of the fabric folded in half should be on top;
- the neck is marked in the center;
- the circumference of the hips is measured, the resulting figure is divided by 4 and vertical lines are drawn - these are the sides of the tunic;
You might be interested in Easy and simple patterns for dressing gowns: we sew them ourselves
Additional Information! An additional detail - the hood - is cut out separately. Further modeling depends on the seamstress’ imagination: you can use a drawstring or elastic band to tighten the fabric under the bust. You can, on the contrary, perform a free model. You can feel very comfortable in a tunic that does not restrict movement.
Tunic with spaghetti straps in fine jersey
Thin knitted fabric is suitable for sewing a model with straps. The width of the fabric should be equal to the distance from one elbow to the other. Length is the customer's preference. The cut of the new version is very simple:
- the canvas is folded in half,
- using a pattern and scissors, the bottom of the product is rounded;
- a large hole is cut for the head; on the back half the cutout is wider;
- 2 upper corners are rounded and processed;
- Braid straps and trim are sewn to the corners.
Model with thin straps
In less than an hour, an exclusive outfit for the beach will be created.
The process of sewing a tunic
Fold the fabric in half along the edge twice.
In the upper right corner we mark the neck. From the top, step back a centimeter for increases, measure 7 cm from the right end, put a notch. On the fold of the fabric, place a dot 3 cm below the top cut. Connect the dots with a rounded line, thus forming a neck cut.
Then we will draw a shoulder line. Move 4 cm down from the upper left corner and place a dot. Connect this point to the neckline with a straight line.
From the outer shoulder point, set down half of your shoulder circumference with an increase for the looseness of the fit. From this point, make a slight bend to the right and lower down to the end. Then cut the fabric along all the resulting lines, remembering to set aside seam allowances.
Now let's prepare the sleeves of the tunic. From the upper right corner, set aside half the circumference of the shoulder with an increase, put a dot. From the bottom right corner, set aside half the desired sleeve width. For example, if you want 20 cm, set aside 10 cm. Then connect the top and bottom points with a straight line.
Next, take two halves of the tunic, folded in half. On one of them (the front part), deepen the cut of the neck.
Place the pieces right sides together. Secure the shoulder sections with pins and sew them together using a sewing machine.
We have prepared for you a detailed video course “Sewing Basics”
Get it now for free!
get a course
Secure with pins and stitch.
Now all that remains is to stitch the side seams. To do this, fold the product over the shoulders with the wrong side up and stitch.
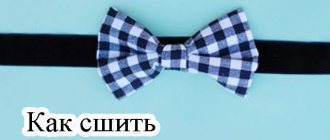
Simple options from a scarf or pareo
You can very quickly and easily make a tunic from a scarf or beach pareo.
Here's a very effective option. For it you need to prepare 2 identical scarves:
- Fold 2 scarves facing inward.
- On the shoulders, make small pinches near the neck and closer to the hem of the shoulder.
- Measure in the middle and set aside the circumference of the widest part (hip or chest).
- At this distance, lay 2 lines on the sides, not reaching the armhole. At the same time, leave holes on both sides for the belt.
- Thread a ribbon of a suitable color.
- The new thing is ready. This tunic can be made short or long, depending on the size of the scarves or pareos.
Brief step-by-step instructions
Beginning craftswomen can use step-by-step instructions to realize the idea of sewing a beach outfit with their own hands:
- You need to take measurements: hip circumference and arm circumference, which will be the width of the product and the width of the armhole; It is also necessary to measure the length of the product;
- The second stage is the selection of material and preparation of tools;
- The fabric should be ironed well and folded in half so that the front side lies inside;
- If the product has sewn-in sleeves, then the cut should be cut in the middle;
- Each part is folded twice more, the blanks are stacked on top of each other and a pattern is drawn;
- 7 cm is measured from the corner of the fabric, 4 cm from the upper right corner; the points are connected by a straight line - this is the shoulder;
- A point 8 cm long is measured along the fold and a neckline of the desired shape is drawn; on the back shelf the cutout will be slightly smaller;
- The length of the product and the width from the resulting point are set aside (hip circumference should be divided by 4); if the shape of the product is flared, add a few more centimeters;
- An armhole is laid off from the shoulder line - a quarter of the hip line measurement;
- Before cutting, you need to mark seam allowances 1.5 cm wide.
You can baste the product, try it on and finally sew it on the machine. A simple and loose shirt is ready, all that remains is to decorate it.
What to wear with a tunic