Share on social media networks:
Today, multifunctional, comfortable, soft blankets with sleeves are in incredible demand among men and women. Essentially, this product is something like a cape that is worn in front. The whole body is under a warm blanket, while the arms are pushed out through the sleeves. Thanks to this unique tailoring, you can type on the keyboard, do any other business, and even read without freezing. With a little effort, you can sew a blanket with sleeves yourself. We will provide patterns and sewing options in this article.
Making your own blanket-robe
Now let's take a step-by-step look at how to sew a blanket with sleeves.
The process itself should not raise any questions for you, because in order to create a cozy blanket, you need literally a couple of meters of fabric, a sewing machine and your own imagination. Let us consider in detail the stages of work. First of all, you need to decide on the type of fabric. It is best to use plush or vel-soft. It can be of different colors - both plain options and more sophisticated shades.
Cutting material and sewing
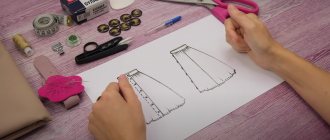
Making a pattern with your own hands is very simple, or you can use a ready-made one, because finding it on the Internet is not so difficult. So, the stages of cutting and sewing.
| Illustration | Description of action |
| We took vel-soft fabric in a fairly calm shade. It is thin enough to sew on a regular machine, but at the same time warm. For our model, we only need to take 2.6 meters of fabric. | |
| We start cutting from the sleeves; for this it is best to fold the fabric in half. Cut out 2 rectangles - sleeve length 70 cm, width 60 cm. | |
| We sew the parts together to create two hollow cylinders (sleeves). On one side we turn and grind the edges. | |
| On the fabric that we have left, we need to cut holes for our sleeves. It is best to use a stencil according to our sizes. We place the center of the stencil (this is a circle) at a distance of approximately 25 cm from the fold line of our fabric, and we also measure approximately 30 cm from the edge of the fabric. We cut out the model and try it on. | |
| All that remains is to stitch the sleeves and secure the pocket. | |
| Here we have such a cozy plaid robe! |
Watch this video on YouTube
How to quickly sew a women's robe without a pattern (video)
- Watch this video in which Irina Paukshte explains in detail and shows how to take measurements and create a pattern directly on the fabric, how to try it on and how to avoid mistakes for novice dressmakers.
- And to make it more convenient for you, see below in detail everything that Irina said.
Taking measurements for a robe
In order to create a robe pattern, you need to have a minimum of measurements:
- chest circumference (write down ¼ of the measurement),
- waist circumference (write down ¼ of the measurement),
- hip circumference (write down ¼ of the measurement),
- bust height (measure from the shoulder line to the high point of the chest,
- back width (40 cm),
- back length (one fourth of height) to waist,
- length of the product.
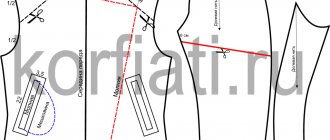
Working moments for creating a pattern: finding the chest height point
Necessary measurements for creating a robe pattern
We take measurements on the fabric
We straighten the fabric and cut off the excess, the edge and begin to take our measurements to create a pattern. When we cut without patterns, we first create a back pattern.
We draw a waist line from the edge of the fabric - it depends on the length of the product, we measure the length of the product from the edge of the fabric and put a point, for us it is 53 cm plus 1 cm for the hem, from this point we draw the waist line.
Building the back
After this, from the waist line up, we put aside a measure of the length of the back (40 cm) and mark the point of the 7th cervical vertebra, draw a line.
Set aside half the width of the back - 20 cm and draw a line for the width of the back. Measure DS (back length) and set aside half of it, that is, 20 cm.
- If we are not sewing according to a basic pattern, but are building a pattern on fabric, we measure the width of the back differently than when creating a basic pattern, to measure we take a centimeter and measure from shoulder to shoulder, see photo
Taking a measurement of the width of the back
- In front of us are the lines of the length of the product (the edge of the fabric), the waist line, the chest line (also known as the armhole line), the line of the 7th cervical vertebra will go into the sprout and the neck line and the shoulder line.
On the fabric there is a measure of the width of the back and it is necessary to mark the line of the hips, approximately 17 cm. The distance from the waist line to the hip line can be from 17 to 20 cm (for very tall people), we take the average - 17 cm.
Along the lines: 1. chest, 2. waist, 3. hips - set aside the pre-calculated measurements; this is ¼ of the volume of measurements taken - chest circumference, waist circumference and hip circumference.
- After this, we move on to our half-girths and set aside 30 cm along the chest line, approximately 26 cm along the waist line, and approximately 30 cm along the hip line.
- We outline these points with a smooth line, so that the line of the side seam looks natural, we draw it so that the point along the waist line is out of place and we have a surplus that we can take into the dart along the waist line approximately in the middle of the front.
- We build a dart, the depth of which will depend on the difference in width between the side seam line and the point obtained when marking the half-waist measurement.
Now you need to set aside the point of the width of the sprout. On average it is 7-8 cm. We take 8 cm, since this is a robe and outline the line of the sprout, see photo
Shelf shoulder line balance
Sprout height
From the highest point of the sprout we draw a shoulder line with an angle. And having these lines we can draw the back of the armhole.
If you need to place a dart along the shoulder line on voluminous areas in the shoulder area, you can make a dart, but extend the shoulder line and draw the armhole line to it so that the points coincide.
From the hip line we draw a line down. The back pattern is ready. We cut out the pattern for the back, and we will use it to build a pattern for the shelves. Our back has a central seam.
The back pattern is ready! the pattern shows: the length of the product, the line of the hips, waist, chest (armhole), neck line, sprout, shoulder line and armhole line, darts are marked along the waist line from the center of the back and side seam, as well as in the middle of the back
Pattern of the front part of the robe
When building the front part of the robe, we will also learn how to build the smell. In a product with a wrap, there is a line of the center front and it must be marked so that the shelves, when superimposed on each other, coincide along the line of the center front, this is important.
Draw a line for the center of the front and mark the width of the wrap
We lay out the pattern on the fabric so that we have enough space on the fabric to leave the fabric on the smell. Mark the line of the center front on the fabric, do not confuse the edge of the product and the line of the center front.
Then we transfer the waist line to the fabric. We draw a line on the fabric for the edge of the product, which has become our scent.
Now it is necessary to note the balance, which we can have from 1 to 2.5 cm. A balance of 3 cm is already for a very large size and a very high chest, so it is rare and for no particular reason never take a balance of 3 cm... A balance of 1 cm is the size 46-48, 1.5 cm -50 - size 52, 2.0 cm - size 54-56. For myself, I take 1.5 cm.
Shelf shoulder line balance
So, the shoulder width is the same, and the height along the shoulder line at the neckline is 1.5 cm higher. There are no changes in volume, but a chest dart needs to be built. The peculiarity of laying a dart with this cut is from 4 to 9 cm maximum; it is not recommended to lay a dart more with this cut. I usually have a 7 cm dart.
From the point where the back armhole begins, I set aside 7 cm upwards. And to the shoulder line I laid a rounded line for the front armhole, see photo
Front armhole line
Is it clear how we built the shoulder line and the nose (we added an even piece from the front center line)? The side seam line of the back and front are exactly the same in shape and will be sewn together very easily.
The side seams match perfectly
Definition of a dart and its construction Bust dart
What was raised along the side seam line for the dart 7 cm will go into the dart. The front part of the shelf armhole was built from it.
From the end of the wrap, from the waist line, connect the point where the belt will be sewn to the beginning of the shoulder line with a straight line.
From the shoulder line we set the height of the chest 29 cm and mark where the center of the chest is, this is approximately 11 cm.
To find your value, you need to measure the distance from nipple to nipple and divide the result in half and set this value not from the edge of the nose, but from the center of the front. This will be the top of our dart.
From the side seam line, it absolutely does not matter where you need to measure 7 cm and draw the dart lines to the point of the top of the chest. The top of the dart was found from the measurement of the bust height and from the center of the chest.
Pay attention to the armhole line, two rounding lines, it is better to round more.
The shelf pattern is ready, let's cut the finished pattern. Once we baste the darts, the side seams will line up perfectly.
The side seams match perfectly
Sweeping
Let's start washing off the robe. On the fabric, be sure to mark the waist line with a notch. Let's move the darts and center front lines. We will make a line of the center front with an interfacing stitch using a thread of a contrasting color.
Chintz fabric, wraparound robe, visible seam in the center of the front and the width of the wrapper
On the shelf we lay the waist lines with a slope so that there is no dart on the stomach. The width of the dart is exactly the same as the excess in the back side seam line.
We find the position of the waist dart from the location of the point of the top of the chest. If the difference between the volume of the hips and the waist is significant, the excess can be removed into additional darts along the waistline. And we transfer all the necessary lines from one side to the other.
- Having spent a little time transferring the lines and laying a spacer seam along the line of the center front, it is much easier and better than getting lost while sewing the product and then looking for information on how to eliminate defects, my rule is not to make defects so that you don’t have to eliminate them later.
- We swept away one detail and tried it on.
shelf fitting
It would be possible not to make darts at the waist, but our trade offers so many shapeless things that if we do it for ourselves, then let’s create more beautiful clothes that don’t look like a bag. All the advantages of the figure, while they exist, must be emphasized.
I would like to draw your attention to darts; taking into account your individual characteristics, find your dart location for your figure.
Regardless of what cutting system you use, remember that this understanding comes with experience, so sew more and study your figure and look for the cut that is right for you, everything comes with experience, only then will you find exactly what you want what you need specifically.
Advantages and disadvantages
Do-it-yourself blanket: types and procedure for making a bedspread
Among the advantages of such TV blankets are the following:
- they are lighter and thinner than ordinary blankets, but warm enough;
- easy to care for and wash;
- almost all models do not wrinkle;
- easy to choose the size as they are universal;
- mobility - the blanket is easy to fold and transport;
- dense and strong material is used;
- suitable as a gift for both men and women (there are models for couples);
- hands free - you can work at the computer or read a book, talk on the phone;
- you are protected from drafts;
- different colors;
- easy to sew yourself.
Among the disadvantages, we can note the price in some models, as well as some angularity of the models, which is not critical, since you are not going to parade in it down the street.
Characteristics of a blanket with sleeves depending on the type of fabric
Crochet a baby blanket
Naturally, such a tasty morsel gave birth to a lot of companies, both large and small, which began to produce their own variations of the blanket from different fabrics. The main condition is to follow certain rules and preserve the important characteristics of the product:
- A cozy bedspread should not have unnecessary seams.
- The sleeves should be quite comfortable, and their location should not restrict movement.
- The blanket should hold well enough on the body and not slip off, even if there is a need to get up or get to the kettle and brew strong tea or coffee.
- The product should be as practical as possible: not prick, not stretch, not electrified. Wash well, do not shrink or become deformed.
- The price of the product should not be higher than the cost of the robe.
If you like all these advantages, then let's move on to another important point - the choice of fabric. This question, especially when sewing a product yourself, should be at the forefront, because the fabric should be as soft as possible, but at the same time light and environmentally friendly
The skin must breathe in it, so we immediately exclude synthetic fabrics from our review.
Microplush, fleece and microfiber are ideal fabrics for creating a blanket robe
Microplush and microfiber
Microplush is a fairly versatile and high-quality material, which can contain different materials, for example, combine wool and synthetic fabrics, silk and synthetics, cotton and polyester. Most often, plush made of wool and polyester is used for blankets.
Pleasant to the touch and noble-looking microplush blankets will help create a unique atmosphere of comfort and relaxation while reading a book.
Interestingly, colors and color variations can be very different. It can be a plain canvas or a variegated pattern.
Plush has a huge advantage - it always looks beautiful, does not change shape, is durable and wear-resistant.
Among the disadvantages is that with an excessive amount of synthetic threads, the fabric can attract dust and small debris.
Unlike microplush, microfiber is a synthetic fabric. Essentially, it is microfiber, which is a mesh of polyamide and polyester fibers. This structure provides additional important characteristics of this type of fabric - hygroscopicity, thermal conductivity and breathability.
Microfiber has its drawbacks. The fabric quickly accumulates static electricity and cannot withstand high temperatures. Microfiber products are expensive.
Fleece and terry cloth
Fleece is an amazing material, the creators of which received a Nobel Prize for their invention. The full name of the material is polarfleece.
The soft texture and light weight make this material ideal for making blankets and blankets.
In addition, the fabric is easy to dye, does not fade, has good thermal conductivity, and breathes. The substances included in its composition prevent the emergence of harmful microorganisms, including dust mites.
Other benefits include:
- durability;
- low cost;
- ease of care.
The disadvantages of fleece most often include a high degree of electrification; therefore, like plush, it attracts fine dust and debris. The material is afraid of open fire and instantly flares up, and can also melt near heating devices.
Terry fabric is a classic of home textiles. This fabric is a loop type material. Typically, such fabric is made from natural fabrics: linen, cotton or bamboo threads.
Blankets made from terry fabrics have the same characteristics as the above-mentioned materials, however, they do not attract dust, have a pleasant texture, and are hypoallergenic
Such products absorb moisture well and have an attractive appearance.
The main disadvantage is that terry products wrinkle a lot. In addition, if used carelessly, snags may appear on the fabric.
What materials are blankets with sleeves made from?
In order for the product to turn out to be of really high quality, pleasant to the touch, warm, and comfortable, it is necessary to choose the right basic material for sewing. The most successful options include such fabrics.
Microfiber
This is a special material made of polyamide and polyester. It is produced using a special technology, due to which it has the following properties:
- Due to the ultra-fine fibers, it is incredibly soft and pleasant to the touch.
- Things made from this material do not fade, so they can be safely washed with other clothes.
- Microfiber does not leave behind any debris, which means you don’t have to run around the house with a vacuum cleaner and pick up small threads.
- The fabric doesn't pill, so if you buy it fluffy and soft, it will stay that way.
- Microfiber perfectly absorbs moisture, so it is very comfortable to walk in such dressing gowns after a shower.
Important! The only thing that scares off many consumers is the high cost of the material, but it pays off fairly quickly.
- Blankets Burberry Russia in St. Petersburg
Fleece
This is a synthetic material, which is why many people experience some discomfort when wearing it. Despite the fact that fleece has excellent breathability, in practice it is much inferior to expensive microfiber.
Important! Fleece absorbs dust strongly and becomes electrified.
Mahra
Due to the fact that this is a natural fabric, the skin feels incredibly comfortable when in contact with it. That is why it is most often used in the manufacture of slippers, bathrobes, and towels compared to other materials. If you choose it for sewing a blanket with sleeves, then, of course, it will fulfill the function of a robe, but it is unlikely to serve as a bedspread. The fact is that terry fabric is subject to mechanical stretching when wet.
Important! If you pull too hard on the product, it may stretch too much, and it will be difficult to fix it later.
The history of the appearance of a blanket with sleeves
Bedspread for a sofa: types, designs, colors, fabrics for covers. how to arrange a blanket beautifully?
You will be very surprised, but the first blanket with sleeves appeared 22 years ago! It was invented, so to speak, by a student at the University of Maine (USA) Gary Cleg. Once, wrapped in a blanket, he wanted to switch the TV from one channel to another, but he was greatly hindered by the need to constantly pull down his sleeves. This made him so angry that he simply made holes in it. A little later, the idea came to him to sew sleeves to the holes, and so Sleery, or blankets with sleeves, were born.
The invention had to go a long way before it was fully recognized. Gary made his first blanket with sleeves for his mother. Very soon the invention had its first fans. Thus, a blanket with sleeves Blanket (blanket) + Sleaves (Sleeves) began to be sold on the Internet with considerable success.
The brand is still considered one of the best-selling in the USA and around the world.
It is actively advertised by such stars as Courteney Cox, Tom Cruise and other celebrities. To date, more than 40 million Slippy sets have already been sold. The product has gained enormous popularity: it is known that every sixth US family has such a robe.
How to sew a dressing gown without a pattern: different techniques and models -
Hello, needlewomen. Wouldn't an extra robe hurt us? See how to sew a robe without a pattern.
- A simple model of a robe with a scent
- How to sew a robe without sleeves and without side seams
- Like Japanese beauties
A simple model of a robe with a scent
A robe is a very comfortable thing, and when you sew it with your own hands, it can become a real work of art. For your home, you can come up with decorations that you won’t wear in public. But at home you also need to be beautiful and well-groomed.
First, without a pattern, we’ll sew a wraparound robe. If you know how to hold a needle in your hand, then this is not a problem for you. Let shorts and a T-shirt remain your home clothes, but a robe will not be superfluous.
Why do you need to sew a thing with a smell first? It is convenient because you can quickly tie it without getting confused with the zipper and buttons, and the buttons can come off, the loops can become unusable, but the straps or belt never!
How much material will be needed
For this wardrobe item, you can take any material, but the dimensions should be as follows: with a width of 150 cm, take a length equal to the length of the product, if your size is up to 54, and if larger, then 2 times larger.
We calculate the width using the formula: FOB plus 20 cm. FOB is the half-circumference of the hips.
We create the pattern directly on the fabric.
- First, iron the fabric well.
- Lay it out on the table.
- Fold fabric 150 cm wide in half with the wrong side inward, narrow fabric 80 cm wide - across.
- We draw the points of the future pattern with chalk.
- On a narrow fabric, we retreat 1.5 cm from the left edge for the seam on the back.
- We build a pattern from above.
- At the top we make an indent for the line - 1 cm.
- From this indentation to the right we draw a straight line
- On this line from the fold of the back to the edge we measure 9 cm, and from the left corner we measure down 2 cm, put a dot. Connect two points. This will be the neckline on the back side.
- Next, to the right of the fold, measure the FOB + 20 cm. At this mark, draw a straight line from top to bottom.
- On it we draw a cutout on the front shelf: you need to measure the distance from the shoulder to the waist, put this value on a straight line.
- On the top line, laid horizontally, to the left of the edge, measure 9 cm and put a dot.
- Connect 2 marks.
- The top horizontal line must be divided in half.
- Draw a straight line 26 cm down from this point.
- We make a cut along it for the hands.
- Next we cut out the parts.
Sewing the product
- We process the edges of the parts with a zigzag.
- We sew the back with narrow fabric.
- We fold the front and back face to face, aligning them along the shoulders.
- We turn up the sleeves and bottom.
- We sew a belt 4 cm wide.
- We use finishing trim to trim the neckline and front edge.
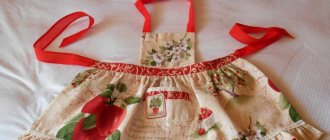
You can also sew a bathrobe from terry fabric .
How to sew a robe without sleeves and without side seams
Let's sew a sleeveless thing, and even without side seams. Let's make the top seams between the back and the shelves. And the sleeves and buttons will be replaced by a belt or a hidden fastener, so it is sewn very quickly.
The base of the robe is a simple rectangle. Width - (MN multiplied by 2) equals the circumference of the hips plus 8-10 cm. The NP segment is given by smell, equal to 15 cm on both shelves. The length of the product is any.
The height of the barrel (from the waist to the bottom mark of the sleeve opening) is 17-20 cm. Choose this size as you like. Also choose the depth of the neck yourself.
Let's start sewing:
- Zigzag the sleeve opening.
- We sew the shelves and back along the top,
- We will process the neck, as well as the edges of the product.
- If you decide to make a hidden fastener, then place it at the intersection of the waist line and the vertical line from point N.
- Treat the shelves and neck with ready-made finishing material.
- Fold the bottom.
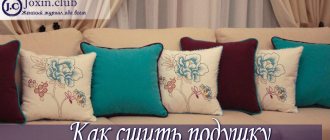
What is a plaid robe?
A blanket robe is suitable for a cozy stay at home; it will help you quickly warm up if necessary, and provide warmth in case of a sudden shutdown of heating. In fact, this is an ordinary full-size blanket; the only thing that distinguishes it from a traditional bedspread is that it is equipped with special sleeves.
This is what the plaid robe looks like in full size
And here it is, if you try it on yourself. In this form, it is in no way inferior to a spacious robe, with the only difference being that its length allows you to hide under it at full height
If you think that the appearance of the product is far from perfect, you are mistaken - a huge number of colors and design options allows even a representative of the stronger half of humanity to choose such a blanket.
Great color for the football lover
A blanket with sleeves is a great option for a gift, for example, on February 23, March 8, since most models are comfortably packaged in a transparent bag, just like a regular blanket.
Compact and practical - what else is needed for a wonderful gift!
How to sew a robe with a hood from a terry sheet
You can sew a robe with a hood from an ordinary terry sheet measuring 180 by 130 cm. There is only one condition: the hip circumference should not exceed 110 cm, otherwise the robe will not fit across the width.
The design of the robe is extremely simple and economical: not a single centimeter will go to waste.
Fold the fabric crosswise and mark the center center line. From it to the left and to the right, set aside ¼ of the hip measurement. Mark the length of the product, the length and width of the sleeve; how to do this can be seen in the drawing.
Cut the armholes and shoulder seams, cut out two squares measuring 17 by 17 cm - they will be used for pockets or gussets if you want to make the sleeves looser.
Please note: there is no need to make a cut along the 16 cm long line - this is where the hood and robe are connected.
Materials used
Microfiber
Soft, delicate and pleasant to the touch, the microfiber plaid robe gives a feeling of comfort and tenderness. At the same time, microfiber itself requires very careful care and delicate washing.
Velours
Velor holds its shape well and retains its original color for a long time. Plaid velor robes are elegant, practical and retain heat very well. For a long time it was believed that a velor robe is a sign of wealth and luxury.
Wool
This is the warmest version of a plaid robe. The excellent hygienic and heat-retaining properties of wool have been known for a long time. The advantages of woolen blankets include their durability and resistance to stains.
Rules of care
Initially, we already mentioned that the material itself, which is used to sew such a blanket, requires virtually no maintenance. However, there is a certain list of rules that still have to be followed.
So, a few important points in caring for a blanket with sleeves:
- After purchasing, wash the fabric. Plush or fleece act as dust collectors, so the first wash is necessary for your safety.
- Do not wash the product at temperatures higher than 30°C. In this case, it is better to use gentle modes. Don't forget to turn the product inside out before putting it in the washing machine.
- Do not use bleaches or other chemicals.
- Many types of fabrics do not require ironing, so simply hang your robe neatly.
A cozy blanket robe will be a wonderful gift for friends and family, and you can't go wrong with the size! Would you like to sew such a blanket or receive it as a gift? Share your comments and leave your examples of successful purchases of blankets - perhaps you will find a unique model.
In the meantime, check out our photo gallery of different models.
1 of 5
Previous Do-it-yourself Quilling crafts from paper and thread for beginners: color schemes and more with step-by-step instructions Next Do-it-yourself Quickly, efficiently, reliably: sterilizing jars in the oven
Where can I get this miracle of comfort?
Many have found their source for most small material goods in the form of online stores.
Very convenient: minimum movement, minimum funds (if you’re lucky) and maximum pleasure from owning the desired item.
One drawback: we buy almost a pig in a poke, wholesale and retail. Almost - because they saw the photo, read reviews about the product (sometimes), and got a general impression.
Most often, blankets with sleeves from two well-known brands are ordered through the online store. S nuggie , which came to us from America and slightly resemble a cozy hoodie with sleeves, cost almost half as much as S leepy , which are made from more expensive fabric.
This conclusion was made based on a study of reviews from happy owners of slippy blankets, especially those who initially made (without looking at the product) a choice in favor of a lower cost.
Leading manufacturers
Such blankets-robes are quite a popular gift today. Two manufacturers have gained the greatest popularity in Russia: the world brand SNUGGIE (USA) that we already call and the Russian brand Sleepy. Unlike the American brand, the Russian brand took over the baton in 2013.
These are the collections you can find on the market:
- New Year theme - NewYear;
- for married couples - with 4 sleeves;
- children's models - Kids (small size);
- classic variations - Original (most often solid colors);
- with fashionable colors - Wildside (with animal prints);
- super soft – Luxury.
In the table we indicate the names of the collections and the fabric options included in them.
Interesting models
Women's
A cozy plaid robe with sleeves in a rich burgundy color. This model is suitable for both a comfortable evening in front of the TV and for meeting friends at home.
A beautiful and delicate plaid robe is created for elegant women who value home comfort. Its delicate ivory color speaks of the owner’s romance and love for comfort and cleanliness.
A stunning plaid robe inspired by the famous Norwegian sweater with reindeer. Its bright red color will give you a joyful mood on the gloomiest and cloudiest day. The spacious and cozy model is a real find for women who, after a busy day, prefer to relax at home.
Men's
The brown plaid robe for men is designed specifically for comfortable relaxation. Delicate velor fibers captivate with their softness and create a suitable atmosphere for reading a book or watching TV with a cup of tea.
A men's plaid robe in a traditional blue color scheme looks original thanks to the beautiful and colorful shade of blue velor. The model protects almost the entire body from the cold, from the neck to the tips of the fingers, leaving the opportunity to do your favorite things without leaving the couch.
Very comfortable plaid robe with a pocket and a hood. Unlike models without a hood, it perfectly protects your head from the cold and can be worn after taking a shower or taking a bath. In the pocket you can put the necessary thing that you may need during your vacation.
DIY children's warm terry robe with a hood
Olga Maksimova | updated 10/31/2019 |
Today I’ll show you how to sew a children’s warm terry robe with a hood and set-in sleeves. Sewing is quick and easy. For a robe for a height of 134-140 cm, it took me exactly 1.5 m of fabric with a width of 150 cm. Terry fabric, 100% cotton, color: salad. I will sew the robe on an overlocker and a little on a sewing machine. If you don’t have an overlocker, you can sew on a sewing machine using an overlock foot or special stitches.
Pattern for height 86-164 cm, suitable for both girls and boys. We cut out the pattern pieces, adding 1 cm to the seams on each side, and 2 cm along the bottom edge of the front and back.
I widened the shelf on the smell side by 4 cm. I deepened the hood by about 5 cm. If you do the same with the edging, then according to the shelf pattern we will cut 2 parts 7 cm wide.
I sewed the hood in one layer, there will be a facing along the edge, I’ll tell you about it later in the article.
We sew the details of the shelves and back at the shoulder seams, where they are marked with clips for fixing the fabric. Iron it.
We sew the sleeves into the armholes, adjusting the sleeve.
Fold the robe along the shoulder seams and sew down the side seams where marked with clips. Iron it.
Let's move on to the hood.
We place the hood parts face to face and grind them down where marked with clips.
At this stage, we prepare the loop and sew the hood and neck together, sewing a loop between them. The strip for the loop is 12x2 cm.
If you don’t want to sew with a hem, but want to sew it in a simpler way, then at this stage all sections can be processed with knitted tape in the color of the fabric (an example of this method can be seen on the website with the pattern - link above).
To trim the hood, you can simply measure the length of the hood cut and cut a strip with a width equal to the width of the hem. Or cut the facing according to the hood pattern in one strip. Since I had fabric close together, I cut the facing from 2 parts according to the hood pattern (don’t forget to add on the seams), it’s better to cut the strip a little longer, and then cut off the excess.
- This is what the details of the lining (on the sides) and the lining of the hood (in the center) look like.
- We apply it to the robe, measure it, adjust it and sew it together in the right order.
Then we place it on the robe face to face and grind along the entire cut, where it is marked with clips. We sew the other side of the facing and the hem using an overlocker. I’ll show you more in the video above and on my YouTube channel.
- We secure the trim piece with a stitch, departing 2 cm from the bottom cut, where it is marked with a dotted line.
- Cut off the excess as noted in the photo below.
Then we overlock the bottom edge of the robe (hem). We bend the hem to the wrong side, straighten the corner, bend the bottom edge by 2 cm and make a straight line where it is marked with clips.
Iron the lining and trim of the hood. We lay a finishing stitch along the edge of the lining and facing of the hood, securing them.
- We also sew the cut of the sleeve on an overlocker, bend it (adjusting the length of the sleeve) and lay a straight line.
- Let's move on to the detail of the belt.
We bend the belt lengthwise and stitch it down, leaving room for turning it inside out. Turn it right side out.
- Sew up the hole and iron it.
From the remaining fabric we cut strips for belt loops of the required size. I have 2 strips 4x14 cm. We overcast the strips on all sides, bend them on both sides and lay a straight stitch along the entire length. On the side seam of the robe we mark the places for the belt loops.
- Having folded the edges, we sew on the belt loops, laying the lines where it is marked with a dotted line.
Let's move on to the pockets. We cut out the parts for the pockets of the required size. I have 2 pieces measuring 25x18 cm. We also sew the edges using an overlocker.
- Fold the top edge of the pocket to the wrong side and sew a straight line where it is marked with a dotted line.
We mark a place for the pocket. Place the pocket, folding the edges and sew a straight line where marked with a dotted line. We put fasteners for security.
- The children's warm terry robe is ready.
This is how it looks on my eldest daughter. Veronica is 8 years old, height 133 cm. I took the pattern a little to allow for a height of 140 cm.
Source: https://helga-handmade.ru/detskij-maxrovyj-xalat-s-kapyushonom.php