The pocket is an integral and rather “capricious” attribute that adorns most models of modern clothing. Trousers, windbreakers, jeans, sweatshirts or hoodies - they can all have (and most often do have) pockets. Many are accustomed to using them as storage for small items, such as apartment keys. Therefore, a torn pocket can cause a lot of problems, not only aesthetic, but also everyday. It’s very unpleasant to come home and find your keys missing.
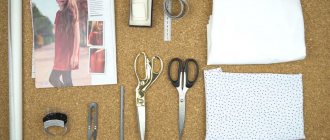
In this situation, the question arises - how to properly mend a pocket. To do this, you don’t have to go to a studio: you can deal with the problem on your own. You just need a little time, patience and available materials: threads of a suitable color, scissors, chalk or a piece of soap and an iron.
How to sew a pocket on a jacket inside or replace the lining
Most outerwear models are decorated with welt pockets. Roughly speaking, they are a small bag. It is the inner part of the element that often breaks, causing small items and keys to fall out. And the appearance of the wardrobe item deteriorates.
Repairs are carried out using the following technology:
- The first step is to turn the clothes outside. The inner part will open, which is a burlap lining fabric.
- After turning the product inside out, you need to carefully examine how it was sewn at the factory. If the method of processing the seams allows you to replace the lining without much hassle, then the edges should be marked with chalk, indicating the upper and lower parts - they can be of different lengths. This simple manipulation will simplify the work of assembling an element with new material.
@samoshvejka.ru
- At the next stage, you need to carefully flog the leaky fabric and carefully go over it with an iron - in the future, you will have to make new parts for the pockets from the pieces. A special fabric called “pocket” is used to sew the lining. It is a denser version of calico, painted black. If such material is not at hand, you can take any other dense cut.
- The selected material must be carefully ironed, then the parts of the old lining are laid out on top.
- Trace the factory elements using chalk or a piece of soap. It is important to leave a small amount of fabric for the seams - make an allowance.
- Carefully cut out new parts along the resulting contour, marking the upper and lower parts with numbers, letters or other clear symbols.
@samoshvejka.ru
- Sew pieces of the future new lining to the inside of the welt pocket.
- Connect the elements together. Manipulations must be performed strictly with a fine double stitch. Parts sewn in this way last much longer and are not afraid of mechanical stress. In other words, keys or small change placed in the pocket will not tear the fabric for much longer.
@samoshvejka.ru
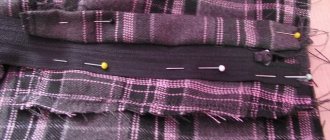
If clothes with torn welt pockets have internal material, and it is not possible to turn it inside out, then you just need to pull the burlap out. Where the gap occurs, remove the remaining threads, and then carefully bend the edges of the dense calico.
Then sew the hole with a small double seam, alternately grabbing several threads on each side. Secure the resulting seam with a tight knot so that it ends up inside the clothing.
Using a blind stitch, carefully sew the pocket to the inside of the product.
Invisible patch pocket treatment: the haute couture method
But this method is not very reliable, since hand stitching is not durable and can tear while wearing the finished product.
In this master class we will look at the invisible method of processing haute couture. This method of sewing a pocket on a lining is little known, but is most popular among professionals.
You will need:
- Textile
- Lining
- Adhesive pad
- Pocket pattern
- Needle, pins, thread, scissors
- Marking tool (crayon, watercolor pen or pencil)
In-seam pocket like Max Mara: master class
Step 1
Cut out the pocket pieces with a one-piece facing 4 cm wide with a 1 cm allowance.
Step 2
Reinforce the facing with an adhesive pad. In this case it is dublin.
If the pocket is cut on the bias due to the location of the pattern, or if you have loose fabric, glue strengthens the entire pocket along with the allowances.
Mark the contours of the pocket according to the pattern.
Step 3
Cut a double-width facing from the pattern. This will be the pocket lining pattern.
Cut out the lining with an allowance of 8 mm. Thus, it is 2 mm smaller than the pocket along the contour. This is necessary so that in the finished pocket the lining does not peek out at the edges.
Step 4
Place the lining face to face on the top edge of the pocket. Sew the lining onto the pocket, leaving a hole in the seam 5-6 cm long.
Press the lining up onto the seam allowances.
Step 5
Place the pocket and lining face to face, folding it along the top line of the pocket.
Pin the lining and pocket together, matching the seam allowances.
The pocket will thus sit on the lining.
How to sew a patch pocket with a side entrance, read on BurdaStyle.ru
Step 6
Mark the pocket along the lining, especially carefully at the curves; they should be the same on both pockets. It is necessary!
Step 7
Sew the lining and pocket using the widest basting stitch on a machine or using small stitches by hand.
Step 8
Cut out the corners of the allowances at the top, not reaching the line 2 mm.
In roundings, trim allowances to 2-3 mm.
Turn the pocket inside out through the unstitched seam section.
Step 9
Sweep the edge of the pocket from the lining side with a 1 mm transition edge so that the lining is not visible from the face of the pocket.
Iron the pocket first with the basting, then without the lining.
Step 10
Remove the basting from the stitching seam of the lining to the pocket.
Sew the hole in the top seam of the lining.
How to properly make a corner with an envelope: master class
Step 11
Transfer the pocket markings from the inside of the coat (jacket) to the front side using a basting stitch.
Step 12
Pin the pocket according to the markings along the top edge only
Turn the pocket up and pin the lining crosswise along the markings.
Step 13
Sew the lining onto the coat (jacket) exactly along the fold, folding back the allowances. Make cross tacks at the top of the pocket.
Press the lining allowances back into line
Step 14
Turn the pocket over the lining and pin it over the lining, overlapping it along the contour.
Baste the pocket, remove the pins.
Iron the pocket well from the inside out.
Important!
Do not iron the pocket on the front side, otherwise all the allowances will show through.
Step 15
Wax the thread for hand stitching the pocket, iron the thread on an unnecessary piece of fabric. The wax will be absorbed into the thread, it will become smoother and stronger. If you don’t have sewing wax, like I do, you can take a simple candle.
Sew the pocket, turning the fabric so that the edge of the pocket protrudes 1 mm.
Place hand stitches often and just below the edge of the pocket. This way they will be completely invisible from the face and the edge of the pocket will lie naturally.
All that remains is to iron the pocket from the inside out one more time and voila! Ready! The stitching is hidden inside the pocket and all the load in the sock falls on the lining. But you can't see her face. The allowances are also hidden between the lining and the top of the pocket. Inside the pocket there is only a smooth lining. Durable and beautiful.
Svetlana Khatskevich
Svetlana graduated from a university with a degree in Sewing Technological Engineer.
She has been teaching sewing technology for over 20 years. He is a senior teacher at Burda Academy. We know Svetlana from her work on the site since its inception. She generously shares her knowledge and infects with her love of sewing. Sveta runs her own pages on Instagram and Vkontakte.
Sewing is creative, fun and educational.
Welcome to this bright and interesting world! Author of the master class and photo: Svetlana Khatskevich Material prepared by Yulia Dekanova
How to sew a lining
Many jackets use inexpensive material as lining - artificial silk, polyester, satin, satin, and less often viscose. When clothes are worn regularly, holes appear in the seam area, which over time turn into large holes.
How to repair a jacket lining:
- turn the jacket inside out;
- select the desired thread color;
- thread the needle;
- cut off the frayed part of the fabric along the edge of the hole;
- Sew the lining by hand using a stucco stitch.
If the fabric delaminates, carefully treat the seam with liquid glue - Moment, Second. If the hole appears in a visible place on the lining, the seam is masked. To do this, use a piece of adhesive non-woven fabric or a patch based on hot-melt adhesive.
In half of the cases, holes in the lining occur in the seam area. If repairs are not done in a timely manner, they increase every day. To repair a broken seam, use a sewing machine:
- set straight line mode;
- adjust the stitch length (optimally 1.5 mm);
- fold the two halves of the lining and clamp it under the machine foot;
- sew, making a 0.5 cm long bartack at the beginning and end.
About bullshit and debt
When a debt is repaid with reluctance or regret, you receive negativity along with the banknotes. To protect yourself from possible energy attacks and avoid troubles, when repaying the debt, put the fig in your left pocket.
In Rus', the fig served as a protective gesture against evil thoughts, evil spirits and energy vampires.
Esotericists recommend folding the fig so that the thumb is sandwiched between the middle and ring fingers. In this case, the fig will not only protect from negativity, but will also mirror it, returning it to the ill-wisher.
Bolognese jacket repair
Compacted artificial fabric - bologna, is made of polymer threads treated with a water-repellent and airtight composition. Bologna jackets provide excellent protection from rain and damp fog, making them perfect for picnics and hikes.
Important! The rubberized material was invented by the Italian engineer Giulio Natta, and the fabric received its name thanks to the Italian city of Bologna, where the inventor lived.
Clothing made from Bologna has long gained popularity among many peoples, as it is indispensable in the wet and cold seasons. Unfortunately, rubberized fabric is not as high tensile strength as we would like, which is why owners of such clothing often have to decide how to put a patch on the outside of a bologna trigger, because the material is not so easy to sew up. And there can be plenty of reasons for clothing damage:
- Burnt by a cigarette or hot object.
- Cut (by a blade or sharp object).
- Snags from a sharp object, such as a nail.
Materials for work
In order to repair a polyester jacket with your own hands, you may need the following materials:
- Glue “Super Moment” or KP-1.
- Acetone or gasoline for degreasing.
- A piece of fabric for a patch, matching the color.
- Polyethylene or non-woven fabric.
- Application.
- Iron.
- Gauze or soft natural fabric.
A light and comfortable bologna jacket can be sealed in several ways using the above materials. Let us consider in detail each method of solving the problem.
Method number 1. Repair using a fabric patch
In order to seal the hole, prepare a piece of fabric and glue that is suitable in size, texture and color.
Proceed as follows:
- Turn the product inside out and lay it out on a flat surface.
- Degrease the tear area from the reverse side with acetone or gasoline.
- Apply a thin layer of Supermoment glue (KP-1) to the patch fabric.
- Connect the edges of the hole neatly and evenly.
- Apply a patch.
- Place the repair area under the press for a few minutes (according to the instructions for the glue used).
- Turn the jacket inside out and evaluate the result of the work. If traces of the tear are visible on the front side, then disguise them using embroidered applique, which is sold in sewing and craft stores.
Important! If a sports jacket is torn, the tear area can be covered with thematic inscriptions or pictures. You can also apply an internal seam and thus sew the torn area on the jacket.
Method number 2. We use polyethylene or non-woven fabric
To seal a polyester jacket, prepare: a special tape made of dry glue (non-woven fabric), a piece of fabric that matches the color, an iron and gauze.
Important! Instead of non-woven fabric, you can use regular cellophane.
Step-by-step instruction:
- Turn the product inside out and place it on the table.
- Spread the lining to get to the cut area.
- Cut a piece of polyethylene or non-woven fabric slightly smaller than the patch.
- Carefully bring the edges of the tear together.
- Apply polyethylene (non-woven fabric) from the inside out and carefully smooth it out.
- Place a fabric patch on top of the non-woven fabric (cellophane).
- Iron the joint using gauze or soft cloth. The polyethylene will melt and securely fix the patch.
- Turn the product inside out and admire the result.
Of course, a line may be visible on the break line, but this is not scary, because only you will know about it, and the line will not be visible to others.
Repairing a burnt hole
Regardless of the cause of the burn, the hole must be eliminated. The problem can be solved in several ways, depending on the size and style of the product, as well as the size of the tear. Here are several options to solve the problem:
- If the clothes have various rivets, embroideries or patterns, then sew additional accessories on the problem area that match the style of the clothes.
- If a whole hole appears on the surface of the product, then disguise it using patches on both sides (front and back) and a patch that matches the color, shape and style. First glue one piece of fabric on the wrong side, and cut the second piece of fabric slightly larger than the hole. Glue the patch on the front side. Disguise the patch with a patch or applique. For symmetry, you can make a patch in another place of clothing.
As you can see, there are many ways to “give a second life” to your favorite jacket. Use the option you like and wear this irreplaceable item for a long time and with pleasure. Good luck!
Probably, many are familiar with the situation when, due to the constant carrying of keys in the pockets of a jacket, their linings very quickly become unusable - the fabric unravels, the seams tear, and the entire contents of the pocket fall into the lining of the product.
Sewing up the lining where the seam is torn or moving the seam slightly away from the unraveling fabric solves this problem only for a short time, after which the pocket becomes unusable again. The optimal solution in this case may be to replace the worn lining of the pockets with parts made of new dense fabric.
How to remake pockets in a down jacket
Here I will tell you in detail with photographs how to remake pockets in a down jacket. Or more precisely, how to flog lightning and what can replace them.
They asked me to remove metal zippers from a good real down jacket.
What is the reason? It is impossible to put your hands in your pockets - the teeth get scratched.
In addition, the shiny pendants on the dogs are annoying. This, by the way, is about tastes. Some people would be happy with these pendants.
I don’t like this kind of work, but I thought it would be possible to write a useful article (even two, the second one is about replacing the main zipper).
Remodeling process step by step
The main thing for me when working with such things is to tune in to peace and tranquility. Literally - take a meditative approach to the process. Then the result will be both neat and pretty.
And if you rush, there will definitely be moments that don’t work out. The result is sheer irritation and dissatisfaction.
Down jacket dismemberment
Of course, I started by stripping out the main zipper, since it would still need to be changed. By removing it, we get wide, spacious access to the insides of the jacket. I devoted the evening to this work.
The zipper is not just sewn on, but with a placket and edges. Each detail is fixed with an individual stitch.
I separate them all one by one so as not to spoil them.
Under no circumstances should you flog with a blade or scalpel; cuts cannot be avoided. And I don’t recommend the seam ripper, because it also has a sharp edge. You can easily cut it using thin raincoat fabric.
I do this kind of work with chicals (pictured below) - small scissors without rings, with sharp tips.
They cope well with decent thicknesses and us. They can crawl into the most inaccessible places. And in general, they are very convenient to use (unlike small nail scissors).
Before proceeding to the next stage, I cleaned all the parts of threads.
Then she took up the short zippers. There are 4 of them in this coat. Two - at the waist line. Decorative. There is nothing behind them. And two - parallel to the first, a little lower, functional. There are pockets behind them.
And I carefully flogged them and cleaned them too.
Ripping is a dirty job. Upon completion, there is a lot of small debris around (threads, feathers and other debris). I don't like this atmosphere. So the next step is cleaning the space. It's important for me.
Sealing false pockets
I describe the work using one example
I stitching onto the seam allowance, which I straightened and raised up (from the wrong side). In the bottom picture, I marked this allowance in pink. The fabric is plump, with padding polyester inside, and movable. It needed to be fixed as best as possible.
I swept it with multidirectional stitches . Such stitches prevent the part from moving. And here it was important to accurately join the vertical seams, to avoid any distortion.
By the way, the needle I took for sewing was very thin. To avoid leaving puncture marks on the fabric.
I laid a stitch along the edge of the letter and stitch.
Then she carefully removed the basting. That is, she didn’t pull or tug on the thread. And at first I cut it in many places. And pulled it out in small fragments. This is also done so that no traces are left.
I secured the edge of the seam allowance from the wrong side (which is raised up) by hand.
And then I stitched the side seams, between which there is a leaf without a pocket.
Seal real pockets
I’ll tell you with one example.
First I sewed up the corners of the pocket entrance. They were a little disheveled, so I had to tinker. Because it was necessary not only to put them in order, but also to maintain the alignment of the vertical seams. So I sewed them up by hand.
I sewed small pieces of fuses into place. They protect pockets from tears.
To decorate the pockets, I took furniture corduroy. It is soft, durable, and the color matches. And it looks like a knitted insert. In general, I was satisfied with this option (by the way, I went through about ten of them).
I cut a rectangle 5cm wide and ironed it as in the photo on the left (below).
I placed it underneath. I pinned it with three pins. I didn’t baste it, the fabric behaved well.
I stitched along the trail of the previous line (one horizontal seam). Under the entrance to the pocket.
A visible strip of fabric was created along the width of the hole - a little more than 1 cm.
The burlap pockets are made of fleece. Soft and cozy, but all in feathers. Everything sticks to this fleece very strongly. I didn’t really clean it, there was no point.
I replaced the facing on the burlap, which will show through the pocket gap. On the left in the photo is what happened, on the right is what she did.
I placed it from the inside out onto the gap (all the burlap hangs down, I’ll deal with it a little later).
I laid another horizontal line along the same lines. Now - above the entrance to the pocket.
You also need to connect the second part of the burlap with the new leaf.
The photos are not pretty, but they are quite important.
I laid out the front part of the down jacket on the table, straightened out the pocket, and put everything there as it should be. And then she carefully lifted the hem (turned it up so that the burlap became visible). This is the left photo (below). I traced the edge of the new fabric. You can also see this line in the left photo.
I pulled the burlap out from under it and cut off the excess, stepping back 2cm from the drawn line. This is in the middle photo.
Then I pinned the sections and sewed them together (1cm allowance). Right photo.
All that remains is to sew up the corners from the inside (as in the photo below).
And make short seams along the face so that the stitch frames the pocket on all four sides with a frame.
Now you roughly understand how to remake pockets in a down jacket, if necessary. The leaf could have been made in a different shape or from a different fabric, but these are details.
I demonstrated the essence of this work.
The next part is about how I sew a long zipper into this down jacket.
—————
About the new moon
The new moon is a new stage, at this time the effect of magical rites and rituals intensifies.
To keep money around throughout the month, esotericists advise putting a brand new coin in your pocket on the new moon. You cannot spend it; on the contrary, you need to stroke it during the month, inviting profit.
On the new moon you can also perform a ritual for wealth. Looking at the emerging month, ring the coins in your pockets, saying: As you grow, so let my income grow. It is believed that new sources of income will appear within the month.


