If you decide to sew a New Year's Snow Maiden costume with your own hands using patterns for adults or children, then you should immediately note your wise decision, because when you get the result, you will experience real pleasure and pride in your creativity and talent. If you have already encountered tailoring, and have a rough idea of how to sew a Snow Maiden costume, then the whole problem will rest only on our eternal lack of time.
[adsp-pro-1]
But for beginners there is no particular reason for self-doubt, we will tell and show everything in sufficient detail, you just need to get ready and start!
It’s easy to sew a Snow Maiden costume from a photo!
Snow Maiden costume: classic or “modern”
The traditional costume of the granddaughter of Santa Claus is a long fur coat or a warm trapeze dress with fur trim and patterns. Snow Maiden's shoes - white high-heeled boots or felt boots, headdress - kokoshnik or hat. The Snow Maiden collects her golden hair in a long braid or hides it under a headdress.
Classic Snow Maiden outfits in blue with white trim
No blue clothes? Don't worry—the outfit can be made all white!
Recently, we can observe a change in the image of the Snow Maiden - the dress or fur coat has noticeably shortened and become tight-fitting, the braid is replaced with loose hair, and the kokoshnik is replaced with a hat. The Snow Maiden can even be dressed in a red dress, like Santa Claus's assistant.
Choice of style
Everyone has a great idea of what our folklore character, the Snow Maiden, looks like, and we will adhere to it as much as possible. However, modernity inevitably imposes its own adjustments, and the traditional Snow Maiden costume only benefits from this.
On the Internet you can find an incredible number of styles of the Snow Maiden costume. From short or super short and fitted styles, to floor length, fitted or loose fit.
Extremes and a large field of choice are a distinctive feature of modern fashion, and you still have to adhere to it in a New Year's costume for an adult girl.
In this article we will tell you how to sew a Snow Maiden costume with your own hands of medium complexity, while the incentive to cope with the task will be to receive an exclusive “haute couture” costume, stylish and impressive.
However, the New Year's look also means additional accessories, so we will describe how to make a kokoshnik with your own hands - one of the options for the headdress of the New Year's Snow Maiden costume for adults or children. You can make another choice of headdress - a hat, as well as other costume accessories, such as:
- gloves;
- muff;
- boots;
- cape;
- cap.
PHOTO: Snow Maiden costume with long dress + pattern for an adult
Making a Snow Maiden costume from ready-made clothes
The outfit does not have to be sewn from scratch. You can transform a ready-made unnecessary dress or a set of a skirt and cape, preferably blue, white or dark blue. If the suit is for the street, then it is advisable to take thicker things, if for indoors, take light clothes that will not be hot.
Perhaps you have a dress or robe that can easily be altered
The hem, ends of the sleeves and edges of the collar should be trimmed with white fur or silver tinsel. The dress can be decorated with snowflakes, sequins, shiny stones. From the remaining materials we decorate felt boots and mittens. If the matinee is indoors, it is better to wear ballet flats or white shoes.
If you want to make the American version of the Snow Maiden - Santa Claus's assistant, then you will need a short red dress or bell-bottoms and a long-sleeve sweater. There is much less work here - just trim the edges with white fur, put on a wide black belt and shoes of the same color (white will do). As a headdress, you can use a hood for a dress or a Santa Claus hat, which can be easily bought at any supermarket before the holiday.
Complete the red minidress with white trim and a cap - and the outfit is complete!
Back
- First we have to work by hand, and only after we connect all the seams with a basting stitch and make adjustments to them after trying on the suit, we sew the parts together on a sewing machine.
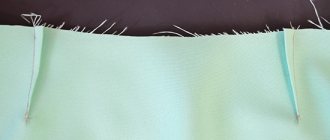
- We begin preparing the parts for basting by manually sewing all the darts on the back and front, getting acquainted with the process of how to sew a costume for the Snow Maiden.
- We baste the details along the shoulder line and connect the side seams, do a preliminary fitting, and, if necessary, adjust the armhole, neckline and overall width of the bodice.
- If we are satisfied with everything, we sew all the basting seams on a machine.
Basque
- Now we make the peplum, sew all three parts, then along the waist line we make two parallel lines with wide spacing. By pulling the ends of the threads from the resulting seams, we assemble the peplum into gathers, ensuring that the size of the waist line matches the size of the bodice.
- If the resulting basque does not seem too fluffy to you, then we baste it along the waist line to the bodice, otherwise we adjust the degree of gathering.
Sleeves
- We baste the sleeves, first gathering the sleeve cap into an assembly, just like we did with the peplum.
- We sew the sleeve cap into the bodice armhole using a basting stitch, do a preliminary fitting, correct the result and sew it on a machine.
- At the bottom of the sleeves we sew finishing cuffs made of fur fabric. We did not make a special pattern for this part, we simply cut out the cuffs of the desired width and a length equal to the length of the sleeve bottom line. Next, we apply the cuff so that we sew its edge from the wrong side to the wrong side of the bottom of the sleeve, fold the cuff to the front side, fold it and stitch it.
Collar
- We prepare the stand-up collar by sewing together two pieces cut out for it, one from the main fabric, the other from fur. If the fabric is too soft, then we also cut out a special paper spacer for the collars to maintain their shape.
- We turn the resulting design right side out and baste the fur side to the neckline of the bodice. Cover the top with the fabric side and sew on the machine.
- We sew a fur trim strip along the entire length of the front shelf, starting from the top of the neck, passing along the bottom of the peplum and ending at the neck of the other shelf. For greater effect of the costume, we also sew silver braid along the entire finishing strip.
- You can use Velcro as a fastener, the bodice of the costume is ready, you can try it on, because you already practically know how to sew a costume for the Snow Maiden.
How to sew a skirt
- We sew the two parts of the skirt that we received when cutting the fabric along the side seams. We make two folds at the top, one 0.5 cm along the entire length of the waist line, and sew with basting. Then we bend it again to a width determined by the width of the prepared elastic band, baste it and stitch it on a machine. We take an elastic band for the skirt that is not too wide, 1 - 2 cm will be enough, measure the length equal to the waist circumference and thread it into the skirt.
- We sew the prepared fur trim strip from the bottom of the skirt from the inside out, similar to the operation that we performed with the cuff. Next, we wrap the fur strip onto the front part of the skirt in exactly the same way and sew it on first with a basting and then with a sewing machine.
- So we made with our own hands an excellent stylish costume for the Snow Maiden, in which you can not only go to a children's party, but also to any adult party and be the center of attention. Such creativity will definitely not go unnoticed and will create a sensation.
Video:
https://youtu.be/SVc5uDhZCDs
How to sew a Snow Maiden dress yourself?
If you couldn’t find ready-made clothes that can be easily converted into Snow Maiden’s robes, then you can sew them yourself. Fleece or patterned brocade in white or blue colors are suitable as materials. To determine the length of the fabric, you need to add the length of the sleeve to the expected length of the dress and trim it with white fur with a pile. Don't forget about zipper/velcro, thread and buttons. The decor should be selected so that all materials are combined with each other. The scheme is as follows:
Find the pattern you need; if you wish, you can draw it yourself. The design should be transferred to the back side of the fabric, cut out and sweep away the details. Try them on a model. If all components of the suit fit well, sew the shoulder and side seams. Sew the sleeves, sew fur to the desired places (hem, sleeves), add a zipper or Velcro. You can decorate your outfit with sequins, openwork snowflakes, pebbles or rhinestones. Place the remaining fabric on the belt.
Options for kindergarten
Those who have had to invent costumes for matinees know that there is a very big difference between children in the junior group and the preparatory group. Therefore, two models will be briefly described here - a little simpler for a junior and a more complex one for a graduate.
Model 1
The easiest option for those who know how to knit. You will need thin and soft yarn of blue and white colors, thin strips of white fur (faux fur is quite suitable). You will need to knit a dress, a kokoshnik and low boots. The shoes are made very easily - the upper is white and the sole is knitted in blue. It turns out something like felt boots. The dress is short, blue, with double puffed sleeves and a wide hem . The bottom strip 10–12 cm wide can be made light. A double sleeve means that only the upper short part will be blue. On all white elements you can knit snowflake stars of different sizes. However, this increases the work time, because you need to draw a detailed diagram. It’s easier to embroider snowflakes on the finished product and decorate them with beads as desired. With the kokoshnik everything is exactly the same. To simplify, you can choose a simple form. However, he won't just hang on. Therefore, you need to knit a double product, and insert a frame made of thick cardboard inside. It can be easily secured to your head using an elastic band or regular invisible pins. Collar, armhole, cuffs, hem - everything is decorated with fur or regular Christmas tree rain.
We will tell you how to make a New Year's costume with beads for a girl with your own hands. This article contains instructions for creating a candy outfit. Here: https://banquettes.ru/calendar/novyiy-god-31/kostyumyi-ng/idei-dlya-devochek-kotoryie-mozhno-sdelat-svoimi-rukami.html - we have collected various ideas for New Year's costumes for girls.
Model 2
An option for girls who are already older, but still go to kindergarten.
- Materials: satin, tulle, glue, foil, braid, silver rain and beads.
- A sleeveless sundress is sewn according to a simple pattern, which can be drawn using a ready-made dress or sundress as a template.
- Tulle is sewn onto the top layer, which is then decorated with snowflakes cut out of foil.
- Under the sundress, wear a white golf shirt, which will simultaneously warm the child and serve as sleeves.
- You can additionally decorate the finished product with braid, fur or rain. Along with their decorative function, these elements successfully hide the seams and make the entire costume elegant.
- The headdress is an ordinary round cap, trimmed with the same fur or wide braid.
- Shoes – white shoes. If a child really wants boots, then you can easily sew stocking boots from leftover fabric, reinforcing the sole with a hard layer of cardboard.
Both models can be easily modified based on the materials available and the time required to prepare the costume.
How to sew a cape for a Snow Maiden costume
If the suit does not look elegant, it can be complemented with a cape made of brocade and velvet. The length of the cape should be chosen depending on the design - a long one will replace the Snow Maiden’s fur coat, and a short one will fit in as an organic element of the overall outfit. Fabric consumption is two cape lengths plus seam allowances.
The pattern is quite simple. It can be applied directly to fabric folded in half and secured with pins. In order for the large arc to come out smooth, draw with strokes. For the throat, you will need to draw a semicircle with a diameter of no less than 15 cm. Cut out the product blank, tuck it in and stitch the edges of the cape. Decorate the hem and neck with white fur.
Every time on the eve of the New Year, children begin to invent characters in whose image they will celebrate the holiday or go to the New Year's party. a carnival outfit for a child at home with your own hands, saving the family budget and spending a little time and effort. This is not very difficult for those who have at least some sewing skills. Moreover, any housewife will probably have the necessary materials or their analogues at home. I’ll tell you how to quickly sew a Snow Maiden for the New Year’s carnival with your own hands. Our costume consists of a spacious fur coat dress with a fur-trimmed collar and sleeves and a beautiful kokoshnik.
For a fur coat dress, it is better to choose a material of blue, white or silver color. Lining fabric made from padding polyester is perfect for sewing a suit. It is not expensive and will create the effect of a winter fur coat, just like the Snow Maiden should have. But if the room where the matinee will be held is very warm, then you can use thick satin or curtain fabric.
For work you will need: - a suitable knitted summer hat; - a piece of fabric, preferably padding polyester; - beads fixed on a thread (beads); - beads of various sizes or sequins; — thick cardboard or soft plastic; - decorative snowflakes; - artificial fur; - threads of the required color; - braid 10 cm; - button.
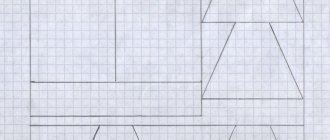
Snow Maiden costume pattern
We build the pattern for the Snow Maiden's costume on the principle of a sun skirt, so it is easy to cut it out by marking it directly on the fabric. Everything is very simple, so you can do without a pattern.
To build we need two sizes:
Osh – neck circumference; Diz – length of the product.
For little girls, you should not make a very long dress, it will get tangled under your feet, and it will be difficult for the child to dance near the Christmas tree. The best option is knee length or slightly higher. The fabric must be folded 4 times, in half and in half again. From the corner of the laid square, i.e. from the center, set aside the required length (R1) along an arc. The inner circle is the neck.
R1= Osh/6 We also mark the bottom of the cape, setting aside the required length from the corner with radius R2 = R1+Diz
We draw a semicircular line.
We cut out the part along the marked lines. You will get a blank in the form of a circle.
Fold the circle in half, inside out. Divide the resulting semicircle into 4 equal parts. The two parts on the sides are the sleeves. We cut the double layer of fabric to the armpit. The optimal cut can be determined when trying on a fur coat. In the middle, we make a cut in only one layer of fabric up to the neckline. Having tried on a fur coat on a girl, you need to outline the desired sleeve length. Remove the fur coat, lay it out evenly and shorten the sleeves to your measurements.
Pattern of a headdress (kokoshnik)
We draw on paper the desired shape of the kokoshnik, I have a five-pointed, semicircular one. You can choose the form at your discretion.
We cut out two parts of the kokoshnik according to the pattern.
Sewing a Snow Maiden costume
Fold the fur coat dress in half, wrong side out. Baste the side seams and sleeve seams.
We sew on a sewing machine.
We process the bottom and front part of our product with a double hem with a closed cut.
We sew strips of fur along the bottom of the sleeve with a zigzag.
We sew a fur collar along the neckline. If you have a suitable pattern, then you can cut out a collar according to it, or you can cut out a collar in the shape of a rectangle: the length of which is the length of the neck, the width is arbitrary.
I used a large bead as a button. The air loop is made of braid.
Below you can decorate the fastener with exactly the same buttons and loops, you can use buttons or sew loops and sew small white buttons. If you have enough fur, then the bottom can also be decorated with a fur trim. If there is not enough fur, then we decorate the fur coat dress at the bottom with beads on a thread. We sew each bead by hand using a slip stitch.
Next, give free rein to your imagination and decorate your fur coat dress with decorative snowflakes, sequins, rhinestones, beads, and tinsel to suit your taste.
The fur coat dress for the Snow Maiden is ready.
Making a headdress (kokoshnik)
We take two kokoshnik blanks, fold them with the wrong side inward and sew the kokoshnik blanks together with a zigzag along the contour. First we insert thick cardboard or plastic inside to fix the shape. I used a plastic cap visor so the product can be washed. We sew a knitted lace cap along the inner edge.
To do this, you need to put it on a jar or other voluminous object of a suitable size and manually sew the kokoshnik to the cap. Next, we sew beads, sequins, snowflakes to the kokoshnik, in any order. If you are in a hurry, you can use hot glue to secure the beads. If you have enough time, you can embroider with beads and make a richer decor. Finally, along the edge we sew the same beads on a thread that we used for the cape. We sew each bead by hand using a slip stitch.
Several freely hanging threads with beads look very beautiful, like earrings, on the sides of the kokoshnik. We sew them on separately.
That's all! The Snow Maiden costume is ready with your own hands.
One evening is enough to make this Snow Maiden carnival costume. We will complement the suit with a white T-shirt (underneath) and tights. We put on shoes or slippers decorated with faux fur or tinsel on our feet. If you have enough time, you can knit lace boots. Or if you have suitable material, you can sew the tops of the boots and embroider them to become the main costume. The master class can be viewed here .
Author of the material: AnastasiyaSP
How to sew a Snow Maiden hat
To sew a headdress, use the pattern of any hat.
It is advisable to make the hat from the same fabric as the rest of the outfit. If you are already making it from another, make sure that the patterns on the hat and clothes are not particularly different. The Snow Maiden's hat consists of six wedges. To calculate the size of each of them, you need to determine the head circumference, add 3 to this number and divide the sum by 6.
The height of the headdress is measured from the ear to the top of the head. Transfer the pattern to the fabric and cut, taking into account the seam allowance. Grind the wedges down on a sewing machine, trim the bottom with fur or silver tinsel, and sew a pompom to the top. Decorate the hat as your imagination dictates.
Options for schoolgirls
At school, girls already pay much more attention to their outfits, especially carnival and festive ones.
Simple one-piece suit
It will consist of three parts - a kokoshnik, a blouse and a skirt . Here you can easily use one color for each element, then the whole outfit will look much brighter. The blouse is made loose . For the pattern, you can take a regular shirt. The sleeve should be shortened to three quarters. The collar is also like a shirt, but without sharp corners. Material: white, very light fur. It can be replaced with a fluffy fleece or other blanket. The skirt will be relatively short and fluffy . To make a tutu skirt at home, you can use organza or other similar material. The basis will be a wide elastic band. Next, we cut the organza into strips 10–12 cm wide. The length is determined by the required length of the skirt multiplied by two. Each strip must be folded in half and tied with a flat knot on the base tape. All subsequent knots are made close to the previous one and so on until the circle is completed. Another strip is tied at the top of the waist with a wide belt to hide the knots. The kokoshnik is made from thick cardboard, organza, beads and all kinds of beads . First of all, make a template from paper. It is folded in half along the center line to achieve complete symmetry. The shape and size of the cutout must necessarily match the parameters of the child’s head. Then a rigid and dense cardboard base is cut out. On both sides it is covered first with opaque fabric to match the entire outfit, and then with organza or tulle. It is advisable to fold the edges and sew them with a hidden seam. Now you need to make sure that the product stays well on your head. To do this, cut out another similar piece from organza, but without a cutout for the head. It is attached to the back along the side. The loose bottom is folded so that a thin elastic band can be inserted into it. The finished kokoshnik is embroidered with beads and seed beads. Be sure to depict at least one snowflake so that the child matches the image even more.
Knitted lace for a young lady
This outfit will also consist of three parts - an upper and lower dress, as well as a kokoshnik. If you use blue for the lower dress and white for the upper lace, you can achieve a very interesting effect. The girl will simply be the queen of the school holiday.
- The kokoshnik is made according to the same scheme as described above. However, it can easily be replaced with a small lace cap, which is more of an ornament than a headdress. It knits up quite quickly using a crochet hook. The finished hat is decorated with shiny elements and two chains of beads on the sides. They represent earrings well. The same earrings are attached to the kokoshnik, if this option is chosen.
- The underdress is sewn from satin or other durable and beautiful fabric. It should be slightly shorter than the top one by 3–5 cm. If you want floor length, it is advisable to make a slit in the back in advance so that the dress does not interfere with walking and dancing. We lower the neckline as low as possible so that it does not peek out from behind the lace. There are no sleeves at all.
Read about the main points of creating a Christmas tree costume for a girl on our website. In this article you will learn how to make a snowman outfit for a boy. Here: https://banquettes.ru/calendar/novyiy-god-31/podarki-ng/chto-mozhno-sestre.html - we will tell you what is the best gift to give your sister for the New Year.
- The top lace dress, like the cap, is crocheted. You can choose any winter pattern you like. In this case, there is no need to cover a large surface, because the lower part will be a fairly dense base.
- Instead of sleeves, bracelets made of the same knitted lace, worn as high as possible on the shoulders, are suitable.
Additionally, the entire outfit can be decorated with sparkling tinsel and beads to make it look as rich as possible.
How to make the Snow Maiden's kokoshnik
Decorating a kokoshnik with beads, rhinestones and sequins
In fairy tales, the granddaughter of Santa Claus wears a traditional headdress with an ornament - a kokoshnik. To create it yourself you will need:
- elastic wire;
- collar glued fabric or cardboard;
- Super glue;
- paper clips;
- beautiful fabric in white, silver or blue;
- at least 5-6 hours of free time.
Instructions First, measure the diameter of the head and make a sketch of the kokoshnik, indicating the length of the top and rim. Two pieces of wire will serve as the frame of the rim, and one more will serve as the frame of the crown. We make the middle of the rim from collar fabric or cardboard. The greater its width, the better the kokoshnik will stay on the head. We attach the part to the frame over the edge by pulling the ends of the wire together. Lubricate the structure with superglue. Cut out the top of the kokoshnik from cardboard and sew it to the wire.
Creating a base for a kokoshnik: wire frame
We cover the back side of our design with fabric, cutting out the part with allowances and wrapping them on the front side. We will hold it all together with paper clips. We trim the lower part of the rim with fabric that was cut along an oblique thread. We wrap the seam allowances on the front side outwards. The seam allowances on the back side can be folded or trimmed to the edge, depending on the fabric texture. Then glue it. The crown and the top of the headband need to be covered with fabric cut to the edge.
Instructions for gluing a kokoshnik with fabric and beads
Don't worry if there are seams on the product - they can be easily hidden under the decorations. If everything was done correctly, the kokoshnik is ready and sits firmly on the head of the future Snow Maiden. You can decorate the kokoshnik with sequins, decorative shiny stones or painting on fabric. The edges of the crown and rim can be decorated with Christmas tree beads or the same stones.
Adding a tulle cap and bow to the kokoshnik
We glue a tulle “cap” under the base, which will help secure the kokoshnik on the head. From the front side it should go over the forehead, from the back it should be gathered into an elastic band. Instead of a kokoshnik, you can use a children's tiara with sparkles or a white headband with snowflakes glued on.
How to make a Snow Maiden costume with your own hands: pattern, photo
Some are satisfied with a regular evening with competitions or a well-thought-out program, others create a real performance and invite everyone with their children. For such costume parties, a DIY Snow Maiden costume, pattern (adult) will come in handy.
Who doesn't want to be someone else, at least for an evening? Instead of the usual boring gatherings, organize a real carnival, where everyone could become anyone. How to create the right costumes? Is it worth buying things for the evening or is it easier to do it yourself? It’s up to everyone to decide. Everyone at home has unnecessary old dresses, scraps of fabric, and if you wish, you can find cotton wool or padding polyester. Why not put it all to work?
Do-it-yourself - advantages
Almost any New Year's costume can be sewn with your own hands and the materials are always at hand. You can buy what you need at a hardware store, but you will avoid additional expenses on a disposable suit - however, if it turns out beautiful, you can use it several times.
Availability of materials, their cheapness - who doesn’t have an old dress, a sheet of cardboard, needles and threads at home? Scraps of foam rubber or padding polyester in the desired colors? If you want to turn into the Snow Maiden, you need to make a bright and memorable outfit. In stores there is usually a small selection, and the cost of any suit is quite decent.
A great opportunity to show creativity and avoid spending on an expensive evening dress if you were planning a regular New Year's Eve party. It doesn’t matter where you will celebrate the New Year - either with colleagues or at home, the opportunity to turn the event into a fabulous ball is everywhere.
DIY Snow Maiden costume, pattern (adult) will turn out special, with your decorations, your choice of colors. Why waste time and nerves looking for something ready? In addition to benefits, such work will also provide moral satisfaction. And if you like it, you can come up with costumes for all family members (or several colleagues who ask).
Beginning of work
For people familiar with the sewing process and patterns, the Snow Maiden dress will not be difficult. Beginners can benefit from educational videos on the Internet. If you don't have a sewing machine at home, you can sew by hand. What you will need:
Choose a fabric of the desired color (light blue, maybe with patterns, but without flowers), because the Snow Maiden is a winter character. You will need 3 m with a width of 1.5 (for a figure of 165 cm), look at the length there. This is if there is no suitable dress from the old ones that could be altered.
• fur 60 cm (sold ready-made, preferably white). • 1 hidden zipper (length 50 cm) • 4 skeins of thread (blue and white). • sewing machine (faster and easier to use). • overlock. • iron with ironing board. • machine needle, model No. 100 (already on the machine). • special tailor's pins. • needles, regular sewing threads. • special tailor's chalk (a scrap of old soap will do).
DIY Snow Maiden costume, pattern (adult) immediately shows what the fairy-tale character's dress will be like in the future. Usually this is a closed model with long sleeves, fitted with a loose skirt. Choose any suitable basic pattern. To figure out the future dress, first outline the reliefs of the back, then along the edges, then outline the waist, add an extension downwards. When modeling the front, close the chest dart in the raised seam from the armhole.
Before cutting, you need to decate the fabric. To do this, lay it out in front of you on a flat, smooth surface, fold it in half so that the right sides are on the inside and the edges are towards you. When cutting, look at the design or pile so as not to go against it. Lay out all the details of the finished pattern and circle or attach with pins - as you wish. However, when cutting, each time estimate 1.5-2 cm from the edge for allowances and seams.
Makeup and hairstyle of the Snow Maiden
Complete the Snow Maiden's costume with makeup in cool colors.
The image of the granddaughter of Father Frost does not require makeup. It is enough to do eye makeup with cool shades - gray, blue or silver. You can apply blush to your cheeks and powder or foundation to your face. Decorate your lips with gloss or pale pink lipstick.
The last preparation is the Snow Maiden’s braid. It is done either according to the classic pattern or with fashionable weaves, such as figure eight or fishtail.
Patterns for costumes of the Snow Maiden and Father Frost
There are only two weeks left until the most important winter holiday! During this time, we need to prepare the house, buy gifts for loved ones and think about how we will celebrate the New Year. If there are children in the house, then the holiday must include a Christmas tree, gifts under it, and, of course, Santa Claus and the Snow Maiden. You can sew the costumes yourself and congratulate all the kids you know. By the way, during the holidays, many people make good money from such congratulations. And all you need is costumes and a little artistry.
