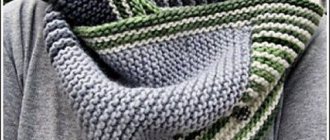
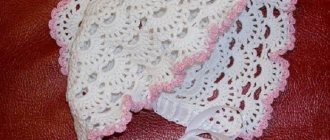
In its classical application, Romanian lace is more often found in interior items - tablecloths, curtains, napkins. To decorate clothes, it is usually used in combination with other techniques. Very beautiful lace wedges, inserts, and yokes look luxurious and stylish. If you decide to use Romanian lace for your models, keep in mind that, despite the apparent airiness, this openwork is quite dense, even rigid. And this is unacceptable for some things. You can choose life-size Romanian lace patterns for knitting from our article.
In order to make Romanian lace you need to prepare:
- fabric: durable, not thick, preferably plain (we will mark a pattern on it, the print will get in the way), can be used;
- plastic film according to the size of the knitting pattern;
- threads - “Iris”, “Snowflake”, “Chamomile”, etc. We will need a set of two types of threads of the same color, of different thicknesses: for knitting a cord - thick, for embroidery - thinner;
- hook No.1.0;
- embroidery needle: the eye of the needle should not be thick, otherwise it will be difficult to pierce the cord
- sewing threads for tacking the cord: the color should be contrasting in comparison with the main threads. Mandatory condition: the threads should not shed;
- regular sewing needle;
- scissors are small, with pointed tips;
- thimble.
Knitting the “Caterpillar” cord: MK video
Cord “Wide track”
The knitting technique is the same as in the previous cord, but the wide one is knitted on 3 rather than 2 loops.
Master Class
We knit 3 VPs, do not tighten the first one.
From the central stitch we knit another 1 stitch. On the hook we get 2 stitches.
We knit them together.
From the outer loop we knit a stitch and knit both stitches together.
We turn the knitting to the left, leaving the thread behind the work, and knit a loop from the previous sc. R.
We knit RLS. Next, insert the hook under the broach (see mark in the photo) and pull out the stitch.
We knit both stitches together again.
Then we knit a stitch from 2 broaches and tie the loops together.
We turn the work and continue knitting using this master class. It turns out to be a wide caterpillar.
Scheme for making a “caterpillar”
Before knitting the cord, preparatory work is carried out by making a diagram of the finished product, transferring the template onto paper, attaching it to the fabric, and covering it with a protective layer of film to keep the lace clean.
To make the main cord, cotton threads such as “Iris”, “Chamomile”, “Snowflake” and a crochet hook No. 1.0 are used. Laying out the Romanian lace pattern is done with a knitted cord. “Caterpillar” and “wide caterpillar” are knitted according to the same principle using two or three loops. Before knitting the side loops, make a simple post connecting the front and back of the wall.
To tie a fixed template, you can use other types of openwork cords.
Track cord
Knitting a cord “Wide caterpillar”: video master class
There are many more options for knitting cords. Choose the one you like best. We offer you some schemes for you to choose from.
We make a beautiful napkin from thick material with our own hands
The materials for this project will be a thick cotton thread and a piece of fabric.
Before starting work, you need to select a specific drawing, which is subsequently transferred to paper. After this, it must be placed on a fabric folded in half and covered with polyethylene on top. In this case, there should be no displacements.
Next, a long cord is knitted. It is knitted by casting on three air loops. The hook must be inserted first into the second loop of the finished chain, and then into the first. This should leave three loops on the hook. Knit the first two loops together so that there are already two loops left on the hook. After this, knit all the loops again and leave one loop on the hook. Turn the finished cord counterclockwise and repeat everything previously described again. Continue knitting according to the pattern, not forgetting to constantly turn the cord. The cord should have teeth consisting of pairs of loops. These pairs of loops need to be put on the hook so that each time you get three loops for the next step.
The cord should be long enough. The finished cord needs to be placed on the drawing and sewn on. It is better to make the simplest stitches, but you need to sew the cord tightly enough. The cord is laid on the side where the knitting began. Thus, a contour is obtained.
Next, the elements are embroidered inside the outline. The product should not be overloaded with embroidery. You can also embroider in different ways. When the embroidering of the elements is completed, you can remove the thread with which the outline was sewn. The thread is cut between layers of fabric without damaging the product. Fabric, polyethylene and paper can be removed, and all thread trimmings can be pulled out. The napkin is ready. Step-by-step execution in the photo can be seen below:
Knitting the “Hearts” cord: MK video
Stage four
We draw Romanian lace with a cord, sewing it along the outline of the diagram. The cord must be securely fastened. You cannot sew the ends of the cords overlay, it should only be a joint. And when laying out the curls of the pattern, adjusting the cords on top of each other is quite acceptable.
Stage five
You need to sew the cords together at the joints and overlays using the same threads and very carefully. Ideally, unnoticed. How to do this correctly - see the master class in the photo.
Stage six
Consists directly of embroidery.
To do this, we use thinner threads than for knitting cord. Romanian lace is most often embroidered with darning, buttonhole, scalloped, knotted or cordon stitches. Let's take a closer look at the master class on their implementation.
Scallop seam
Reminiscent of, but different from, a buttonhole stitch. The peculiarity of the stitch is that the thread is drawn in the form of a loop around the exiting end of the needle. Usually a single loop is enough, sometimes a double loop is done. Although simple, scallop stitches come in many different forms, with the difference depending on which direction the needle goes through the loop. Variations arise due to the peculiarities of the location of the stitches relative to each other, as well as due to different lengths of the stitches
Let's take a closer look at the technique of embroidering scallop stitches.
To fill a square with mesh, for example, we begin to embroider scallop stitches along the bottom edge of the cord on the top side of the square. 1st r. embroider from left to right. To do this, we draw the thread down from left to right in an arc, insert the needle into the 1st point of the cord from top to bottom. We pull the thread, the arc decreases, tightens and the thread lies at the base of the loop into which the needle was led. We repeat this until the end of the row. The stitches must be identical.
They differ only in location and combination. When moving to the lower river. We draw the thread with a needle inside the cord, the distance depends on the pattern. We embroider the next row in the opposite direction. Now we also draw the thread down, but from right to left, in an arc. We also insert the needle into the 1st point of the upper river. pattern formed between two scallop stitches, from top to bottom right, and tighten the thread. We repeat this until the end of the river.
Scallop stitches should be free and not touch the fabric on which the design is applied. We thread the beginning and end of the working thread into the cord. We cut off the tip. The most common:
- dense scalloped stitches: embroidered on each stitch of the cord and fit tightly to it;
- rare scalloped stitches: embroidered through 2-3 stitches of cord;
- a row of groups of scalloped stitches: stitches are embroidered in groups of 2-3 stitches each, then a gap between them and again a group of stitches;
- a series of free rare scallop stitches - the stitches are embroidered through 1-2 stitches of the cord and sag freely.
Darning stitch
In the example, the seam is made on three threads. Execution order: insert the needle from left to right under the thread, bring it out in front of the middle thread, go around it from above and insert it under the right thread from left to right.
In the opposite direction, with a needle we go around the right thread from right to left from above, insert it under the central thread, go around it from below, bring it up and go around the left thread from right to left from top to bottom, etc.
Cordone seam
The seam is used to sew individual columns, which are most often used as bridles.
The working thread comes out of the cord and wraps around the stretched threads until the entire column of tensioned threads is covered with stitches tightly adjacent to one another so that the column looks like a lace.
Loop stitch
The execution of the seam depends on its position. It can be positioned from left to right or right to left:
- if the seam is located from left to right, then the 1st stitch is obtained as follows: we draw the working thread clockwise so as to obtain a closed spiral turn, we pass the needle vertically down under the bridle that we are stitching, to the right of the starting point;
- if the seam is located from right to left, then the 1st stitch is obtained thus: we draw the working thread counterclockwise so as to obtain a closed turn of the spiral, we pass the needle vertically down under the bridle, which we are stitching, to the left of the starting point.
To obtain knots on top of the brid, we pull the thread down under it (toward ourselves), then pull it away from us in a vertical plane. As a result, the loop is crossed, stretched, the knot moves upward, and the working thread is also directed upward. The next turn of the spiral repeats the first, the new stitch lies to the left of the previous one.
Knotted sutures
It is used when a pattern is formed by tying several threads with different knots. The most common knots are the oblique chain and Turkish knots.
With an oblique tambour knot, the threads forming the “flagella” are pulled together by means of an oblique cross-shaped knot, in which the working thread is folded back in a loop to the right, and the needle passes above the working thread and under the next three threads, comes out over the loop and pulls the three threads into the “flagella”.
The picture shows how the working thread runs in the middle of a narrow path on the outside, and how 3 threads are pulled in the middle with one knot, and the working thread connects one group of “flagella” to another.
The Turkish knot tightens the “flagella” with a double knot, without a transverse thread.
The figure shows that every 3 threads are connected with a Turkish knot. The algorithm is this: keep the work vertical. We fasten the working thread on the left cord, take it out of the loop of the third transverse thread, lead it parallel to this thread until the middle of the seam, then lead the working thread in a loop to the right and make the first tambour knot, lead the working thread in a loop to the right and make the 2nd knot, to the right of the 1st one. th. We bring the working thread to the right stitching cord, insert the needle into the loop of the third thread, draw it lower along the cord and remove it from the loop of the third thread as well.
Since the working thread, which binds the “bundle” with two knots, runs parallel to the third transverse thread, the “bundle” is no longer made of three, but of 4 threads.
Methods for creating laces
An unlimited number of ways to weave cords determines the sophistication of the future lace. In one product it is possible to use threads and cords of different thicknesses and configurations.
You might be interested in Description of jute, composition and production technology of the material
The use of cotton threads for weaving the main cord is most common. This is explained by its non-slip properties, because the entire product will be held on it. To connect the elements of the pattern, threads of a different quality can be used - wool, linen, viscose. Making a product from the finest threads containing synthetics or lurex requires more painstaking work and perseverance.
The thickness of the thread and the size of the hook require the selection of an appropriate template. Using coarse threads for a sophisticated design can lead to unexpected results.
Types of cords
Napkin
We transfer the diagram drawing onto the fabric and cover it with film.
We tie the laces, leaving long pieces of thread at the ends. We fix the cords tightly on the fabric.
Using the threads left at the ends of the cords, we sew them together.
The pattern is already being drawn.
Let's start embroidery.
The petals in the small and large flowers for this model are made using different techniques.
Next, the master class shows how to embroider a stem.
The first petal is ready!
We continue to embroider.
Completed master-class on embroidery.
We tear off, remove excess threads, lightly clean with a dampened cotton swab, and iron through the fabric.
The napkin is ready!
How to transfer a drawing to canvas?
Romanian lace for beginners step by step instructions.
- Select an ornament using ready-made patterns or create your own.
- Applying a pattern to paper.
- Transferring the design onto fabric using tracing paper.
- Sew polyethylene over the template to keep the threads clean, especially the white ones.
- Making the main cord.
- Fastening the cord with threads along the bends of the pattern.
- Filling the space between cords by knitting or sewing.
- Disconnecting the finished product.
Note! When making complex products in the form of jackets or dresses, a mannequin is often used, on which a fabric blank is fixed.
To make small patterns from thin threads, using a hoop makes the job easier.
If the design is created independently, then it is possible to make the pattern directly on the fabric with a pen or marker. The material used does not have to be new. Paper models are sometimes joined together from several parts with glue.
To work, you will need a needle and thread, small scissors, a thimble, film to the size of the template, rough fabric, tracing paper, and a pen.
Securing the cord
We knit a collar using the Romanian lace technique: video master class
https://youtu.be/UOCmqTr2p_4
And now, concluding our master class, we bring to your attention several options for schemes. By printing them in full size, you can make Romanian lace for various models of clothing or for interior items.
The history of lace
The duties of every Romanian woman included embroidery, weaving, weaving and spinning. The production of clothing items was done at home by hand. Historical finds confirm the use of lace lace for home decoration.
Wedding Dress
The modern fashion for creating collars, boleros, jackets, handbags and belts as elements of festive clothing is being used more and more often. The return of table napkins and shawls on shoulders makes a woman and her home more elegant and mysterious. Tunics and wedding dresses using the finest Romanian lace are valued in the markets of many countries. Fine works of art usually exist in limited quantities because they are handcrafted.
Bolero for celebration
Shutdown
It should be noted that all the work described above is performed on the wrong side of the fabric. Therefore, when all the activities are completed, you can take out the pins and the rough contrast thread, and look at the front side.
You should carefully examine what happened and check if there are any too large gaps. They are undesirable because of the possible sagging of the cord in this place. If deficiencies are nevertheless found, they should be eliminated, and all ends should be firmly sealed.
Other adjustments may be required to get the product looking perfect, but the end result is worth every hour spent.
Romanian lace will look more impressive and smooth if it is starched.