Recently, ponchos have become very popular. Girls and women can increasingly be seen wearing such a cape at different times of the year. A stylish trend will help you diversify your wardrobe and come up with a new, unique look. You can always find an attractive item of clothing in your nearest store. Handicraft lovers who want to create a unique item can sew a poncho with their own hands with or without a pattern.
Description and selection of material
A poncho is a traditional Latin American outerwear that is a large rectangular piece of fabric or knitted fabric with a hole in the middle for the head. For the first time, such a product was made by the Mapuche Indians.
The ethnic element of the wardrobe came into fashion in the middle of the last century and quickly won many fans. Ponchos were worn not only by women, but also by men. The original version of the product was supplemented with hoods, sleeves, collars, belts, fasteners and other details. The style also changed, which could no longer be called Indian or Mexican. Based on the basic model, today various types of capes are made, for which any types of materials are used.
A modern poncho is a comfortable thing that can be worn in any weather. This product is suitable for both slender girls and plump ladies. With these clothes you can create an elegant and sophisticated look. The poncho is comfortable to wear. In addition, it can hide various figure flaws.
You can save money if you sew the desired item yourself. The choice of material and style should take into account the season in which the cape will be used. For summer you should buy chiffon, silk or linen. Lace and sequins can become successful decorative elements for a product. Autumn and winter options are made from drape, cashmere, knitwear or wool. You can decorate the material with fur.
How to choose fabric and model
Due to the fact that they are worn in any season, different types of fabric can be used:
- atlas;
- fleece;
- knitwear;
- fur;
- cotton;
- tulle;
- wool;
- drape
The type of fabric is chosen depending on the season when the fashionista wants to wear it.
Silhouettes:
- Mexican;
- square;
- oval, etc.
The item is suitable for any body type, but the main thing is to choose the right model:
- The classic one reaches mid-thigh and is considered universal. However, in 2021 it can be either long or ultra-short.
- If you are tall and have a slender figure, a wide, short product will suit you.
- For a curvy girl, a flowy, elongated product is suitable.
For example, a poncho without seams (oval pattern) is suitable for a plump girl.
Product on a plump girl
Creating a Simple Option
Sewing a cape on the shoulders is quite simple, but beginners are recommended to start with simple styles that exclude hoods and other additional elements.
A cape made of square cloth is considered the simplest sewing option, since it does not even require a template.
How to sew a poncho with your own hands without a pattern:
- To make a poncho you will need light fabric or square lace fabric measuring 115x115 cm.
- A circle with a diameter of about 20-22 cm is cut out in the center of the canvas, and an additional cut 10 cm long is made to any corner of the square piece of fabric.
- Each edge should be finished using an overlocker. You can use bias tape.
- Strings or clasps are added to the edges of the cut.
Preparing for work
You should have scissors, material for making thread or fabric, knitting needles, tracing paper, pencil, chalk, hook, scissors, meter, ruler, sewing machine.
When everything is prepared, you need to take measurements so as not to make a mistake with the size. Measure the length of your arms (from the wrist to the shoulder), the length of the shoulder (from the neck to the beginning of the shoulder). As well as the volume of the waist and neck, and the length of the back.
Now transfer the dimensions onto paper, corresponding to the chosen pattern, and cut out the parts. Then place the details on the inside of the fabric, trace them and cut them out.
As for the material, they are sewn from silk, satin, drape, wool, velvet, and also linen. For knitted ones, mohair, acrylic, as well as cotton, etc. are used.
Then decide on the style of the poncho, be it a knitted or sewn model. A standard rectangular one will be a universal option for any look. It depends only on the shade and decor suitable for the occasion. But the cape is a good choice as an addition to a festive outfit. Mexican style, in a rectangular design, will appeal to extraordinary fashionistas.
When everything is prepared, we can begin production.
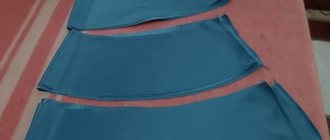
Sewing from round fabric
Making a cape from a round piece of fabric will be a little more difficult due to the processing of the rounded edges. A novice needlewoman will be able to correctly sew a poncho with a pattern. A quarter of a circle is drawn on paper, the total radius of which is 60 cm, while the diameter of the neck will be 30 cm, and the length from it to the edge of the cape will be 45 cm.
With these values, the poncho will be shortened and will reach the waist. The length of the product can be changed by increasing or decreasing the corresponding pattern line.
To make a round poncho, you need a fabric that drapes well. Fleece would be a great solution. The material is purchased in size 120x120 cm. The fabric is folded in half. A pattern is applied to the panel and a semicircle is outlined. The workpiece is cut out using scissors. Then an additional incision is made into which the head should fit freely. The edges of the product are processed using a machine or overlock. Then they decorate the neckline and sew on the clasp. If desired, the cape is decorated with decor.
Sewing a poncho: the first stage
Having decided on an option, the first step is to make a pattern for the future product. It is from this stage that the quality fit of the item will depend. After all, it is on it that you will cut out the details of the future product.
Classic poncho pattern
To create a pattern for a classic model, you need to follow simple steps:
- Measure the height of the future product: from the top of the back to the desired length.
- Take measurements from the shoulder and arm, as well as the neck circumference.
- Draw a rectangle in which one side is the height of the future product, and the width is equal to the sum of the measurements of the arm, shoulder and 1/3 of the neck circumference.
- Draw a neck line in one corner.
- Make any necessary adjustments to the pattern.
Pattern of a poncho with a hood
If you want to sew a poncho with a hood, then take the classic pattern as a basis and add hood details to it.
To create a hood pattern, you will need to take measurements from your head and use the sample provided below. Sometimes this detail is cut out together with the main elements.
Poncho pattern with sleeves
Creating a pattern for the sleeve version will be a challenge. But the result is worth the effort. The proposed sample is supplemented with pockets, but you don’t have to use them. Sometimes it is easier for the craftswoman to knit the sleeves. This option will also look good.
Patterns of new poncho models for women
The variety of variations of this clothing is very large. And for each, individual changes must be made to the basic pattern. So, for models with a stand-up collar , you need to add the necessary detail to the basic pattern. You can also complement this item with a stylish belt. It will be especially interesting to sew it from contrasting fabric.
How to sew a poncho coat
A poncho can be used not only as a cape, but also as a coat. The product can be sewn from any warm material. For the cold season, drape is the ideal choice. To make it you will also need a leather clasp with a buckle. Rivets or rhinestones will decorate the coat. You should choose those accessories that are attached to the material with teeth.
Poncho making plan:
- First, determine the length of the product (D1) and the length from neck to wrist (D2).
- The fabric sheet is folded in half. To prevent the material from moving out, the sections are secured with pins. From the fold of the fabric, using a chalk, draw a circle with a radius equal to D1.
- Excess material is cut off using scissors. The canvas is unrolled once so that it forms a semicircle.
- A neck is cut out in the center. You can use a T-shirt by attaching it to the canvas.
- Using chalk, draw a straight line from the neck to the middle of the bottom edge and cut the top layer along it.
- Measure D2 from the edges of the neck to the right and left, making marks with chalk. If this distance from the neck to the wrist is less than the length of the product, then draw a smooth transition from the bottom to the marks and cut off the excess material. You can make cuts along the fold of the fabric at the top and front of the product, then the arms will look out to the elbows.
- Then all edges and cuts are decorated with bias tape.
- Special glue is applied to the ends of the fastener and attached a few centimeters below the middle of the neck. The fastener should be secured with a pin until the glue dries.
A few tips for needlewomen
Sewing a poncho is half the battle done. It still needs to be properly combined with other clothes and shoes. Here are some recommendations for using this wardrobe item:
- When putting on a poncho, try to wear models with heels. This will give your figure more slimness and stature.
- When wearing colorful clothes, take a plain poncho. Wear an item made from scarves with plain options.
- When choosing a fabric for sewing a summer version, take one that is more airy.
- The poncho sleeves can be knitted or made with clasps.
- The neckline can be redrawn from the finished item that fits you best.
- The poncho can be belted. A contrasting belt will look especially interesting.
As you have already seen, this thing is very beautiful, functional and easy to implement. It is perfect for pregnant women. Will serve as an elegant addition to an evening outfit . Will warm you up in chilly weather. And most importantly, it will replenish your wardrobe without extra effort and expense. Imagine how your heart will be warmed by praise for your appearance and skillful hands. Even if you have never held a needle in your hands, take a risk and you will succeed.
Model with asymmetrical neck
A fashion trend is a poncho coat with an asymmetrical neck. In such a product the girl will look elegant and stylish.
To sew this model, it is recommended to use material with wool fibers and a size of 1.75 cm. To work, you will need a sewing machine, as well as pins, threads of the required color and scissors.
Sewing process:
- The fabric is straightened and folded in half with the right side inward. Sections of the panel are secured with pins.
- A machine stitch is laid along one cut at ¾ of the distance towards the top fold. Leave 24-26 cm from the fold to decorate the neckline.
- On the other side, the fabric is cut along the fold at a distance of about 36 cm.
- The neckline is then secured on both sides using small stitches.
- The product is turned right side out.
A stylish coat can be complemented with a belt made of the same material. The edging of a contrasting shade along the entire edge of the product looks interesting. You can decorate the poncho with fringe or decorative buttons on the front.
Knitted patterns
Knitted items have a special comfort and coziness. And thanks to the embodiment of your ideas, you get a unique design. Which will help you create stylish and extraordinary images. And in addition to the decor, such ponchos will be simply stunning.
Legend
Naturally, if you have taken up knitting a poncho, you are already good at knitting and probably understand the designations of loops in patterns. But we will remind you not to get confused and figure it out easily.
Exquisite product with fur
A poncho can be sewn from Pavlovo Posad shawls. Traditional products are not used as often today as in the old days. If such a scarf is lying idle in the closet, it can be used to create an original cape for the cold season.
For work you will need the following elements: Pavlovo Posad scarf measuring 125x125 cm, faux fur, lining fabric (silk), insulation (fleece). After preparing the materials, the creation of the poncho begins:
- The fabric sheet is laid out on the surface and the central point is determined. Draw two diagonal chalk lines across the mark.
- A circle with a diameter of 15-18 cm is drawn in the center, which will be the neck. In this case, it is necessary to take into account the characteristics of the figure. If a woman has large breasts, then the circle is moved a little back, otherwise the finished poncho will ride up in front.
- Then they do the first fitting. If the neck turns out to be small, then a 10 cm incision is made along one diagonal so that the element turns out to have a cut, which can be fastened with a button, brooch or decorative pin.
- For the hands, cut off two corners opposite each other.
- The lining and insulation are cut out from the scarf. All parts are sewn together by machine.
- A strip of the required length and width is cut out of the fur using a sharp stationery knife. In this case, you must not touch the pile.
- The fur trim is sewn along the bottom of the product, starting from the front side and ending with the back.
Knitting needles
This pattern shows a classic poncho model, without complex patterns. If you are a beginner craftswoman, then this pattern is for you. This style can be complemented with interesting decor. But even without it, the poncho will look interesting in combination with your outfit. Below we have presented several simple diagrams, some of which require you to enter your size before starting work.
Braid pattern
One of the most common and at the same time beautiful knitting patterns is the braid pattern. A poncho with this pattern will harmoniously complement a stylish look. It's easy to do by following our description below.
And thanks to the vertical arrangement of the pattern, this model slims the silhouette.
Pullover poncho with pattern
A stylish pullover will be an indispensable thing in the off-season. And such a model in combination with a poncho will be an interesting choice for extraordinary fashionistas. And it will be easy for you to knit it by following the diagram below.
Don't be afraid and experiment! By adding new drawings or decor to the proposed schemes.
Poncho with accessories
With the arrival of cold weather, you want to feel protected from the wind and frost. Therefore, we offer you a unique knitting pattern for a poncho with a muff, a cap, and also leggings. All you have to do is choose the shade of yarn you need and concentrate on knitting.
Bright summer model
In the summer season, the trend is light capes and ponchos that hide delicate women's skin from the sun. Bright light colors are trendy and will succinctly complement and refresh your look. And the original design will always help you remain stylish and unsurpassed. This is exactly what the following diagram with description is.
Jacquard design
Needlewomen who love difficult but interesting tasks will love the model with a jacquard pattern. This poncho looks noble and will effectively complete your look. How to knit such a poncho, see the diagram with a description below.
Shiny Cape Poncho
An elegant cape-poncho in dark colors, complemented with shiny notes, will be an indispensable accessory to your look in cool weather. She will perfectly complete the outfit, giving it piquancy and special charm. If you are interested in this option, then follow the description further in the diagram and make your dreams come true.
Square poncho
This model is made in ethnic style with the addition of a geometric pattern. But thanks to the monochrome design, the style is discreet and can be easily combined with any thing. But if you wish, you can change the color of the yarn, and the model will be brighter and more extraordinary. And by adding interesting decor, the poncho will be stylish and mesmerizing.
Knitting patterns
An original addition to your products will be adding knitting patterns. We will consider the most common ones below.
Cape made of regular stole
Few people realize that a simple poncho can be made from ordinary wide scarves without using sewing skills. A fashionable stole cape will replace a jacket or jacket. It is also called a transformable scarf .
This wardrobe item can be thrown over your shoulders and tied on your chest in a beautiful knot. Some manufacturers produce stole models with small slits, which allows you to convert a scarf into a poncho and vice versa.
A stole, similar to a square-shaped blanket, can also simply be transformed into a cape: it must be folded into a triangle, thrown over the shoulders and tied with a belt at the lower parts. Or you can tuck the ends of the fabric into the sides of the strap and get a spacious vest.
You can even make an impressive poncho from two stoles if you tie them with neat knots at the front and back. Scarves can also be draped over the sides. This look will be no less attractive than with just a stole.
Wide fabrics can also be used for sewing ponchos. Tunics, capes, and do-it-yourself dresses made from stoles will become a favorite element of a needlewoman’s wardrobe. You can sew a poncho for a child. Fabrics for them must be selected in bright colors. Capes made of thick materials in neutral colors are also used by men. The poncho looks great with any element of clothing, so you can buy it or make it yourself for any season and occasion.
A little history of the poncho, popular among fashionistas
The development of this clothing model began with the Araucano tribe, South America. They cut a hole in a wool blanket for their heads and put it on themselves. Then the fashion spread to the inhabitants of Patagonia. However, the products did not differ in the type of cut or size. Most often, they cut out a rectangle of 1.5x1.5 meters, which did not include sleeves or cuffs.
Girl in a poncho
Later the trend moved to Mexico, creating things was considered a craft. The clothes were of different colors and types of decoration. The color of the product reflected the characteristics of the area where it was made.
Additional Information! Women were assigned to work with dense materials, and men were assigned to work with thin fabrics.
Several hundred years later, the idea began to be used by the military. Waterproof material and ease of sewing made this item practical and affordable.
In the 60s, it became a mandatory attribute of hippies, since they drew the idea and style from the peoples of India and Central America. Loose fit, versatility - confirmed the hippie ideas about freedom, peace and love. It was also valued for the opportunity to express a person’s imagination and individuality, since they were sewn independently.
In the 70s, clothing began to gain popularity among needlewomen and housewives. They began to be knitted using various stitches and adding embellishments. So people moved away from the traditional rectangular, square shape and began to use them as household products. Afterwards, ponchos appeared at Couturier’s fashion show, paired with various things.
You might be interested in Description of grosgrain ribbon: what is it used for and where is it used?
In 2021, ponchos are becoming fashionable again. Dior, Moncler, Burberry are some of the many brands that have ponchos in their collection.
Poncho on a model at a fashion show
Choosing fabric for the cape
It all depends on what time of year the product is intended to be worn and for what purpose it is intended. Having decided on the conditions for using clothing, the following types of fabric are selected:
- fleece;
- atlas;
- natural fur;
- knitted fabric;
- cotton fabric;
- satin;
- wool.
For a cape used in cooler times, take two types of fabric that differ in color. A lighter shade is used for the interior. You should not opt for fabrics with a single color, the product will turn out boring. Material with a pattern on the outside and contrasting colors will look beautiful.
It is recommended to use cotton fabric for sewing the product, as it is lightweight. Moreover, it can be used not only for the outside, but also for the inside.
Master class for a cape with sleeves
How to make a cape with sleeves:
1. First we make a pattern. To do this, take your T-shirt and lay it flat on the paper. Mark the armhole points for the sleeves. To make them symmetrical, first we work with half of the drawing. We copy half of the top of the back, and then draw a mirror image, all contours should be smooth. To make it easier to sew in the sleeves, we make the teardrop shape a little wider at the top and bottom. We prepare fabric in the form of a rectangle one and a half meters long and 1.2 meters wide. We outline where we will have the armholes, fix the material with needles and trace the parts of the pattern with a pencil.
2. Next, use scissors to cut out the armholes, but do not forget about the indentations for the seams. After this we put on the product. If you are comfortable in it, measure the circumference of the armhole.
3. Next, fold our workpiece in half, remove the corners by about 10 cm.
4. We go over the edges with an iron, bending the indents.
5. Bend the cut corners right side inward so that the edges match. We sew the cut line manually with an indent. Next, turn them inside out and iron them.
6. Use pins to secure all the edges that we turned and ironed.
7. Next we need to make a pattern for the sleeves: for this you can also use your own shirt or jacket as a basis. Again, place the product flat on the paper, fix it with needles, and transfer the design. Next we do the same for the back.
8. Measure the rollback length of the sleeve. If they coincide with the armholes, then cut out the sleeves, adding 1 cm for the seam. If the fabric stretches well, then the width can be reduced.
9. Fold the sleeves in half, stitch the edges first by hand, and add cuffs. Then we sew the seams using a machine.
10. Now all that remains is to connect the sleeves to the main workpiece. We insert the two parts into the armholes and secure them with pins to make sewing easier. While using the machine, periodically check that the edges match well.
11. Decorate the product to your taste: adding a belt would be a good solution.
conclusions
There are covers made of two materials: natural and synthetic. The price of materials depends on its composition.
Manufacturers claim that any type of upholstered furniture cover can withstand up to 50 washes.
Housewives note that they are satisfied with the purchase, the comfort and charm that the blanket, cape or bedspread provided them with.
VIDEO: The most beautiful furniture covers that you will definitely like
Covers for armchairs and sofas
Option to use
Quilted bedspreads
The sophisticated color scheme will lift your spirits and please the eye. The advantages include the fact that they have a sealant inserted between the main material and the lining fabric, most often a padding polyester.
Thanks to this combination of fabrics, the bedspreads are lush and soft, hiding the folds on the sofa. There are these types of stitches:
- thread stitching - expensive models;
- thermal stitch.
Thermal stitching is used only for bedspreads made of artificial fabrics. It involves bonding the layers of a bedspread using a special device that precisely melts synthetic fibers.
In unison with the rug
It is voluminous and takes up a lot of storage space. Therefore, it is difficult to wash. Any bedspread must be washed at least 2 times a year. Or clean it from dust and be sure to ventilate it.
Selection of models by style
The easiest way is to choose a simple monochromatic quilted bedspread; the only difficulty will be the selection of harmonious shades.
Bedspreads with patterns require special attention. The difficulty lies in choosing styles. For example, the Borocco and Rococo style is characterized by bedspreads made of satin and silk fabrics, decorated with frills, ruffles and lace.
Bedspreads decorated with small monotonous flowers are typical of Provence. Monochromatic colors, straight lines or checkered patterns are preferable to Classicism. The patchwork technique, as a rule, harmoniously combines with the country style: highlighted squares with delicate roses and a diluted picture with bed tones will create charm and comfort.
Cozy option for reading a book
3D flower designs will fit perfectly in the Art Nouveau style, with delicate frills and an animal skin rug. Modern motifs with metallic shades, of course, are assigned to High-Tech, but it is possible that it will not suit Loft; for this you need to add several symmetrical lines.
An oversized bedspread on your upholstered furniture will look untidy, dirty and give the effect of disorder; the bedspread should correspond to 110 by 140 cm. For a double bed, the following standards have been noted: 200 by 220 cm.
European beds are famous for their maximum sizes, so a bedspread for a standard double bed will be small, so choose sizes from 220 by 250 cm to 230 by 250 cm.
In the style of minimalism
Patterns for cape coats
The simplest style option is a straight cut without a pronounced waistline. Below is an example of a cape coat pattern.
For this style, you will need to measure the circumference of the hips, neck, distance between the shoulder points, and sleeve length. The shelves of the product will correspond to the hip circumference, you will only need to add a few more centimeters to make the product spacious.
To create a one-piece sleeve, we need to measure the width of the shoulder from the collar, as well as the length of the planned sleeve. To make a collar, just a small piece of fabric that matches the neckline is enough.
The side seams need to be sewn on a machine, then we attach the ready-made collar, tuck the edges of the sleeves and the bottom. You can then add buttons or sew a belt if there is excess material left.