The product for repairing leather products, widely known as liquid leather, is good for everyone, except for the price - you don’t really want to pay 300 rubles to cover up one small scratch. However, you can make liquid leather yourself according to the recipe of Soviet shoemakers. It will not be a full-fledged analogue of a store-bought product, but it will be quite suitable for restoring shoes, jackets, belts or furniture upholstery with minor defects.
What is known about natural and artificial leather (leatherette)
Before you learn how to glue leather, you need to consider what kind of material it is and what types there are.
There are several types:
- Artificial leather is granite, vinyl artificial leather, stretch leather and others. Leatherettes at a lower price, which are made from polymers. In appearance it is not much different from the natural one. It loses in terms of performance characteristics, however, it withstands mechanical stress better.
- Genuine leather is the most expensive option, which is used for sewing clothes, various accessories, making furniture, and finishing car interiors. It is comfortable to wear and durable.
- Recycled is an analogue of leather, made from natural scraps and parts.
- Eco-leather stands out as a separate group.
This is a modern material that is quickly gaining popularity.
Leather comes in vegetable and chrome tanning.
In addition to tanning methods, they are divided into:
- clothing;
- haberdashery;
- lining;
- furniture;
- shoe
They are made from bulls, sheep, goats, pigs, calves, and exotic animals.
According to the processing method, they are distinguished:
- suede leather;
- split wood;
- nubuck;
- perforated;
- embossed and some others.
According to the coating processing method:
- Painted with nitro paint, a relief created by a press.
- Uncoated - painted, but not further processed.
Eco leather
This is a combination of a polyurethane base with synthetic fibers. After launching into production, the number of animals killed to obtain natural material decreased.
Several strengths have been noted for which modern manufacturers and buyers value it:
- Various color variations.
- Resistance to mechanical stress.
- Less expensive production process.
- Visually, the pattern is difficult to distinguish from genuine leather.
- Easy to process and stitch.
- Durability, wear resistance.
- Low hygroscopicity.
- Does not cause allergic reactions.
To connect two separate parts made of this material, you can sew them, or use eco-leather glue.
How to glue shoe soles?
Before sealing your boots, you should assess the damage and choose the most optimal remedy to repair the damage. An effective shoe glue must have the following qualities:
- long service life;
- reliability;
- water resistance and frost resistance;
- reliable gluing regardless of the thickness of the materials used;
- minimal rigidity;
- elasticity.
It is true that, in the absence of more suitable means, shoes can be sealed with sealant. However, with its help you will not achieve the necessary adhesive strength. In addition, if used carelessly, it can ruin the appearance of the product.
Many types of glue have the necessary properties, but not all of them can glue leather to polyurethane, rubber or PVC. Therefore, before purchasing adhesive of a particular brand, carefully read the instructions for use.
Main characteristics of leather glue
An incorrectly selected adhesive composition will not provide adequate joint strength and may damage the material. Skin glue must meet certain standards and have characteristic features and properties that you need to learn more about.
There are a number of properties that any adhesive composition for artificial or natural material must have.
These include:
- Resistant to high and low temperatures.
- Optimal viscosity indicators.
- Resistance to long-term exposure to chemicals, water, fats.
- Easy to apply, thick consistency.
- Long working time in a sticky state.
- Should not damage the material after application.
- No allergens in the composition.
- The composition must be free of caustic substances that are hazardous to vision and breathing.
- No strong odor.
- Weather resistance.
- Seam flexibility and strength.
- The seam should not have color or stand out.
It is better to choose elastic, waterproof leather glue from a well-known manufacturer. All these qualities must be present in the best examples.
How to restore leatherette?
Creases on leatherette appear even faster than on natural material. You should not hesitate to correct them, as they quickly turn into cracks. To deal with the problem, proceed as follows:
- remove dust and dirt from the surface;
- Heat the wax in a water bath;
- fill folds with it;
- wait until the wax hardens, remove its excess;
- apply a thick cream to the product;
- After an hour, polish the treated surface.
You can also try to eliminate defects on leatherette using an iron.
However, you need to act carefully, since non-natural matter is more susceptible to the influence of hot steam. To carry out the procedure, be sure to use a damp cloth
You need to keep the iron at some distance from the item
To carry out the procedure, it is necessary to use a damp cloth. You need to keep the iron at some distance from the item.
Types of glue for natural and artificial leather
There are 4 types of adhesives that are used for gluing leather products:
- Nairite adhesives. The main component of these adhesive masses is cotton rubber. May have a yellowish tint. They are distinguished by optimal indicators of viscosity and density. The average hardening time for a seam is about 3 hours.
- Polyurethane based adhesives. They are a colorless structure that is suitable for gluing leather to different materials. Resistant to prolonged exposure to moisture.
- Rubber-based adhesives. Latex leather adhesives are used for short-term bonding of leather elements to each other and to other materials.
- Silicone adhesives. Suitable for gluing artificial and natural materials. Before applying the adhesive mass, it is necessary to stretch the product, then securely fix it until it dries completely.
If we talk about the division of adhesive compositions according to properties, we can distinguish three large groups:
- Transitional products are products with the PVA-M type designation. The finished seam is soft, due to the water-based polymer.
- Durable and hard are various epoxy resins. The seams are hard and brittle. Suitable for joining thick, tough leather pieces.
- Elastic adhesives are the most popular and popular among the others. Polychloroprene or butadiene-styrene masses diluted with organic solvents. Suitable for joining different types of leather.
The choice depends on what technical characteristics of the finished seam are needed.
Proven glue brands for any skin
When choosing glue for leatherette, eco-leather or natural material, you can easily get confused among the variety of products from different manufacturers if you don’t have practical experience. To choose a high-quality composition, you need to get acquainted with the opinions of people who glued leather products.
Glue liquid leather
It is a liquid glue for leather, on a synthetic basis. Imitates natural material. Strengths include:
- The dried seam is resistant to mechanical stress.
- Has high strength and adhesion.
To glue a patch using this adhesive composition, you need to prepare the base. To do this, it is cleaned of dirt, sanded along the edges of a hole or cut, and degreased. After the mass hardens, a smooth transition is obtained between the patch and the main product.
Desmokol SAR-306
It is a one-component composition based on polyurethane. Suitable for gluing different types of leather, rubber, PVC. Withstands high temperatures and bonds quickly.
Bonding is carried out using two technologies:
- Cold method - the surfaces are covered with an adhesive mass, then joined together, left under pressure for 6 hours.
- Hot method. The first layer of glue is applied to the parts to be joined. Then dry for 20 minutes, the procedure is repeated. After this, you need to heat it to +80 degrees and glue them together.
The hot method allows for faster repairs. Regardless of the method used, it is advisable to use the finished product only after 24 hours.
Nairit 30-E (polychloroprene base)
A sticky mass that resembles honey in consistency and color. Easy to apply, dries quickly. Provides a reliable, durable connection. Most often, positive reviews about Nairit can be seen from shoe repairers. Both hot and cold methods are used for gluing.
Aerosol adhesives
For temporary and permanent bonding of leather products, universal aerosol adhesives can be used. Now they are becoming more and more in demand.
Their main advantages:
- Ease of application.
- Fast drying.
- Universal aerosols are suitable for almost all materials.
When applied carefully, a uniform layer without smudges is obtained. They do not leave stains on different types of fabric.
Crystal moment
One of the most famous adhesive compositions among professionals and people who repaired anything on their own. Suitable for gluing wood, plastic, leather, rubber, glass, porcelain, ceramics, cork, metal, cardboard, paper, fabric.
Should only be applied to clean surfaces. Dries quickly. You can remove hardened glue by rubbing the remaining glue with your fingers.
There are two restrictions when working with the Crystal Moment:
- Not suitable for joining Teflon, polypropylene, polyethylene.
- According to the instructions, it is not recommended to use it for the restoration of dishes in contact with food.
The adhesive is removed from clothing after washing at a given temperature.
Super PVA (based on water dispersion)
Another popular glue for leather products from the Moment company.
Has a number of strengths:
- Hardens quickly.
- Withstands temperature changes.
- High strength of the hardened seam.
- Optimal viscosity.
In addition to joining different types of leather, it is in demand among carpenters for gluing veneer, chipboard, fiberboard, plywood, and laminate.
Rubber adhesives (rubber)
Adhesives for leather and suede, which are used for temporary joining of products. Often they are used to treat areas that will later be stitched on a sewing machine. Disadvantage: low strength after drying. May have a yellowish tint.
There are several tips for working with rubber glue:
- To obtain the desired thickness of the mass, you can dilute it with purified gasoline, which is purchased at a hardware store.
- Remains of the sticky mixture can be easily removed using pieces of rubber.
SMS glue
SMS glue for leather is used for smooth processing of edges and polishing the inside of the leather. A big problem when cutting leather products is end processing. For this, different types of paint and wax can be used. However, according to professionals, SMS glue is considered the best option.
Shoe glue: brands for various materials
Wondering which adhesive is best for shoes made of a certain material? Let's take a look at the rating of high-quality special compounds for reliable bonding.
- KENDA FARBEN is a good shoe glue from an Italian manufacturer. It is considered universal and is excellent for gluing synthetic and natural leather. Copes with rubber, textile, wood, plastic, shotgun and metal products. It is often used by craftsmen when repairing boots, because the materials adhere quickly, and the seam is durable and moisture-resistant.
- UHU “SCHUH & LEDER” - this glue is actively used by shoemakers for gluing hard and soft materials. The seam has been characterized by increased elasticity for a long time. Resistantly withstands the negative effects of moisture, alkali and acid. It does not dry out for a long time and can withstand high and low temperatures. If the sole has burst, then using Uhu glue you can glue the separated parts together using the contact method. Use solvent reactivation or heat activation.
- Use professional EVA glue if you don’t know how to seal a hole in your shoes. It reliably connects corner and side cuts, porous surfaces of breaks. In addition, they can be used to glue the insole. This is a reliable waterproof product that does not flow under the influence of ultraviolet radiation and does not leave adhesive marks. Suitable for all types of materials except PVC.
- You can glue the polyurethane sole with Nairit Shoemaker. It is actively used in their work not only by shoemakers, but also by ordinary people. It has high strength and water resistance. Does not contain hazardous substances, therefore completely harmless to humans.
- Russian-made Contact glue has been popular for more than 10 years. This product is suitable for repairing leather, rubber, ceramic and porcelain products. With its help, it is possible to fill all the cracks and gaps. If we glue even heavily damaged parts, the seams will be almost invisible.
- The Henkel company suggests using Moment Marathon for repairing boots. This is a universal adhesive that is highly effective. Economical in consumption and convenient to use. It has fast adhesion and will only take a few hours to completely harden.
Car leather glue
Before buying glue for leatherette for cars or genuine leather, you need to pay attention to several important factors.
These include:
- Freezing time.
- Solubility under the influence of chemicals and various aggressive substances.
- Thermoplasticity - it is important to consider the temperature region of your place of residence in order to choose the right adhesive.
The two most popular groups of adhesives are made based on polyurethane and polychloroprene.
Adhesive Mah 800*213 (based on polychloroprene)
The product from the German manufacturer has many positive reviews among professionals. Among its peers, it is a leader in auto repair shops for reupholstering car interiors. The main advantages are resistance to temperature changes and reliable bonding to the prepared base.
Polyurethane UR-600 (Rogneda)
Leather adhesive is flexible, waterproof and very durable. One-component, transparent. Sets quickly and does not contain solvents. Designed for stretchy and plastic materials. They also use it to glue shoes and PVC. With the hot method, full hardness is achieved after 4 hours, with the cold method - 24 hours.
Glue 88-Luxe (Rogneda)
Universal, like the first two. Glues a variety of materials, the seam is resistant to moisture and frost. Durable and elastic. Maintains long-lasting stickiness, this quality helps when working on large areas. According to reviews, it is suitable for skin without problems, but there is a significant drawback - a persistent smell for several weeks after the interior is reupholstered. Curing - 24 hours.
Care method
The structure of the material consists of two layers:
- microporous polyurethane film with a printed surface of natural composition on the top layer;
- polyester base.
The combination ensures ventilation and moisture permeability. Therefore, product care is carried out quickly and without special costs.
You have these rules on how to care for eco-leather on furniture:
- avoid strong friction of the upholstery, do not press intensely;
- wipe with slightly damp towels so that excess moisture does not penetrate between the layers;
- Place sofas and armchairs made of this material away from sources of heat and light.
On a note! Use soft rags for cleaning. Polishing is allowed with products intended for genuine leather. Rub the surface once a year with a water-repellent preparation.
Can't be sealed
Many craftswomen and beginners in this business wonder why it is necessary to use glue, and whether it would be easier to sew up the product.
Let us highlight several factors that you need to pay attention to before choosing a method of joining materials:
- Consider the thickness of the skin. If it is large, it is advisable to use an adhesive composition.
- If you need to maintain an attractive appearance, flashing the damaged area will not work.
- Lack of sewing skills, and leather requires special experience.
Glue can be used to reach hard-to-reach places, which is quite difficult with a sewing machine and even more so with a needle and thread by hand. This involves additional work in the form of ripping out the lining and carefully stitching it together “as it was.”
Small damage can be easily repaired. Serious tears are usually stitched up, or glued and stitched. But you will need special needles and strong threads.
Removing scratches from shoes
It is better to get rid of scratches on shoes immediately, even if they look like very small stripes. They tend to increase over time and spoil the appearance and quality of the shoes. You can do this in several ways:
- Acetone . Soak the sponge in a small amount of acetone and squeeze. Rub the damage with light, circular movements. When the leather is smooth, wash the boots with soapy water and wipe dry.
- Candle wax. This method is suitable for patent leather shoes. Apply a small amount of wax shavings to the scratches and use a directed stream of hot air to melt it with a hairdryer. When the wax becomes soft, take a cotton cloth and begin to rub it into the surface of the shoe. After the shoe wax is absorbed, warm the shoes with a hairdryer again and polish with a dry cloth.
- Olive oil. Soak a cotton swab in the oil and rub into the damaged area using soft, circular movements. Leave for an hour to take effect. After time has passed, wipe off excess oil with a dry cloth.
- Using an iron. This method is suitable for restoring small creases and scratches. Moisten the cloth and apply it to the damaged area. Walk the heated iron over the surface, holding it in one place for no longer than 5-10 seconds. Repeat the process until the scratch disappears. Upon completion, thickly lubricate the shoes with cream and leave for 12 hours to soak.
Tools and materials for work
Before starting work, you need to prepare tools and consumables.
These include:
- Pieces of leather, selected according to the desired color and size.
- Adhesive composition.
- Scissors, mallet.
- Awl, sandpaper.
- Brushes for applying sticky mass.
- Double-sided tape.
- Any heavy object as a press.
- A few scraps of paper.
The workplace must be cleared of unnecessary things so that nothing interferes with gluing. To ensure that the seam is the desired color, you can use a special adhesive paint for leather.
Shoe shine
The first thing you need to do is clean your shoes. If you want it to last you longer, you need to do this regularly. Don't forget to coat it with nourishing cream to prevent cracks from forming. If they have already appeared, try to repair them quickly. Otherwise, over time, their size will increase, and your shoes will lose their presentable appearance.
When I start sealing shoes, I always check to see if there is any mold or mildew on them. This applies to those boots that have been in the closet for a long time. Look out for any white or greenish spots. If you notice them, take your shoes outside. This will help prevent mold or mildew spores from entering and growing in your home. Wipe your shoes with a dry cloth or soft brush. If the mold does not come off, wash it off with warm water. Use an unnecessary cloth or brush that you don't mind throwing away. If you use it to clean other shoes, you may introduce mold spores to them.
If the boots were in the closet, be sure to check it for stains. As a rule, spores reproduce well in warm and humid places. If mold has infested your closet, thoroughly wash it and any shoes stored in it.
Sealing process, preparation for work
Before gluing artificial leather or natural material, it is necessary to carry out preparation.
Step-by-step instruction:
- Cut a patch from the same material as the product. Its size should be at least 1 cm larger at the edges.
- Align the hole with a sharp blade, trim off threads and uneven surfaces.
- Using a damp cloth, wipe the surfaces, remove dirt, dust, and any debris from them.
- Degrease them after cleaning. Wait until completely dry, do not touch with your hands.
- Use fine sandpaper to sand the areas to be glued.
The preparation process directly affects the final result.
Drying shoes is also important
After cleaning your shoes, it is important to dry them. Take a clean piece of cloth and wipe the skin thoroughly. It will help quickly remove residual soap and water. Rub it in a circular motion until it is completely clean. Pay special attention to cracks. They need to be wiped most thoroughly, because it is in these creases that hard-to-reach dirt accumulates. If it is not removed, you will not be able to properly fill the cracks. After this, leave the shoes to dry for 8-12 hours.
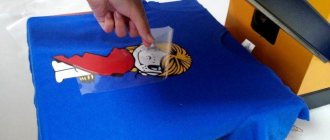
How to seal a hole in a leather jacket
Leather jackets get damaged sooner or later; buying such a wardrobe is expensive. You can fix your favorite thing yourself. It is important to understand that the repair procedure directly depends on the type of damage. If this is a through hole, then there are two options to sew up the hole using patches, preparing it using the technology described above.
The first method is gluing with a patch facing out:
- Cut out the shape of a hole from several sheets of paper or cardboard.
- Apply glue to the edges of the patch protruding beyond the edge of the damage. Also cover the edges of the hole with it.
- Apply the adhesive composition to the pre-cut paper backing. Press the patch onto the hole with the backing.
- Wait a certain amount of time until a thin film forms on the surface of the glue. This time period is indicated on the packaging.
- Repeat the procedure. Press the patch together with the product to be glued along the glued areas.
Place the item on the work table and place a weight on top. Wait until completely dry.
The second method is gluing the patch from the inside:
- Cut a patch from identical material, which should be 3-5 mm larger than the damage.
- Clean the patch and the edges of the hole from dust and dirt. Wipe them with acetone.
- Apply adhesive to the patch and the edges of the damage from the reverse side.
- Press the edges of the tear as close as possible to each other.
- Wait until the first layer begins to harden, then apply the second.
- Press the patch onto the damage and place the product under a weight until it dries.
We must not forget that ambient temperature directly affects the speed of hardening.
Additional shoe care
You won't be able to get rid of cracks completely. Therefore, the procedure for filling them out will have to be repeated from time to time. To maintain the presentable appearance of your shoes, do not forget to properly care for them. Treat it with a special conditioner every week. It can be applied immediately after shoe repair.
Carry wet wipes or cotton cloth with you to remove dirt from its surface. If dried dirt accumulates on your shoes, cracks will appear faster. Don't forget to use emollient creams regularly.
Found a violation? Report content
Corner break
There are situations when the jacket gets caught on sharp objects, which leads to rupture of the material. To repair the damage, you need to rip the lining with any sharp object.
Step-by-step instruction:
- After turning the jacket inside out, opening the seam near the damage, you need to lay it out in front of you to make it more convenient to work.
- Moisten a cloth with solvent and wipe the area to be treated.
- Cut a patch larger than the damage by 10-15 mm on each side.
- Cover the patch and the edges of the tear with glue. Do not apply adhesive mass to the ends of the material.
- Let the first layer harden for 20 minutes.
- Repeat the procedure.
- Apply the patch to the torn area. Smooth out its edges and place a heavy object on top.
- After 10-15 minutes, turn the jacket back inside. Using a toothpick, apply glue along the edges of the patch.
- Press down with a load for a day.
All that remains is to sew up the lining from the inside.
Repairing cracks and scratches
Once the shoes are completely dry, you can move on to the next step—filling the cracks. Be sure to stuff crumpled up newspapers or rags inside your shoes first. This will help maintain their shape. Fill the shoes as much as possible so that there is practically no free space left. The newspaper will not only help maintain the shape of the boots, but will also absorb any moisture that may get inside.
Children born after infertility treatment differ in height from their peers
March 1 is the birthday of Karpovich and Muceniece: what Priluchny gave Miroslava
Anxiety, depression: excessive parental control harms the child
Apply a moisturizer to your shoes, for example you can use mink oil. Pay special attention to the cracks, they need to be filled first. Do not skimp on the product, it should completely cover the creases. You can always remove any excess with a rag.
To help the product penetrate the cracks better, you can heat the shoes a little. Place it next to a heater or blow warm air with a hairdryer. This will help absorb the oil faster. Apply it not only to the cracks, but also to the entire surface of the shoe.
Why do I use mink oil? First of all, it is more convenient because it has a solid structure. It can be applied by hand. Moisturizers are made from wax and natural oils, so they are runny.
Tear off a whole piece
Repair work is complicated by the fact that the damaged part of the leather clothing is missing. Initially, you need to think about the color of the material that will be added. Some people, for example, cut off most of the jacket with the damaged area and change it to a different color. It depends on the wishes of the owner.
Step-by-step instruction:
- Cut a new piece from leather matched to the color. Using tape, stick it to the tear area.
- Rip the lining along the seam to get to the damage from the inside.
- Apply a previously cut piece of leather to the tear site.
- Remove the tape. Cut the patch along the tear contour. Coat it with glue.
- After gluing, sew up the lining.
You can paint part of the jacket with a special adhesive-based paint.
Painting and dampening leather shoes
Over time, even high-quality shoes and genuine leather lose their color. After filling the cracks, you can also paint it and further dampen it. This will help prevent new wrinkles from appearing. Take shoe polish and apply it all over the shoe. For this you can use a sponge or cotton cloth. The cream not only helps restore color to dull skin, but also polishes it, making it smooth and shiny. Remember to only choose a color that matches the shade of your shoes.
The cream also works well on filled cracks. Therefore, it needs to be applied to them most of all.
Once the color cream is absorbed, wipe the shoes with a clean cotton cloth. It will help quickly remove any remaining cream and make your skin smooth and shiny. I start wiping down each shoe from the top. The cream is best removed with small circular movements.
After this, place the shoes in a well-lit room. Check if cracks are noticeable. If you did everything correctly, both shoes should look the same. It is important that the skin color is uniform without dark or light spots or streaks. If cracks are still visible, repeat the procedure and apply more filler.
Cut on the jacket
You can learn how to seal a cut on a leather jacket from the title about tearing with a corner. The procedure is performed exactly the same.
In addition, professionals give several recommendations that will help during the work:
- The patches are additionally stitched for reliability. You just need to work with a special leather needle.
- It is not advisable for beginners to use quick-drying adhesives. They require a quick workflow, which can cause a number of problems without practical experience.
- To create a unique design and make the patch less eye-catching, fashion designers recommend making several similar patches in a chaotic manner.
The last point is especially interesting for young, creative people.
How to glue leather to wood
Fans of folk art and handicrafts are sometimes faced with a situation where it is necessary to combine leather with wood in the best possible way. This can be the front lining of products, creating the inside of various boxes, toys, souvenirs and much more.
According to experts, there are several options for suitable adhesive compositions:
- Nitroglue – made on a cellulose basis, suitable for thin leather.
- Double-sided tape, which is good as a temporary option.
- Hot glue using a hot glue gun.
Aerosol contact adhesive is also suitable.
Subtleties of repairing artificial leather or suede
It is generally accepted that leather cannot be washed, as it loses fat and becomes rougher. You cannot iron with steam; collagen fibers curl up and, as a result, lose their natural organic properties.
A utility knife is used to cut straight only. In other cases, it is not suitable; for complex cutting, a shoemaker’s knife, a scalpel and some others are suitable.
Acrylic paints can be used to tint leather. But car aerosols are the best; the paint goes on smoothly and firmly, without sacrificing elasticity.
How to repair leatherette with your own hands
Let's say the damage is really serious - a large and long tear in the material, more than a few centimeters. This is difficult to cope with using conventional means. But you can continue to use the same “liquid skin”. Its main advantage is that by repairing leatherette, a leather-like relief is created. This is an ideal material for repairs.
Since the gap is large, you should choose the right color - this is not a small dot or strip that will be almost invisible. Not only color is important here, but also shade. And also the coating is glossy or matte.
After selection, it is important to degrease the damaged area. If the damaged area has an area of up to 1 cm2, then the area is treated with a brush. If it is larger, then a fairly wide piece of fabric is placed at the site of the rupture (medical gauze in several layers works well). Its width should be at least one and a half centimeters in order to capture a sufficient amount of eco-leather on the sides of the gap.
The rupture site is treated with “liquid skin” from the inside (you can directly apply it to gauze), almost causing the material to “stick.” A thin first layer is immediately applied over the gap. Afterwards, you need to wait a few hours (three is enough) and apply a second base layer, thick enough and so that the cut is no longer visible. If necessary, the area is tinted.
How to repair a leatherette bag
Let's say your favorite handbag was pierced by a nail or damaged by any other object. In fact, the artificial leather has received a serious tear and needs to be repaired. This is much easier to do in a special workshop. However, if you wish, you can try recovery at home.
To do this you will need all the same materials as before. However, since you will definitely not be working with a smooth surface, you will need to recreate a certain skin pattern. Having repaired the puncture (or rupture) itself using the method described above, create a suitable pattern on a clean and smooth surface. To do this, apply “liquid skin” to a regular table napkin. And then apply it to the undamaged area (it will turn out like a cast of the surface).
After drying for a long time (at least 10 hours), the napkin can be used as a stencil to apply an identical pattern to the damaged part of the handbag. Which, by the way, will dry itself by then.
How to remove glue from skin
After working with glue, situations often arise when it gets on human skin.
To wipe it off, you can use several methods:
- Rub the remaining glue with your fingers and roll it into a small ball.
- Mix hot water with laundry soap. The stained areas are thoroughly wiped with soapy liquid until the adhesive structure comes off.
- Use sunflower oil. Wet your hands with vinegar and soap them. Wait 10 minutes. Using a swab moistened with oil, thoroughly wipe the dirty areas of the skin.
- Apply white spirit. This solvent can quickly remove adhesive residue from a dirty surface. However, its pungent odor and active components can negatively affect a person’s general condition.
If the above methods do not help, you can use a special chemistry called “Anti-glue Moment”. They need to treat dirty areas, wait the time indicated on the package, and wipe off any adhesive residue. Knowing how to remove glue from leather, you can safely carry out repair work.
Conclusion
Genuine leather is not cheap, which is why not everyone can afford to buy products made from this material after complex damage. You can repair your favorite item yourself to save on the services of a repair shop.
The best glue for leather is extremely difficult to find. Products of even the same name from different manufacturers differ in technical and operational characteristics and can be used for different purposes. Now it has become clear which adhesive compositions are best to use, according to professionals.
The best option is a special glue for working with leather.
In addition, you need to carefully study the gluing procedure. It would be a good idea to practice on unnecessary leather scraps.
How to glue the sole
All elements of the shoe body are sewn together; only the sole can be glued. Even if it is additionally stitched, it will not prevent it from coming off if you trip or get caught badly. Before gluing shoes, you need to choose an adhesive. It should be:
Some types of glue, such as super glue in small tubes, boil upon contact with leather and leatherette, forming a hard, brittle joint. The skin seems to burn, and a hole forms at the joint at the first use. If you need to glue the joint between the sole and the leather upper, we recommend using:
rubber glue – universal and suitable for all types of materials;
Nairit (polychloroprene glue) – a special composition for professional use, recommended for gluing leather to rubber;
polyurethane glue - allows you to both glue leather and repair textiles, approved for PVC, rubber and polyurethane.
You can buy material to glue the soles of shoes in hardware stores and places that sell consumables and furniture fittings. If you haven’t found a suitable option, turn to compositions for household use - Moment adhesives, for example. Compare the descriptions on the packaging to correctly choose which glue is best for gluing - the manufacturer indicates the scope of application.
How to clean an eco-leather sofa
Eco-leather has a water-repellent property and does not immediately absorb dirt. It is advisable to immediately wipe any stain with a damp cloth. There are almost never any marks left on dark furniture. Upholstery in light colors may leave a pale mark, which will require a little more effort.
Problems appear when the stain has had time to be absorbed. Stains from ballpoint pens are especially difficult to remove. In this case, you need to choose a method that will not damage the polyurethane layer on the surface of the upholstery, but will be able to deeply clean it.
How to clean eco-leather from dirt
It is better to start cleaning any stains with the most gentle substances, and only if they do not work, move on to more effective and aggressive ones. The eco-leather surface can only be rubbed with light pressure, without stretching.
Eco-leather comes in different qualities depending on the quality of the material itself and the thickness of the polyurethane layer. The same cleaning product may be harmless for the upholstery of one sofa and irrevocably damage the upholstery of another. Therefore, it is better to first try any product except, perhaps, a melamine sponge and a damp cloth on an inconspicuous area of furniture.
When cleaning a stain with laundry soap, lemon juice, a solution of ethyl or ammonia, hydrogen peroxide, dishwashing detergent, this should be done with a soft cloth or sponge, or a cotton swab or disk. It is necessary to have clean water, a rag for clean water and a dry rag on hand. Eco-leather should not be in contact with water for a long time, and especially with other solutions. Penetrating into the material, the liquid changes its structure and can leave a noticeable stain that is more difficult to remove.
How to clean eco-leather on a white sofa
When buying a sofa upholstered in white eco-leather, you need to take it for granted that maintaining it in perfect condition is especially troublesome. Even small stains are clearly visible on it, especially when exposed to natural daylight. And removing any harmless stain can result in stains and the appearance of a larger stain.
For particularly demanding owners of a white sofa, it is better to have a special cleaning product in their household. The most popular is Vineet. You can choose any other, and although there are not many of them, a sales assistant in a household chemicals store will probably find something suitable.
In any case, it is better to resort to stain removal using chemicals, even special ones, only if the dry method - a melamine sponge - does not help.
How to clean eco-leather from a ballpoint pen
Ballpoint pen paste can easily be called the main danger to eco-leather among contaminants.
Special chemicals do not always cope with it. Even the most effective ones leave strong stains after the first use. Repeating the procedure is necessary.
On Internet forums, participants share their personal experiences. There are many quite aggressive methods: hairspray, toothpaste, 70% alcohol solution (perfume), nail polish and shellac remover.
How to clean a white eco-leather stroller
A baby stroller requires a special approach. Although its appearance is important, the priority remains the safety of the newborn and favorable conditions for his fragile health.
It is unacceptable to use products with harmful compounds and fragrances.
Caring for the stroller involves wiping it with a melamine sponge. For stubborn stains that a dry or damp sponge cannot remove, a solution of laundry soap, hydrogen peroxide, and alcohol solutions are suitable. When using alcohol solutions, care must be taken to ensure that all vapors dissipate before the child is in the stroller. Weathering occurs quite quickly, but it is better to complete the procedure in advance of the walk. You can check whether the fumes have dissipated by simply smelling the stroller.